Power Steering Gear Outlet Pipe/Hose Replacement 2.0L Engine
Removal Procedure
- Siphon the power steering fluid from the fluid reservoir.
- Remove the engine oil filter. Refer to Engine Oil and Oil Filter Replacement .
- Remove the engine beauty cover. Refer to Engine Cover Replacement .
- Place a drain pan under the vehicle in order to catch the power steering fluid.
- Remove the front bumper fascia. Refer to Front Bumper Fascia Replacement .
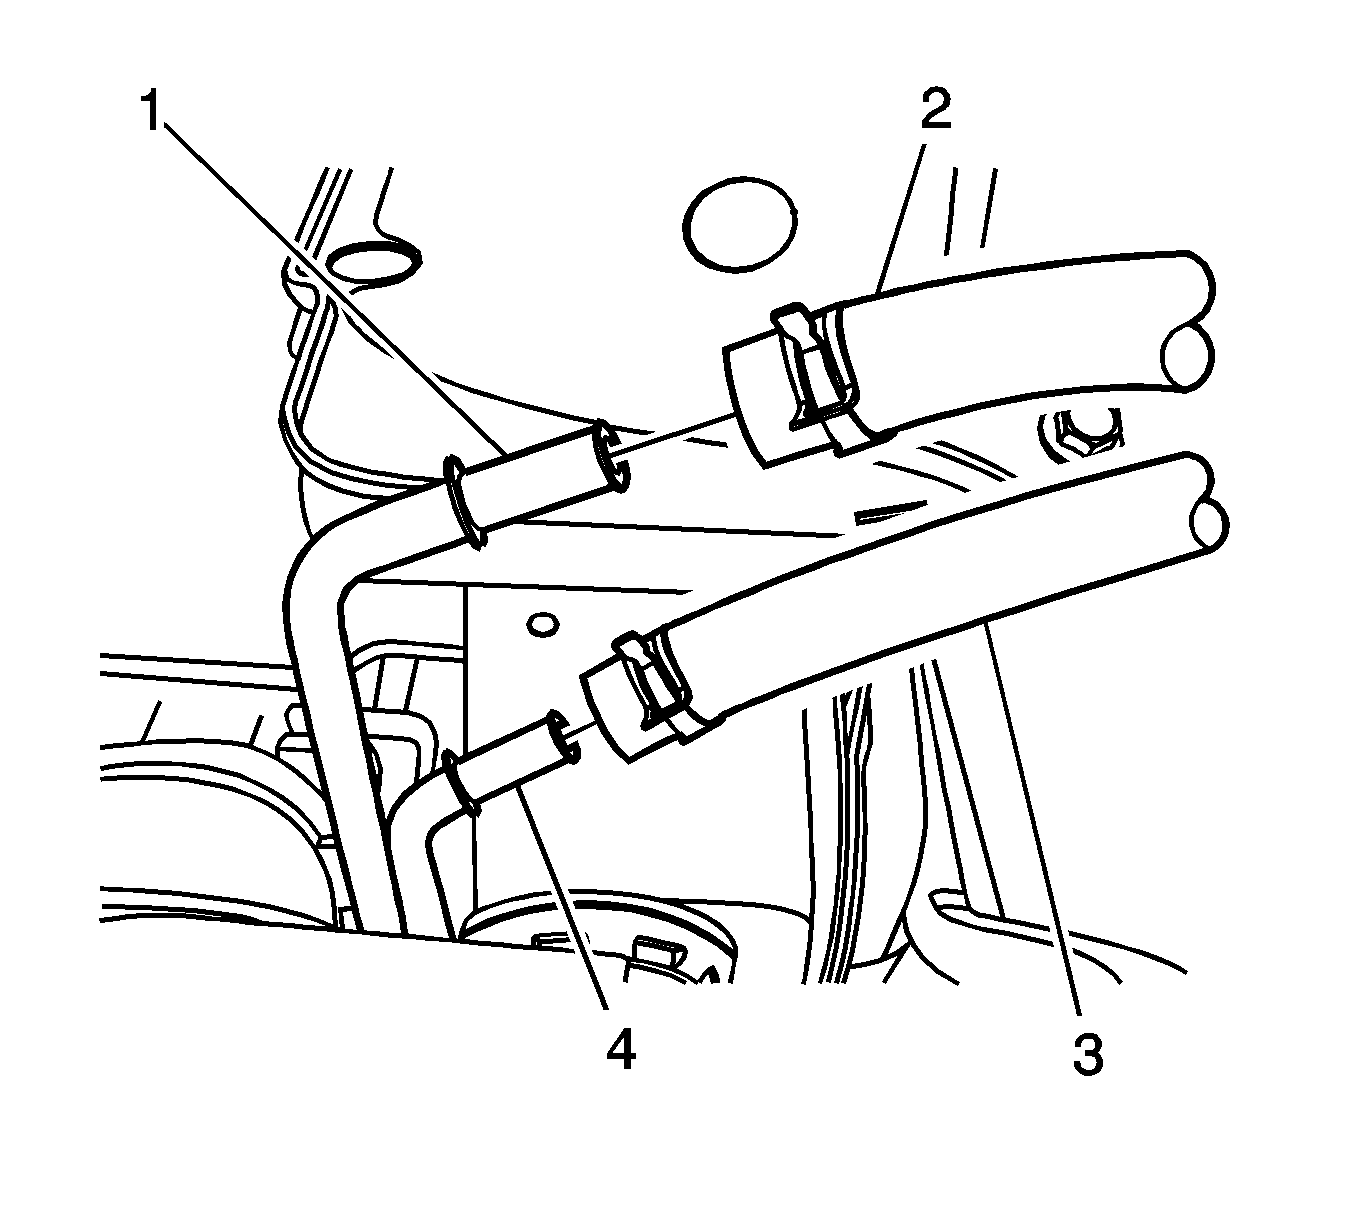
- Remove the hoses (2, 3) from the pipes (1, 4) near the left lower side of the front bumper.
- Raise and support the vehicle. Refer to Lifting and Jacking the Vehicle .
- Remove the left front wheel. Refer to Tire and Wheel Removal and Installation .
- Remove the left front engine shield. Refer to Engine Protection Shield Replacement .
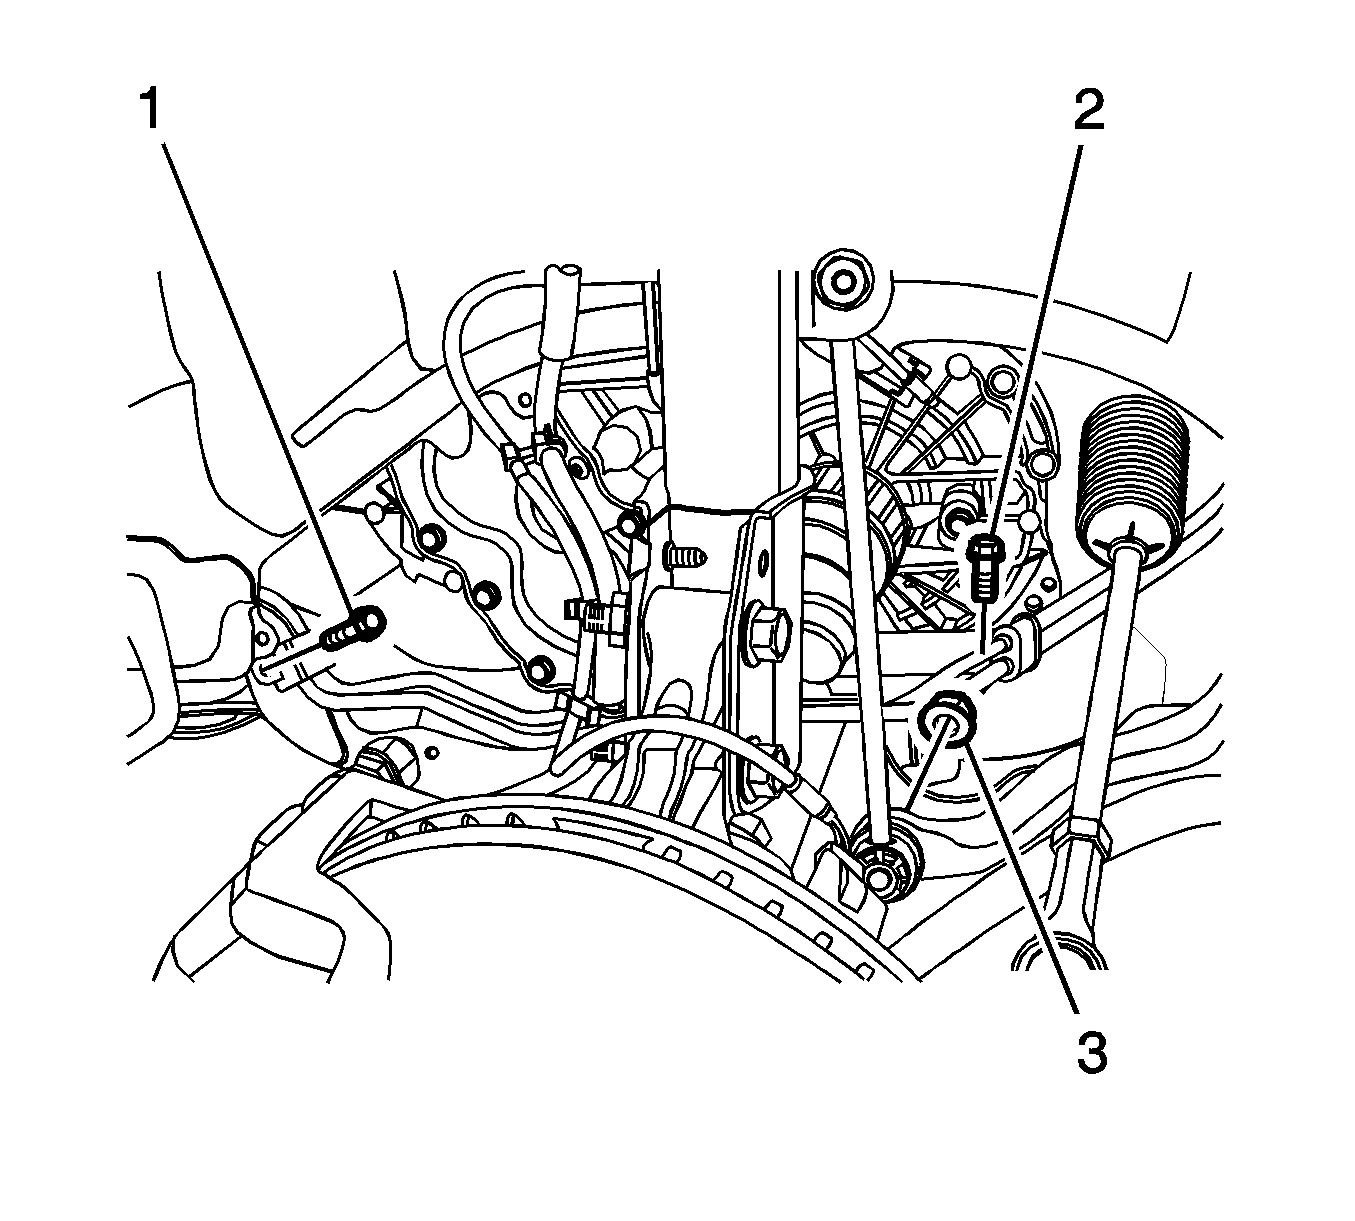
- Remove the bolts (1, 2) from the pipe brackets near the front frame.
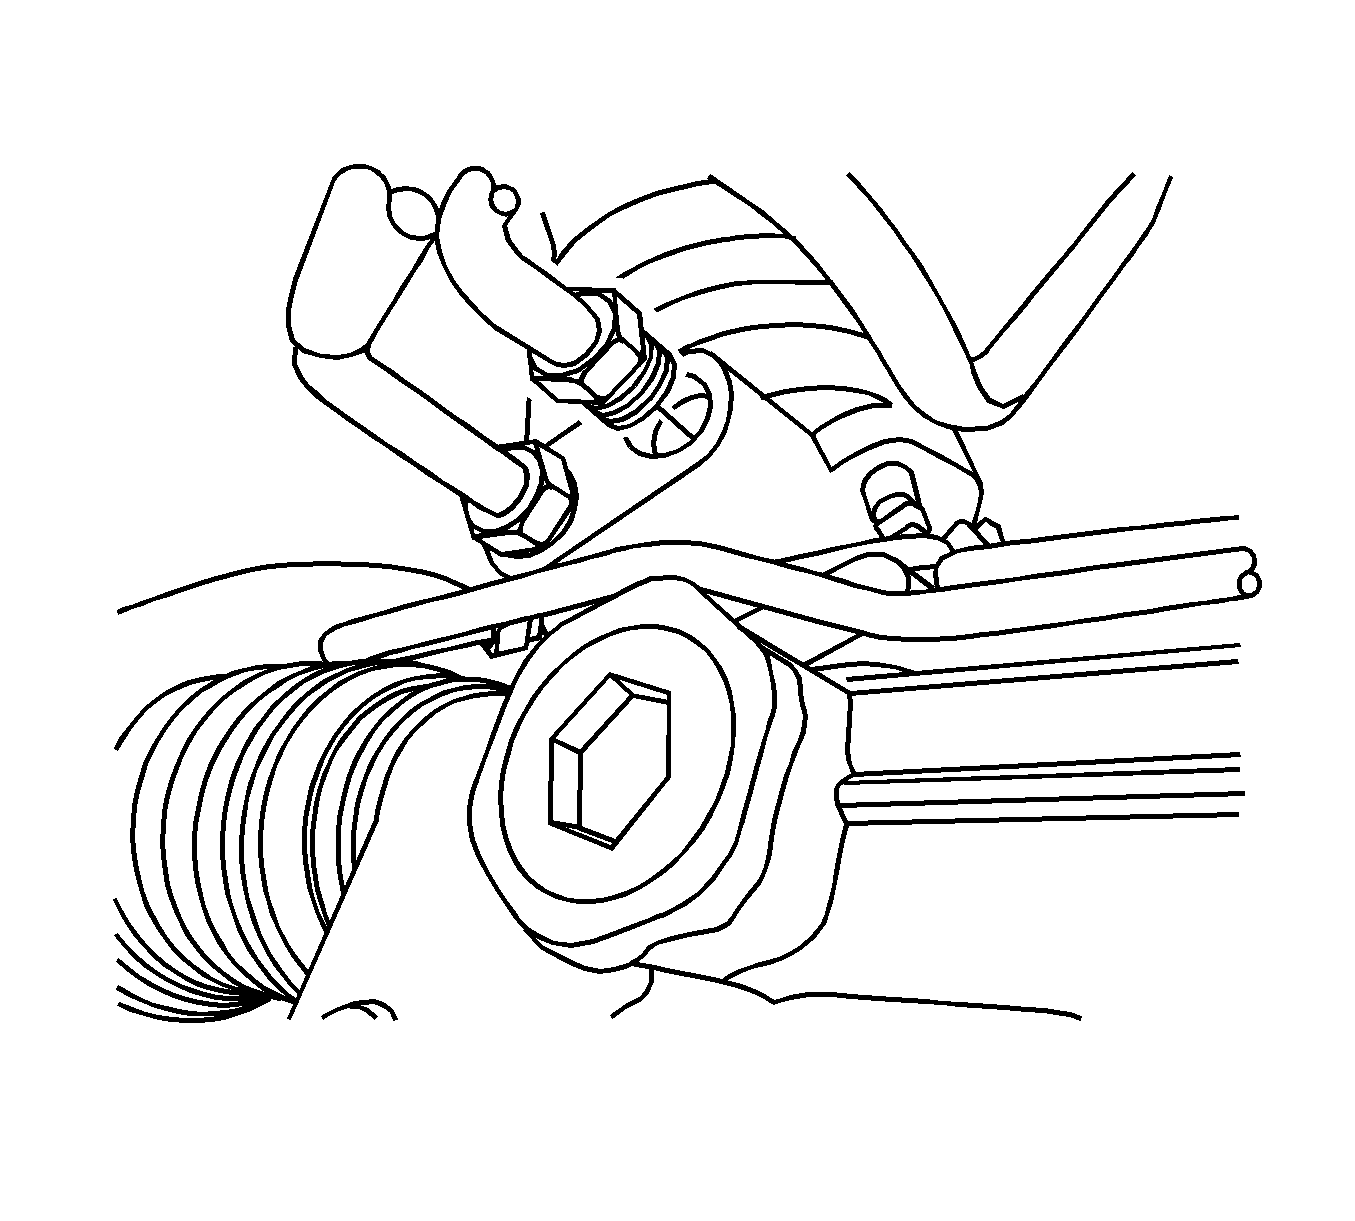
- Remove the nut (3) from the stabilizer shaft.
- Lift and move the stabilizer shaft toward the rear of the vehicle.
- Remove the left front wheel drive shaft. Refer to Front Wheel Drive Shaft Replacement .
- Remove the front exhaust pipe. Refer to Front Pipe Replacement .
- Remove the transaxle rear mount assembly. Refer to Transmission Rear Mount Replacement .
- If the vehicle has AWD, remove the transfer case. Refer to Transfer Case Assembly Replacement .
- Remove the pipe from the power steering gear outlet.
- Remove the power steering gear outlet pipe/hose from the vehicle.
Important: The left-hand drive model is shown. The right-hand drive model is similar.
Notice: Refer to Power Steering Hose Disconnected Notice in the Preface section.
Installation Procedure
- Route the power steering gear outlet pipe/hose from the cooler pipe/hose to the steering gear.
- Install the pipe to the power steering gear outlet.
- If the vehicle has AWD, install the transfer case. Refer to Transfer Case Assembly Replacement .
- Install the transaxle rear mount assembly. Refer to Transmission Rear Mount Replacement .
- Install the front exhaust pipe. Refer to Front Pipe Replacement .
- Install the left front wheel drive shaft. Refer to Front Wheel Drive Shaft Replacement .
- Install the stabilizer shaft to the link with the nut (3).
- Install the bolts (1, 2) to the pipe brackets near the front frame.
- Install the left front engine shield. Refer to Engine Protection Shield Replacement .
- Install the left front wheel. Refer to Tire and Wheel Removal and Installation .
- Install the hoses (2, 3) to the pipes (1, 4) near the left lower side of the front bumper.
- Install the front bumper fascia. Refer to Front Bumper Fascia Replacement .
- Fill the reservoir with power steering fluid. Refer to Checking and Adding Power Steering Fluid .
- Inspect for leaks. If there are leaks, correct the cause of the leaks. Refer to Power Steering Fluid Leaks .
- Bleed the power steering system. Refer to Power Steering System Bleeding .
- Lower the vehicle.
Notice: Refer to Installing Hoses without Twists or Bends Notice in the Preface section.
Notice: Refer to Fastener Notice in the Preface section.
Tighten
Tighten the pipe fitting to 28 N·m (21 lb ft).
Tighten
Tighten the nut to 65 N·m (48 lb ft).
Tighten
Tighten the bolts to 10 N·m (88.5 lb in).
Notice: Refer to Using Proper Power Steering Fluid Notice in the Preface section.
Notice: Refer to Air in the Power Steering System Notice in the Preface section.
Power Steering Gear Outlet Pipe/Hose Replacement 3.2L Engine
Removal Procedure
- Siphon the power steering fluid from the fluid reservoir.
- Raise and support the vehicle. Refer to Lifting and Jacking the Vehicle .
- Remove the front tire and wheel assemblies. Refer to Tire and Wheel Removal and Installation .
- Place a drain pan under the vehicle in order to catch the power steering fluid.
- Remove the front bumper fascia. Refer to Front Bumper Fascia Replacement .
- Loosen the hose clamps and remove the hoses (2, 3) from the pipes (1, 4) near the left lower side of the front bumper.
- Remove the left front engine shield. Refer to Engine Protection Shield Replacement .
- Remove the bolts (1, 2) from the pipe brackets near the front frame.
- Remove the nut (3) from the stabilizer shaft.
- Lift and move the stabilizer shaft toward the rear of the vehicle.
- Remove the left front wheel drive shaft. Refer to Front Wheel Drive Shaft Replacement .
- Remove the front exhaust pipe. Refer to Front Pipe Replacement .
- Remove the transaxle rear mount assembly. Refer to Transmission Rear Mount Replacement .
- If the vehicle has AWD, remove the transfer case assembly. Refer to Transfer Case Assembly Replacement .
- Remove the pipe from the power steering gear outlet.
- Remove the power steering gear outlet pipe/hose from the vehicle.
Important: The left-hand drive model is shown. The right-hand drive model is similar.
Notice: Refer to Power Steering Hose Disconnected Notice in the Preface section.
Installation Procedure
- Route the power steering gear outlet pipe/hose from the cooler pipe/hose to the steering gear.
- Install the pipe to the power steering gear outlet.
- If the vehicle has AWD, install the transfer case assembly. Refer to Transfer Case Assembly Replacement .
- Install the transaxle rear mount assembly. Refer to Transmission Rear Mount Replacement .
- Install the front exhaust pipe. Refer to Front Pipe Replacement .
- Install the left front wheel drive shaft. Refer to Front Wheel Drive Shaft Replacement .
- Install the stabilizer shaft to the link with the nut (3).
- Install the bolts (1, 2) to the pipe brackets near the front frame.
- Install the left front engine shield. Refer to Engine Protection Shield Replacement .
- Install the hoses (2, 3) and the hose clamps to the pipes (1, 4) near the left lower side of the front bumper.
- Install the front bumper fascia. Refer to Front Bumper Fascia Replacement .
- Install the front tire and wheel assemblies. Refer to Tire and Wheel Removal and Installation .
- Fill the reservoir with power steering fluid. Refer to Checking and Adding Power Steering Fluid .
- Inspect for leaks. If there are leaks, correct the cause of the leaks. Refer to Power Steering Fluid Leaks .
- Bleed the power steering system. Refer to Power Steering System Bleeding .
- Lower the vehicle.
Notice: Refer to Installing Hoses without Twists or Bends Notice in the Preface section.
Notice: Refer to Fastener Notice in the Preface section.
Tighten
Tighten the pipe fitting to 28 N·m (21 lb ft).
Tighten
Tighten the nut to 65 N·m (48 lb ft).
Tighten
Tighten the bolts to 10 N·m (88.5 lb in).
Notice: Refer to Using Proper Power Steering Fluid Notice in the Preface section.
Notice: Refer to Air in the Power Steering System Notice in the Preface section.
