For 1990-2009 cars only
Heater Core Replacement Hatchback
Removal Procedure
- Raise the hood.
- Disconnect the negative battery cable.
- Remove the instrument panel assembly from the vehicle. Refer to Instrument Panel Assembly Replacement.
- Remove the heater/air distribution case from the vehicle. Refer to HVAC Module Assembly Replacement.
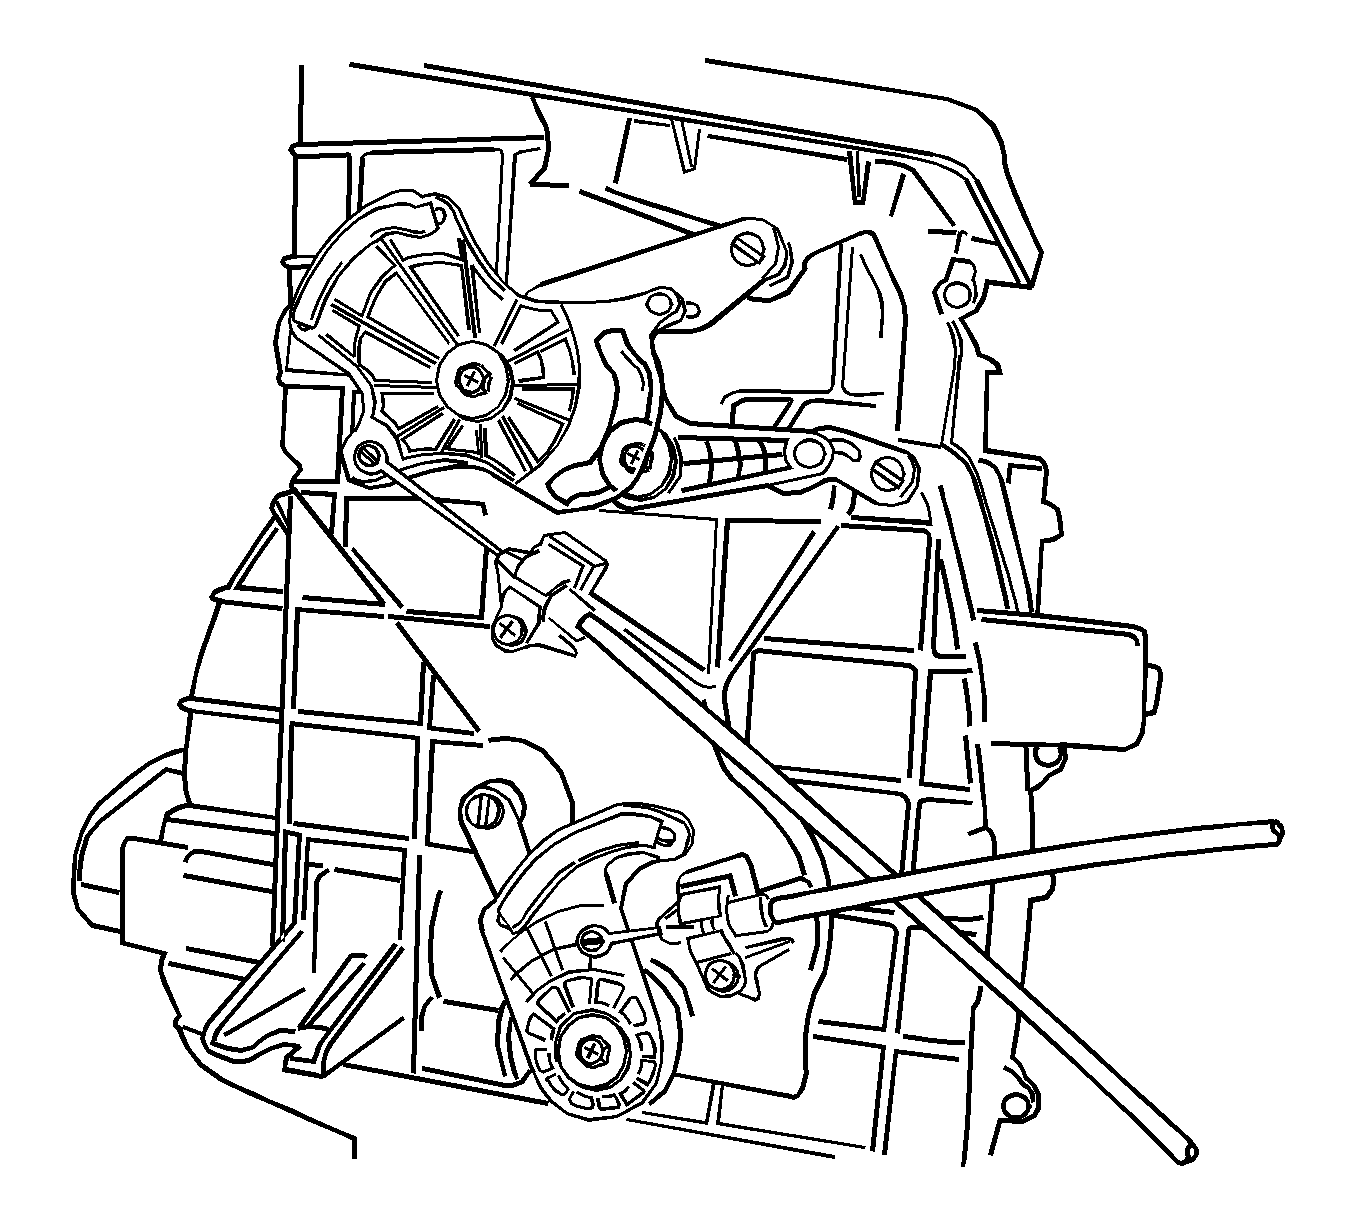
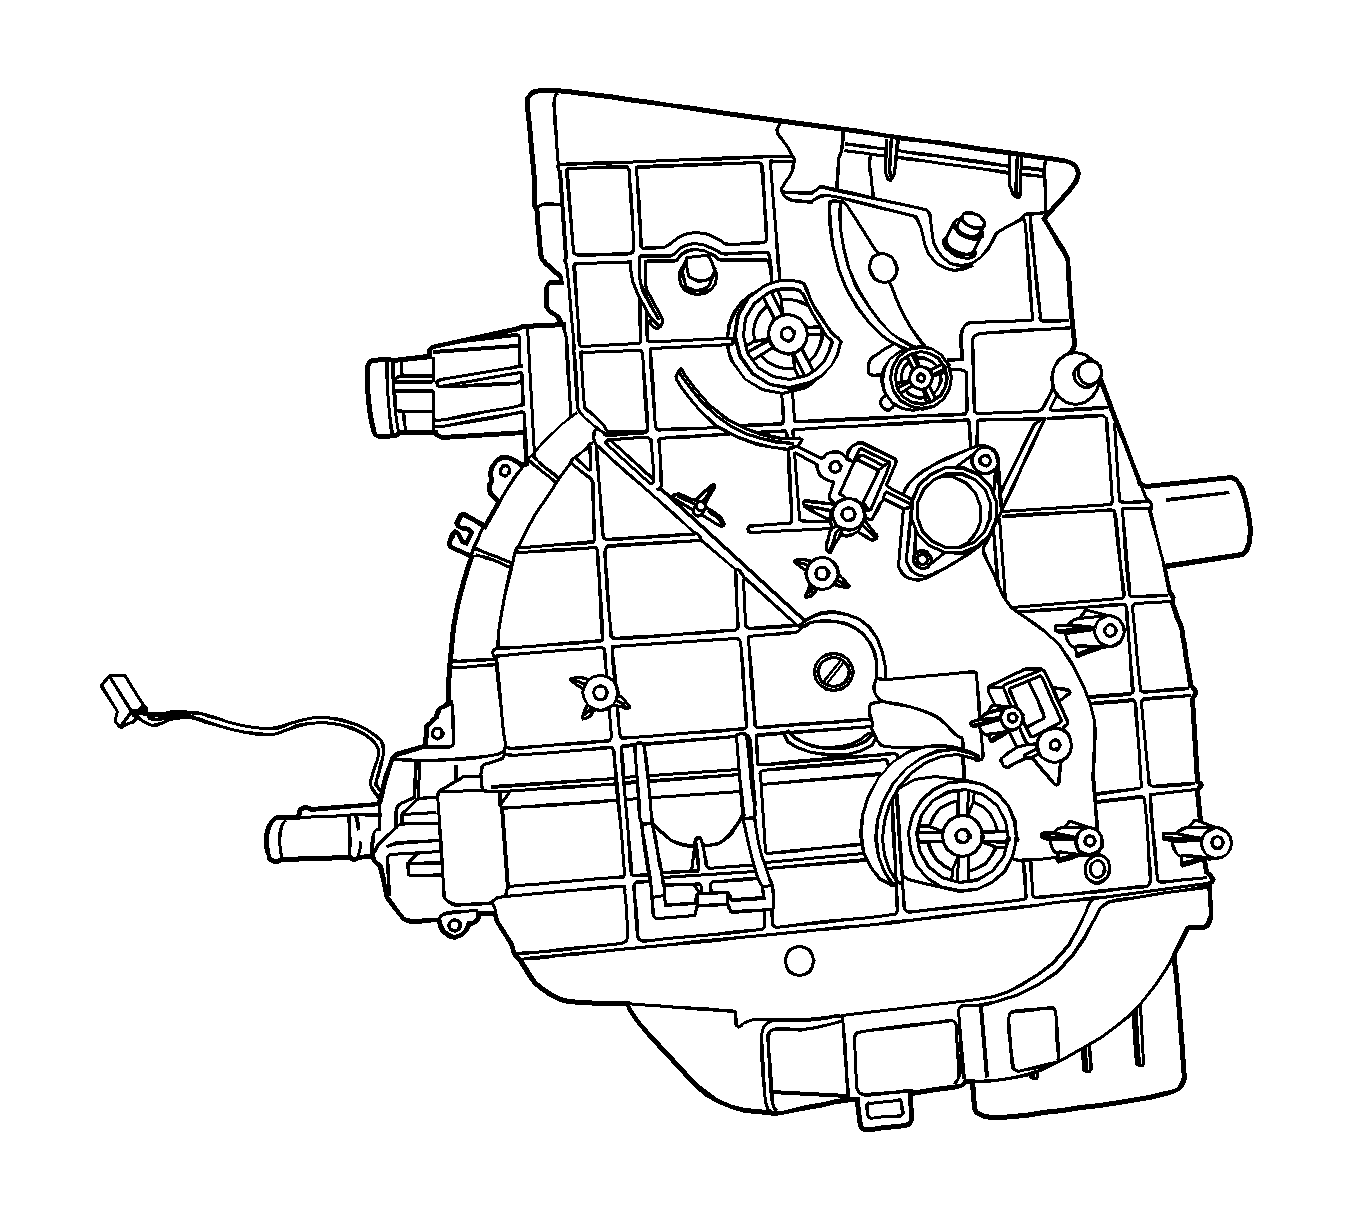
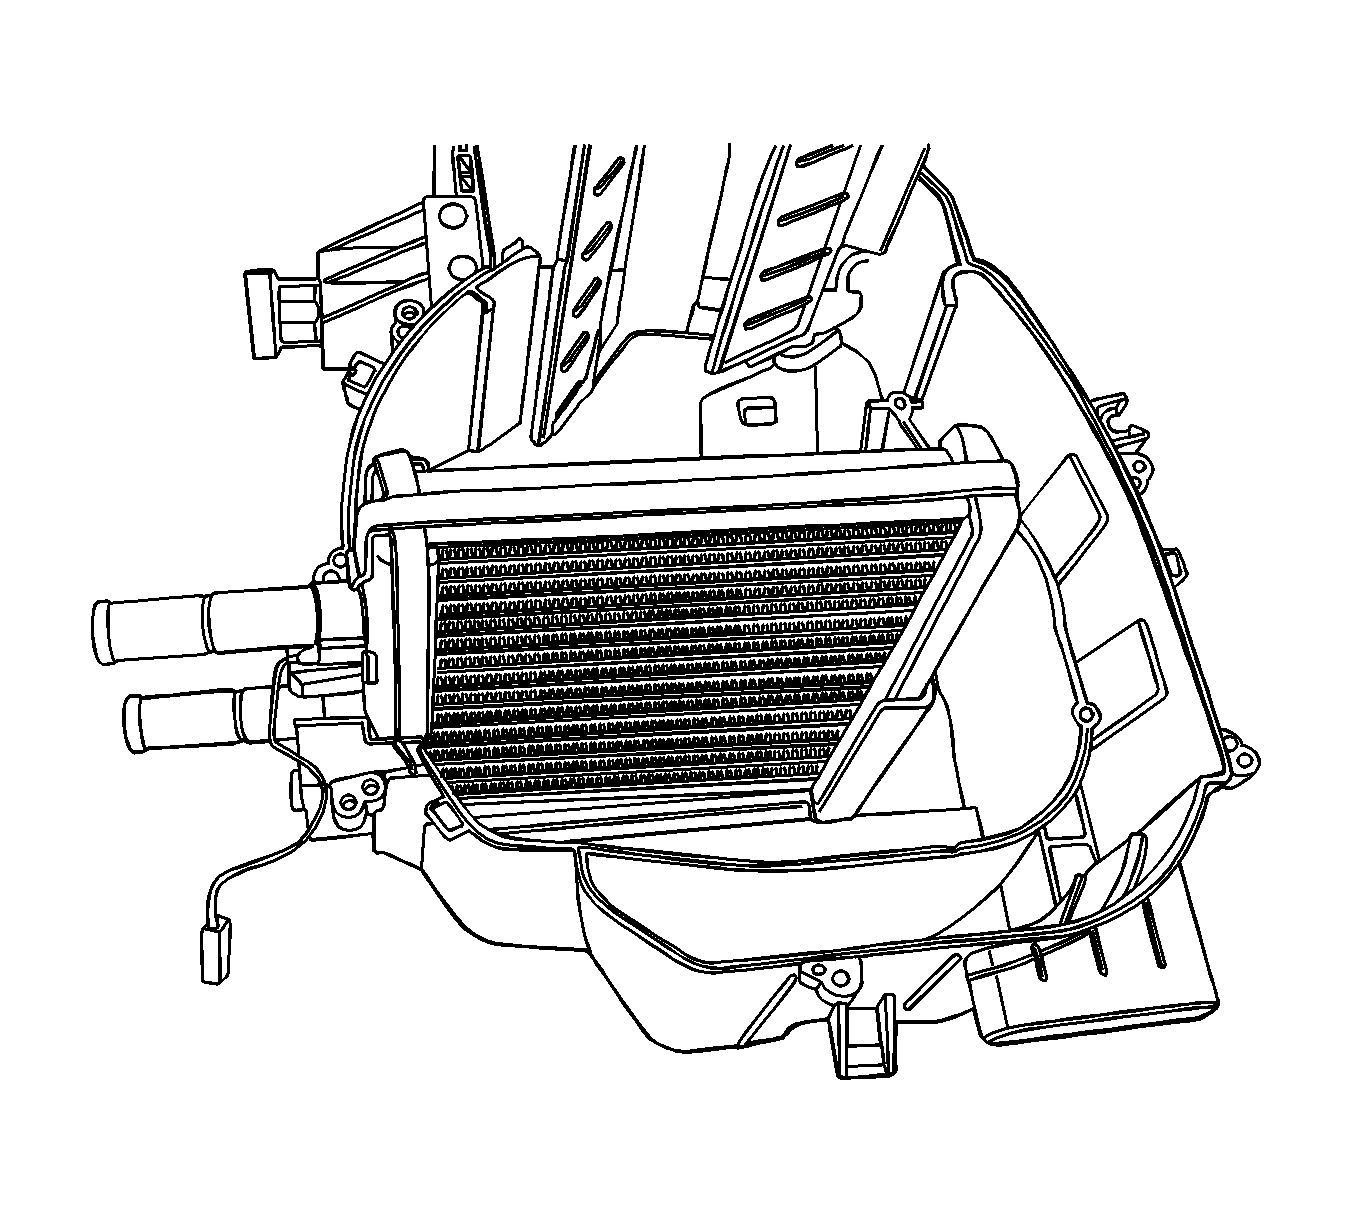
- Remove the linkage screw from the lower heater core cover post.
- Remove the linkage lever. Note the position of all the levers to facilitate reassembly.
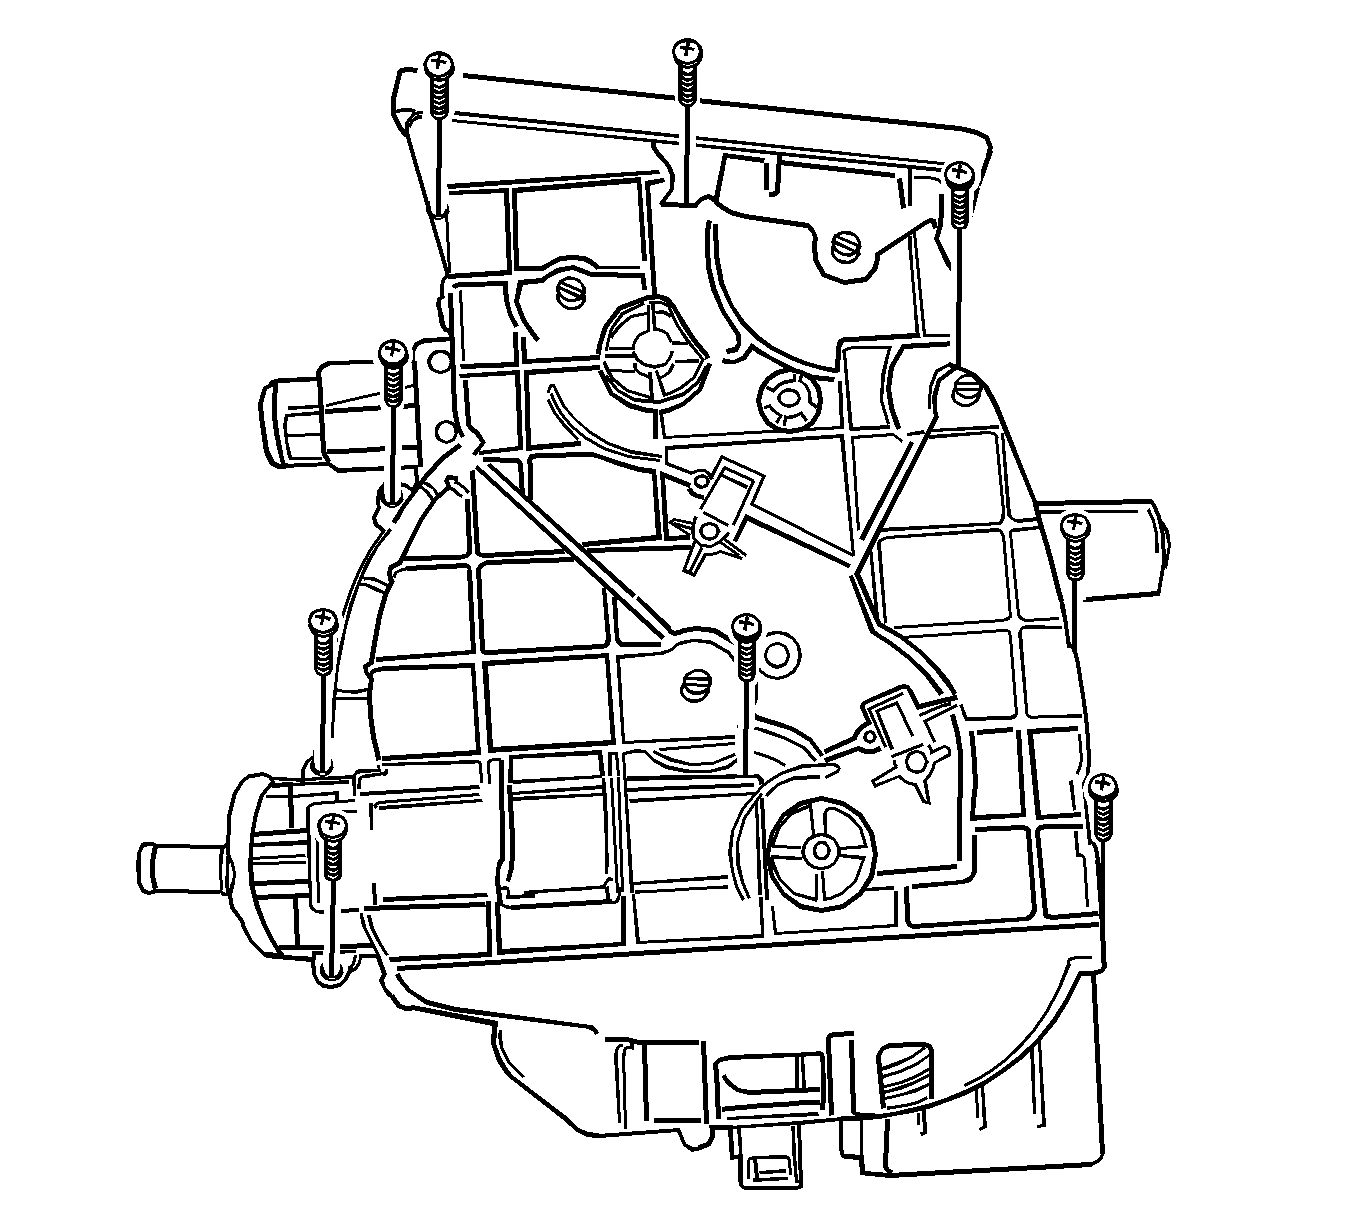
- Remove the screws that secure the heater core cover.
- Slowly separate the lower heater core cover from the rest of the assembly. Retain the sealant.
- Remove the screw and the bracket clamp that secure the heater core lines to the case.
- Remove the spring clamp that secures the heater core body to the case.
- Remove the heater core from the case.
Warning: Refer to Battery Disconnect Warning in the Preface section.
Caution: Handle the case carefully to avoid damage to the linkage levers.
Installation Procedure
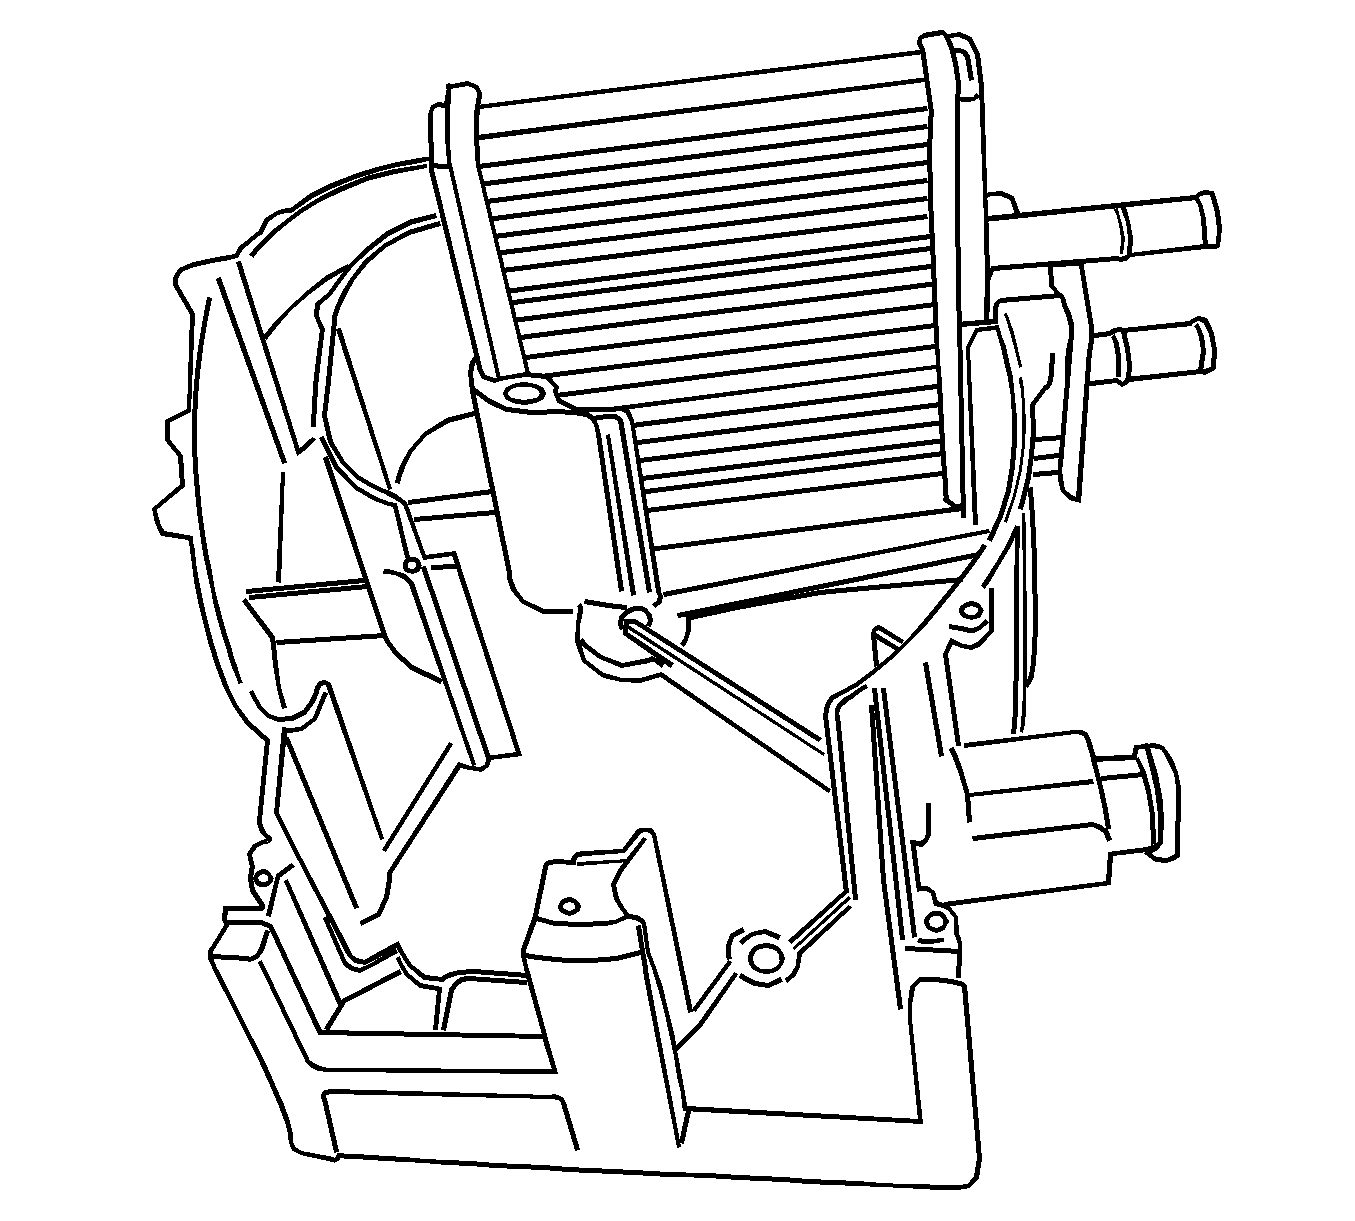
- Install the heater core into the case.
- Secure the heater core lines to the case with the retaining bracket clamp and the screw.
- Install the heater core body with the retaining spring clamp.
- Reapply the sealant to the heater core cover mounting channel flange as removed.
- Install the heater core cover.
- Install the retaining screws.
- Install the linkage lever onto the cover post with the screw.
- Confirm proper operation of the actuating levers for the heater/air distribution case doors.
- Install the heater/air distribution case. Refer to HVAC Module Assembly Replacement.
- Install the instrument panel assembly. Refer to Instrument Panel Assembly Replacement.
- Fill the cooling system.
- Connect the negative battery cable.
Heater Core Replacement Notchback
Removal Procedure
- Raise the hood.
- Disconnect the negative battery cable.
- Remove the instrument panel assembly from the vehicle. Refer to Instrument Panel Assembly Replacement.
- Remove the heater/air distribution case from the vehicle. Refer to HVAC Module Assembly Replacement.
- Remove the linkage screw from the lower heater core cover post.
- Remove the linkage lever. Note the position of all the levers to facilitate reassembly.
- Remove the screws that secure the heater core cover.
- Slowly separate the lower heater core cover from the rest of the assembly. Retain the sealant.
- Remove the screw and the bracket clamp that secure the heater core lines to the case.
- Remove the spring clamp that secures the heater core body to the case.
- Remove the heater core from the case.

Warning: Refer to Battery Disconnect Warning in the Preface section.
Caution: Handle the case carefully to avoid damage to the linkage levers.
Installation Procedure
- Install the heater core into the case.
- Secure the heater core lines to the case with the retaining bracket clamp and the screw.
- Install the heater core body with the retaining spring clamp.
- Reapply the sealant to the heater core cover mounting channel flange as removed.
- Install the heater core cover.
- Install the retaining screws.
- Install the linkage lever onto the cover post with the screw.
- Confirm proper operation of the actuating levers for the heater/air distribution case doors.
- Install the heater/air distribution case. Refer to HVAC Module Assembly Replacement.
- Install the instrument panel assembly. Refer to Instrument Panel Assembly Replacement.
- Fill the cooling system.
- Connect the negative battery cable.
