Tools Required
| • | OTC 1726 (KM-412) Engine Overhaul Stand or equivalent |
| • | J 42492-A (KM-421-A) Timing Belt Adjuster |
| • | J 45059 Angle Meter |
| • | KM-470-B Angular Torque Gage |
| • | J-36792 Crankshaft Rear Oil Seal Installer |
| • | KM-635 Crankshaft Rear Oil Seal Installer |
Disassembly Procedure
- Remove the engine. Refer to Engine Replacement.
- Remove the flywheel bolts.
- Remove the flywheel.
- Remove the crankshaft rear oil seal.
- Mount the engine assembly on the OTC 1726 .
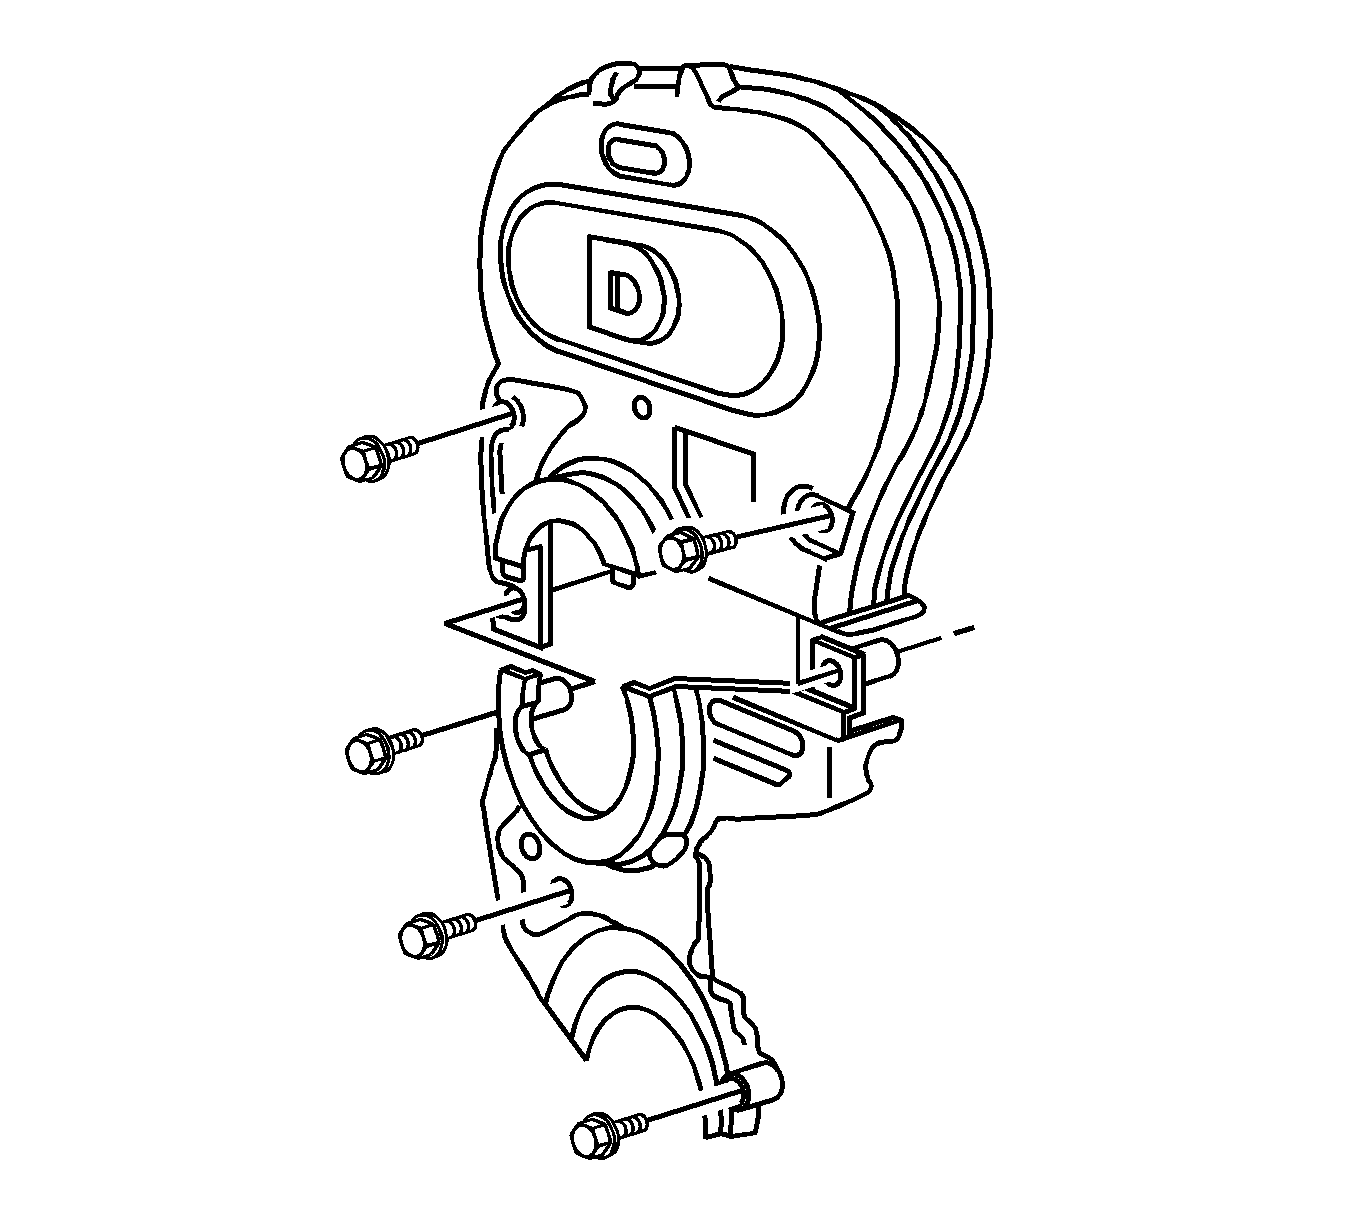
- Remove the upper and lower front timing belt cover bolts.
- Remove the upper and lower front timing belt cover.
- Slightly loosen the coolant pump retaining bolts.
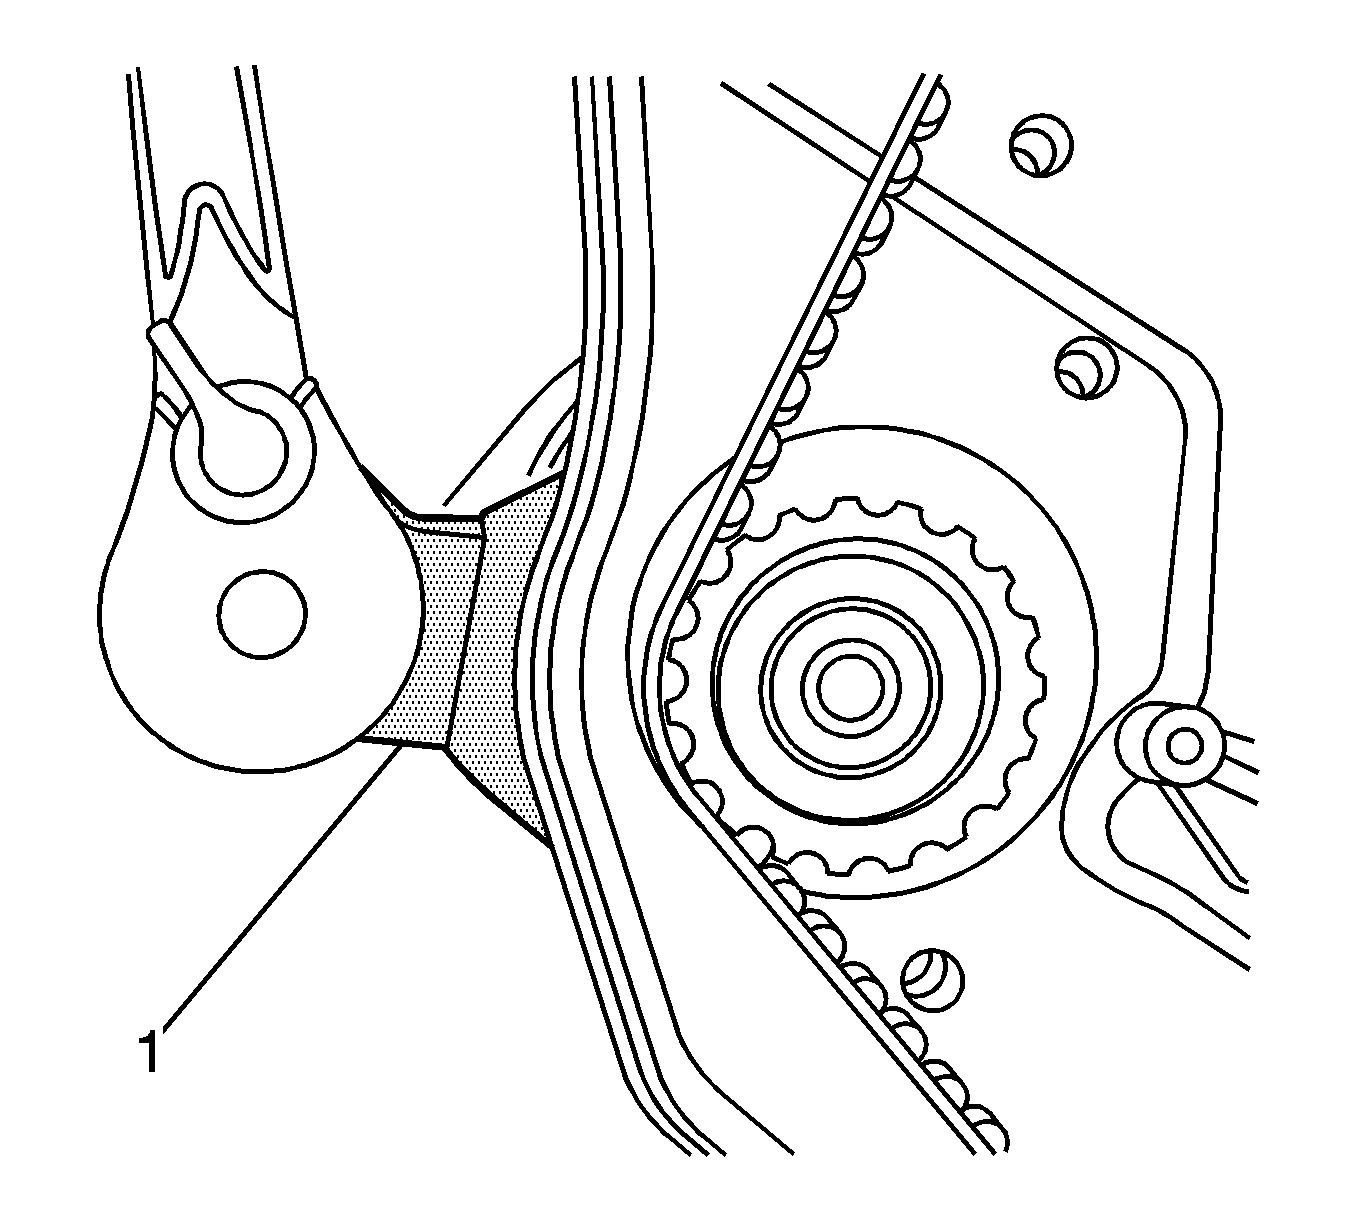
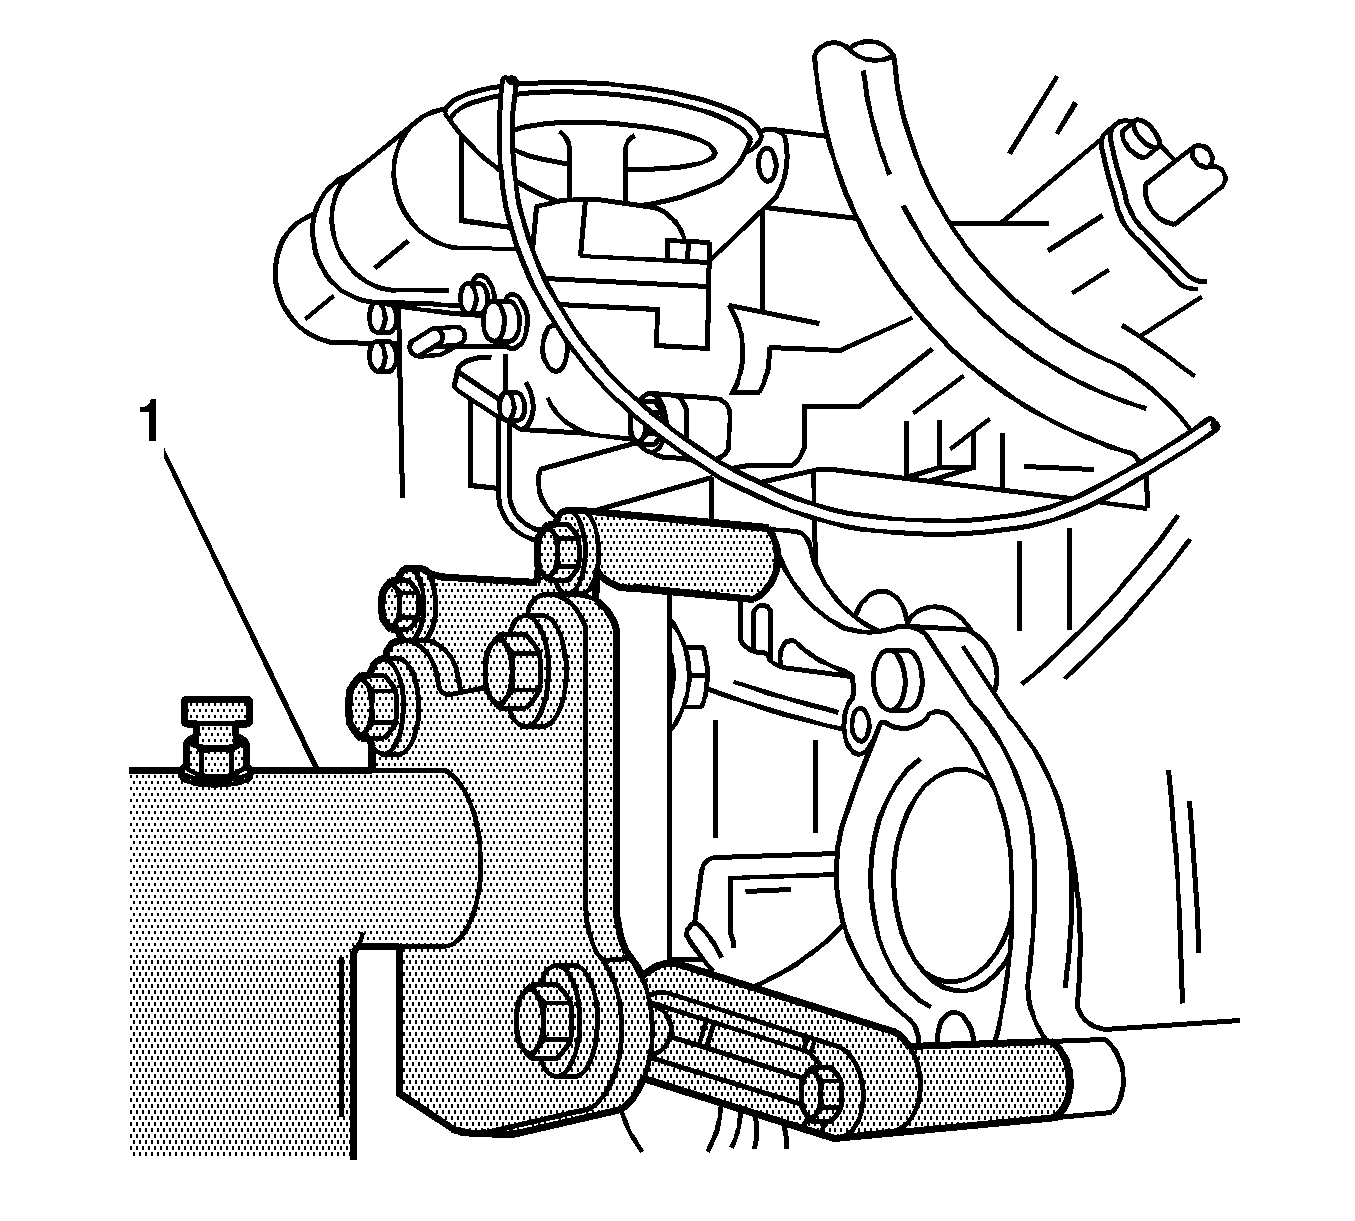
- Rotate the coolant pump using the J 42492-A (1) to remove the tension from the timing belt.
- Remove the timing belt.
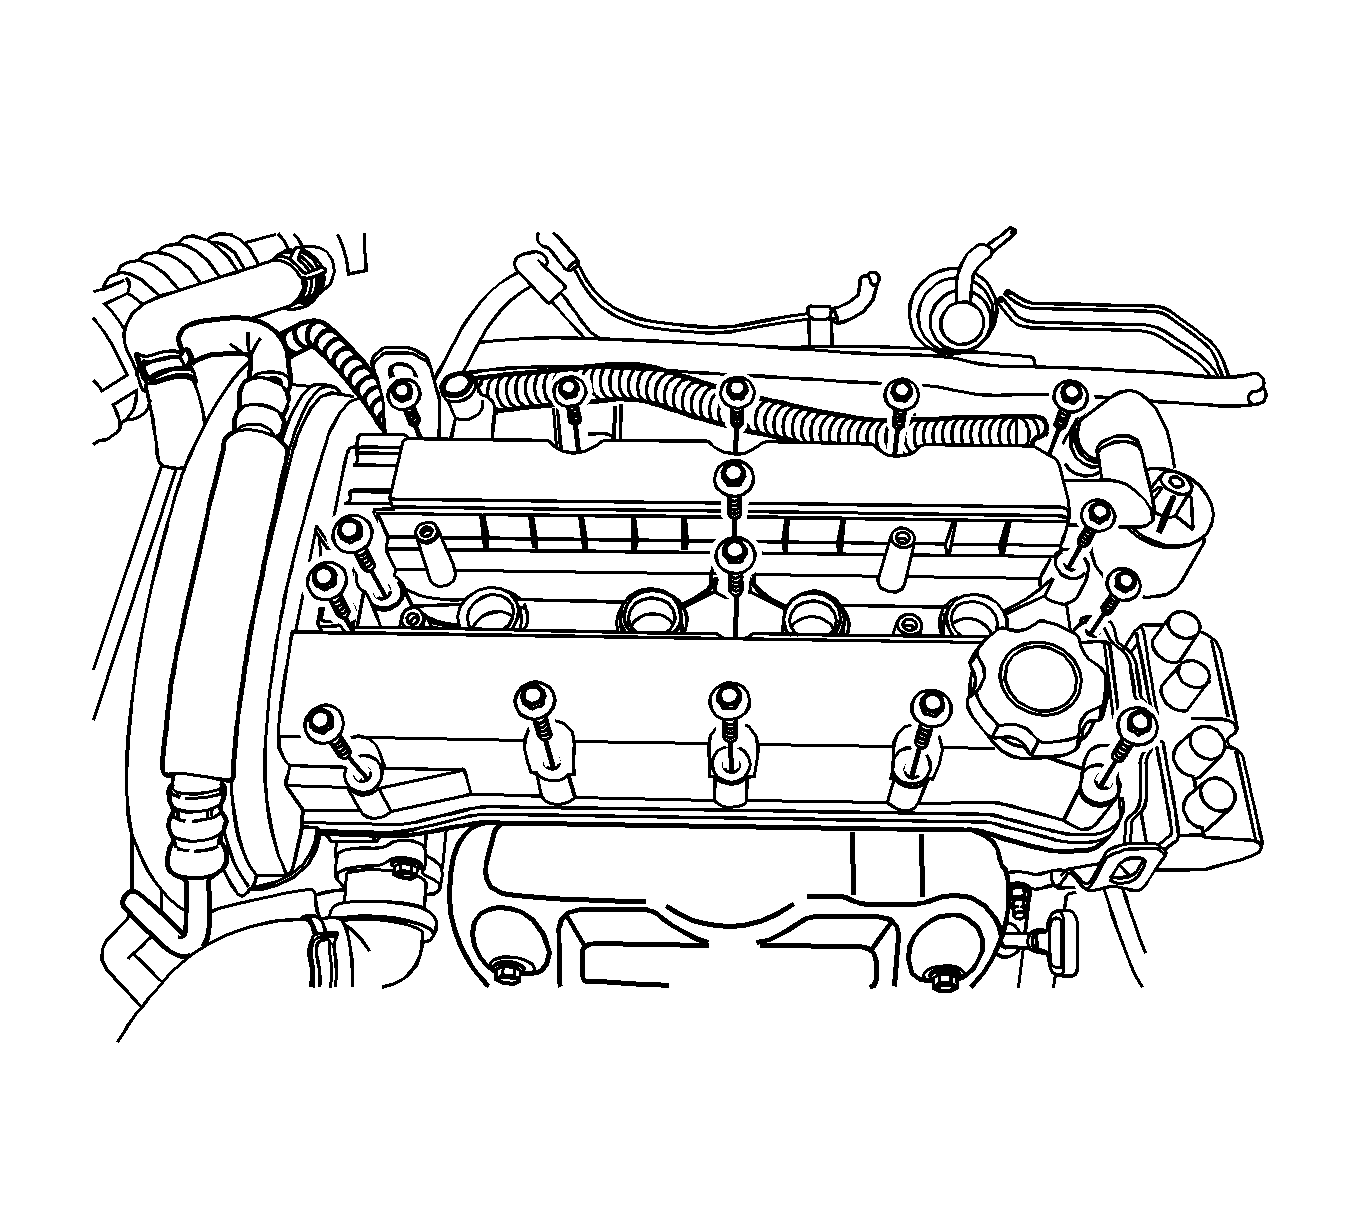
- Disconnect the crankcase ventilation tubes from the valve cover.
- Remove the engine cover bolts.
- Remove the engine cover.
- Disconnect the ignition wires from the spark plugs.
- Remove the valve cover nuts.
- Remove the valve cover washers.
- Remove the valve cover and the valve cover gasket.
- While holding the intake camshaft firmly in place, remove the intake camshaft bolt.
- Remove the intake camshaft gear.
- While holding the exhaust camshaft firmly in place, remove the exhaust camshaft bolt.
- Remove the exhaust camshaft gear.
- Remove the timing belt automatic tensioner bolts.
- Remove the timing belt automatic tensioner.
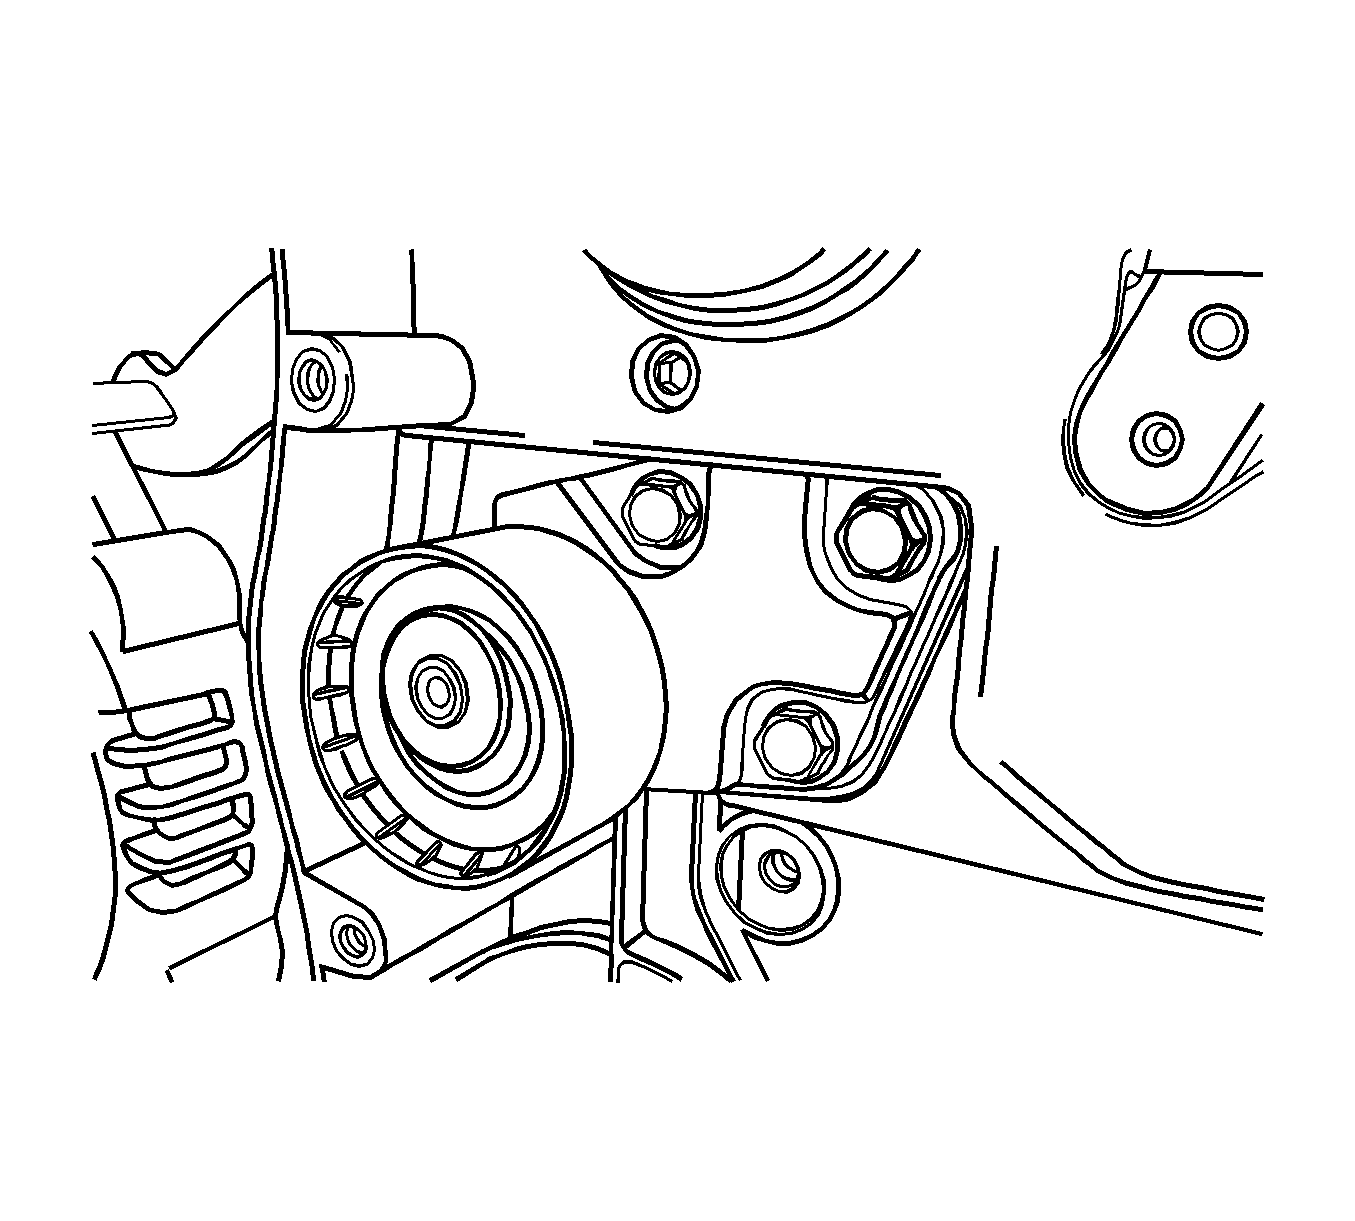
- Remove the timing belt idler pulley bolt.
- Remove the timing belt idler pulley.
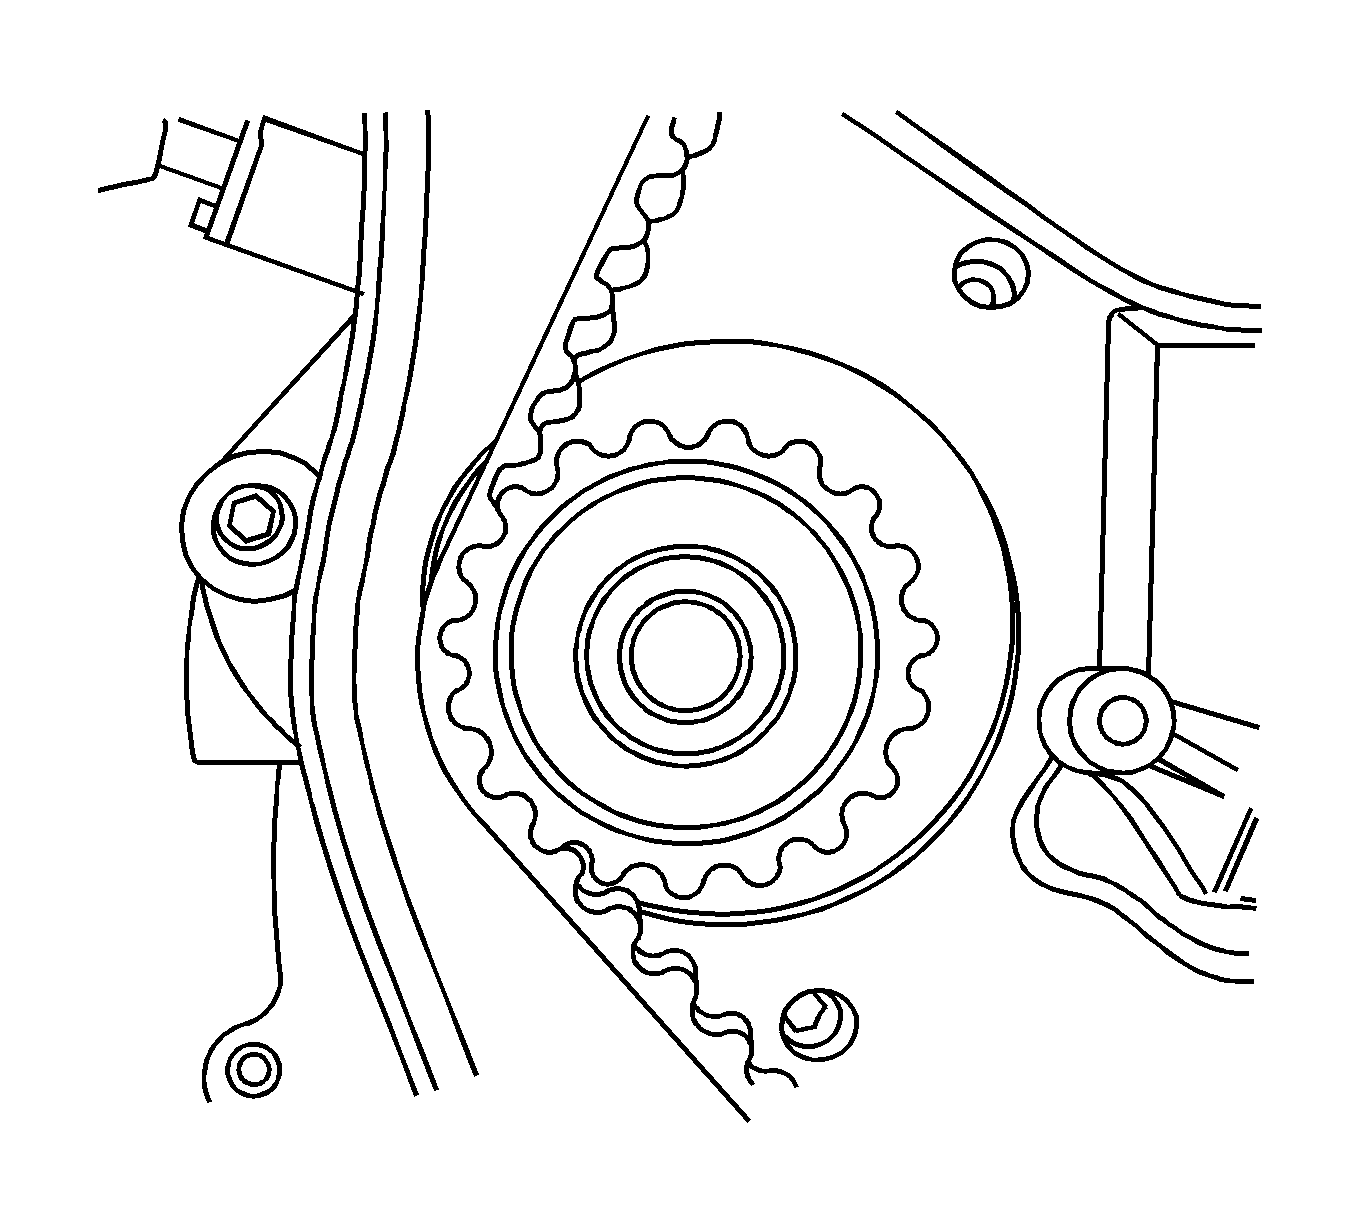
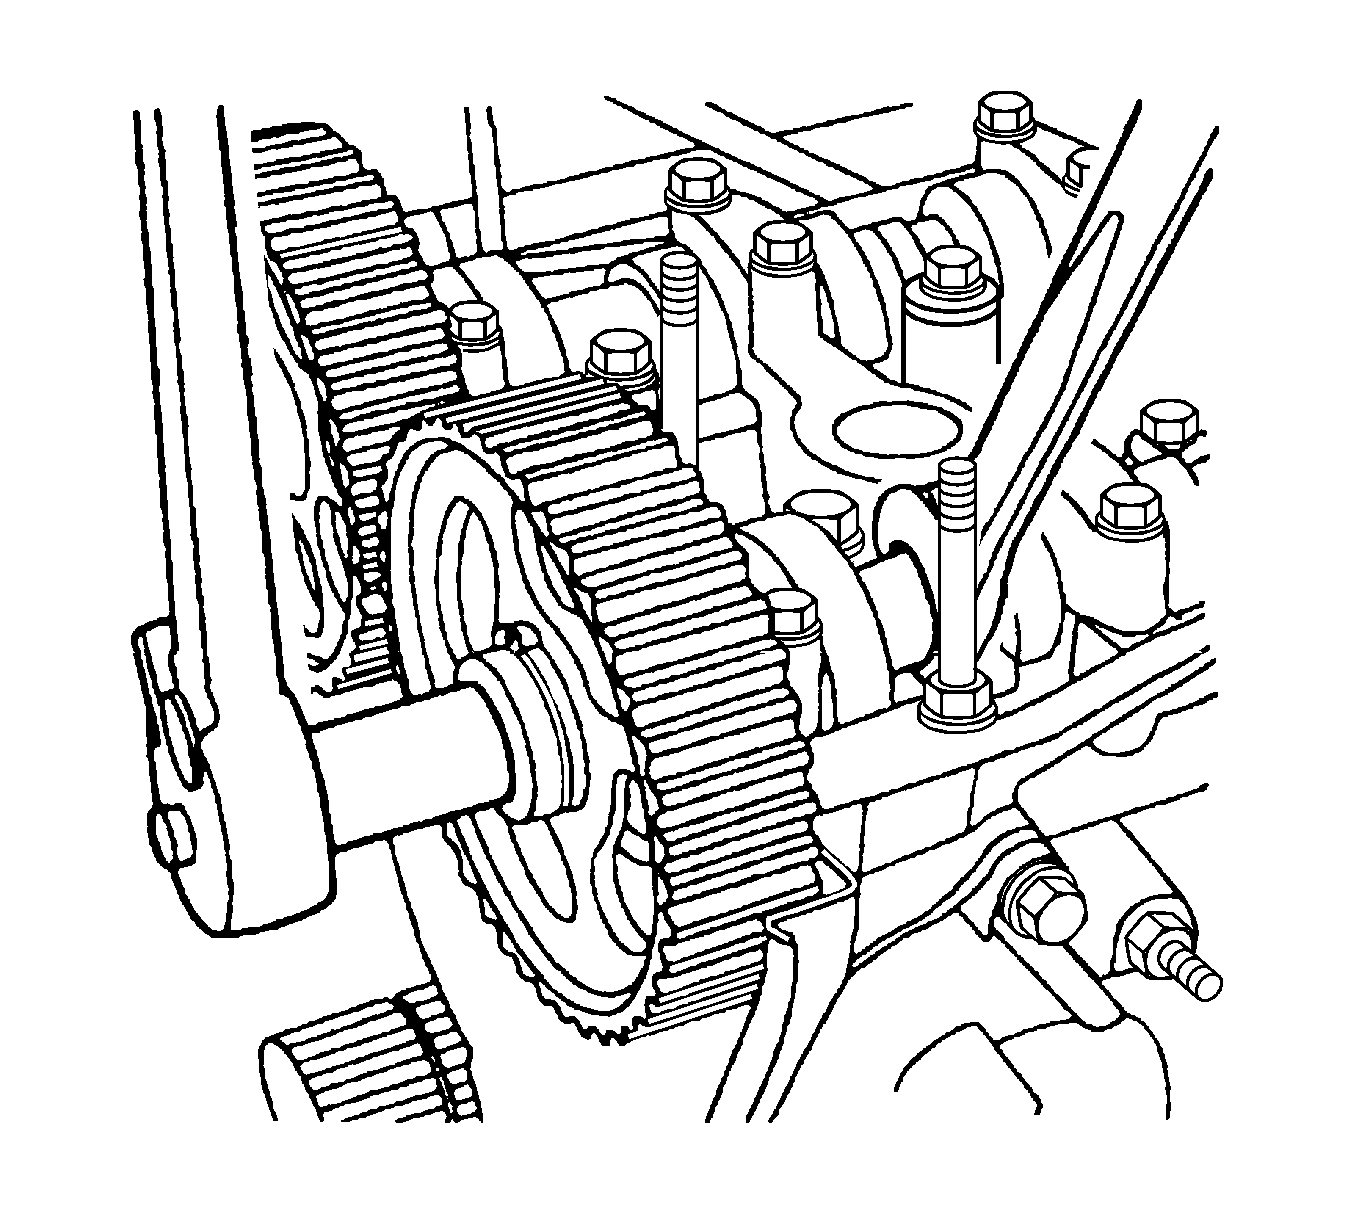
- Remove the crankshaft timing belt gear.
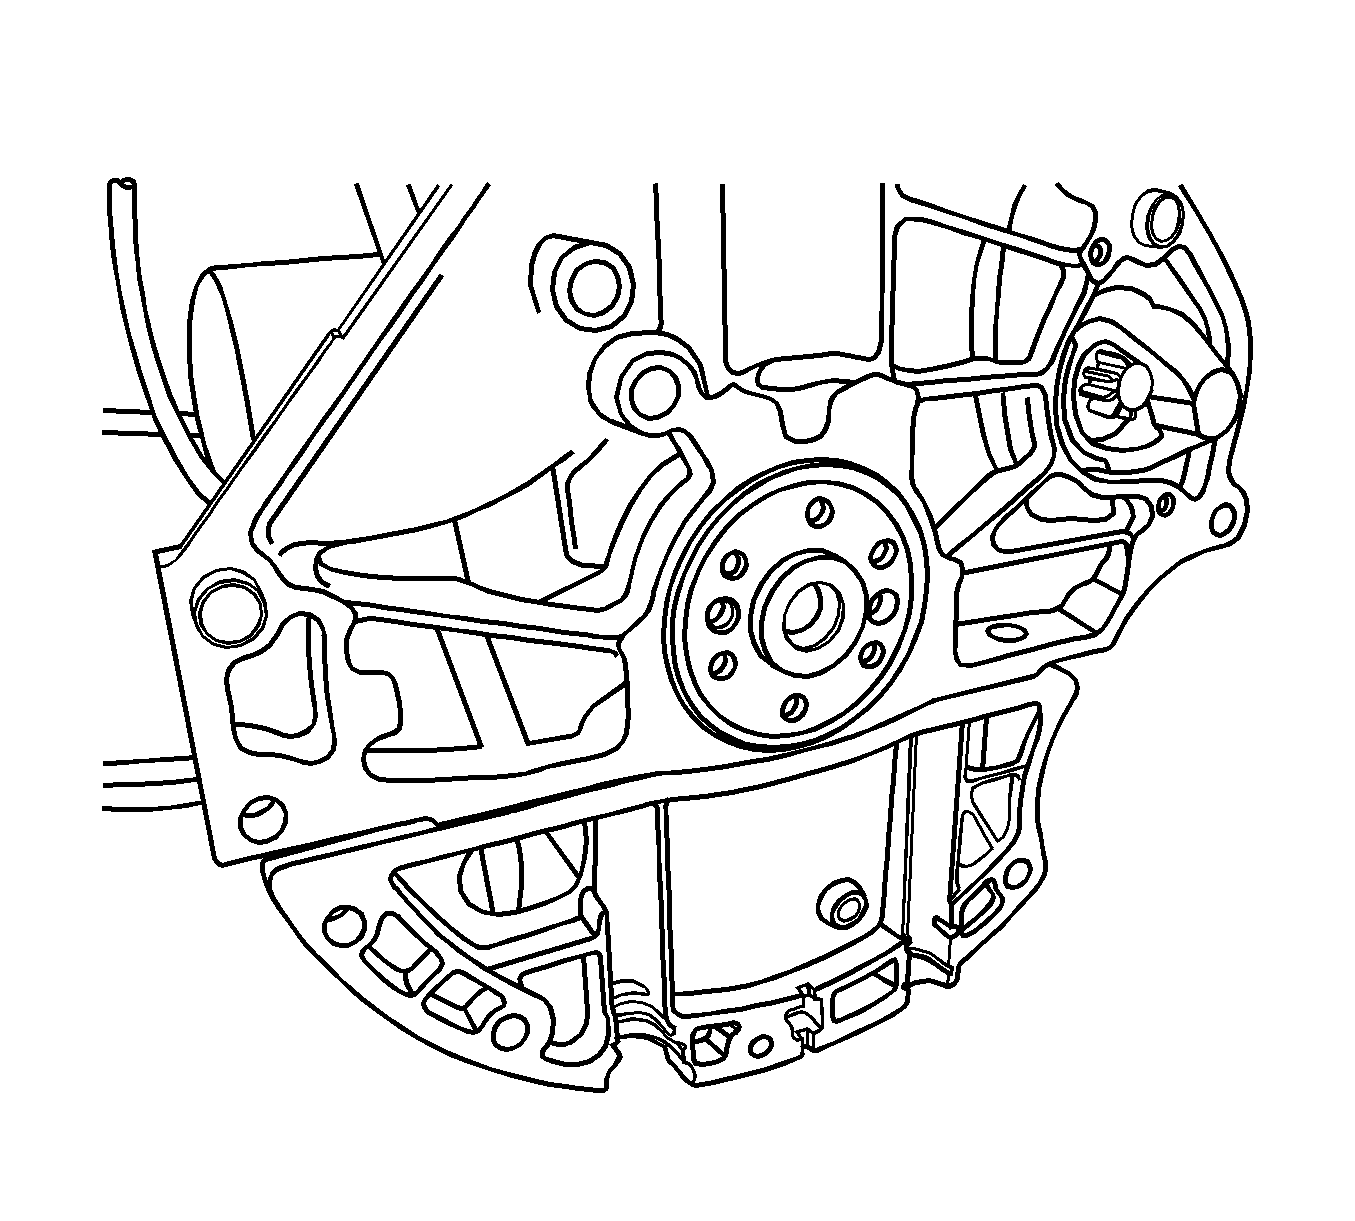
- Remove the rear timing belt cover bolts.
- Remove the rear timing belt cover.
- Rotate the engine of the OTC 1726 (1).
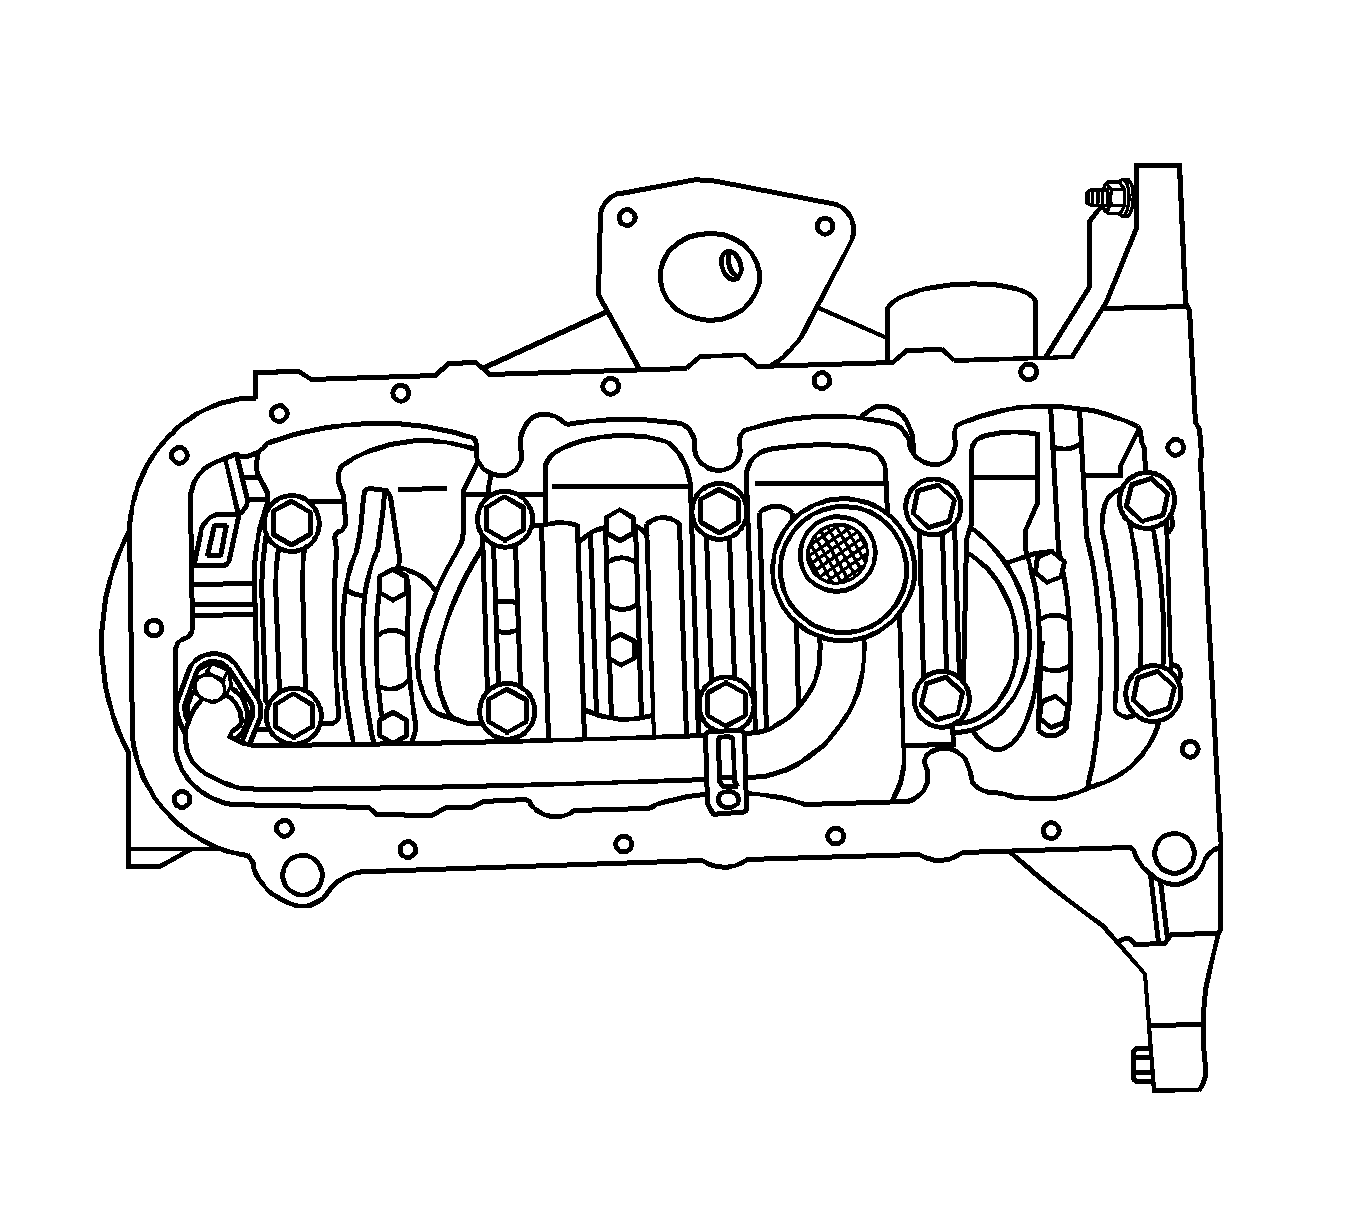
- Remove the oil pan retaining bolts.
- Remove the oil pan.
- Remove the oil pickup tube bolts.
- Remove the oil pickup tube.
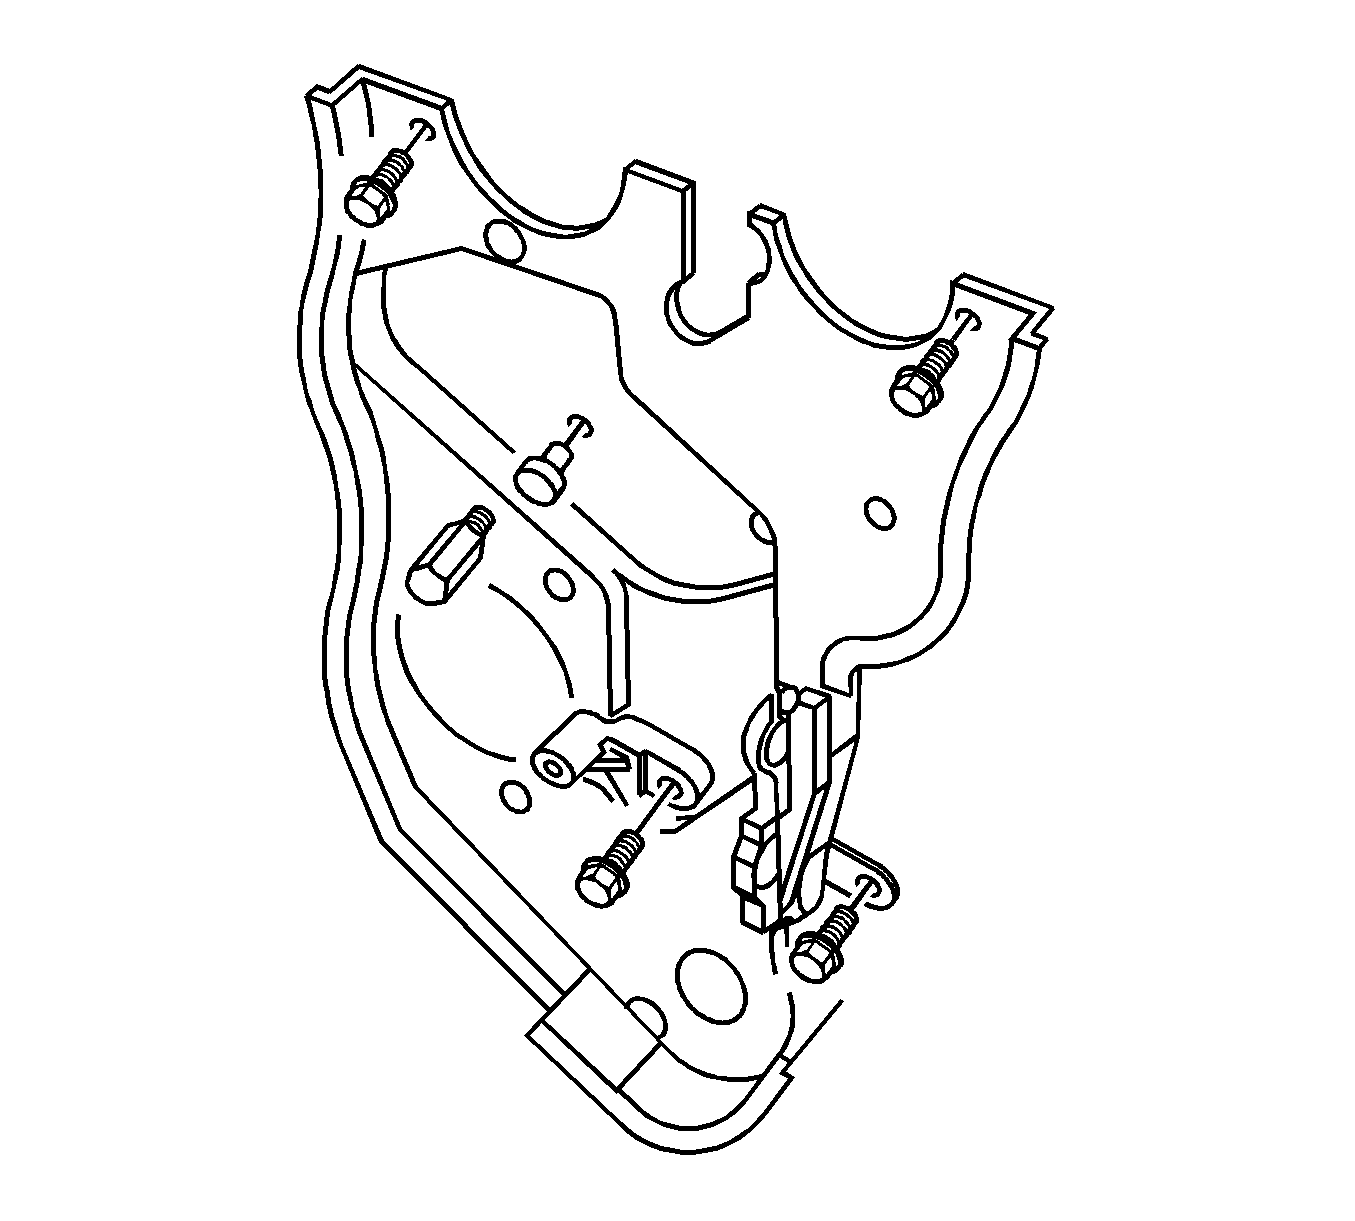
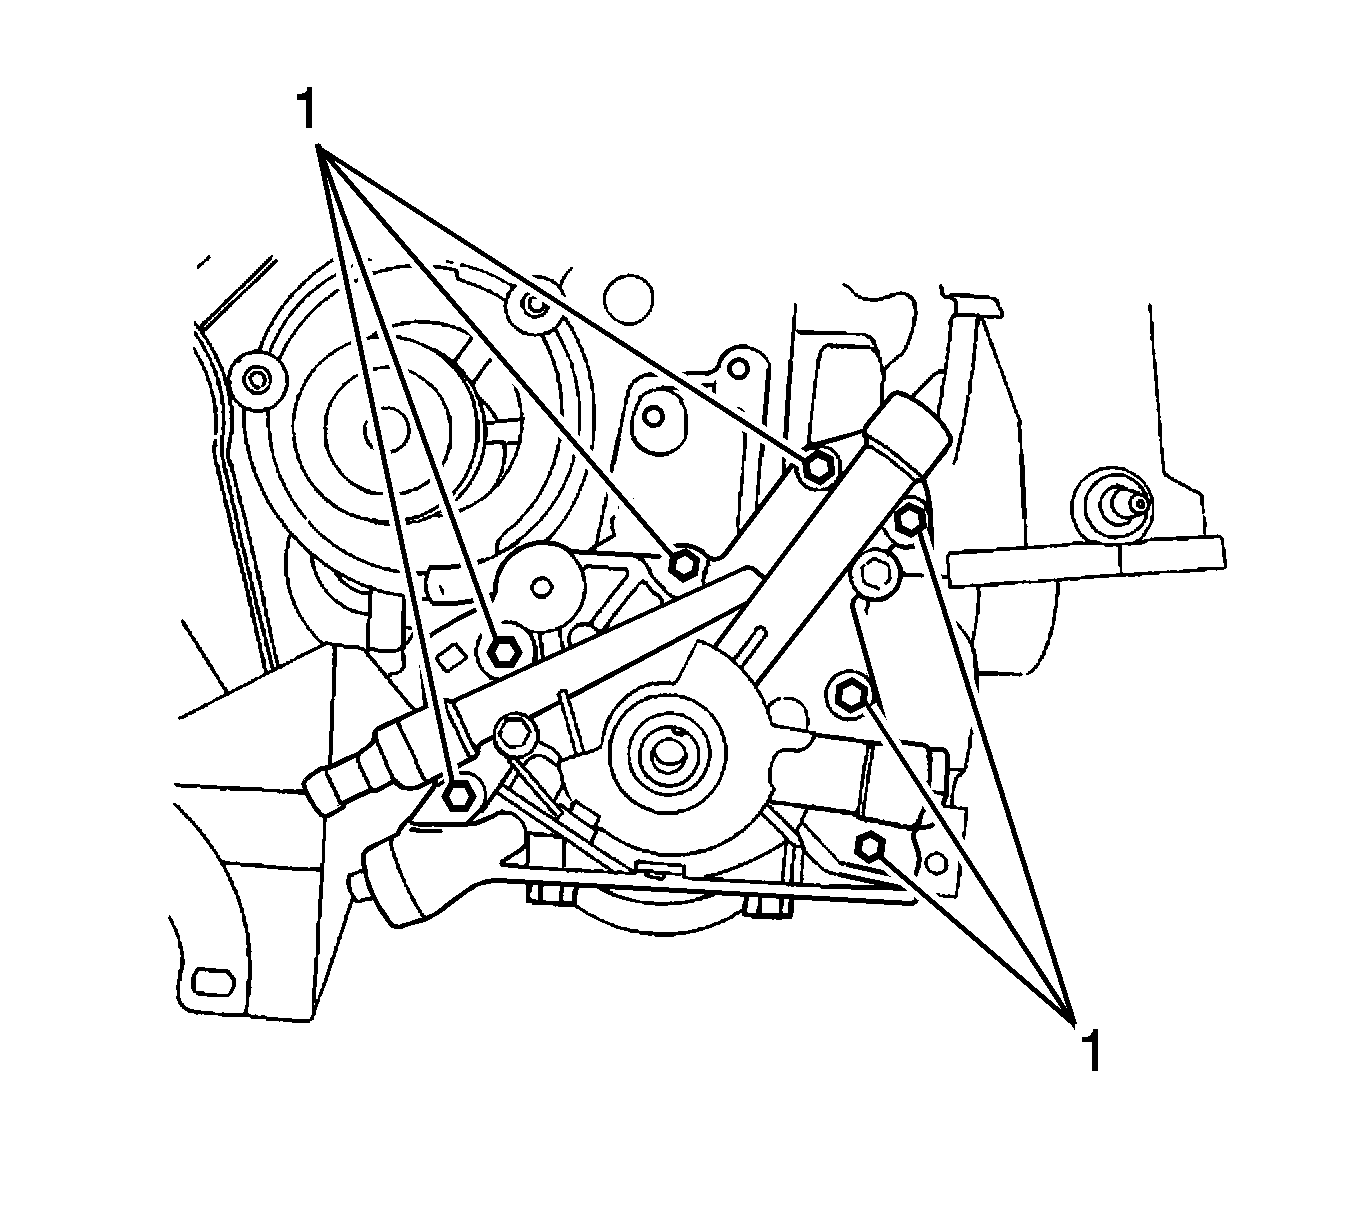
- Remove the oil pump retaining bolts (1).
- Remove the oil pump.
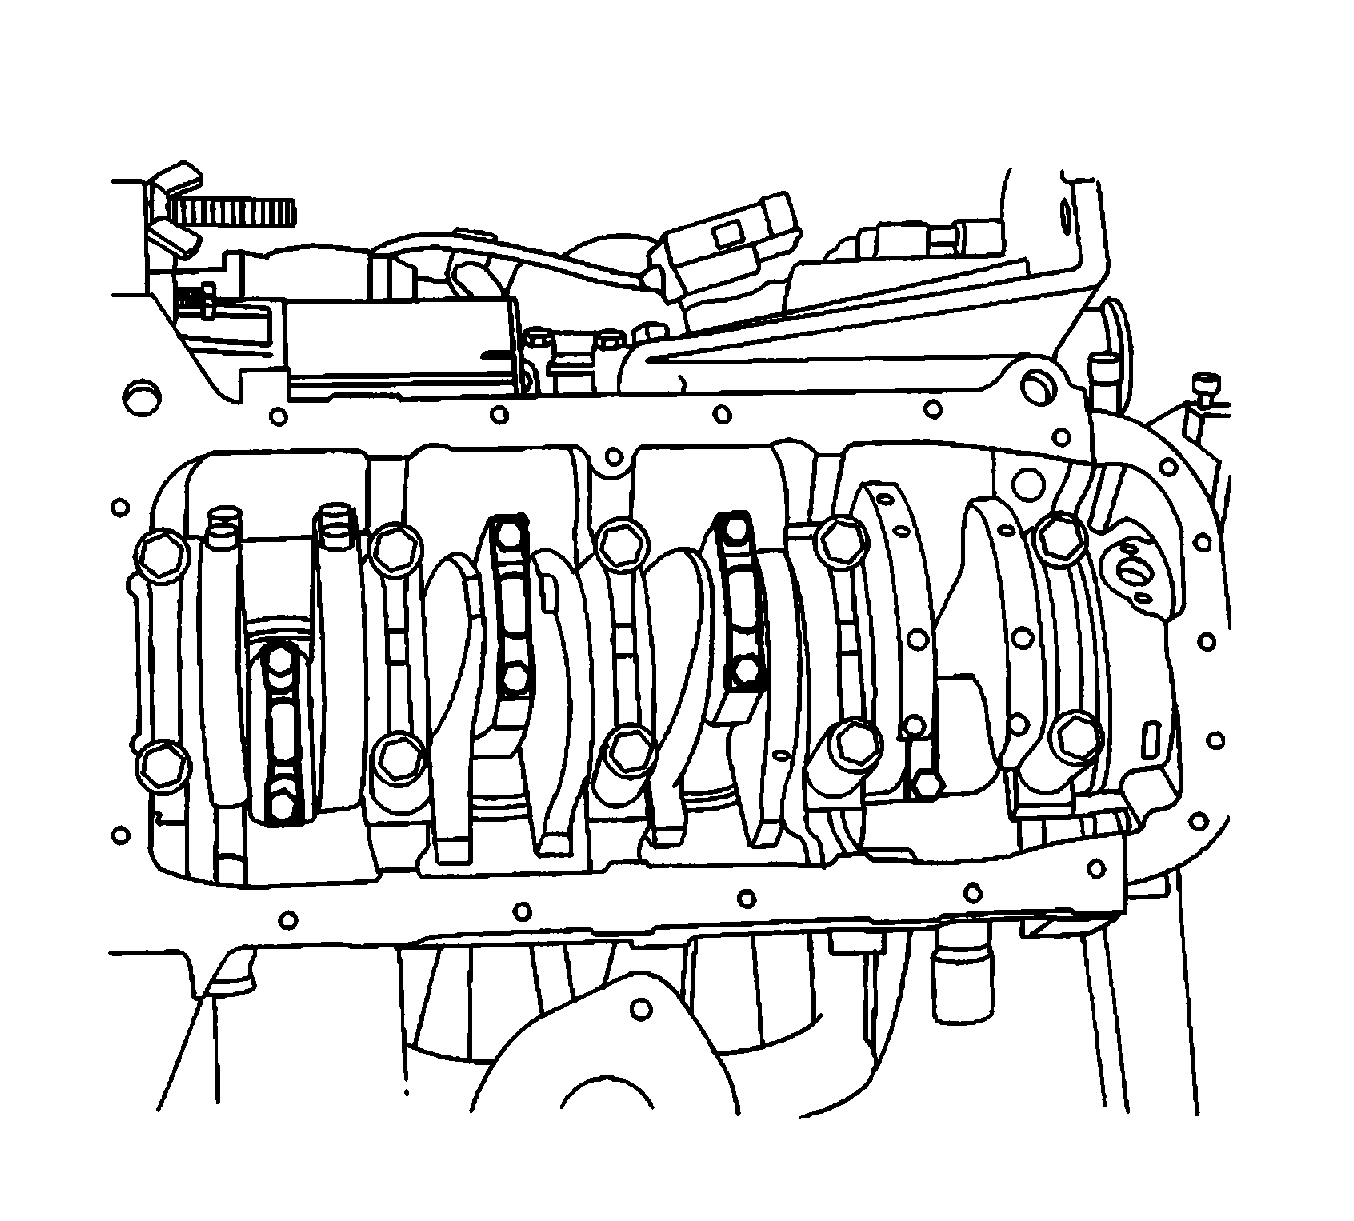
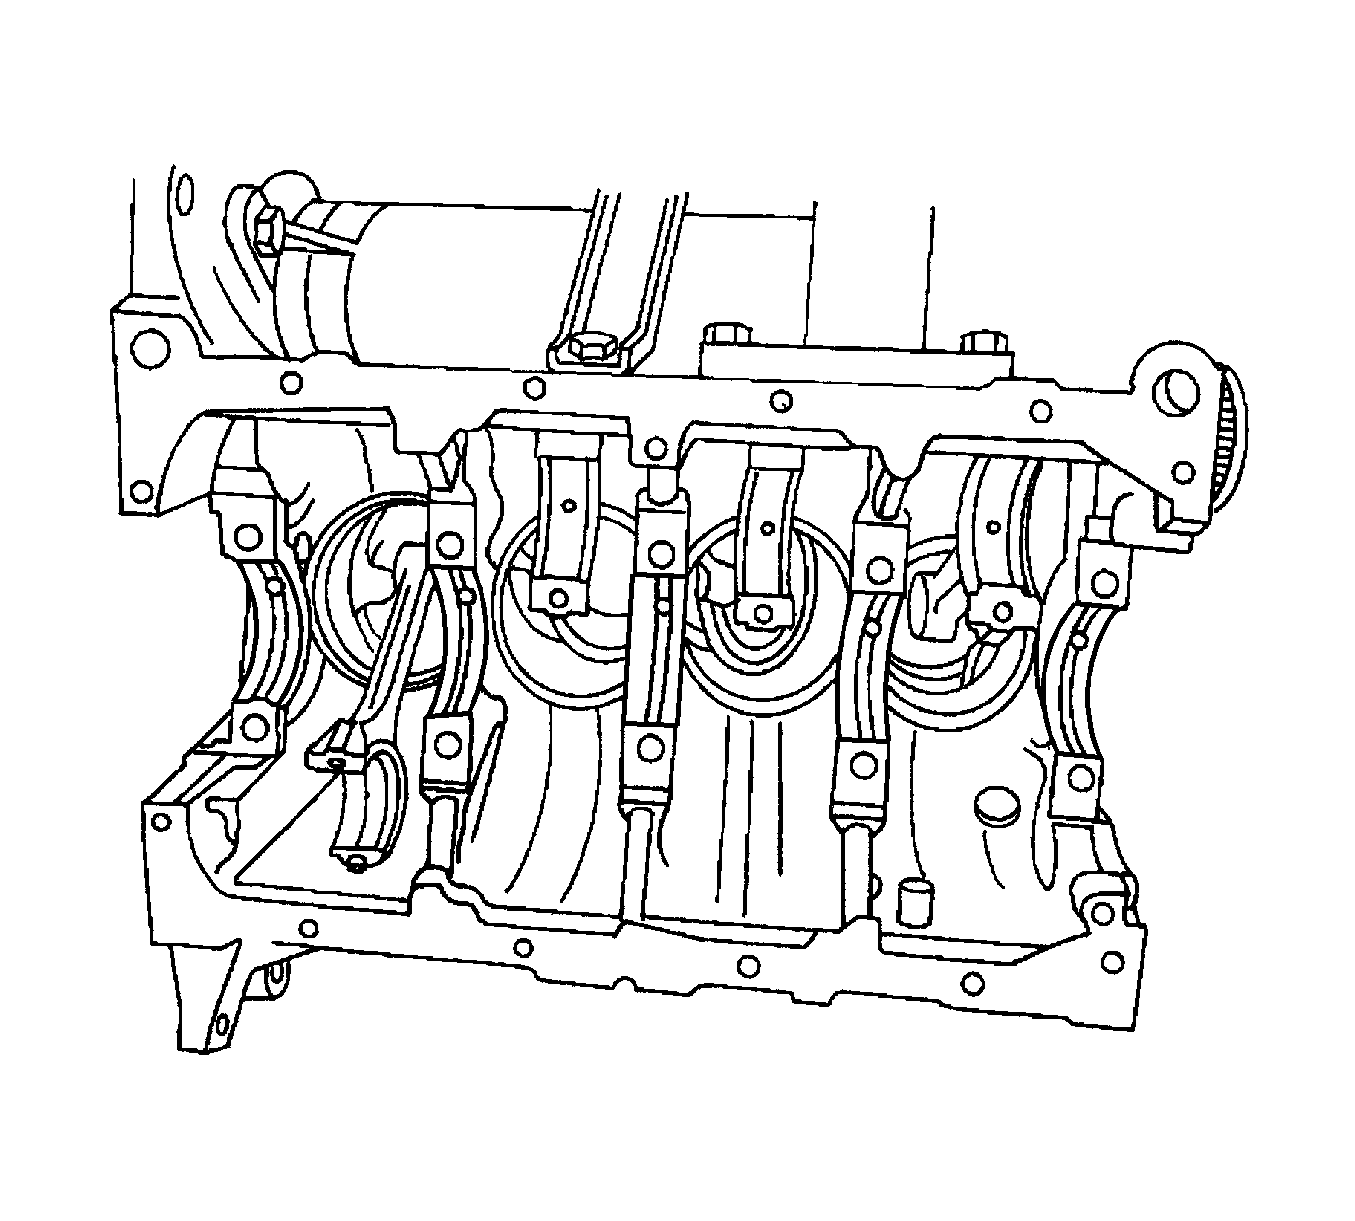
- Mark the order of the connecting rod bearing caps.
- Remove the connecting rod bearing cap bolts for all of the pistons.
- Remove the connecting rod bearing caps and the lower connecting rod bearings.
- Remove the upper connecting rod bearings.
- Mark the order of the crankshaft bearing caps.
- Remove the crankshaft bearing cap bolts.
- Remove the crankshaft bearing caps and the lower crankshaft bearings.
- Remove the crankshaft.
- Remove the upper crankshaft bearings.
- Clean any parts that need it.

Notice: Use extreme care when installing the camshaft not to nick, scratch, or damage the camshaft lobes or bearing surfaces.
Caution: Refer to Safety Glasses Caution in the Preface section.
Assembly Procedure
- With the crankshaft and bearings in place, plastic gage all bearing clearances. Refer to Crankshaft and Bearing Cleaning and Inspection.
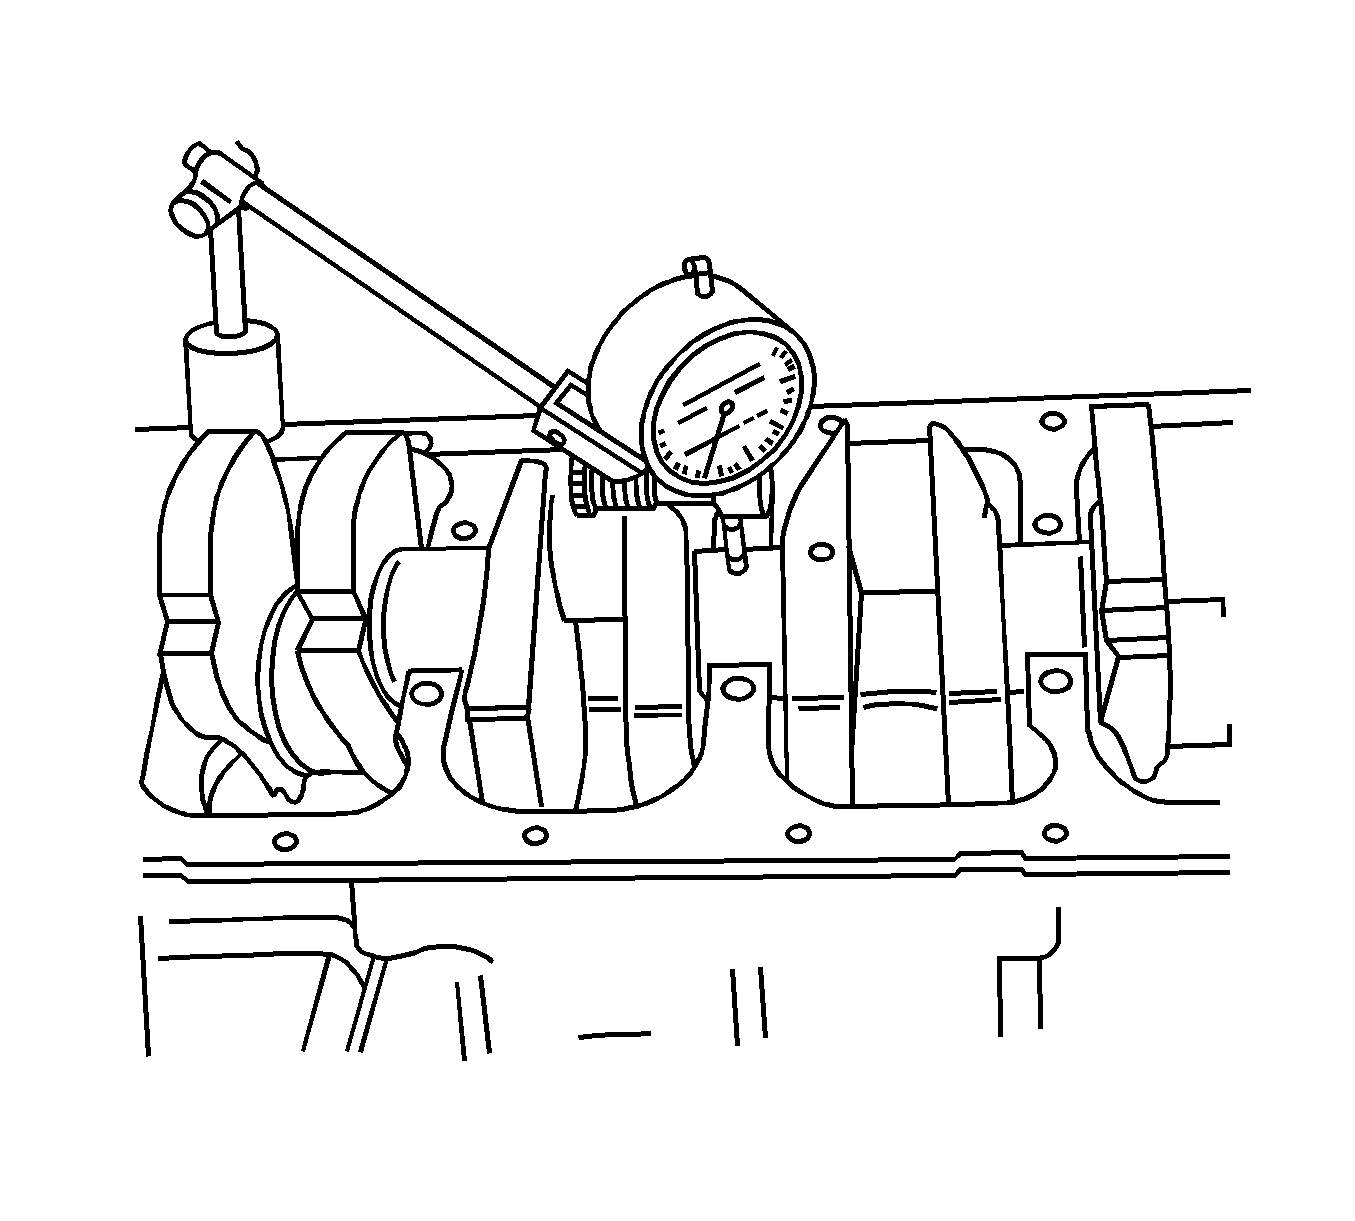
- Inspect the crankshaft end play with the crankshaft bearings installed.
- Inspect for permissible crankshaft end play. Refer to Engine Mechanical Specifications.
- With the crankshaft mounted on the front and the rear crankshaft bearings, check the middle crankshaft bearings, check the middle crankshaft journal for permissible out-of-round runout. Refer to Engine Mechanical Specifications.
- Coat the crankshaft bearings with engine oil.
- Apply a bead of adhesive sealing compound to the grooves of the rear crankshaft bearing cap.
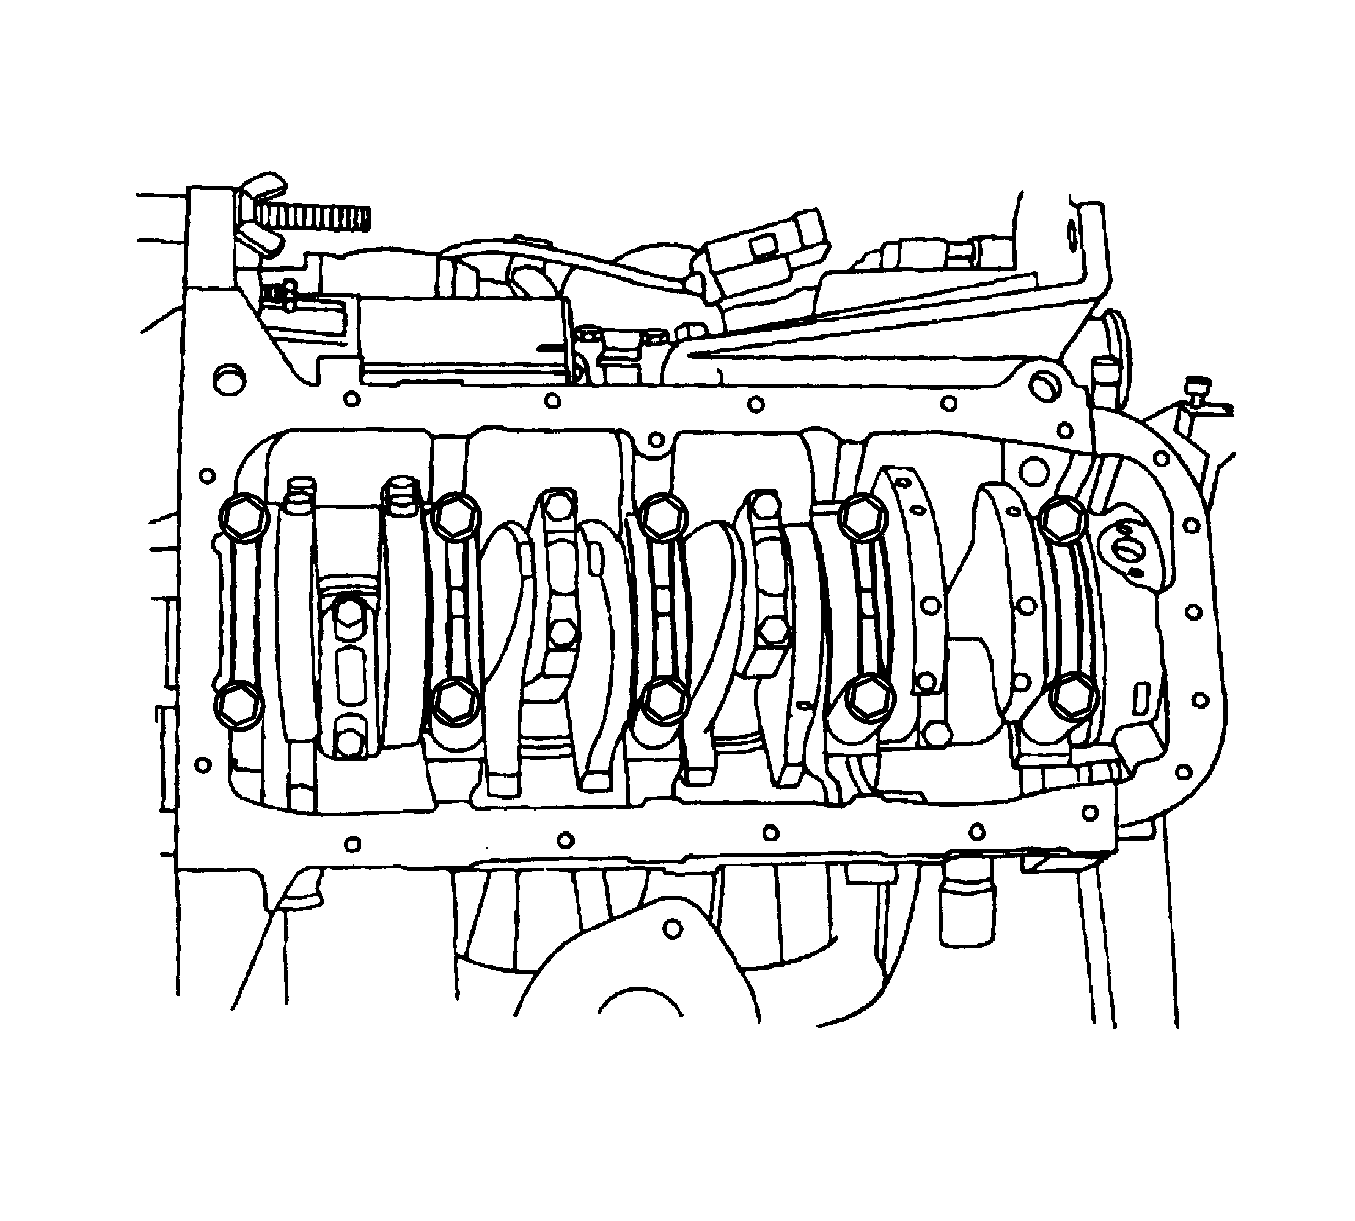
- Install the crankshaft bearings in the engine block.
- Install the crankshaft.
- Install the crankshaft bearings to the crankshaft bearing caps.
- Install the crankshaft bearing caps.
- Install the new crankshaft bearing cap bolts.
- Install the upper connecting rod bearings to the connecting rods.
- Install the lower connecting rod bearings to the connecting rod bearing caps.
- Install the connecting rod bearing caps to the connecting rods.
- Install the new connecting rod bearing cap bolts.
- Install the oil pump.
- Install the oil pump retaining bolts (1).
- Install the oil pump pickup tube.
- Install the oil pump pickup tube bolts.
- Install the oil pan gasket to the oil pan.
- Install the oil pan.
- Install the oil pan retaining bolts.
- Rotate the engine on the OTC 1726 (1).
- Install the rear timing belt cover.
- Install the rear timing belt cover bolts.
- Install the crankshaft timing belt gear.
- Install the timing belt automatic tensioner.
- Install the timing belt automatic tensioner bolts.
- Install the timing belt idler pulley.
- Install the timing belt idler pulley bolt.
- Install the intake camshaft gear.
- Install the intake camshaft gear bolt while holding the intake camshaft firmly in place.
- Install the exhaust camshaft gear.
- Install the exhaust camshaft gear bolt while holding the exhaust camshaft firmly in place.
- Install the timing belt. Refer to Timing Belt Replacement.
- Adjust the timing belt tension. Refer to Timing Belt Inspection.
- Apply a small amount of gasket sealant to the corners of the front camshaft caps and to the top of the rear valve cover-to-cylinder head seal.
- Install the valve cover and the valve cover gasket.
- Install the valve cover washers.
- Install the valve cover nuts.
- Connect the ignition wires to the spark plugs.
- Install the engine cover.
- Install the engine cover bolts.
- Connect the crankcase ventilation tube to the valve cover.
- Install the upper and lower front timing belt cover.
- Install the upper and lower front timing belt cover bolts.
- Install the power steering pump, if equipped.
- Install the power steering pump mounting bolts.
- Install the engine lifting device.
- Remove the engine from the OTC 1726 .
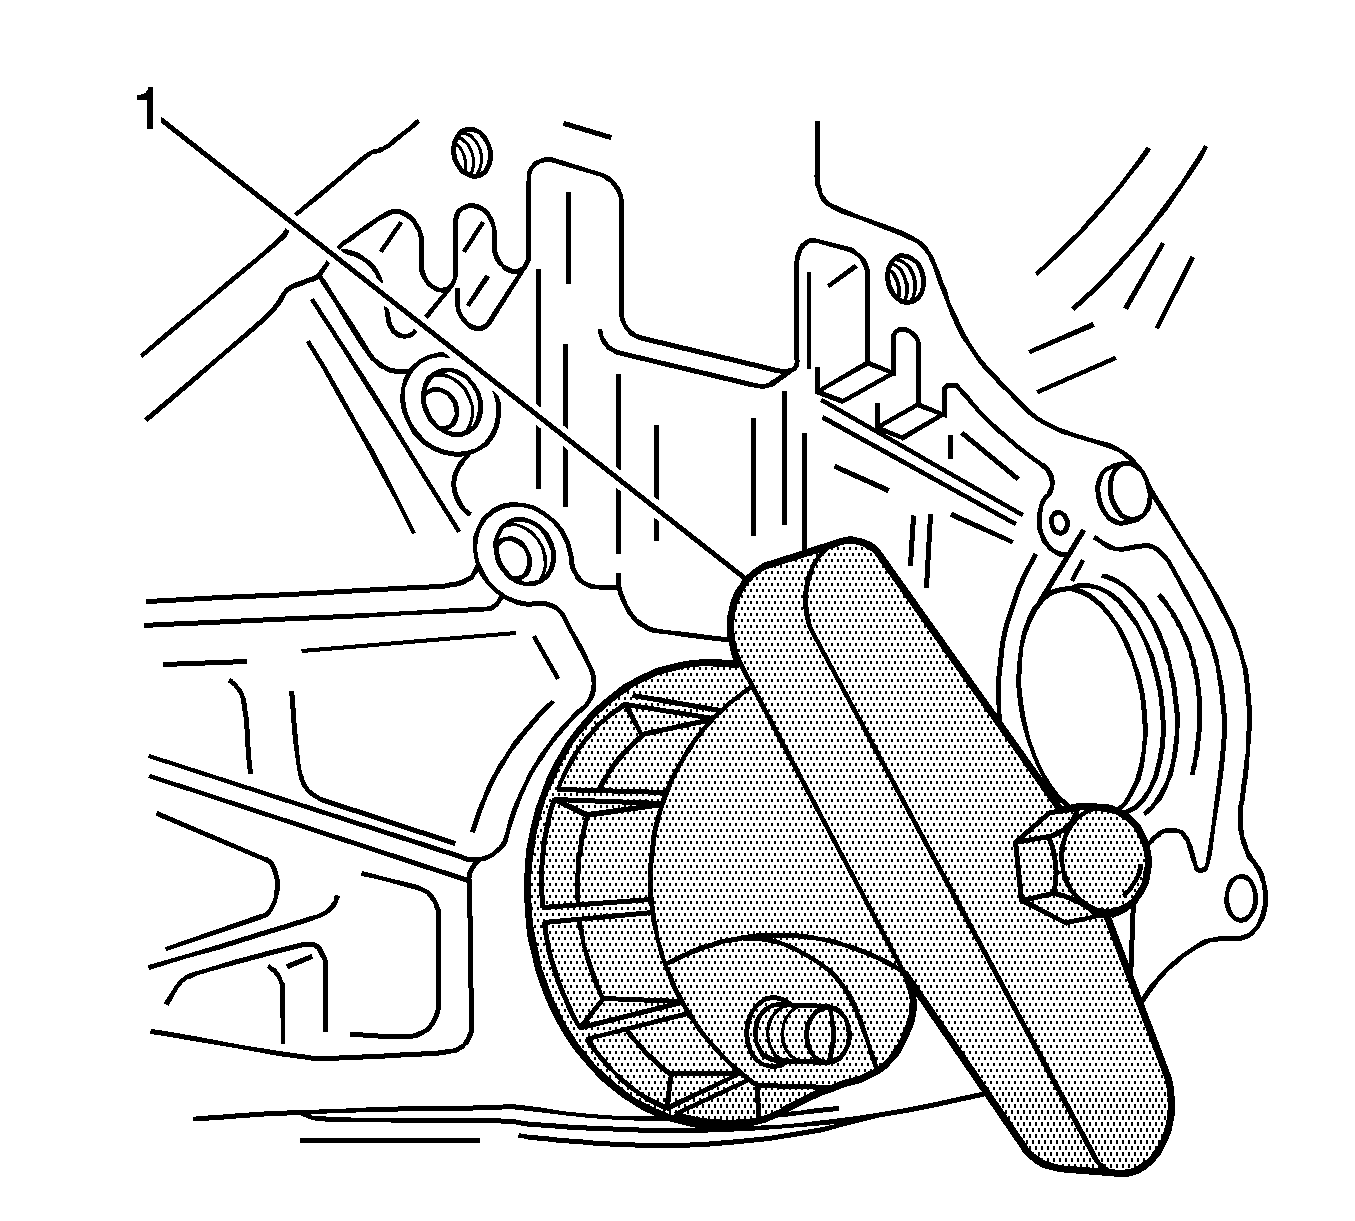
- Install a new crankshaft rear oil seal using the J-36792 (1) or KM-635 .
- Install the flywheel or flexible plate.
- Install the flywheel or the flexible plate bolts.
- Install the engine. Refer to Engine Replacement.
Notice: Refer to Fastener Notice in the Preface section.
Notice: Do not reuse crankshaft bearing cap bolts. Failure to replace the crankshaft bearing cap bolts can lead to crankshaft bearing cap bolt breakage or crankshaft bearing failure. A broken crankshaft bearing bolt can lead to extensive engine damage.
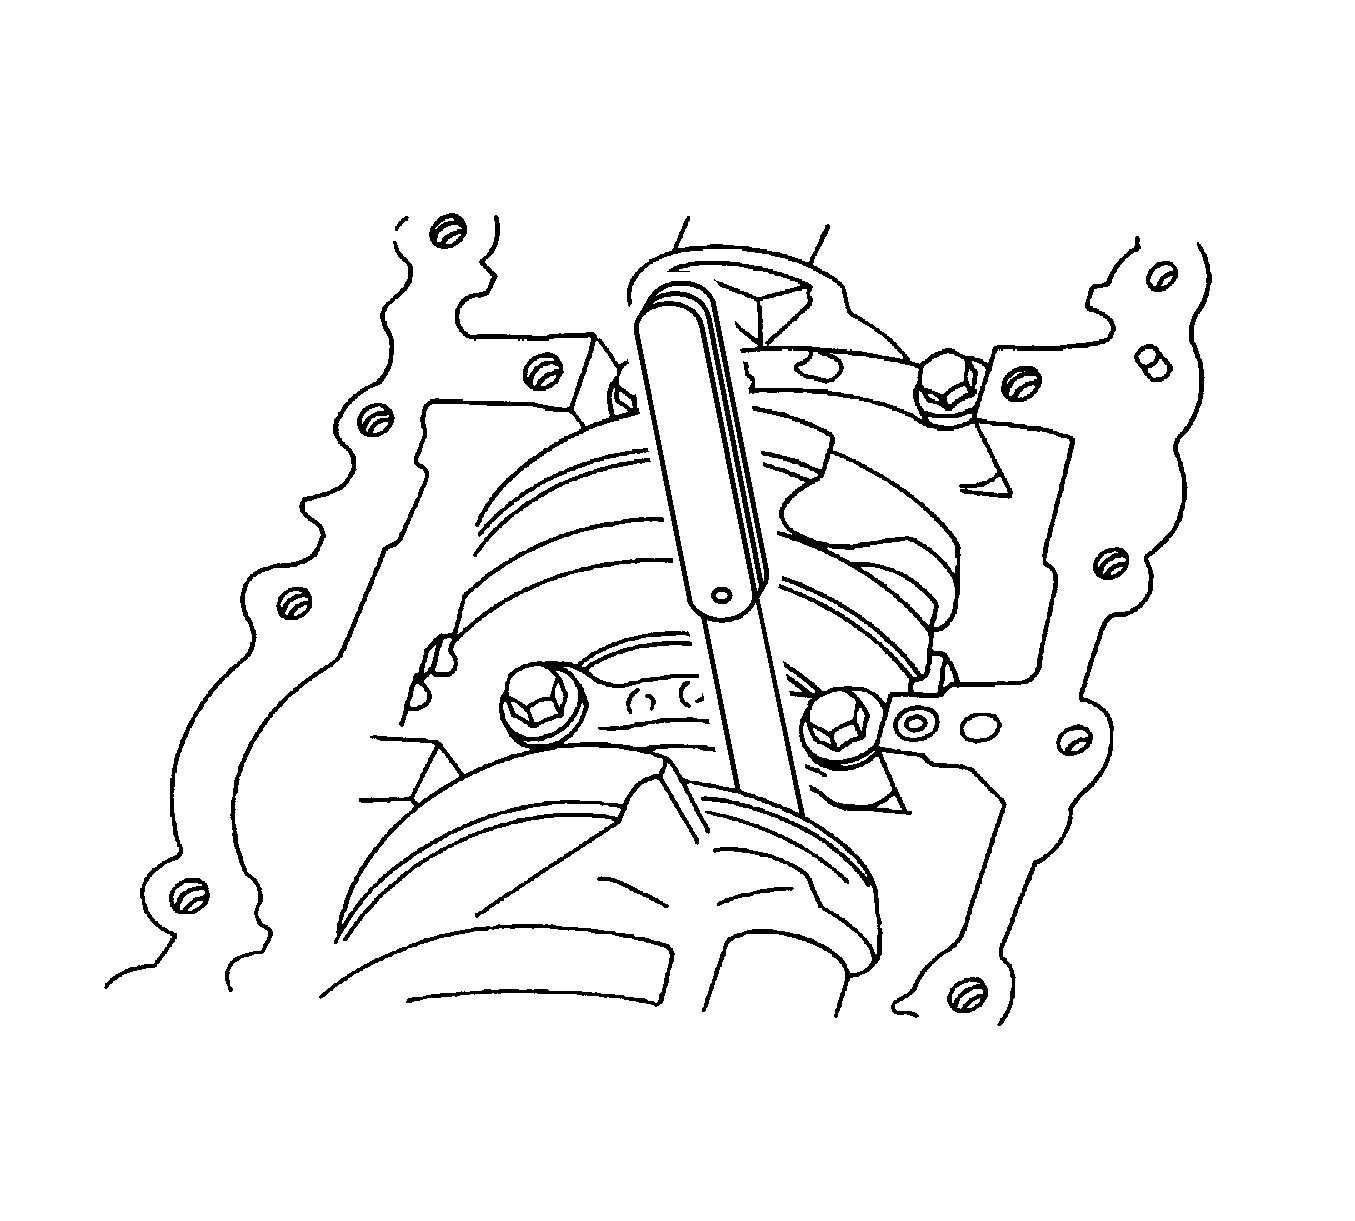
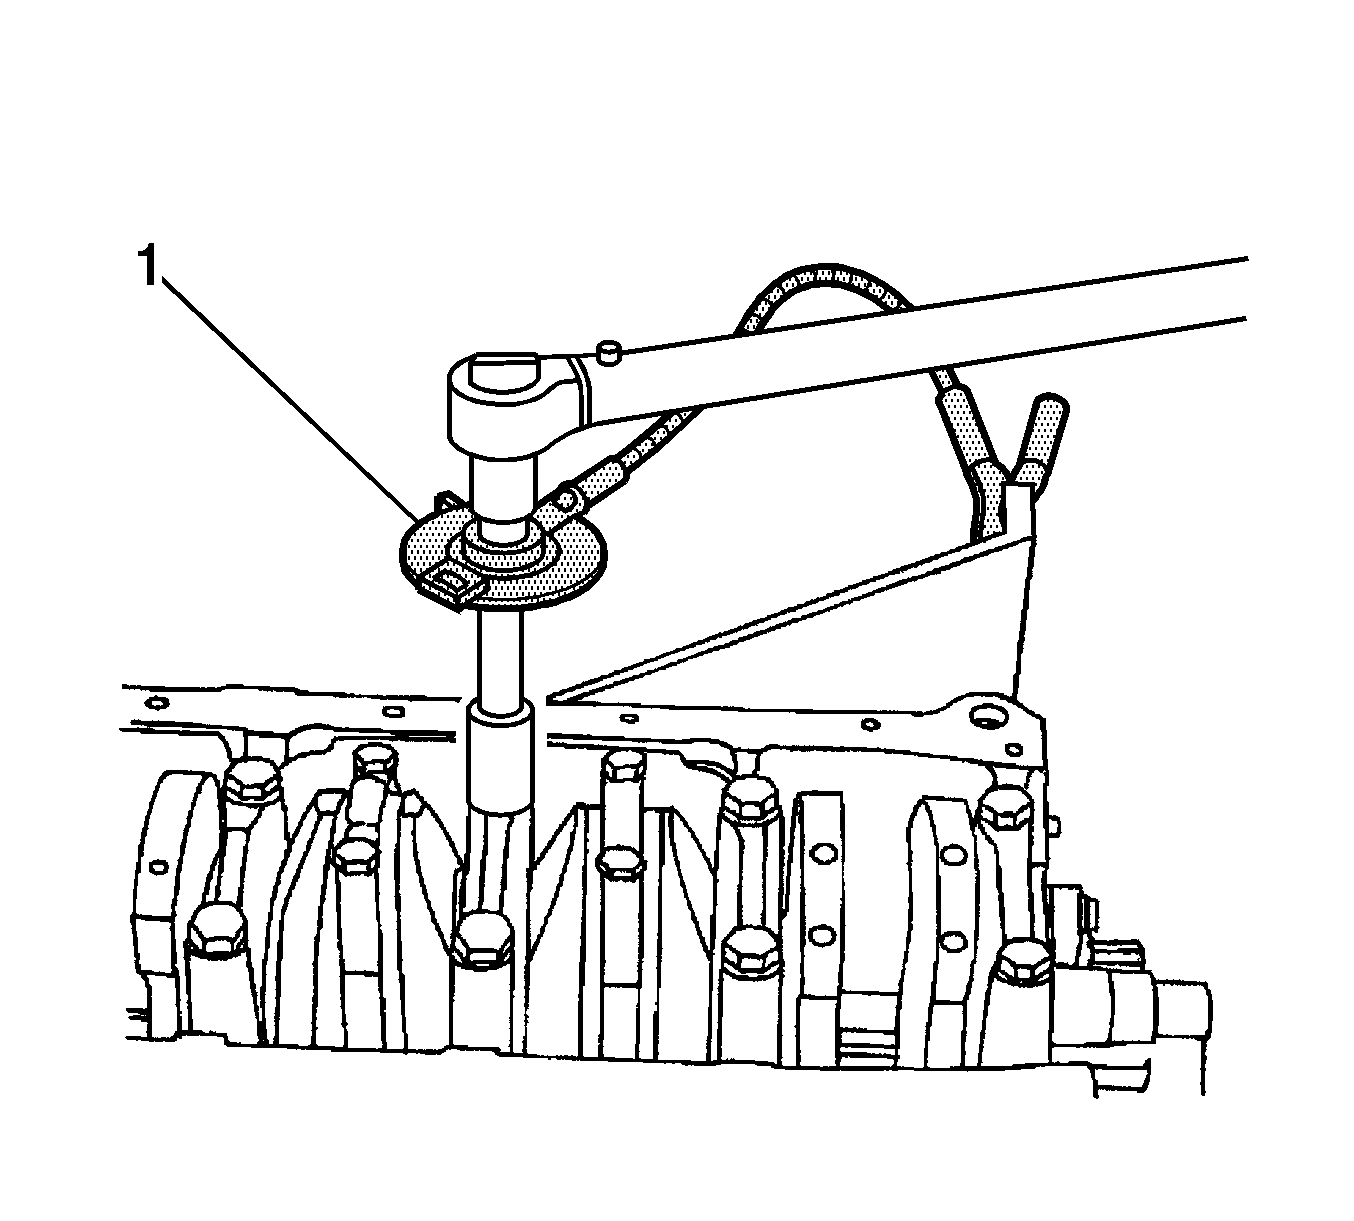
Tighten
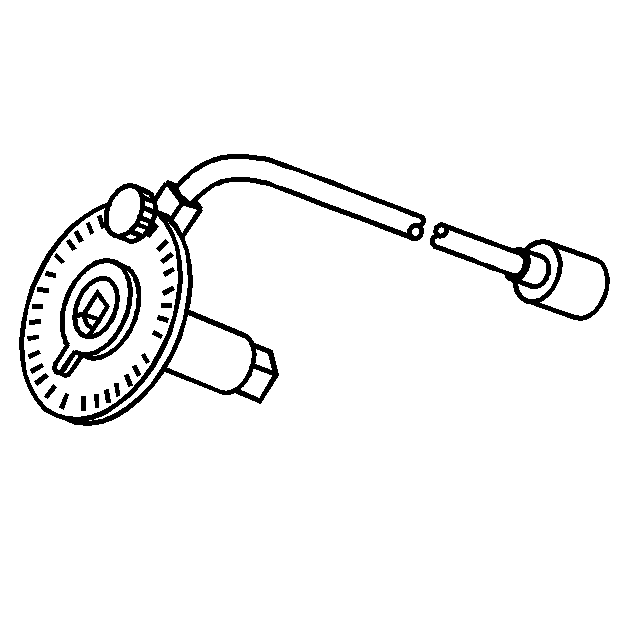
Tighten the crankshaft bearing cap bolts to 50 N·m (37 lb ft). Using the
J 45059
(1) or the
KM-470-B
, tighten the crankshaft bearing cap bolts another 45 degrees.
Notice: Do not reuse connecting rod bearing cap bolts. Failure to replace the connecting rod bearing cap bolts can lead to connecting rod bearing cap bolt breakage or connecting rod or bearing failure. A broken connecting rod bearing cap bolt can lead to extensive engine damage.
Tighten
Tighten the connecting rod bearing cap bolts to 25 N·m (18 lb ft). Using the
J 45059
or the
KM-470-B
, tighten the connecting rod bearing cap bolts another 30 degrees plus 15 degrees.
Tighten
Tighten the oil pump retaining bolts to 10 N·m (89 lb in).
Tighten
Tighten the oil pump/pickup tube bolts to 10 N·m (89 lb in).
Important: Install the oil pan within 5 minutes after applying the liquid gasket to the oil pan.
Tighten
Tighten the oil pan retaining bolts to 10 N·m (89 lb in).
Tighten
Tighten the rear timing belt cover bolts to 10 N·m (89 lb in).
Tighten
Tighten the timing belt automatic tensioner bolts to 25 N·m (18 lb ft).
Tighten
Tighten the timing belt idler pulley bolt to 40 N·m (30 lb ft).
Tighten
Tighten the intake camshaft gear bolt to 67.5 N·m (49 lb ft).
Tighten
Tighten the exhaust camshaft bolt to 67.5 N·m (49 lb ft).
Tighten
Tighten the valve cover nuts to 9 N·m (80 lb in).
Tighten
Tighten the spark plug cover bolts to 3 N·m (27 lb in).
Tighten
Tighten the upper and lower front timing belt cover bolts to 10 N·m (89 lb in).
Tighten
Tighten the power steering pump mounting bolts to 25 N·m (18 lb ft).
Tighten
Tighten the flywheel bolts to 35 N·m (25 lb ft). Use the
J 45059
or the
KM-470-B
to tighten
the flywheel bolts 30 degrees plus 15 degrees. For the manual transaxle, tighten the flexible plate bolts to 60 N·m (44 lb ft).
