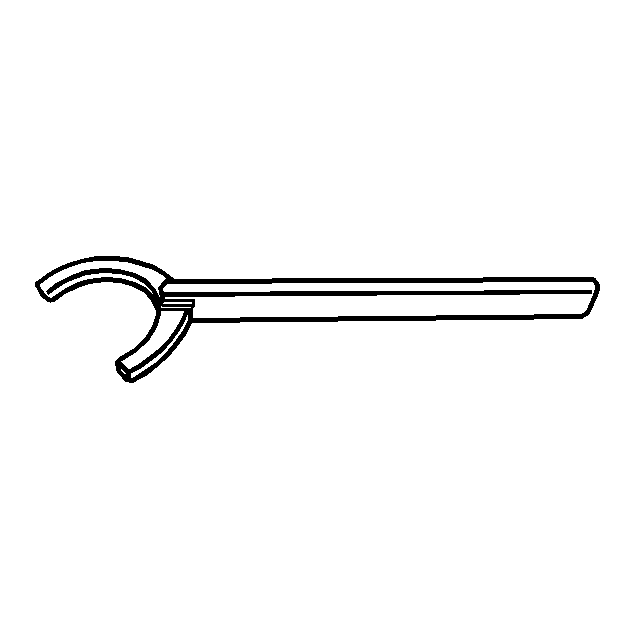
Tools Required
| • | KM-507-C Ball Joint Remover |
| • | DT 47539 (DW 340-110) Axle Shaft Remover |
Removal Procedure
- Raise and suitable support the vehicle.
- Remove the wheels. Refer to Tire and Wheel Removal and Installation .
- Remove the engine under covers.
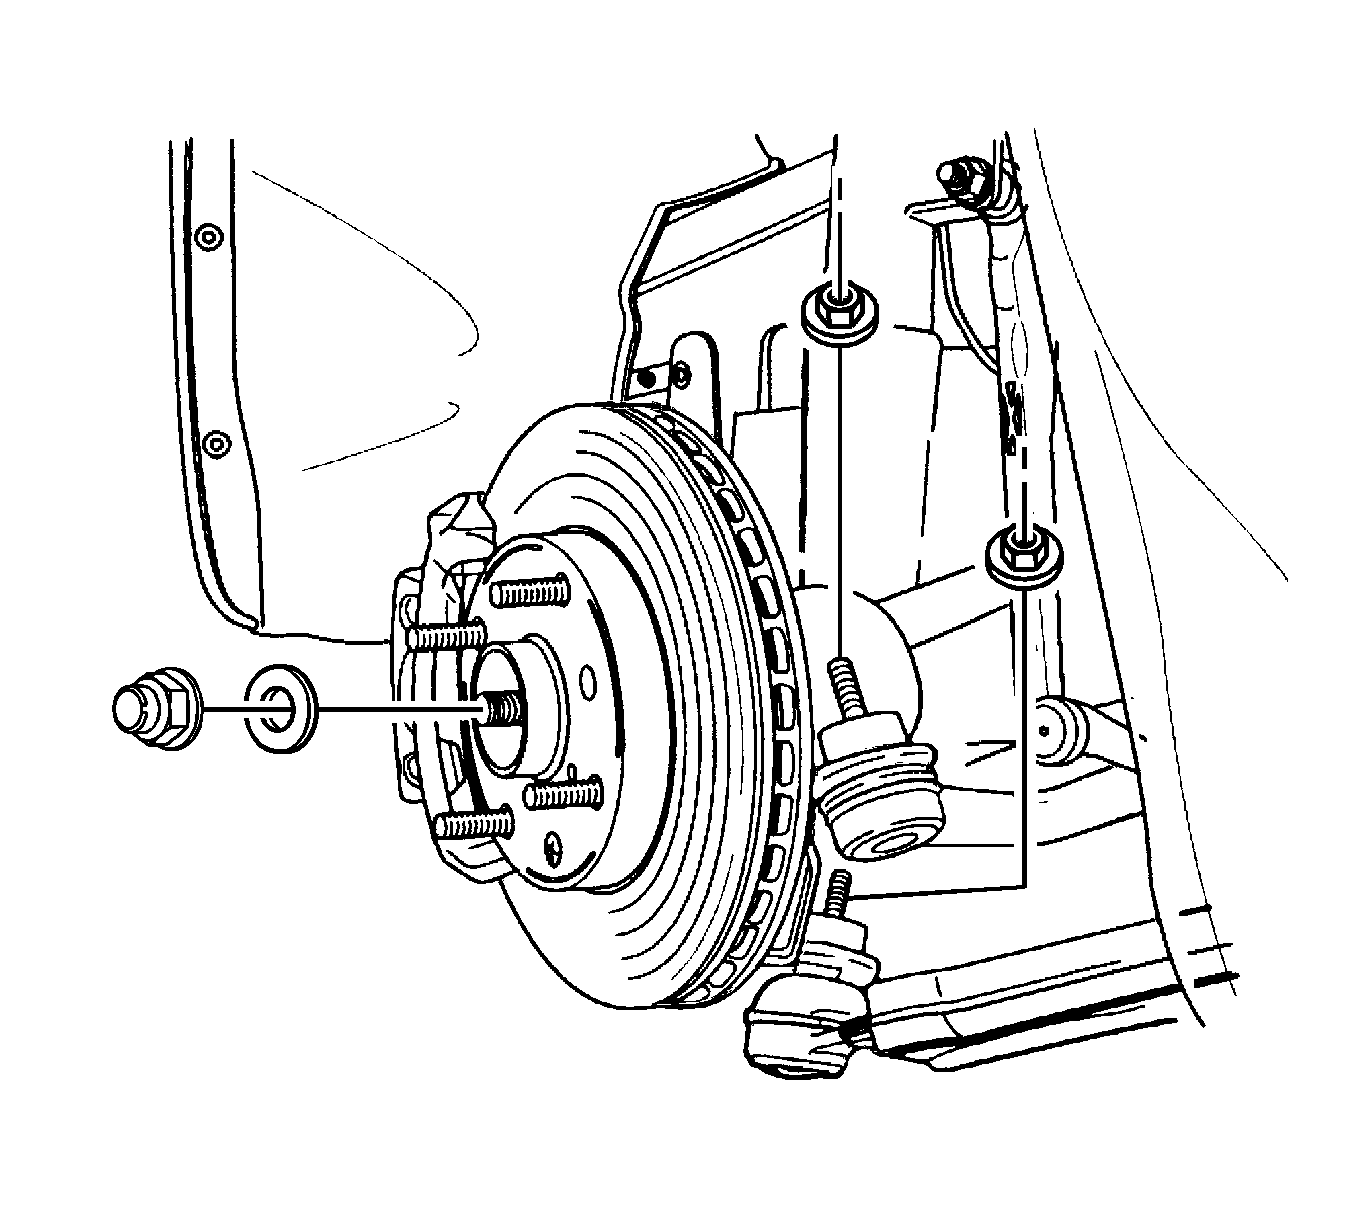
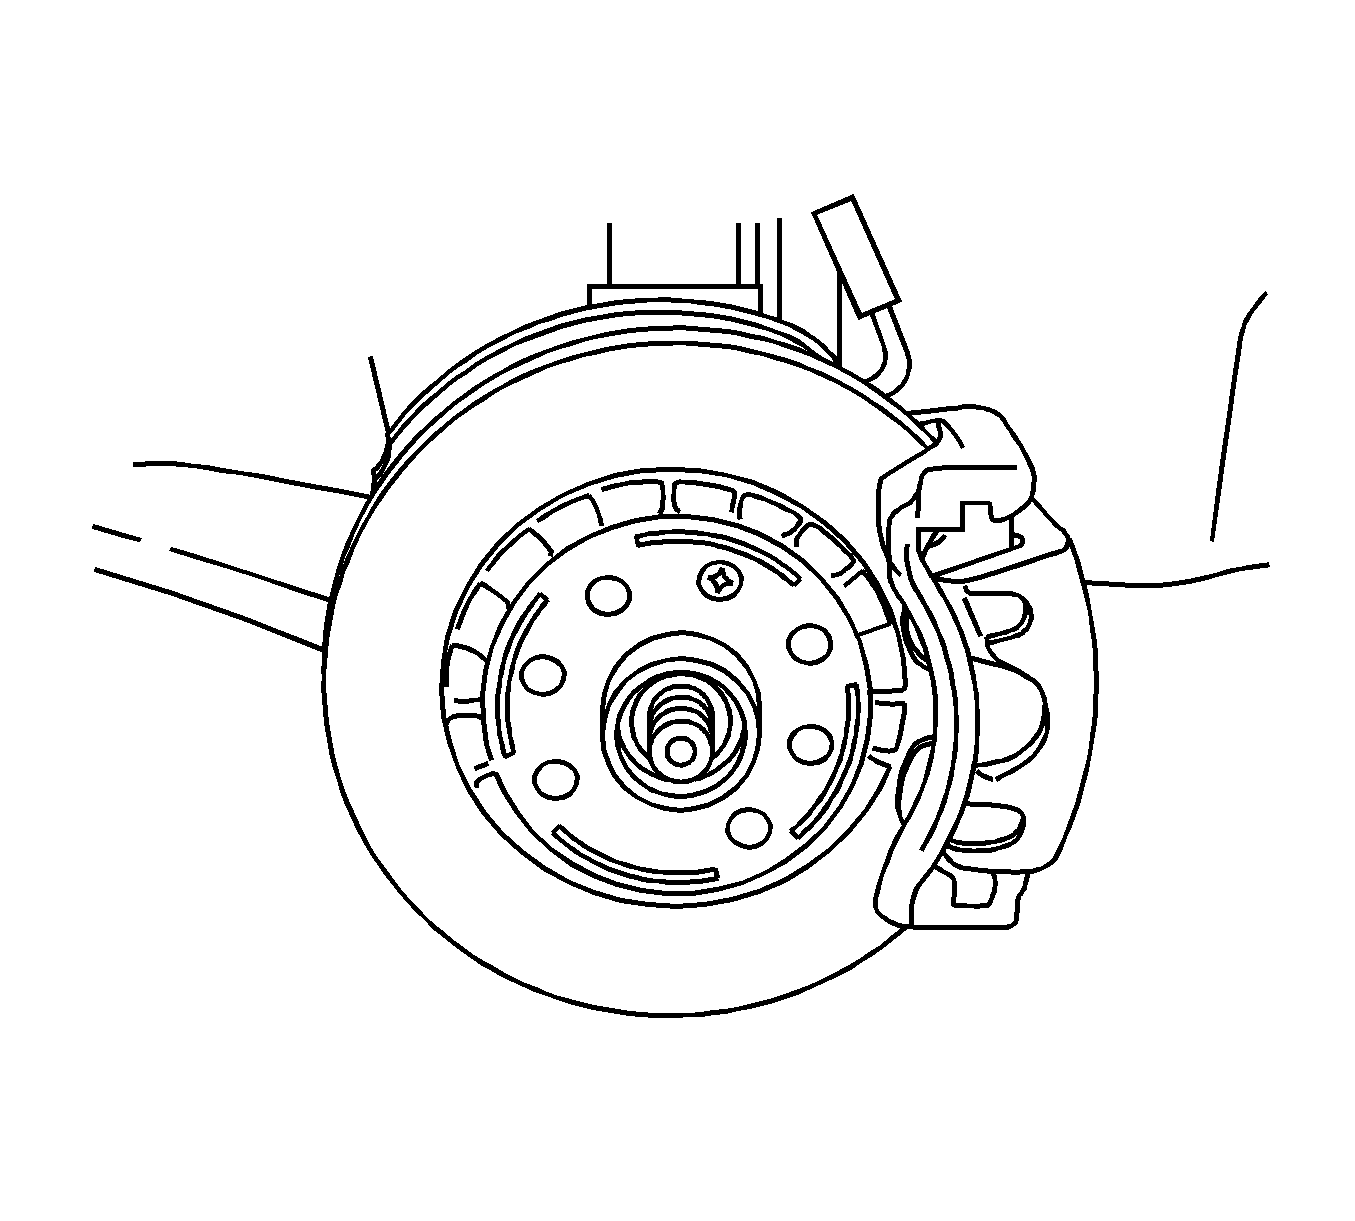
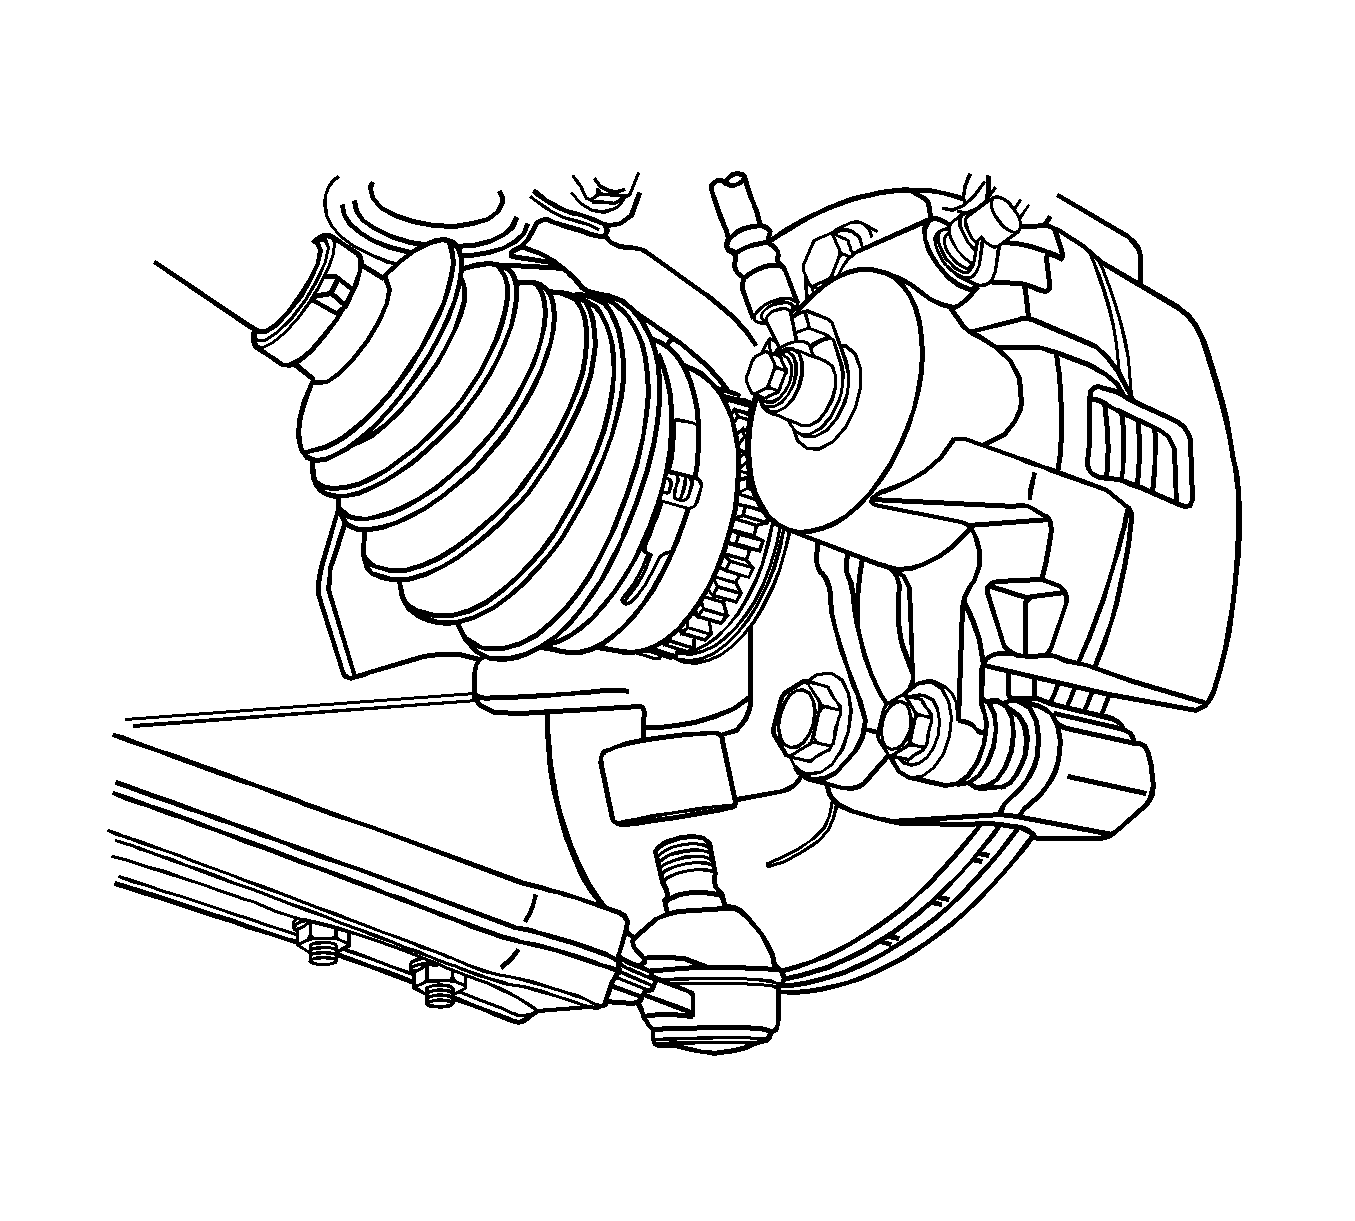
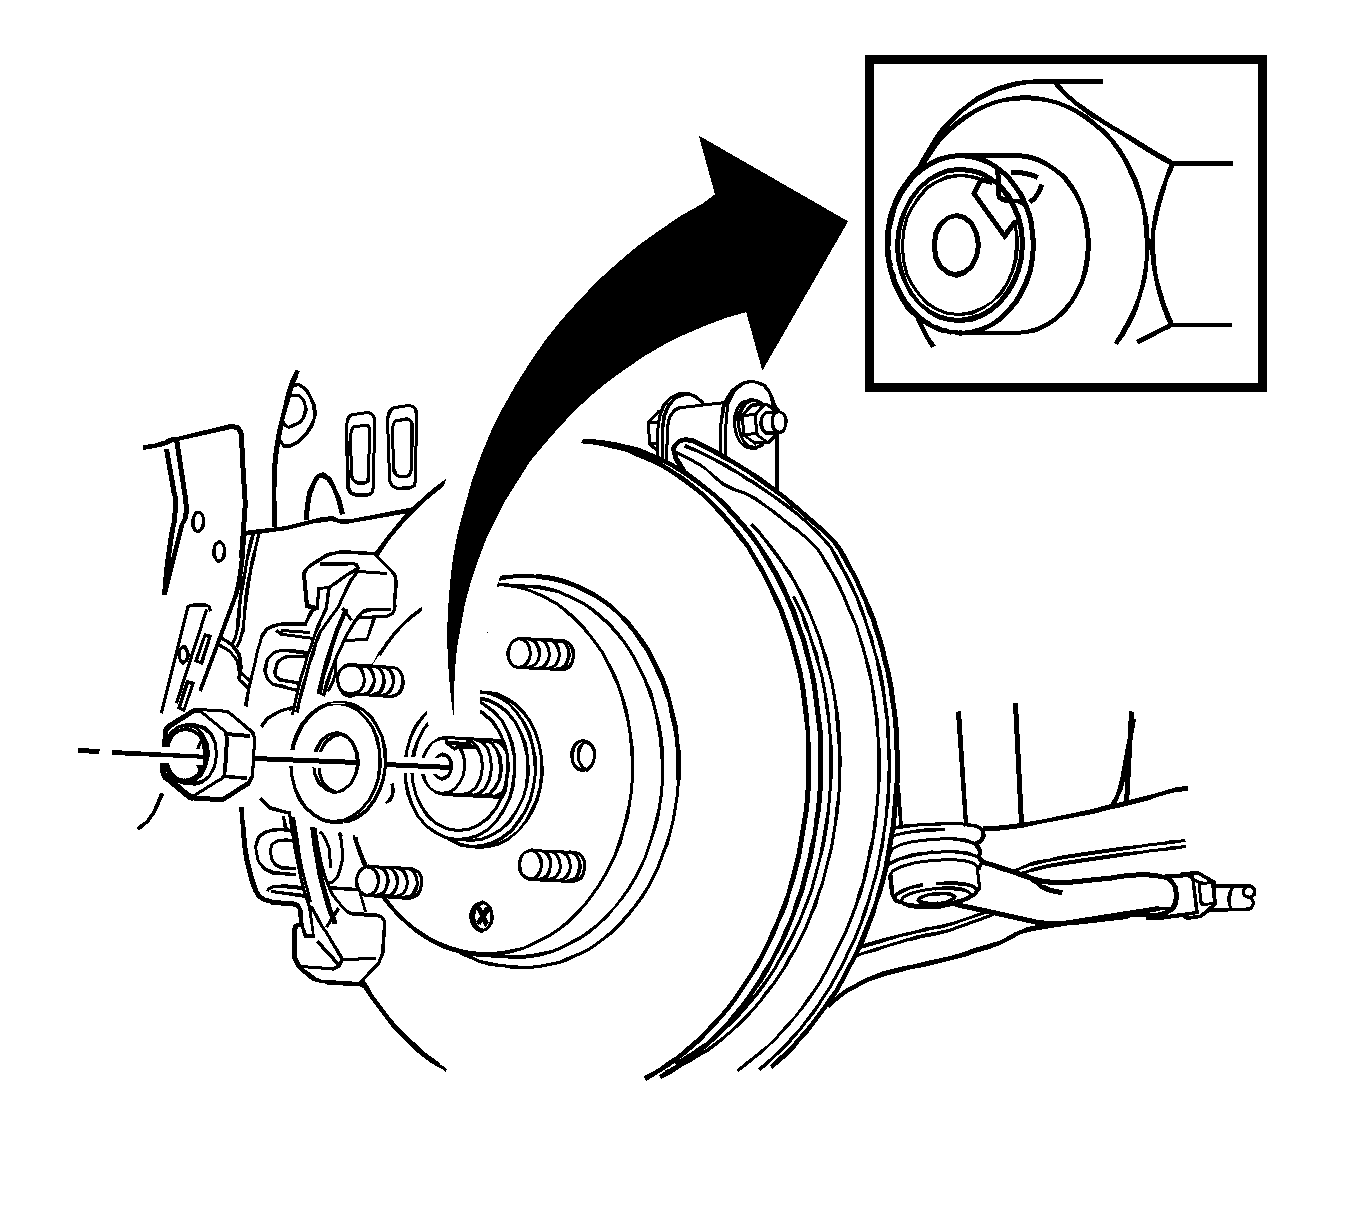
- Remove the axle shaft caulking nut. Discard the nut.
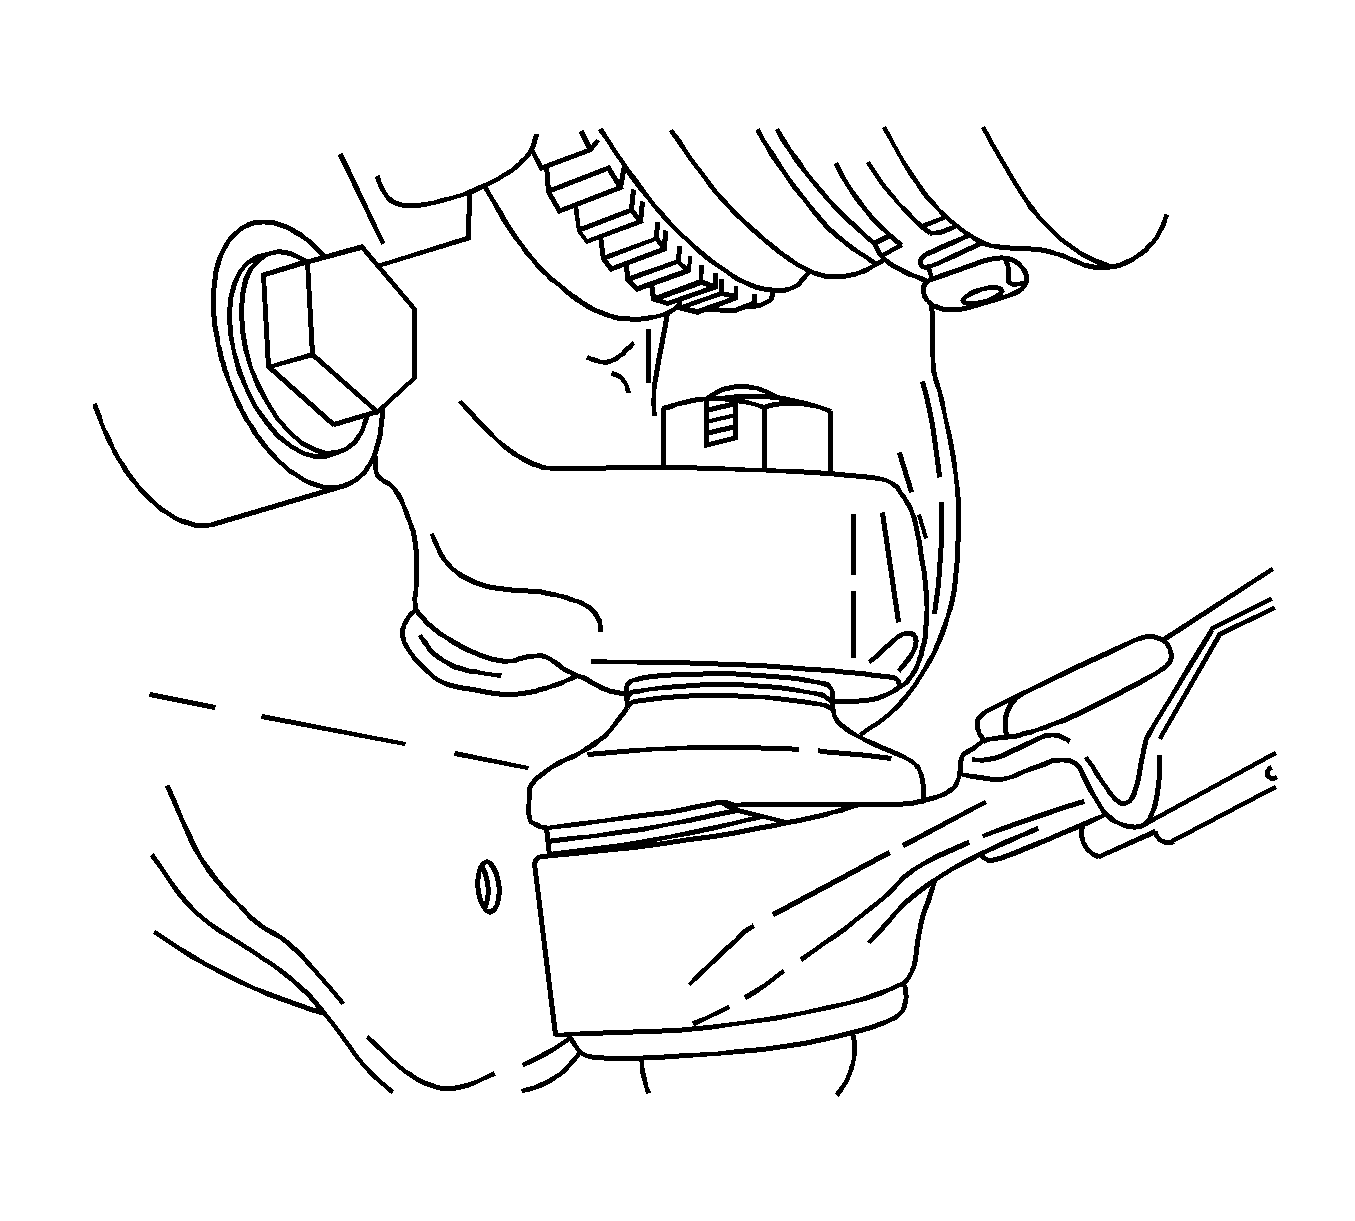
- Remove the lower ball joint nut.
- Separate the steering knuckle from the lower ball joint using the KM-507-C .
- Remove the tie rod nut.
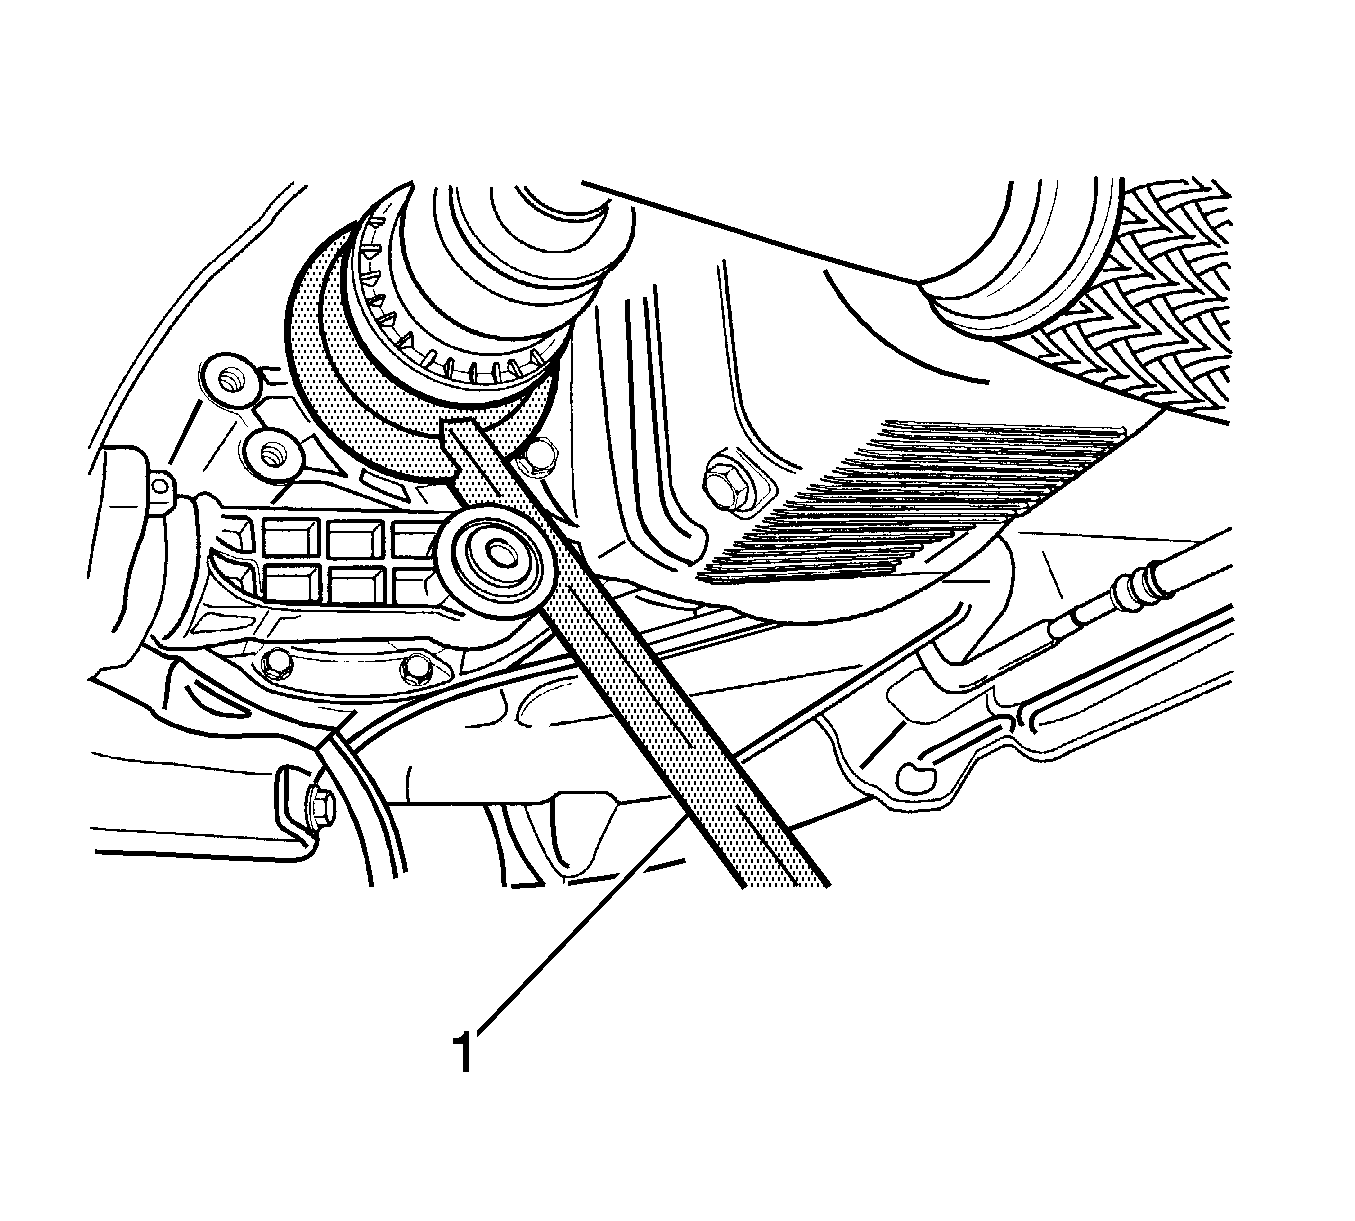
- Separate the tie rod end using the KM-507-C (1).
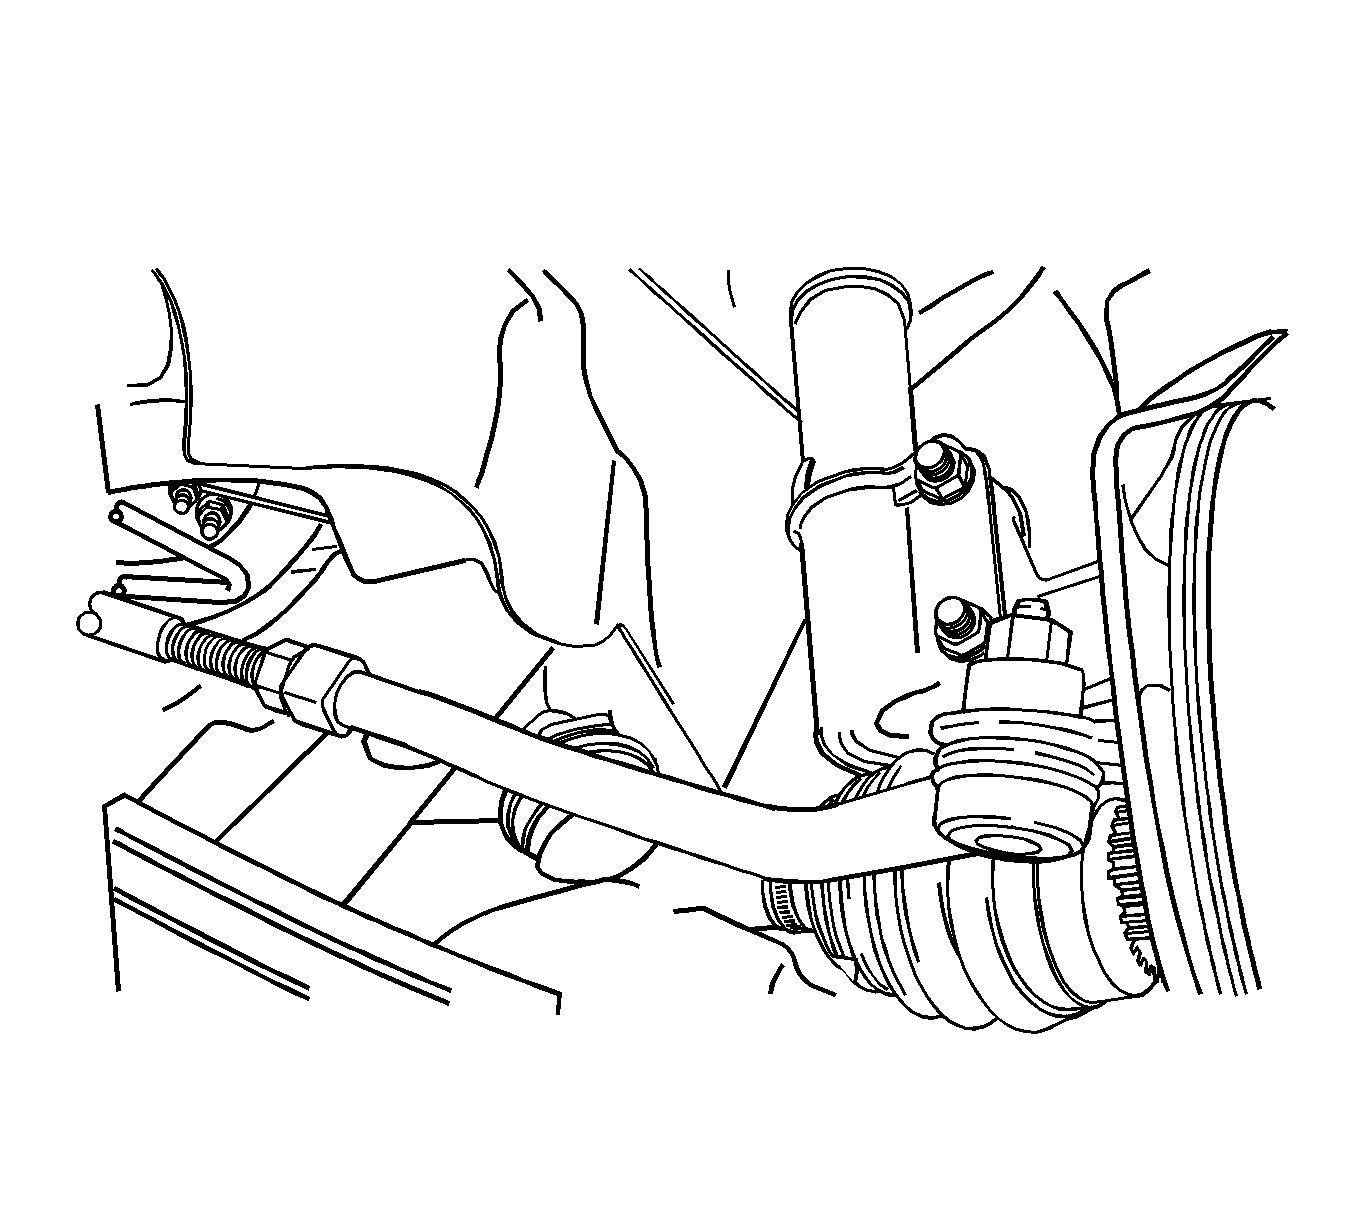
- Remove the damping block connection nut and bolt.
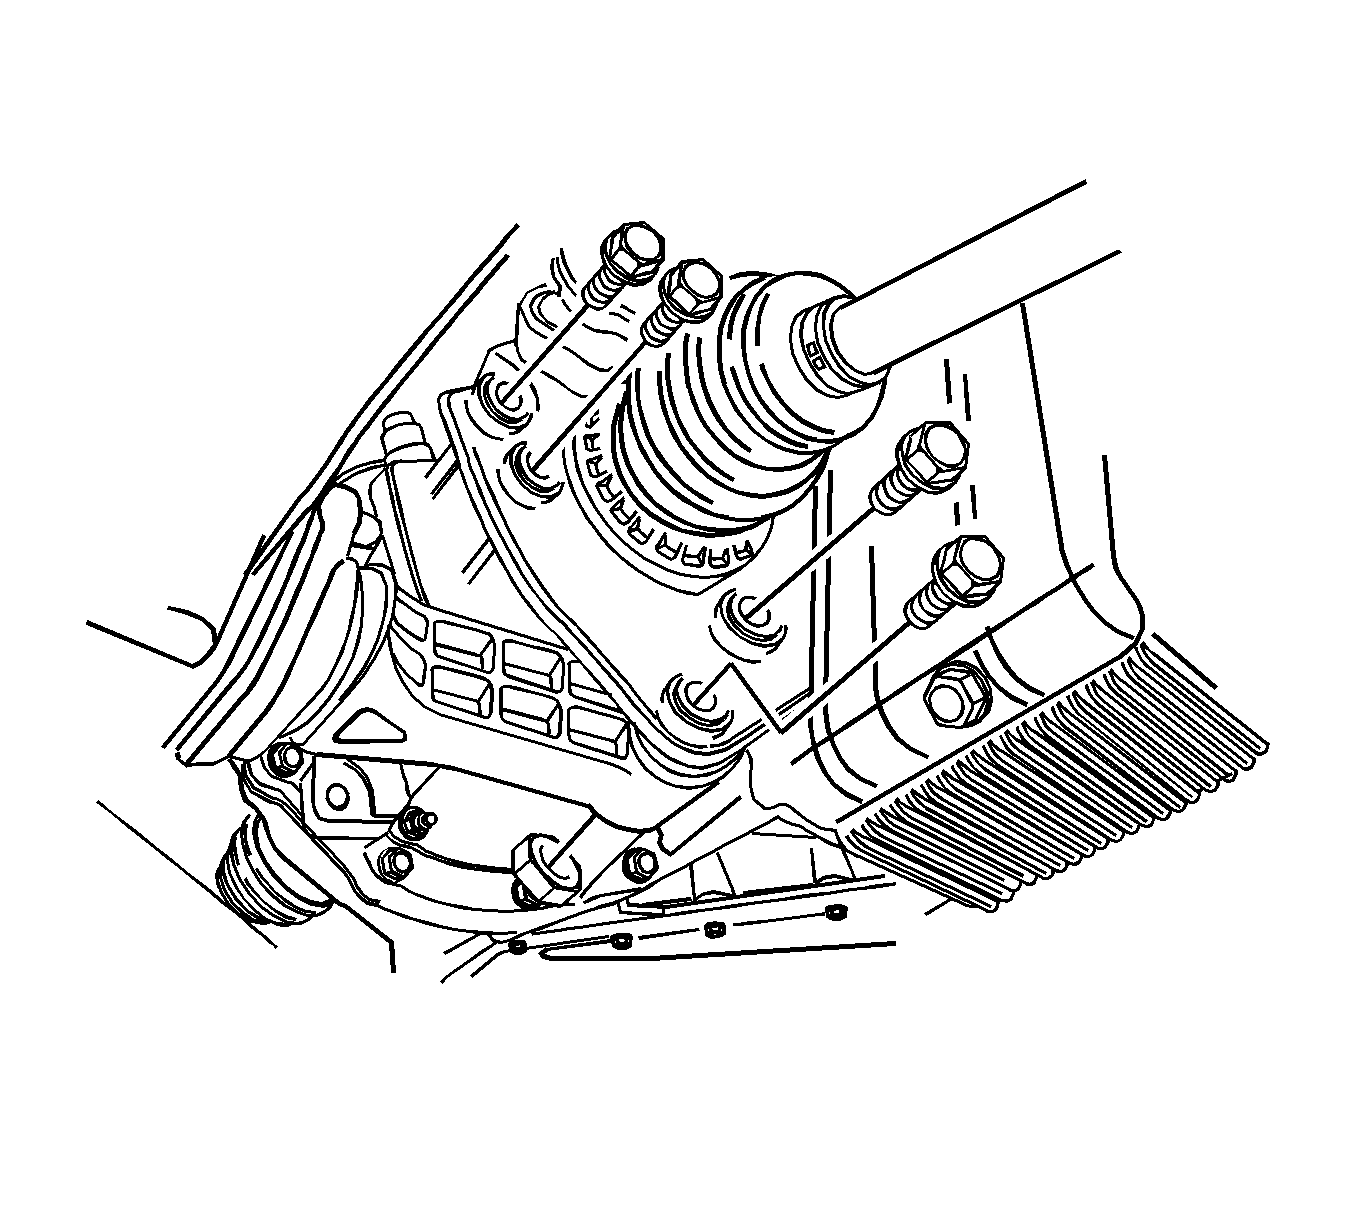
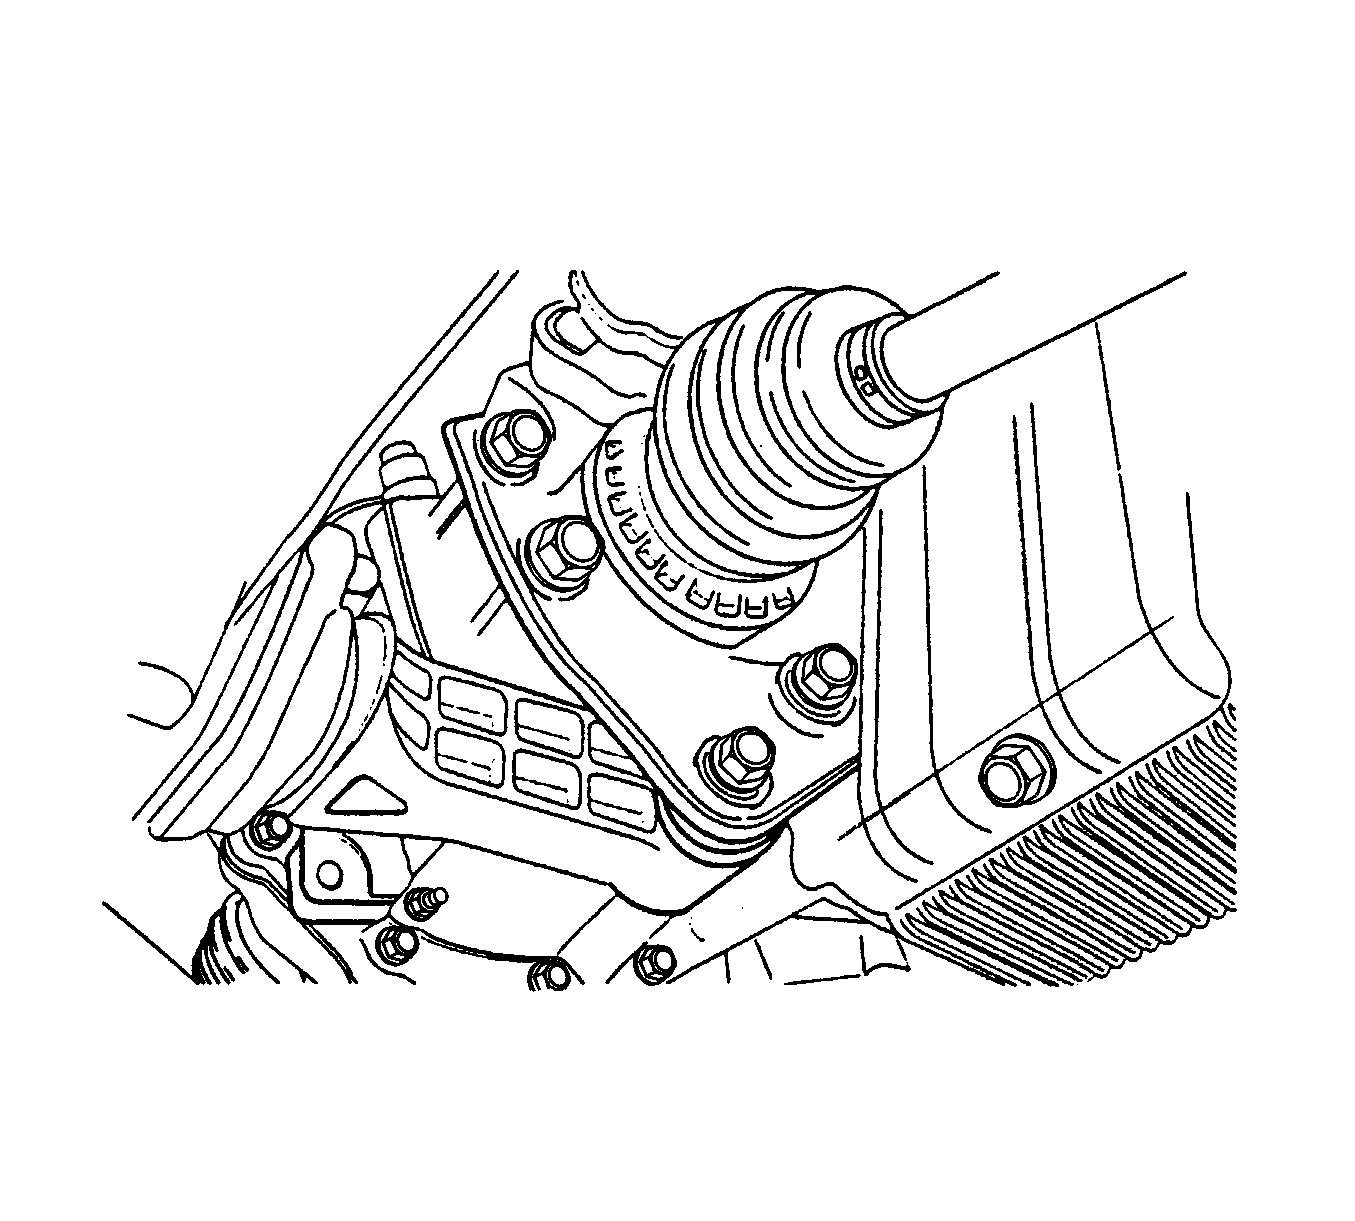
- Remove the rear mounting bracket bolts and the bracket.
- Push the drive axle shaft from the wheel hub.
- Remove the drive axle from the transaxle using the DT 47539 (1).
Notice: Refer to Vehicle Lifting and Jacking Notice in the Preface section.

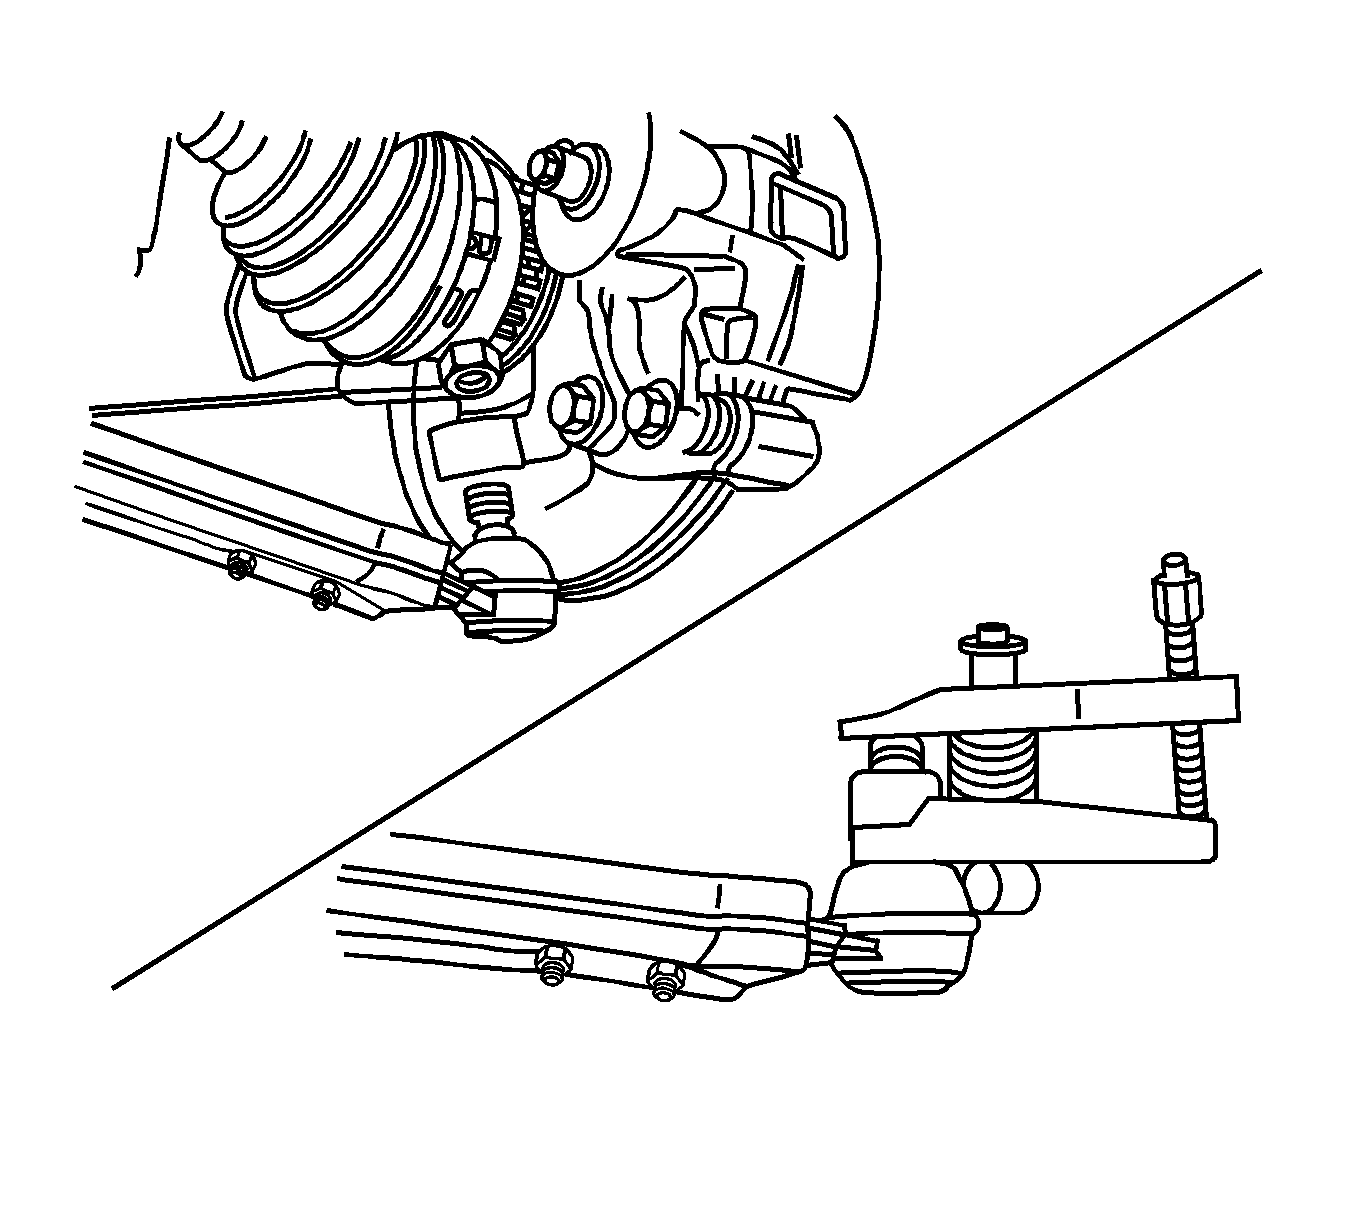
Notice: Use only the recommended tools for separating the ball joint from the knuckle. Failure to use the recommended tools may cause damage to the ball joint and seal.
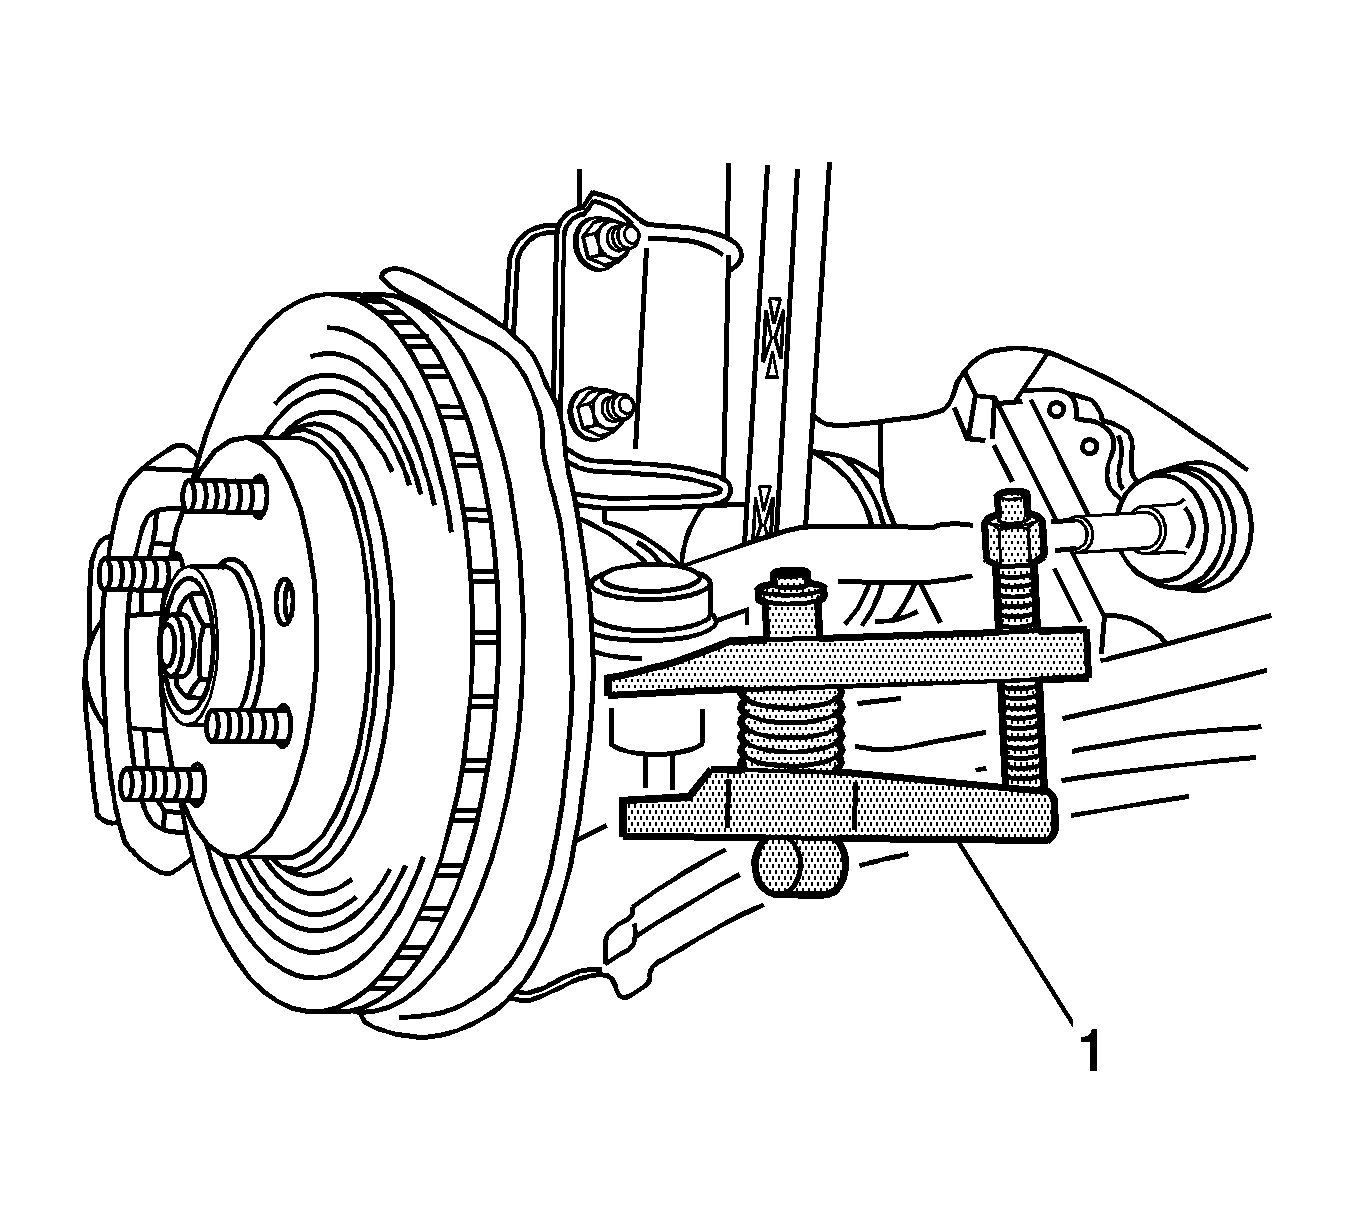
Notice: Use only the recommended tools for separating the ball joint from the knuckle. Failure to use the recommended tools may cause damage to the ball joint and seal.
Notice: Refer to Drive Axle Notice in the Preface section.
Important: Place a drain pan below the transaxle to catch the escaping fluid. Cap the transaxle drive opening after the drive axle has been removed to keep the fluid in and any contamination out.
Installation Procedure
- Clean the hub seal and the transaxle seal.
- Install the drive axle into the transaxle.
- Install the wheel hub onto the axle shaft.
- Install the rear mounting bracket bolts and the bracket.
- Install the damping block connection nut and bolt.
- Mount the steering knuckle onto the lower ball joint.
- Install the tie rod into the knuckle/strut and install the tie rod nut.
- Install the lower ball joint nut.
- Loosely install a new axle shaft caulking nut. Always use a new nut.
- Install the wheels. Loosely install the nuts. Refer to Tire and Wheel Removal and Installation .
- Lower the vehicle to the floor.
- Install the axle shaft caulking nut.
- Peen the caulking nut with a punch and a hammer until the nut is locked into place on the axle shaft hub.
- Install the engine under covers.
- Refill the transaxle fluid to the proper level. Refer to Transmission Fluid Draining .
Important: Do not damage the seals.
Notice: Refer to Fastener Notice in the Preface section.
Tighten
Tighten the rear mounting bracket bolts to 60 N·m (44 lb ft).
Tighten
Tighten the damping block connection nut and bolt to 80 N·m (59 lb ft).
Tighten
Tighten the tie rod nut to 45 N·m (33 lb ft).
Tighten
Tighten the lower ball joint nut to 50 N·m (37 lb ft).
Tighten
Tighten the wheel nuts to 120 N·m (88 lb ft).
Tighten
Tighten the axle shaft caulking nut to 300 N·m (221 lb ft).
