Removal Procedure
Notice: Use care in removing the fuel injectors to prevent damage to the electrical connector terminals.
The fuel injector is serviced as a complete assembly only. Also since the injectors are electrical components, these injectors should not be immersed in any type of liquid solvent or cleaner as damage may occur. Fuel injector cleaning is not recommended.- Relieve the fuel pressure. Refer to Fuel Pressure Relief .
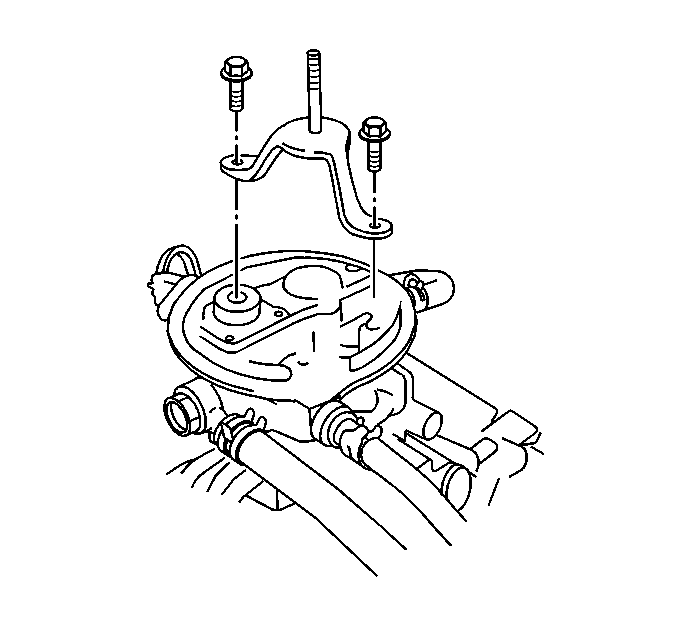
- Remove the air cleaner from the throttle body fuel injection (TBI) unit. Refer to Air Cleaner Assembly Replacement .
- Remove the two bolts and the air cleaner stud bracket from the TBI unit.
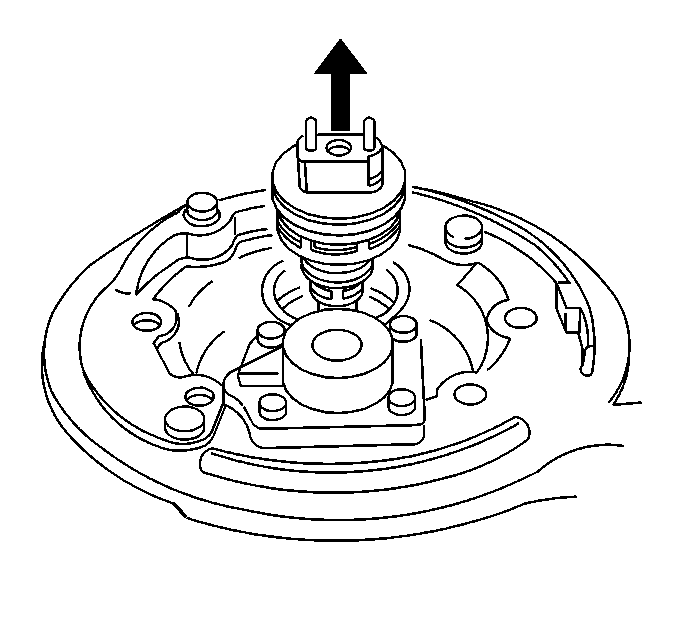
- Remove the two screws (3) and the fuel injector cover (1) (with the electrical connector attached) from the fuel injector.
- Remove the fuel injector from the TBI unit.

Installation Procedure
Important: Replace the fuel injector with an identical part. Other fuel injectors may appear to be the same, but they are calibrated differently with different flow rates and are not interchangeable.
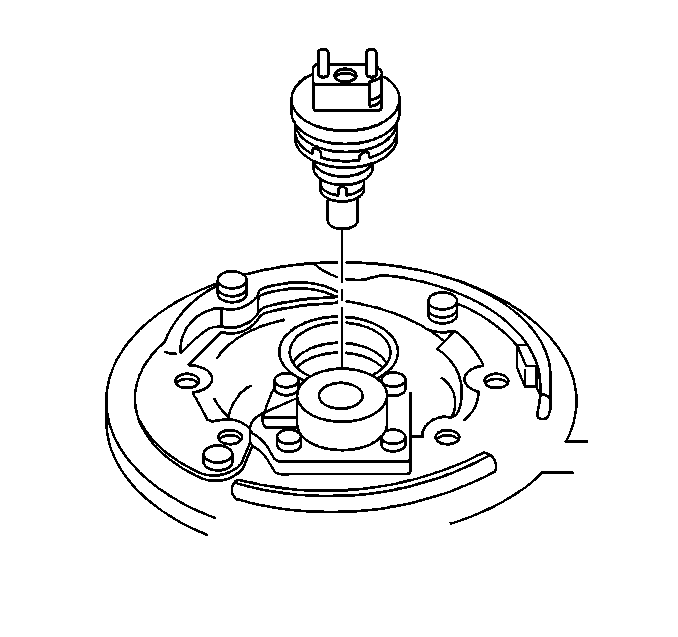
- Apply a thin coat of oil to the new upper and lower O-rings and install them onto the fuel injector.
- Install a new lower fuel injector insulator into the fuel injector cavity of the TBI unit.
- Install the fuel injector to the TBI unit.
- Install the fuel injector cover (1) (with the electrical connector attached) to the fuel injector and secure with the two screws (3).
- Install the air cleaner stud bracket to the TBI unit and secure with the two bolts.
- Install the air cleaner. Refer to Air Cleaner Assembly Replacement .
- Connect the negative battery cable.
- Turn ON the ignition in order to pressurize the fuel system.
- Turn OFF the ignition.
- Check for any fuel leaks.
Notice: Do not twist the fuel injector during the installation to the throttle body in order to prevent damage and misalignment of the fuel injector O-ring seals.
Notice: Use the correct fastener in the correct location. Replacement fasteners must be the correct part number for that application. Fasteners requiring replacement or fasteners requiring the use of thread locking compound or sealant are identified in the service procedure. Do not use paints, lubricants, or corrosion inhibitors on fasteners or fastener joint surfaces unless specified. These coatings affect fastener torque and joint clamping force and may damage the fastener. Use the correct tightening sequence and specifications when installing fasteners in order to avoid damage to parts and systems.
Tighten
Tighten the air cleaner stud bracket bolts to 10 N·m (7.5 lb ft).
Tighten
Tighten the negative battery cable terminal retainer to 5.5 N·m
(4 lb ft).
