For 1990-2009 cars only
Removal Procedure
- Disable the SIR system. Refer to SIR Disabling and Enabling .
- Disconnect the negative battery cable. Refer to Battery Negative Cable Disconnection and Connection .
- Remove all related panels and components.
- Repair as much of the damage as possible to factory specifications. Refer to Dimensions - Body .
- Note the location and remove the sealers and anti-corrosion materials from the repair area, as necessary. Refer to Anti-Corrosion Treatment and Repair .
- Perform the necessary procedures to gain access to the repair. Refer to Radiator Upper Support Replacement , Upper Rail Replacement , Radiator Lower Support Replacement , or to Front Wheelhouse Replacement .
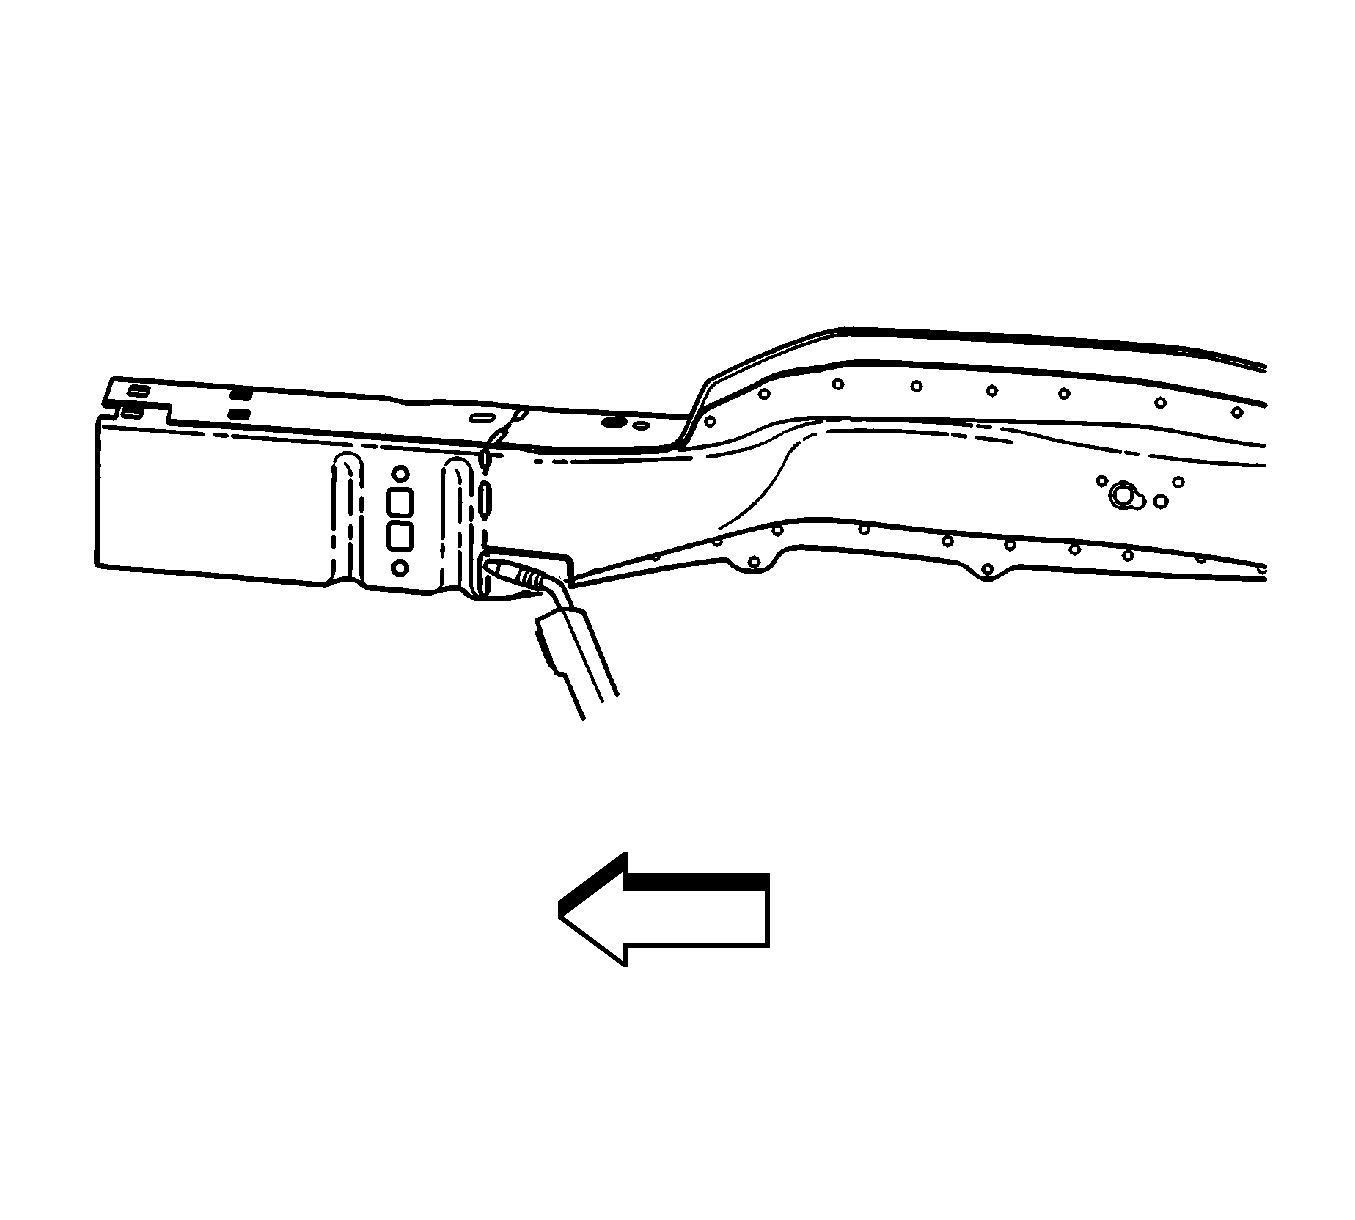
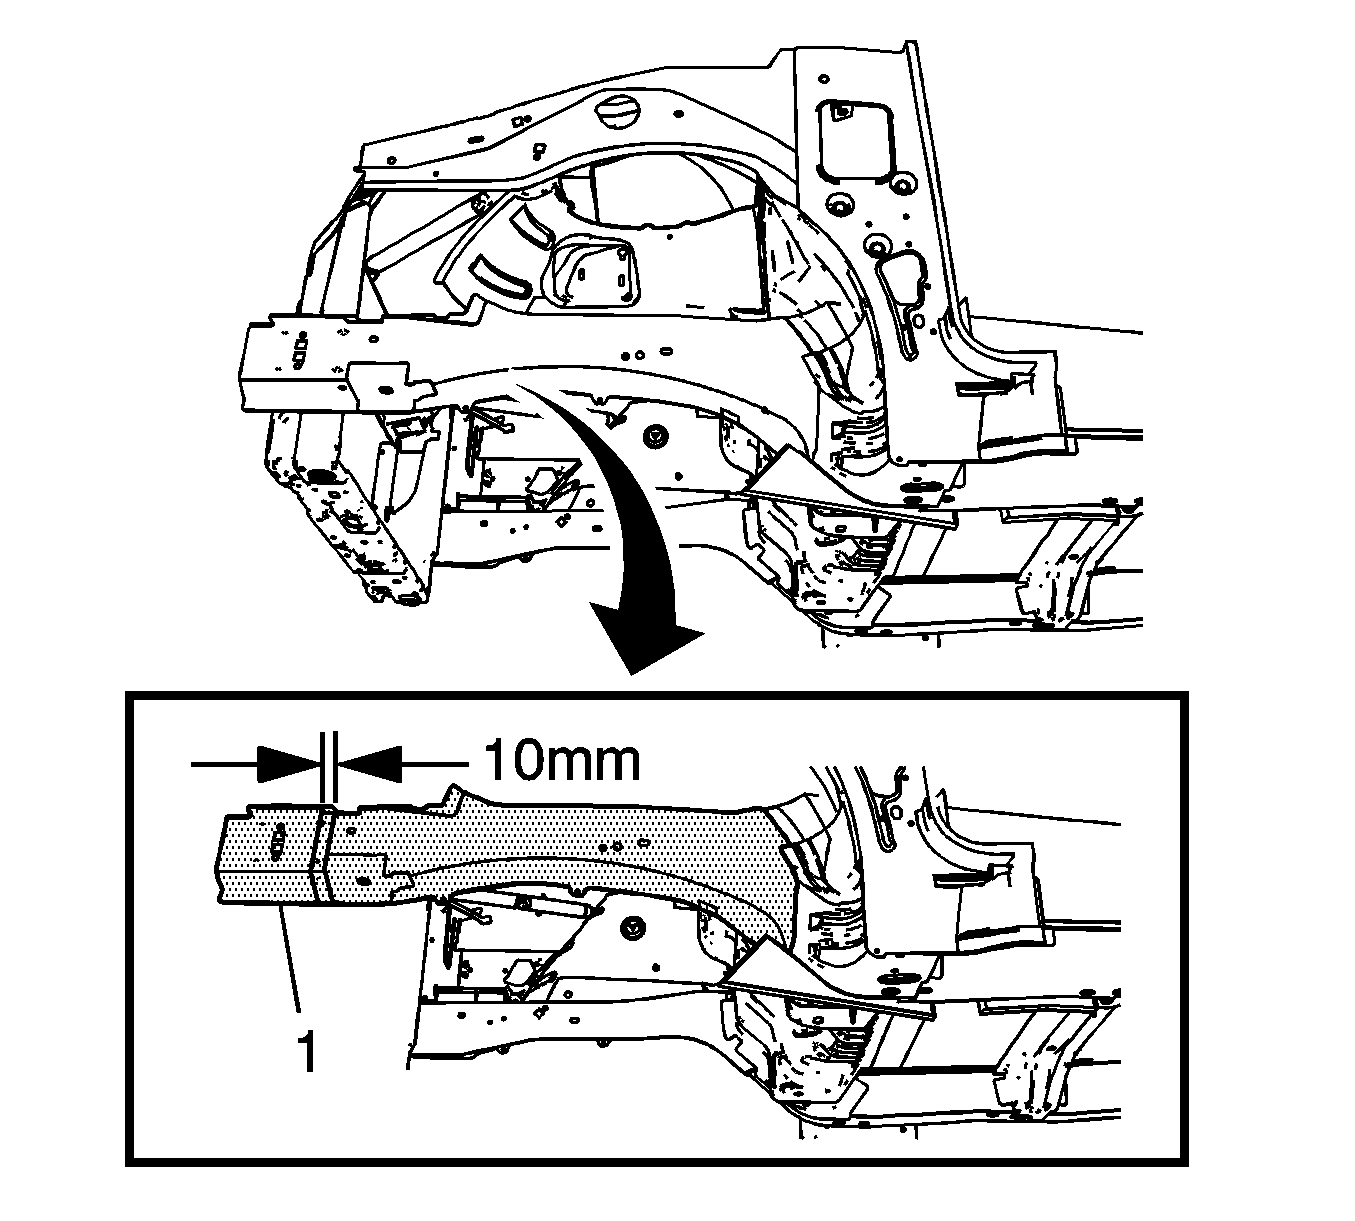
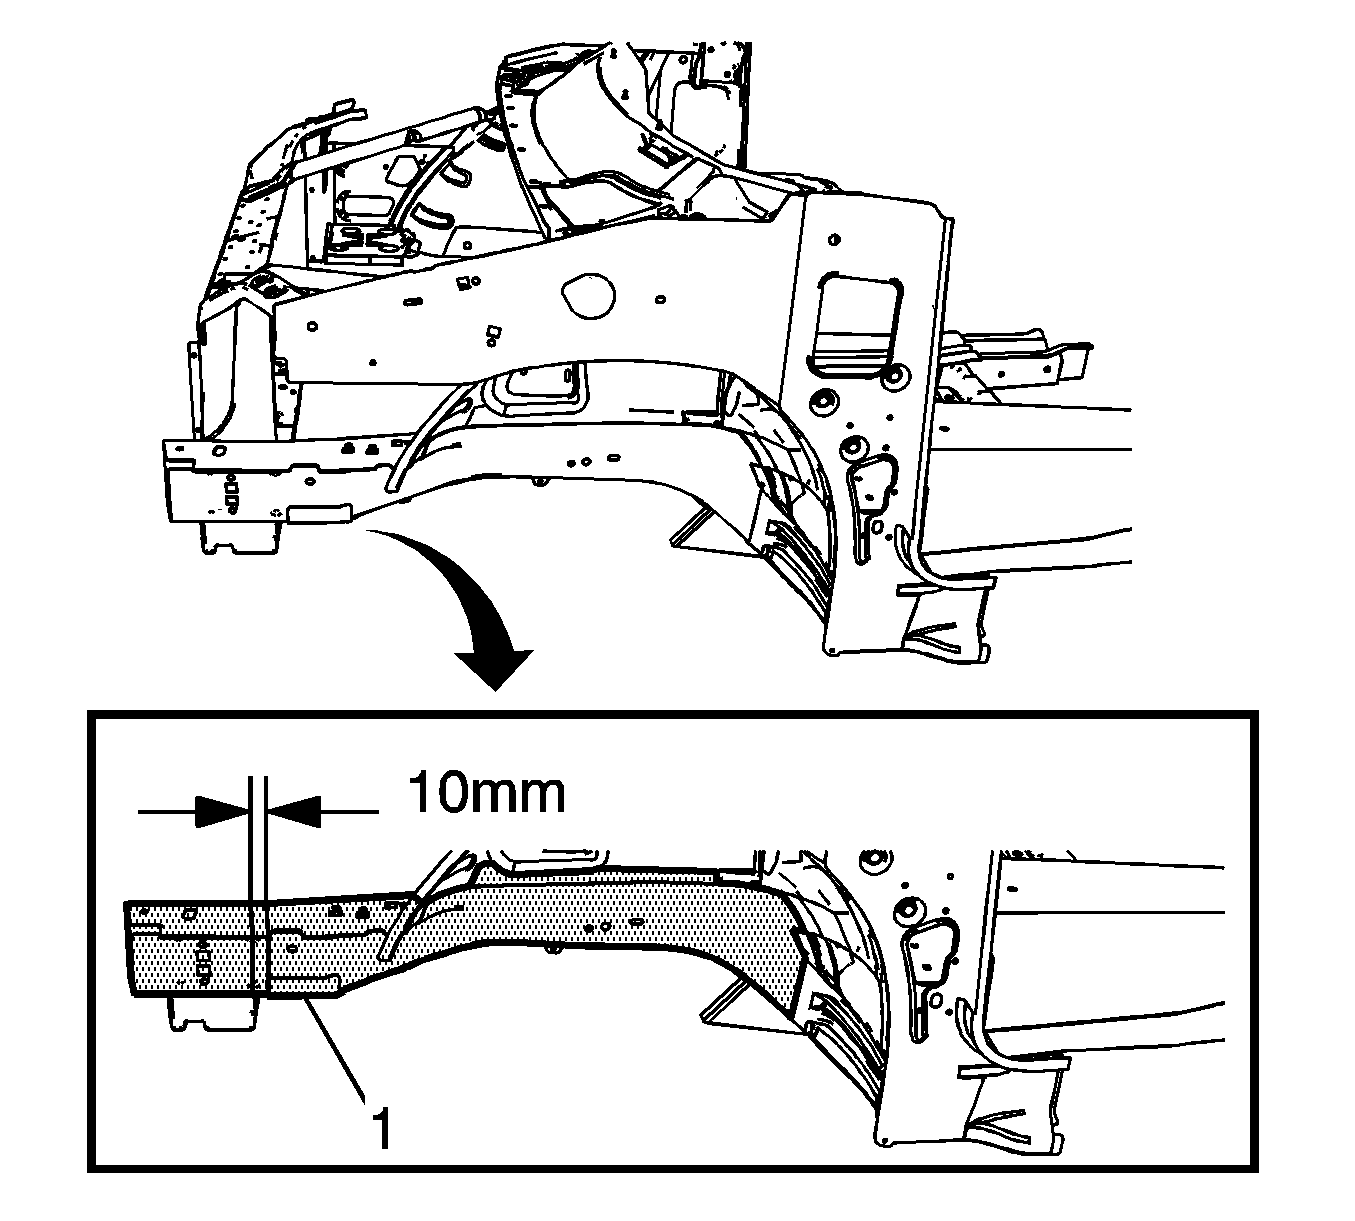
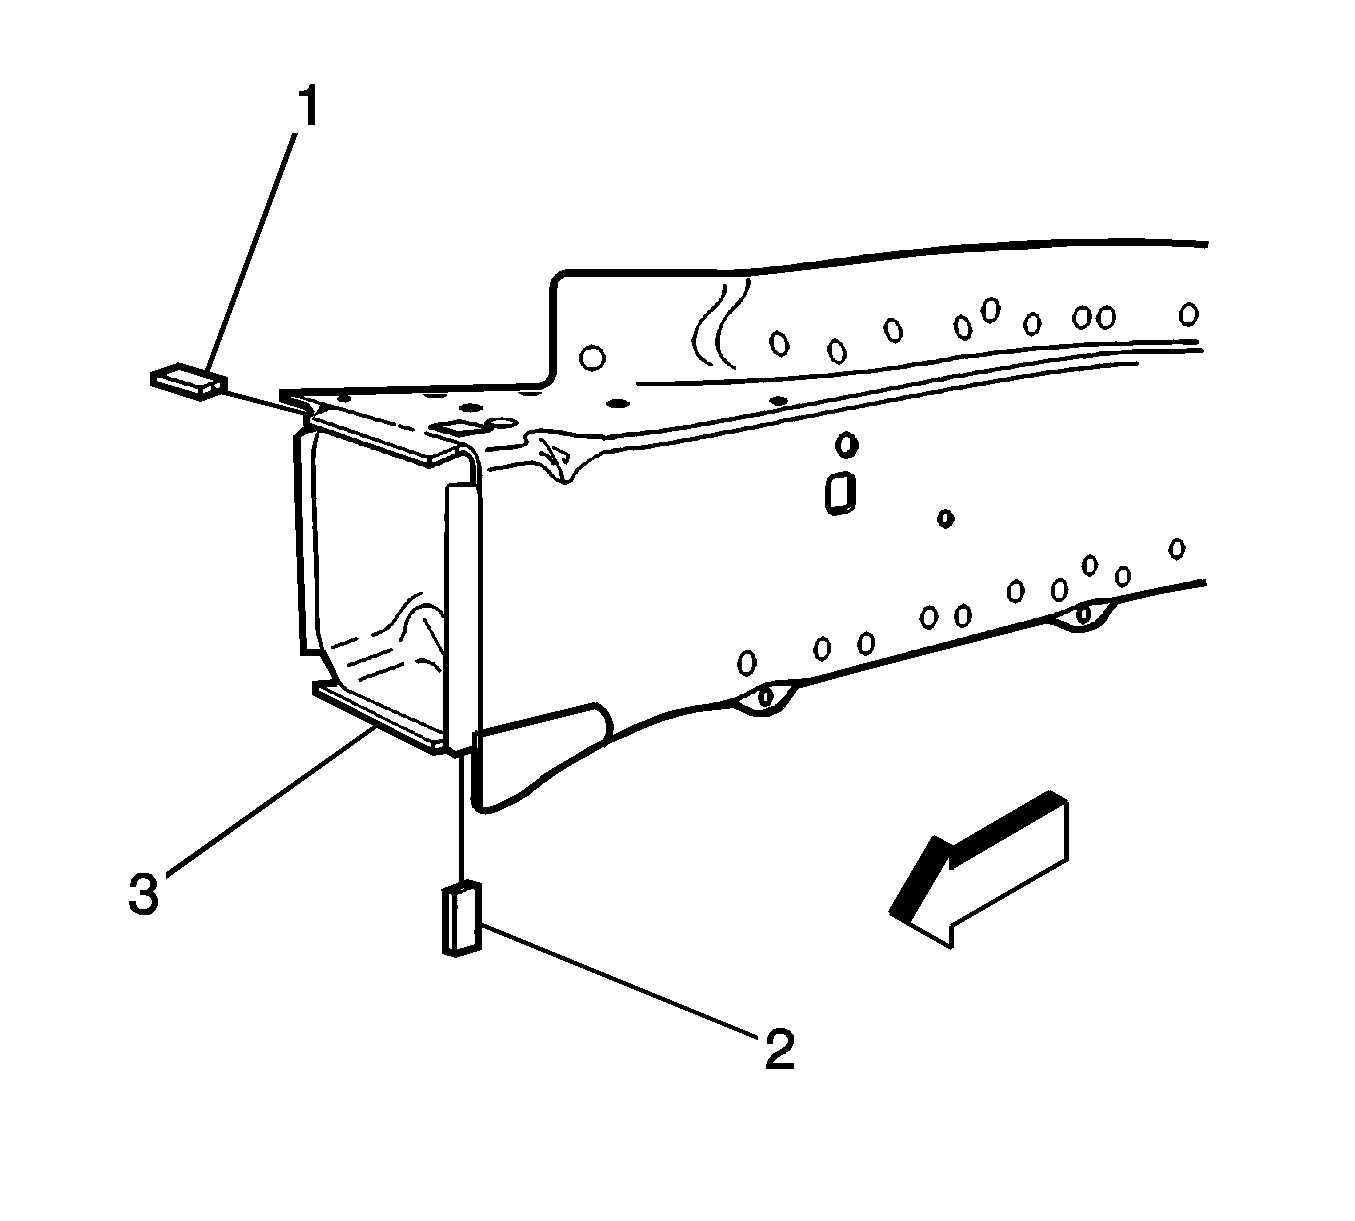
- On the outboard side of the rail and on the bottom of the rail, locate the cradle support bracket (1).
- Measure 10 mm (13/32 in) forward from the edge of the cradle support bracket (1) and scribe a line.
- With a straight edge, scribe a line as squarely as possible on the remaining rail sides (1).
- Align the 4 sides of the rail.
- Cut through all 4 sides of the rail.
- Remove the damaged section of the rail (1).
Caution: Refer to Approved Equipment for Collision Repair Caution in the Preface section.
Important: If the damage exceeds the recommended area for sectioning and the rail cannot be straightened, replace the entire rail.
Sectioning procedures have been developed to simplify repair of the lower rails, providing the majority of the damage can be repaired to factory specifications. Failure to follow the instructions may lead to improper rail sectioning, which may compromise the structural integrity of the vehicle.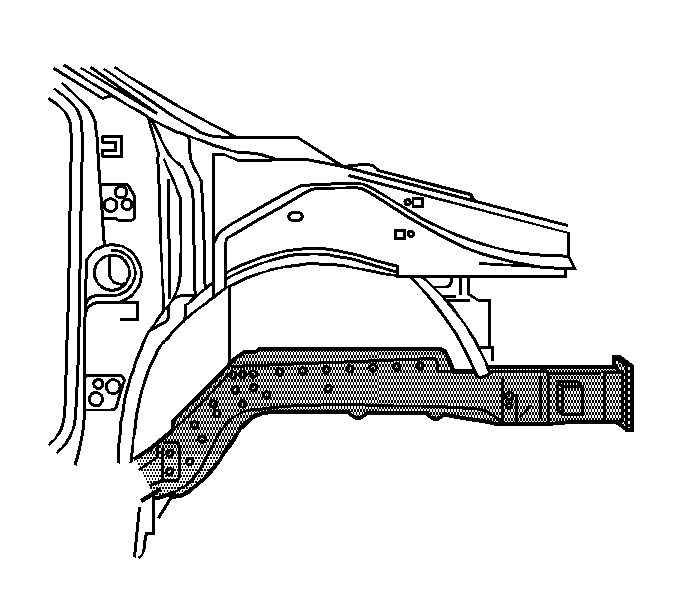
Caution: Refer to Foam Sound Deadeners Caution in the Preface section.

Service Part Preparation
- On the original rail, cut and remove 10 mm (13/32 in) of the outboard (1) and downward (2) turned flanges of the rail.
- Cut 10 mm (13/32 in) gaps along the corners of the original rail.
- Step the top, bottom and side tabs (3) inward to allow the service part to fit over the original rail.
- Clean and prepare the mating surfaces, as necessary.
- Apply GM-approved Weld-Thru coating or equivalent to all mating surfaces. Refer to Anti-Corrosion Treatment and Repair .
Installation Procedure
- Position the service part over the original rail.
- Align and check fit the rail with 3-dimensional measuring. Refer to Dimensions - Body .
- Stitch weld along the entire sectioning joint.
- Make 25 mm (1 in) welds along the seam with 25 mm (1 in) gaps between.
- Go back and complete the stitch weld to create a solid weld joint with minimal heat distortion.
- Complete the necessary procedures. Refer to Radiator Upper Support Replacement , Upper Rail Replacement , Radiator Lower Support Replacement , or to Front Wheelhouse Replacement .
- Clean and prepare all welded surfaces.
- Apply the sealers and anti-corrosion materials to the repair area, as necessary. Refer to Anti-Corrosion Treatment and Repair .
- Paint and repair the area. Refer to Basecoat/Clearcoat Paint Systems .
- Install all related panels and components.
- Connect the negative battery cable. Refer to Battery Negative Cable Disconnection and Connection .
- Enable the SIR system. Refer to SIR Disabling and Enabling .