Removal Procedure
- Set the parking brake.
- Raise and support the vehicle. Refer to Lifting and Jacking the Vehicle in General Information.
- Remove the right rear tire and wheel assembly. Refer to Tire and Wheel Removal and Installation in Tires and Wheels.
- Place a drain pan beneath the differential.
- Remove the differential drain plug (2).
- Drain the rear differential gear oil.
- Disconnect the electrical connector from the clutch pump check valve.
- Remove the right rear wheel drive shaft. Refer to Rear Wheel Drive Shaft Replacement in Wheel Drive Shafts.
- Remove the front propeller shaft. Refer to Propeller Shaft Replacement in Propeller Shaft.
- Place an adjustable support beneath the torque tube.
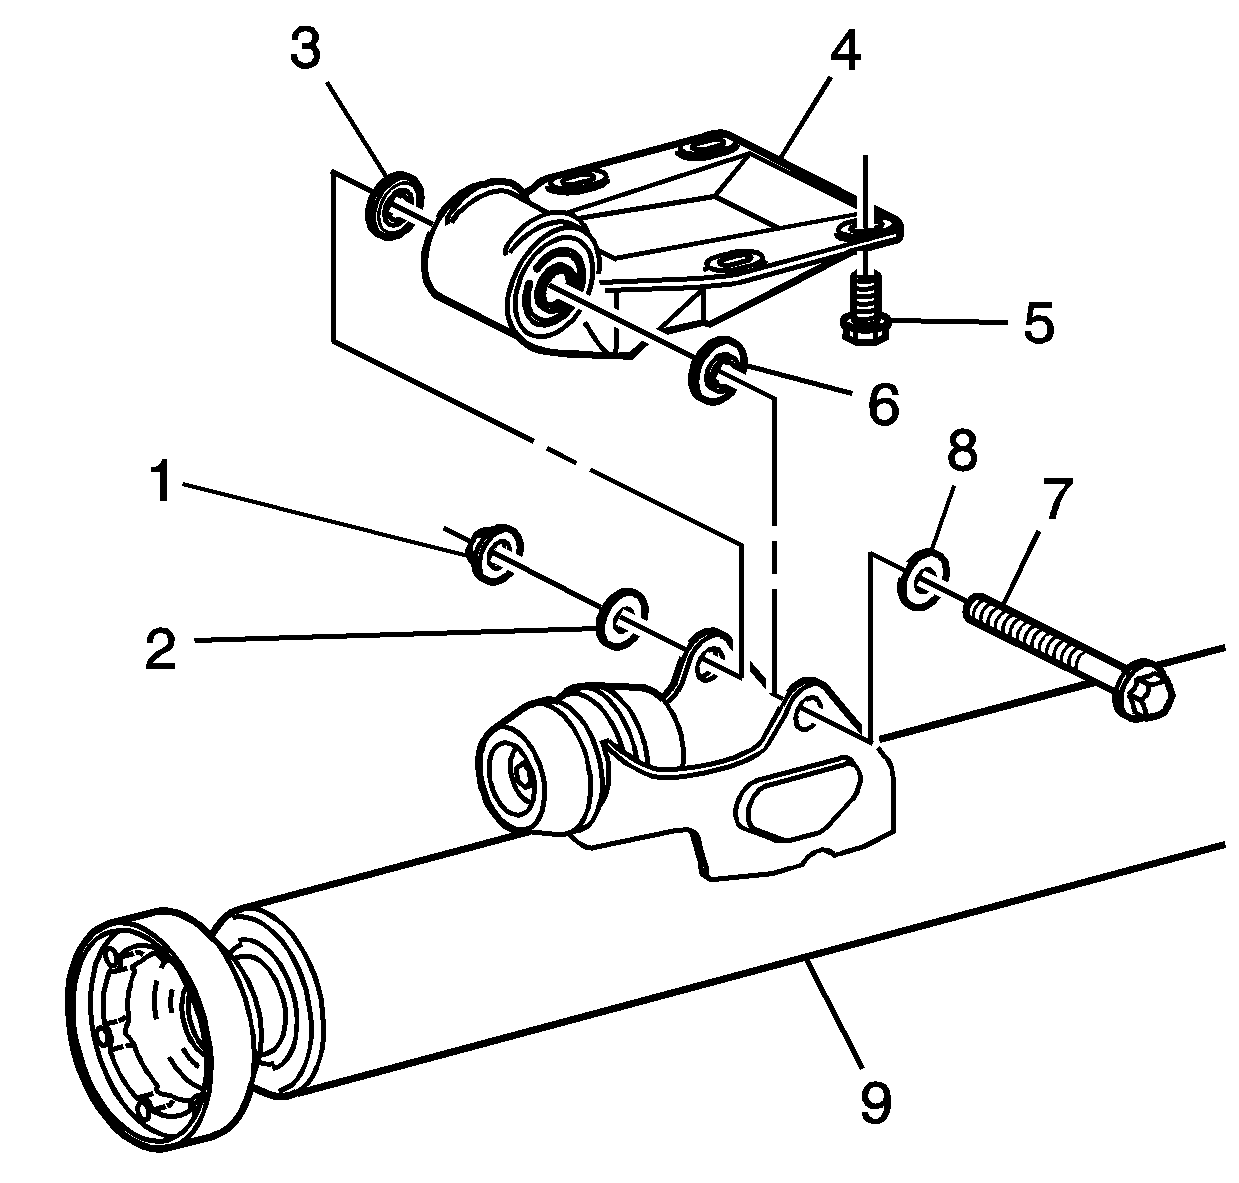
- Loosen, but do not remove the torque tube-to-bracket through bolt (7) and nut (1).
- Remove the bolts (5) from the torque tube bracket (4).
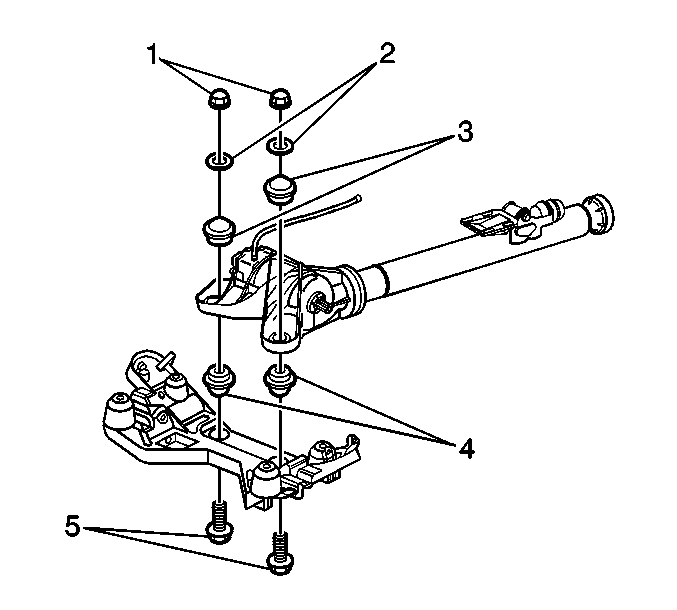
- Remove the differential carrier-to-cradle mounting bolts (5), nuts (1), washers (2), and mounts (3, 4) from the differential.
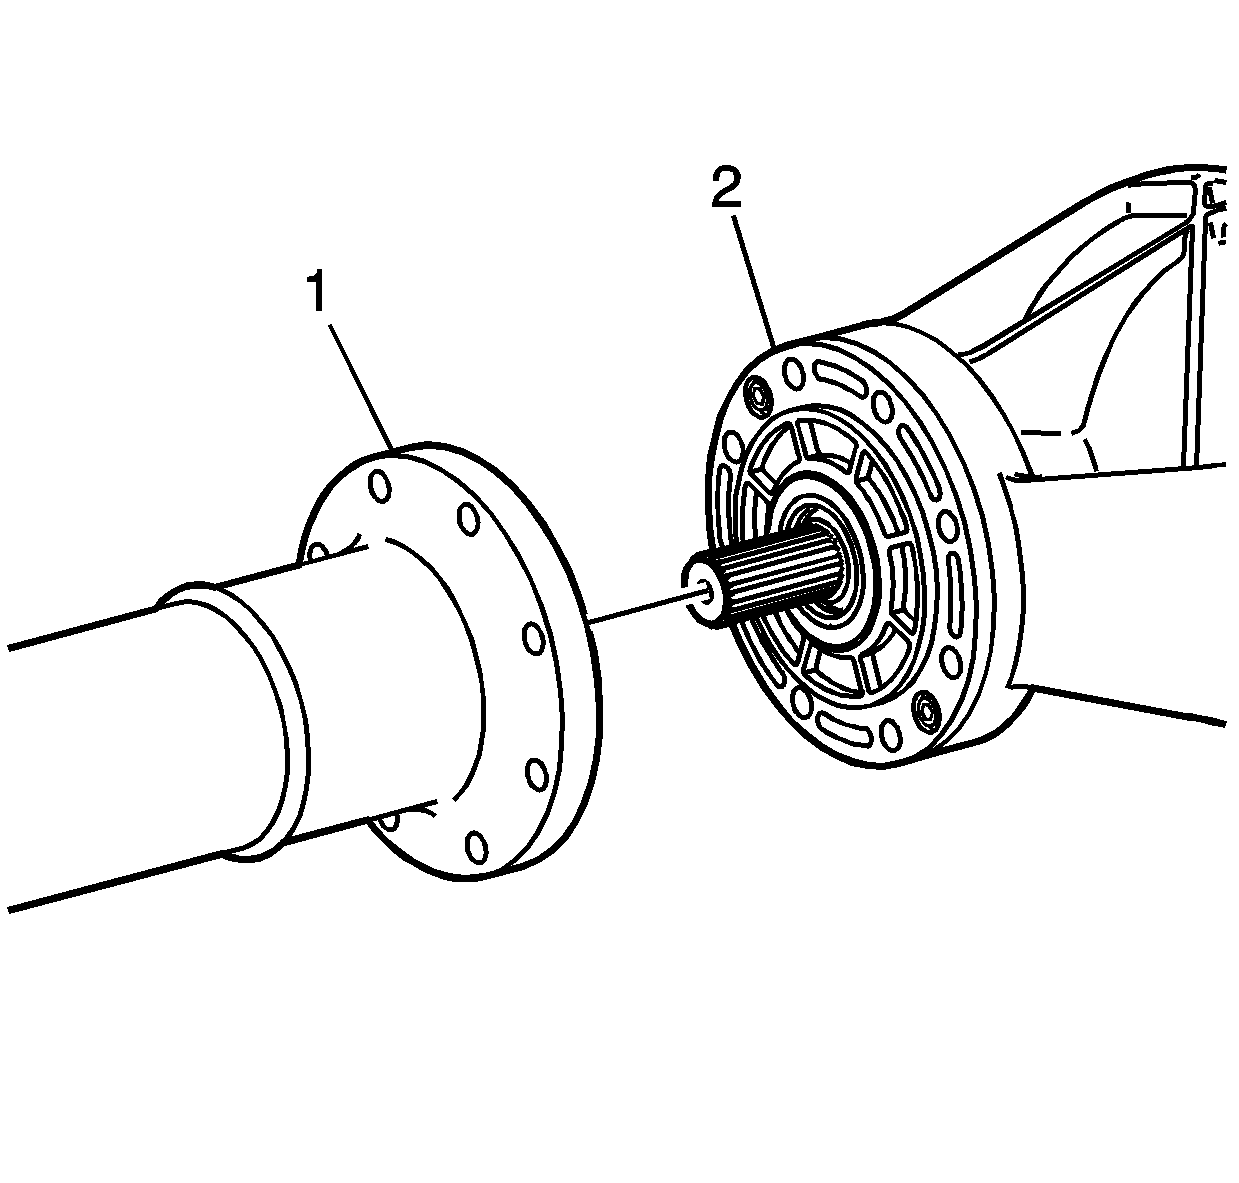
- While simultaneously moving the differential assembly to the right side of the vehicle, disengage the left wheel drive shaft from the differential.
- Remove the rear differential and torque tube as an assembly.
- Remove the torque tube (1) from the differential (2). Refer to Driveline Torque Tube Replacement .

Important: During the removal of the wheel drive shaft, the differential output shaft may become disengaged from the differential. If this occurs, firmly grasp and separate the output shaft from the wheel drive shaft. Align the splines on the output shaft to the differential and reposition the output shaft to the differential.
Installation Procedure
- Install the torque tube (1) to the differential. Refer to Driveline Torque Tube Replacement .
- Install the rear differential and torque tube assembly to the suspension cradle.
- Place an adjustable support under the torque tube.
- Ensure that the left wheel drive shaft is fully engaged to the differential output shaft.
- Install the differential carrier mounts (3, 4), washers (2), bolts (5), and nuts (1) to the differential.
- Install the torque tube bracket-to-body bolts (5).
- Install the front propeller shaft. Refer to Propeller Shaft Replacement in Propeller Shaft.
- Install the right rear wheel drive shaft. Refer to Rear Wheel Drive Shaft Replacement in Wheel Drive Shafts.
- Install the right rear tire and wheel assembly. Refer to Tire and Wheel Removal and Installation in Tires and Wheels.
- Install the differential drain plug (2) and gasket to the differential.
- Remove the differential fill plug (1).
- Fill the axle with synthetic gear oil. Refer to Lubricant Change .
- Inspect the differential oil level to ensure it is even with, to no lower than, 6 mm (0.25 in) below the opening of the fill hole.
- Install the differential fill plug (1) and gasket.
- Connect the electrical connector to the clutch pump check valve.
- Remove the adjustable support from the torque tube.
- Lower the vehicle.
- Operate the vehicle making tight left, then right turns in order to engage the all-wheel-drive system and distribute the gear oil throughout the differential.
- Raise and support the vehicle. Refer to Lifting and Jacking the Vehicle in General Information.
- Remove the differential fill plug.
- Fill the axle with synthetic gear oil. Refer to Lubricant Change .
- Inspect the differential oil level to ensure it is even with, to no lower than, 6 mm (0.25 in) below the opening of the fill hole.
- Install the differential fill plug and gasket.
- Lower the vehicle.
Simultaneously guide the left wheel drive shaft onto the differential output shaft while positioning the differential assembly to the suspension cradle.
Notice: Use the correct fastener in the correct location. Replacement fasteners must be the correct part number for that application. Fasteners requiring replacement or fasteners requiring the use of thread locking compound or sealant are identified in the service procedure. Do not use paints, lubricants, or corrosion inhibitors on fasteners or fastener joint surfaces unless specified. These coatings affect fastener torque and joint clamping force and may damage the fastener. Use the correct tightening sequence and specifications when installing fasteners in order to avoid damage to parts and systems.
Tighten
Tighten the differential carrier-to-cradle mounting bolts to 50 N·m
(37 lb ft).
Tighten
| • | Tighten the torque tube bracket-to-body bolts to 55 N·m (41 lb ft). |
| • | Tighten the torque tube-to-bracket through bolt and nut to 64 N·m (47 lb ft). |
Tighten
Tighten the drain plug to 32 N·m (23 lb ft).
Tighten
Tighten the fill plug to 32 N·m (23 lb ft).
Tighten
Tighten the fill plug to 32 N·m (23 lb ft).
