For 1990-2009 cars only
Rear Axle Upper Control Arm Replacement IRS
Removal Procedure
- Raise and support the vehicle. Refer to Lifting and Jacking the Vehicle in General Information.
- Remove the rear wheel. Refer to Tire and Wheel Removal and Installation in Tires and Wheels.
- Remove the rear stabilizer link.
- Remove the brake hose bracket-to-knuckle bolts.
- Remove the brake hose bracket in order to disconnect the brake hose from the parking brake lever.
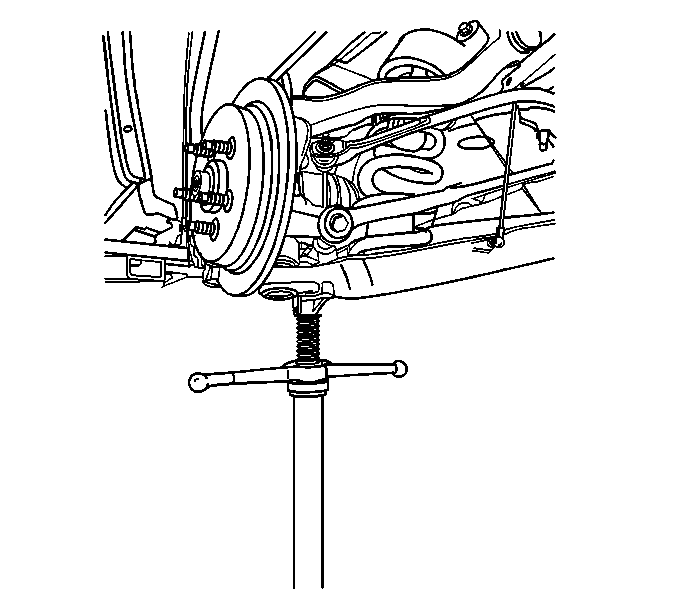
- Use a utility stand in order to support the lower control arm.
- Disconnect the height sensor link from the lower control arm as necessary.
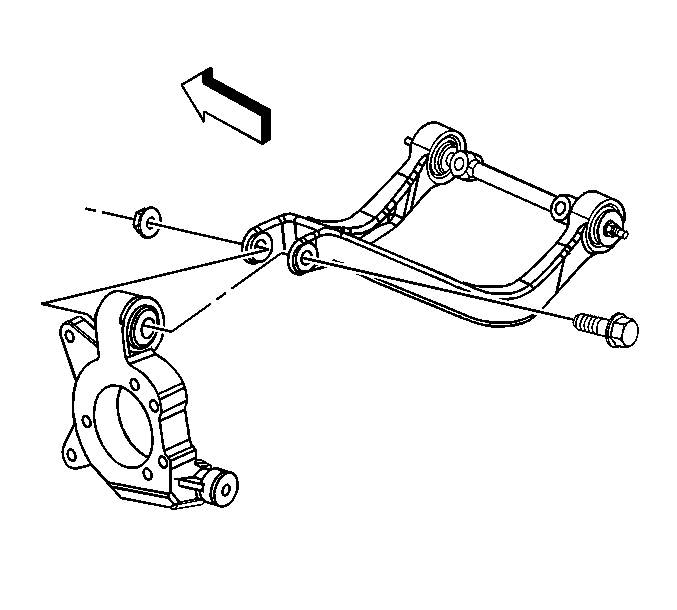
- Remove the upper control arm to knuckle nut and bolt.
- Remove the upper control arm to crossmember bolts and nuts.
- Remove the upper control arm.

Installation Procedure
- Install the upper control arm.
- Install the bolts and the nuts which secure the upper control arm to the crossmember.
- Install the upper control arm to the knuckle.
- Connect the height sensor link to the lower control arm as necessary.
- Remove the utility stand.
- Install the brake hose bracket.
- Install the brake hose bracket belts. Refer to Rear Brake Hose Replacement in Hydraulic Brakes.
- Install the rear stabilizer link.
- Install the rear wheel.
- Lower the vehicle.
Notice: Refer to Fastener Notice in the Preface section.
Tighten
Tighten the nuts to 75 N·m (55 lb ft).
Tighten
Tighten the nut which secures the upper control arm to 100 N·m (74 lb ft).
Tighten
Tighten the stabilizer link ball nut to 40 N·m (29 lb ft).
