For 1990-2009 cars only
Tools Required
| • | J 36797-A Getrag Axle Output Shaft Seal Installer |
| • | J 44755 Holding Fixture |
Removal Procedure
- Raise and support the vehicle. Refer to Lifting and Jacking the Vehicle in General Information.
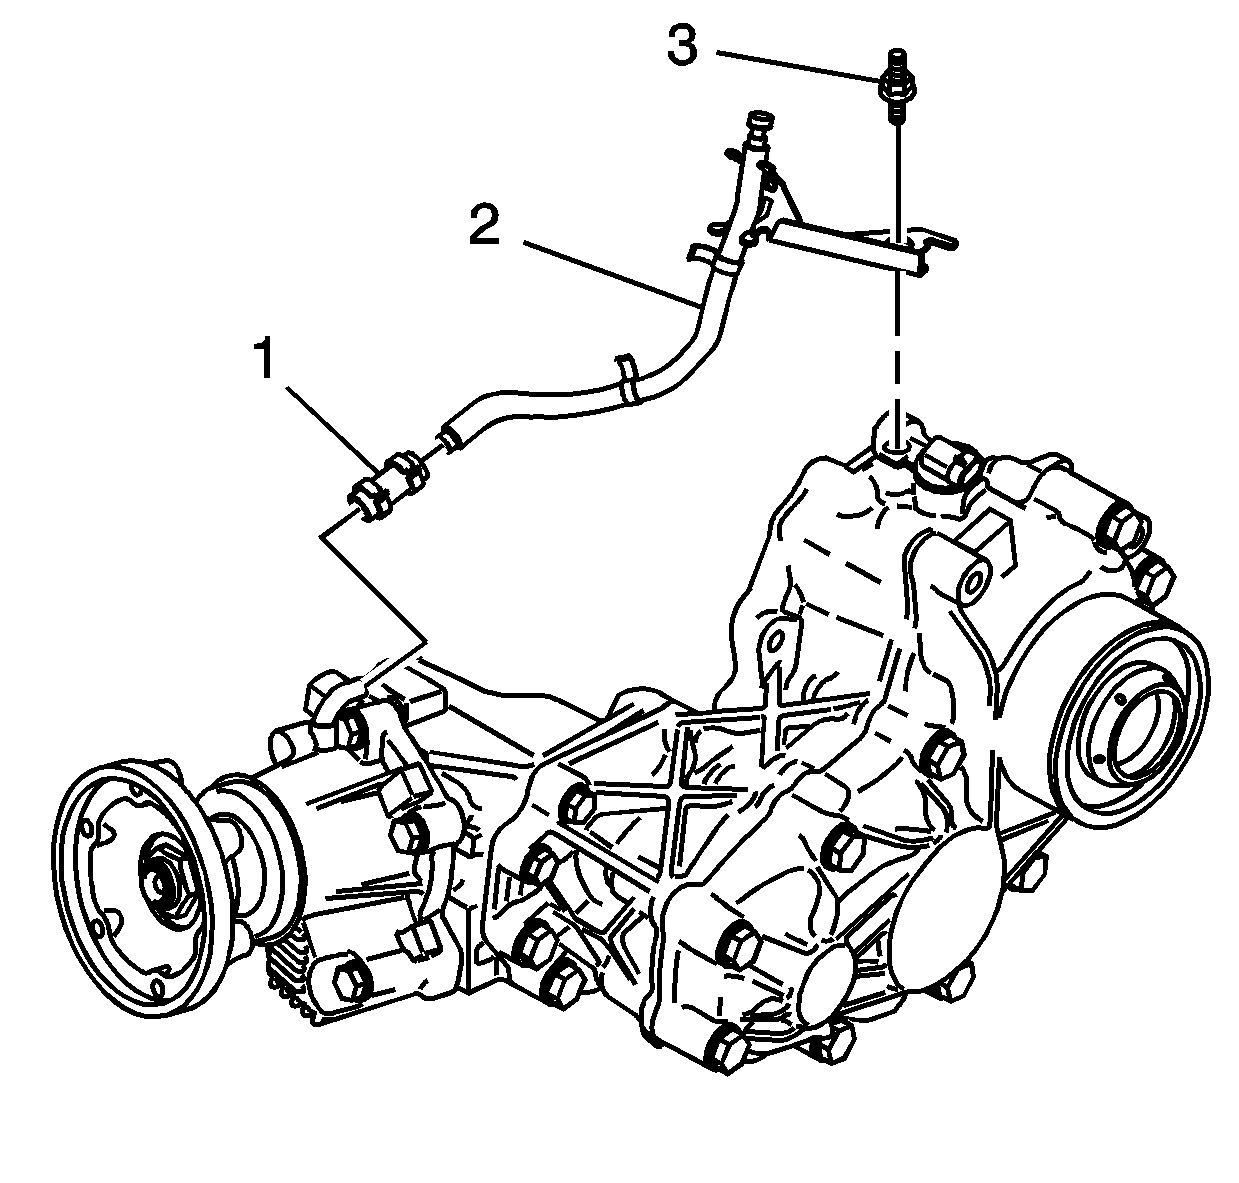
- Remove the extension housing vent hose (2) and clamp. Refer to Vent Hose Assembly Replacement .
- Remove the propeller shaft. Refer to Propeller Shaft Replacement in Propeller Shaft.
- Place a container under the extension housing.
- Remove the lubricant drain plug (1) and gasket. Allow the oil to drain.
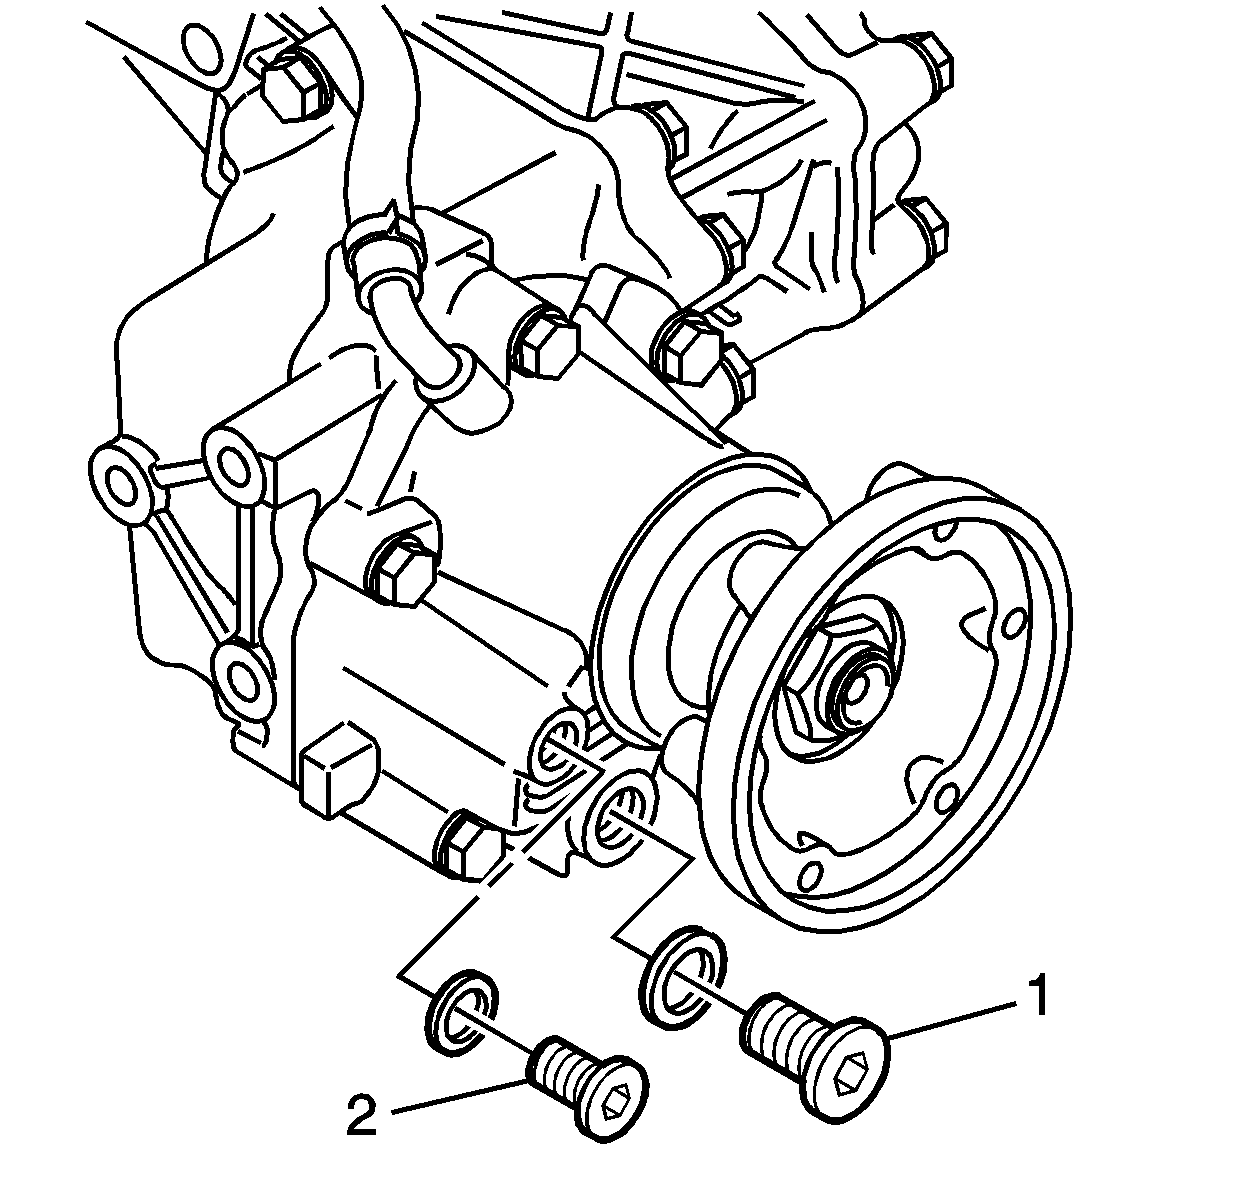
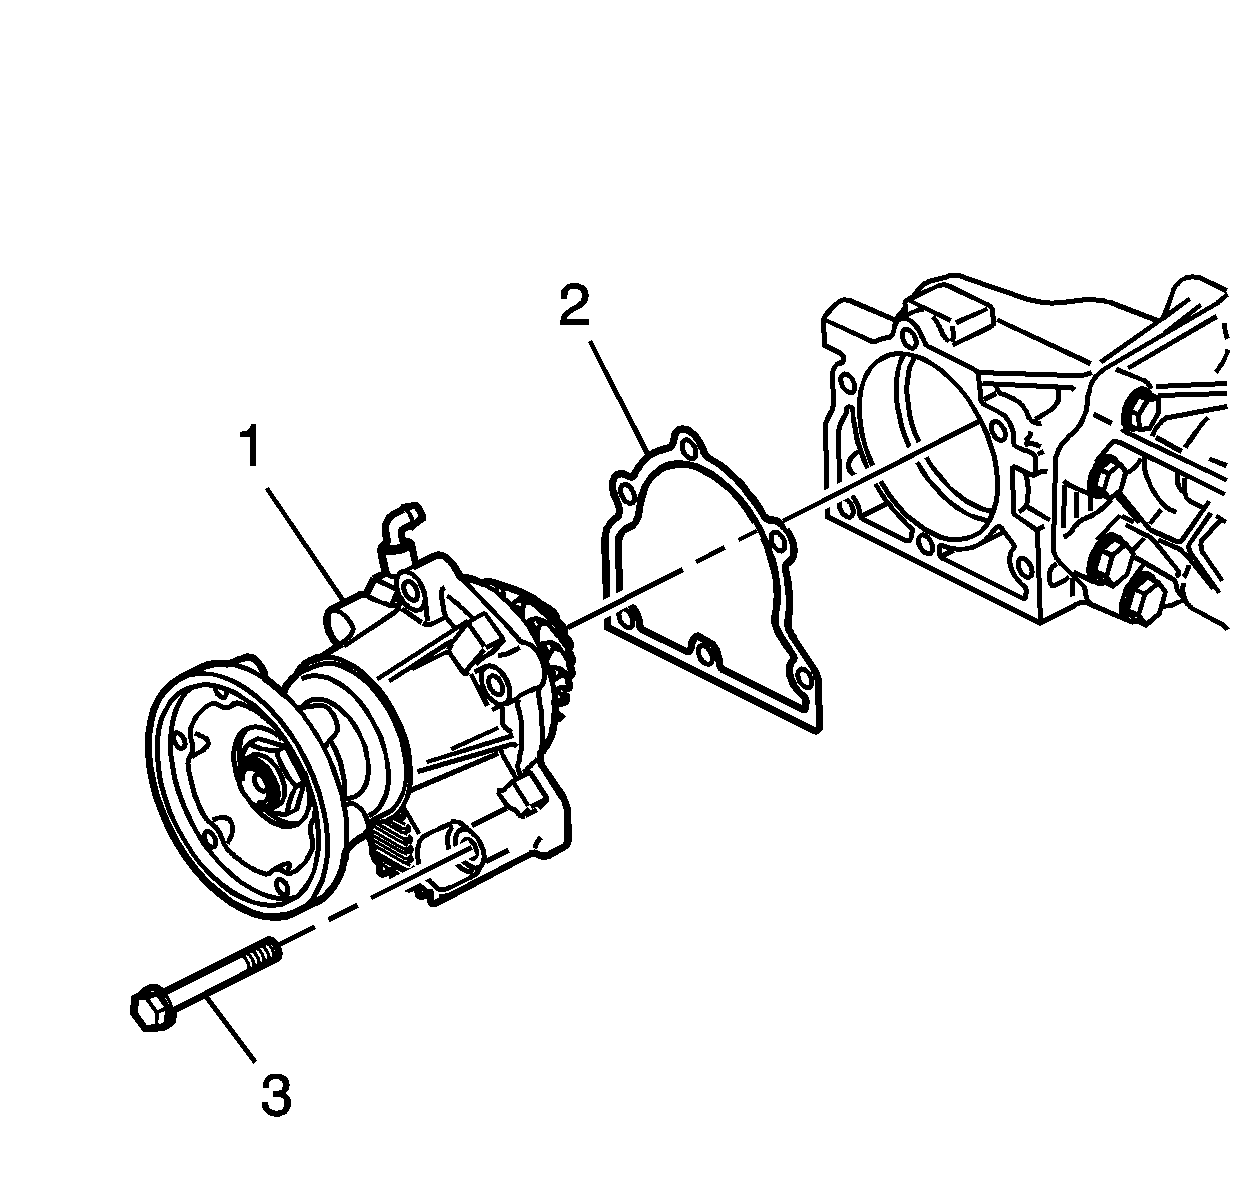
- Remove the bolts (3), extension housing assembly (1), and shim (2) from the transfer case.
- If reusing the drivenshaft bearings, measure in both directions, the rotating torque of the drivenshaft and record the value for assembly.
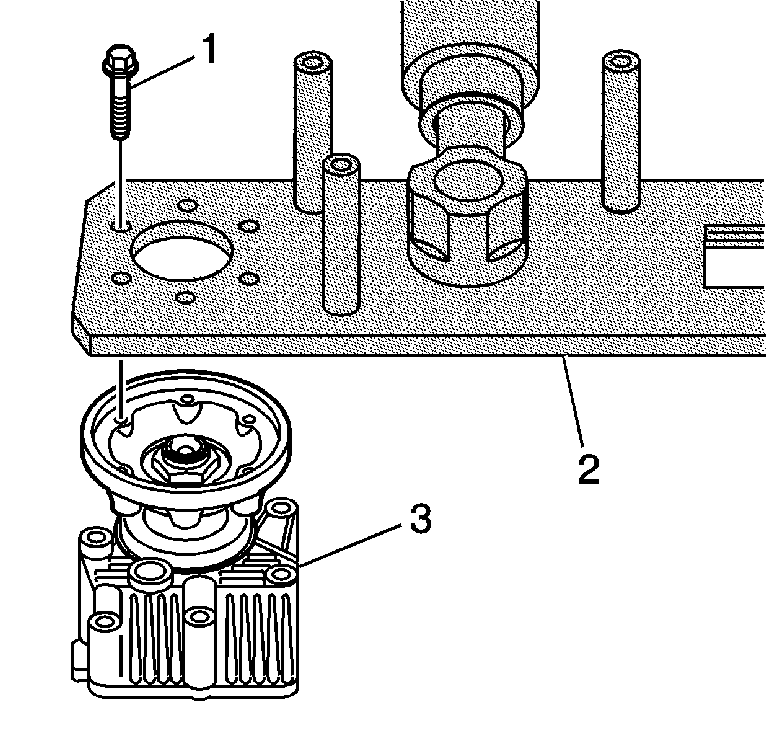
- Install the extension housing assembly (3) to the J 44755 (2) with M8 x 1.25 bolts.
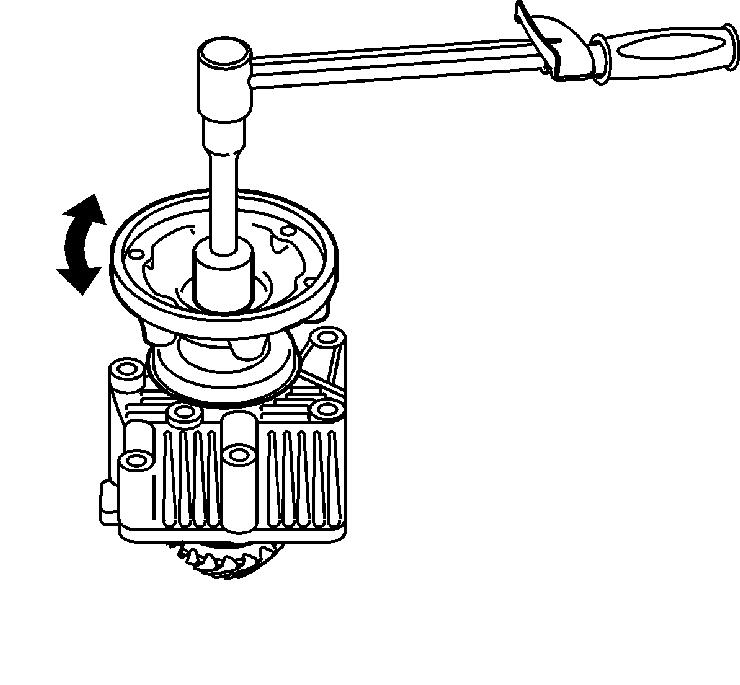
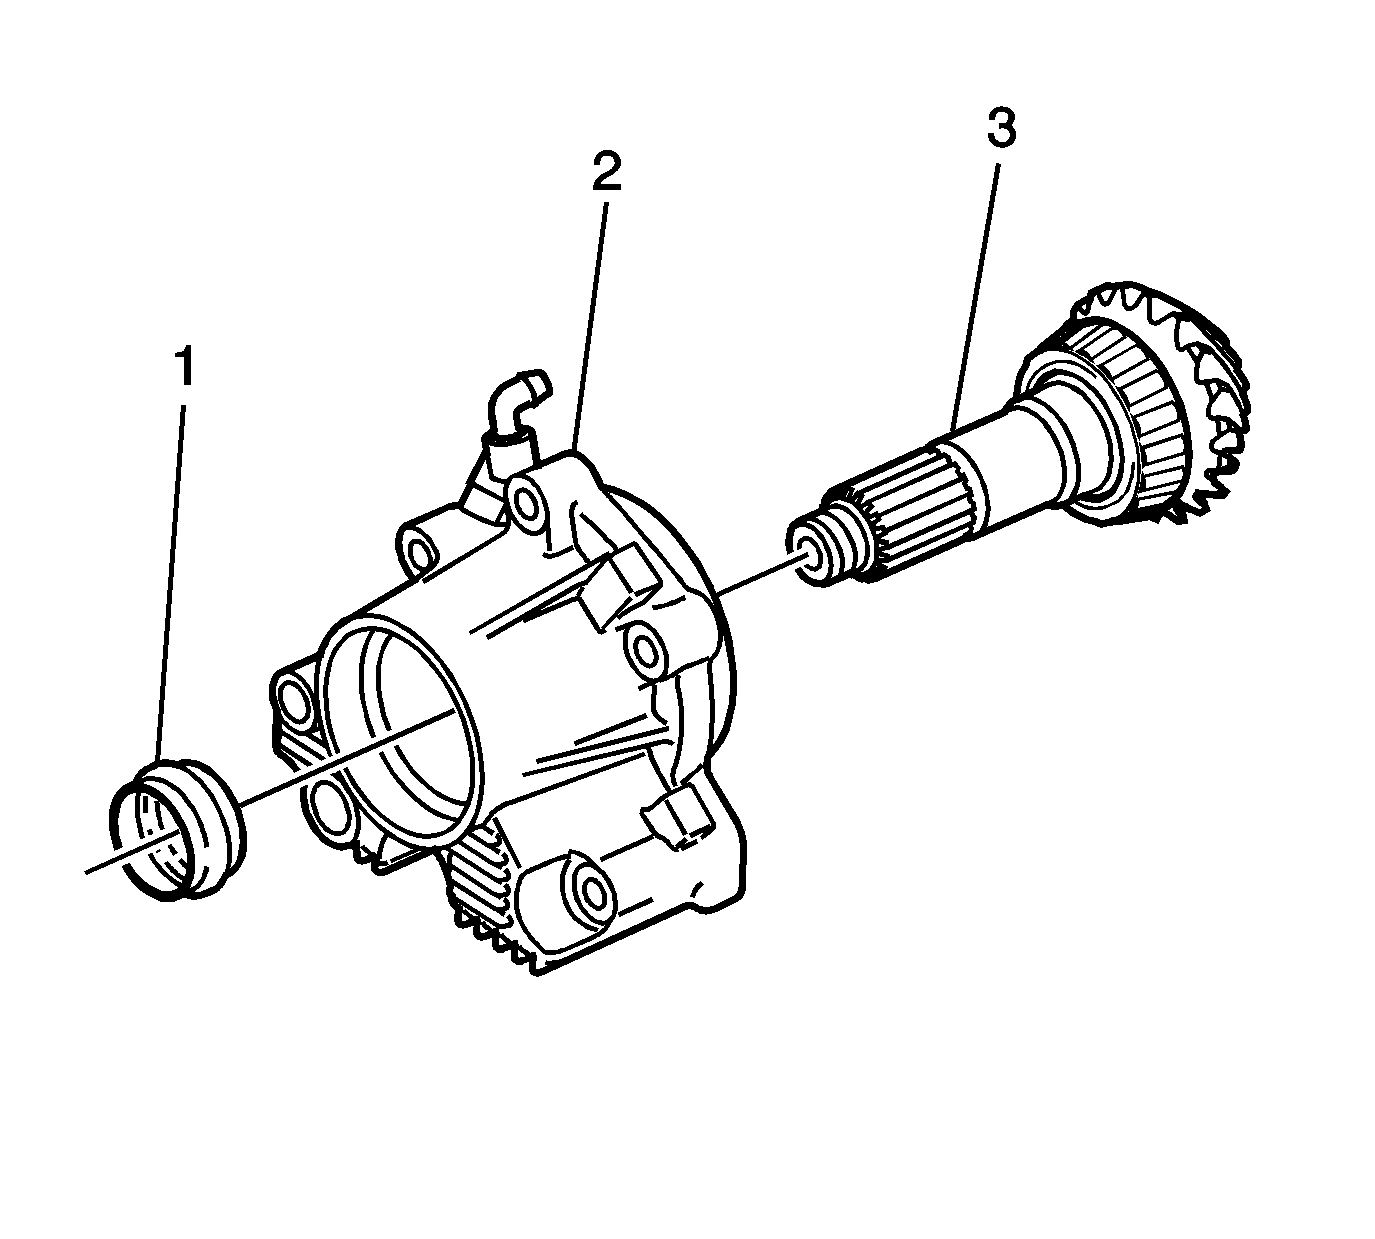
- Remove the flange nut (1).
- Remove the bolts and the extension housing assembly from the J 44755 .
- Position the extension housing assembly into a press.
- Press the pinion shaft from the flange.
- Remove and discard the extension housing seal.
Reference mark the shim for proper reassembly.
Notice: Refer to Fastener Notice in the Preface section.
Tighten
Tighten the bolts to 25 N·m (18 lb ft).
Installation Procedure
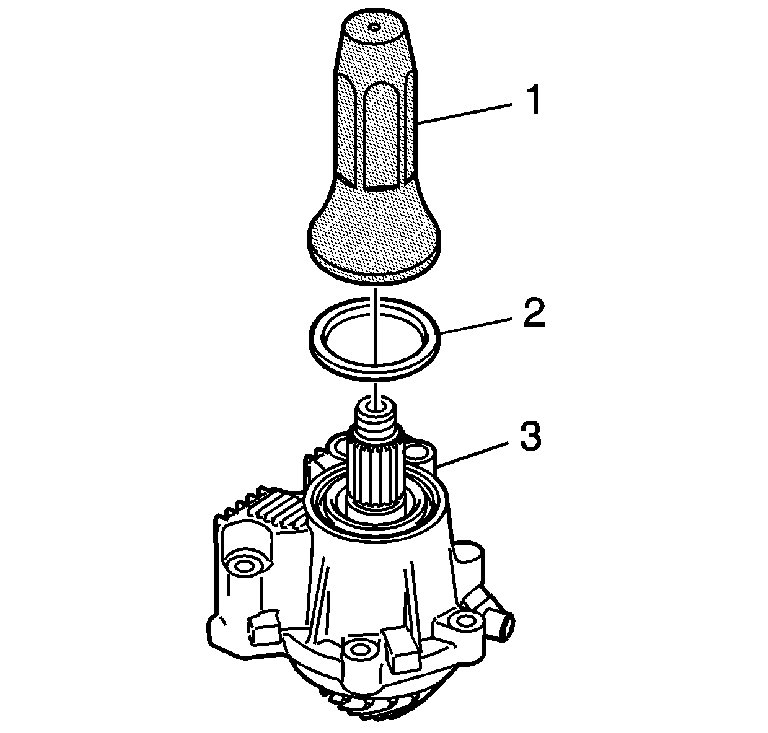
- Install the drive pinion (3) and NEW spacer (1) into the extension housing (2).
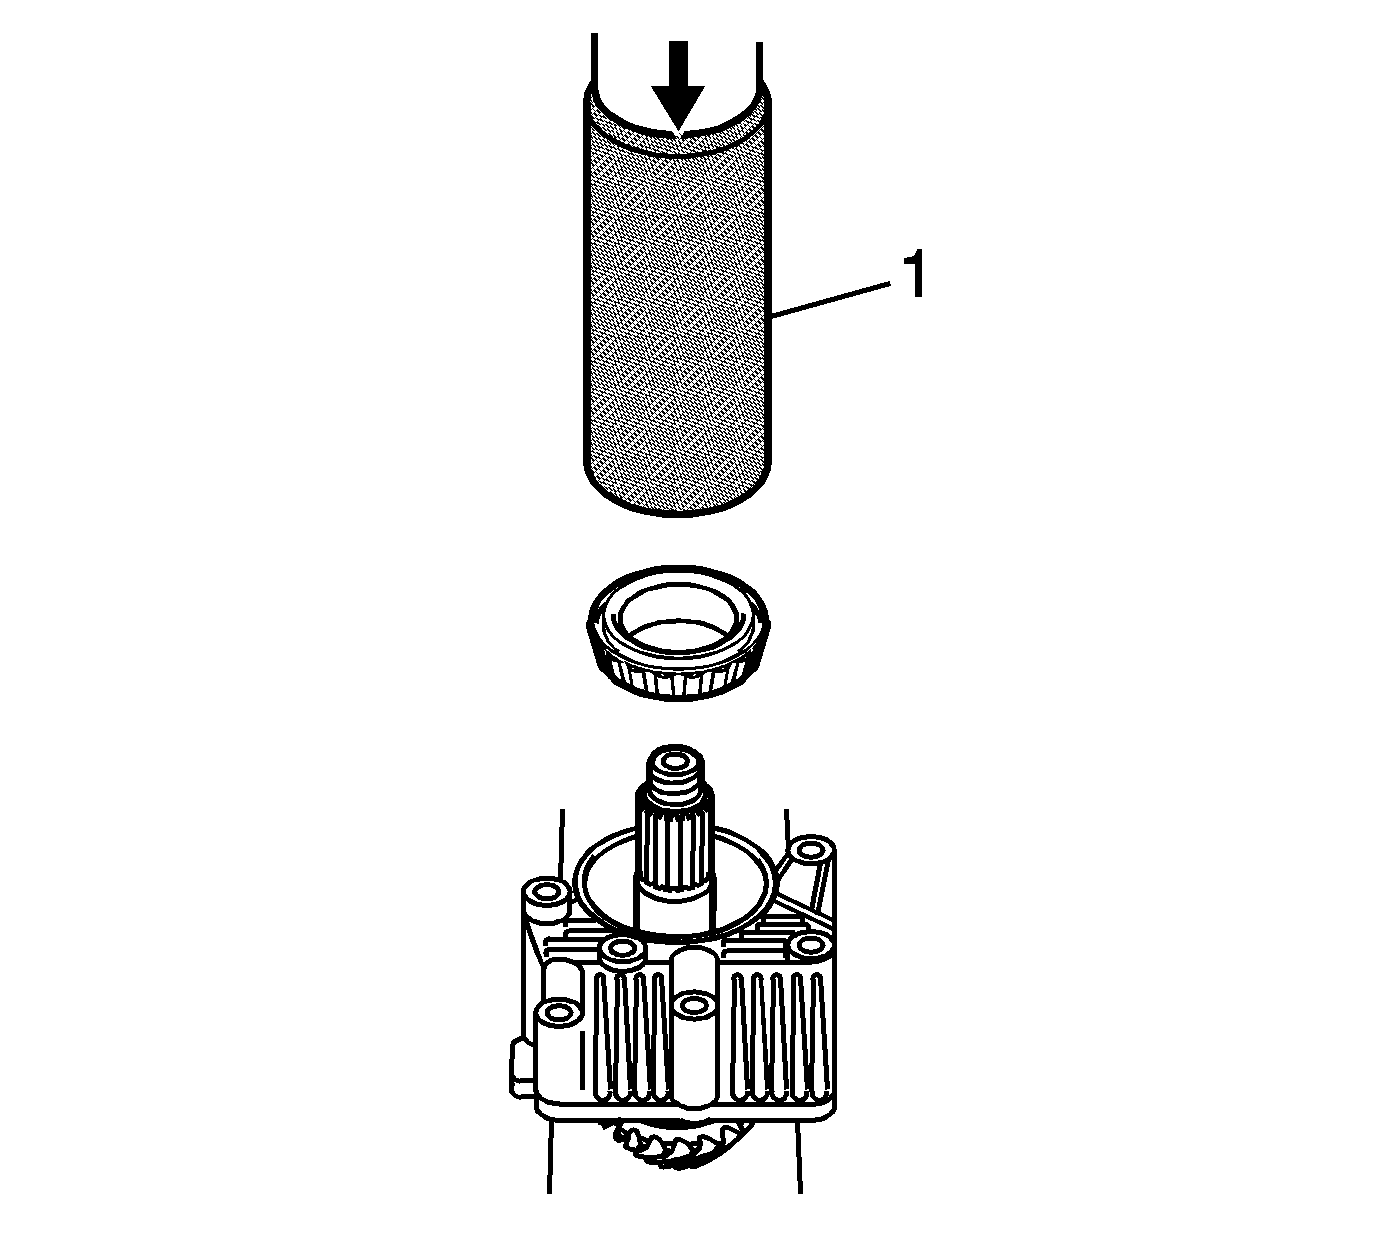
- Use the J 5590 (1) and a hydraulic press in order to install the bearing onto the shaft.
- Use the J 36797-A in order to install a new oil seal (2) into the extension housing.
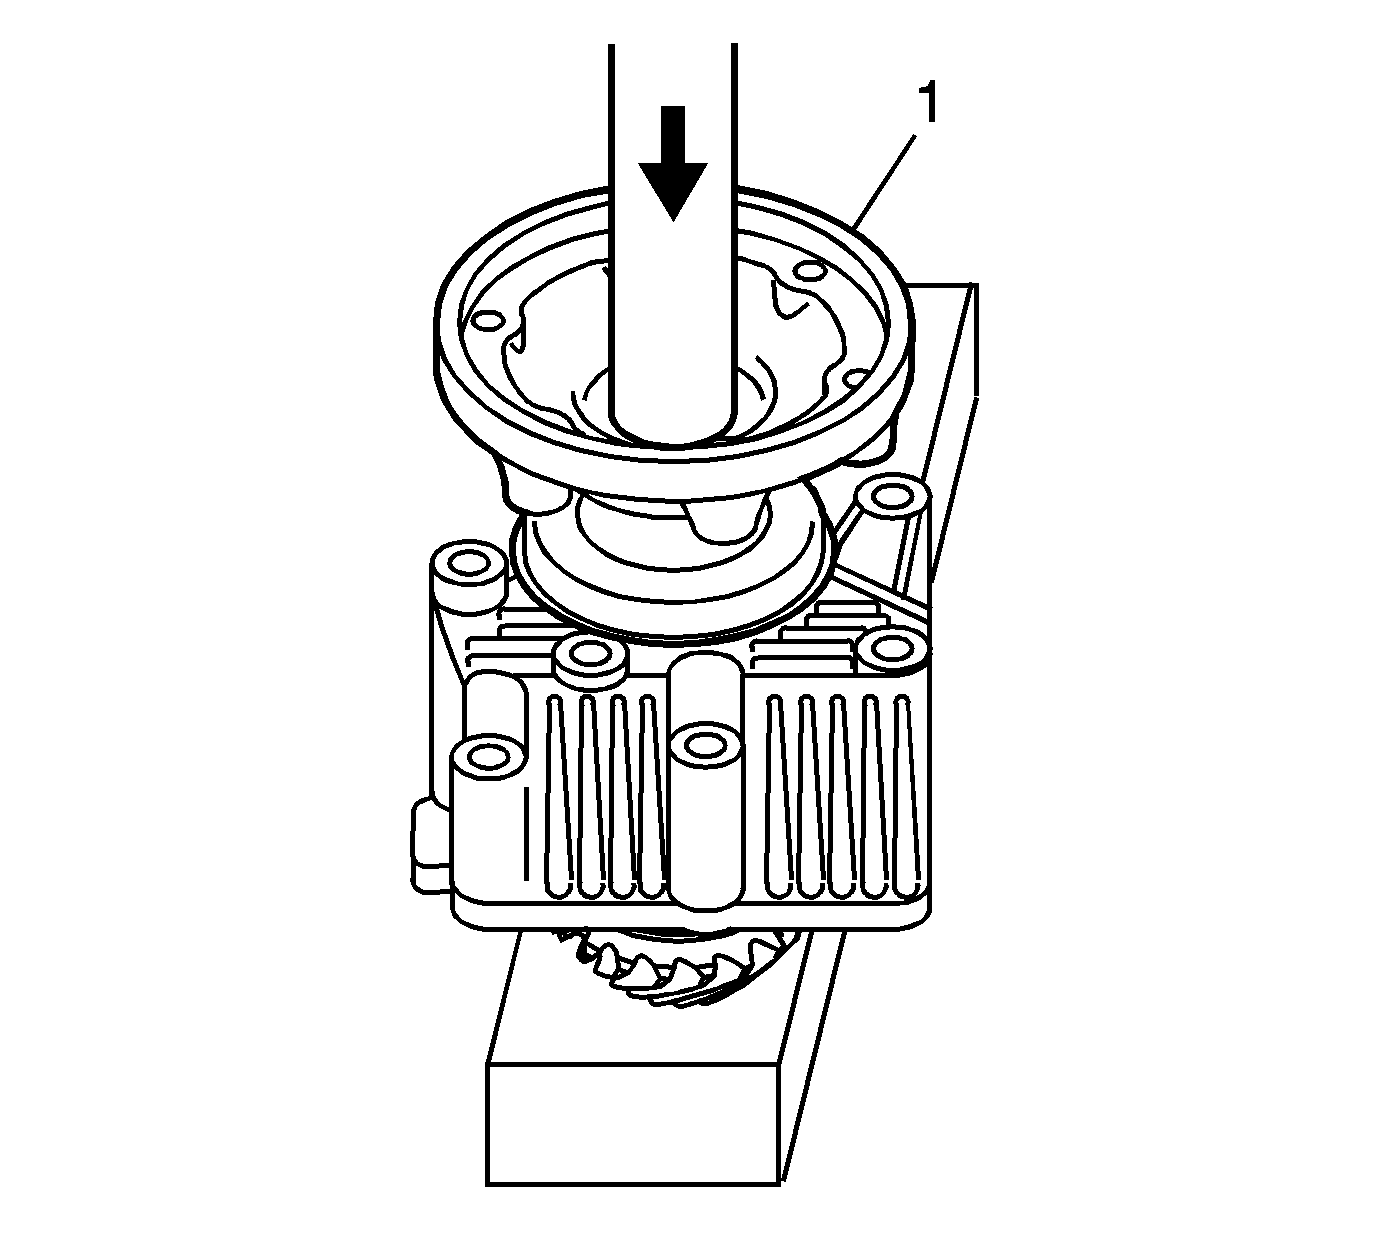
- Position the flange and the extension housing assembly into a press.
- Lightly lubricate the splines on the driven shaft.
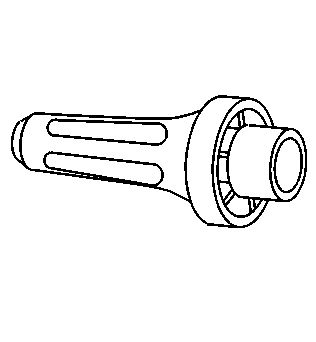
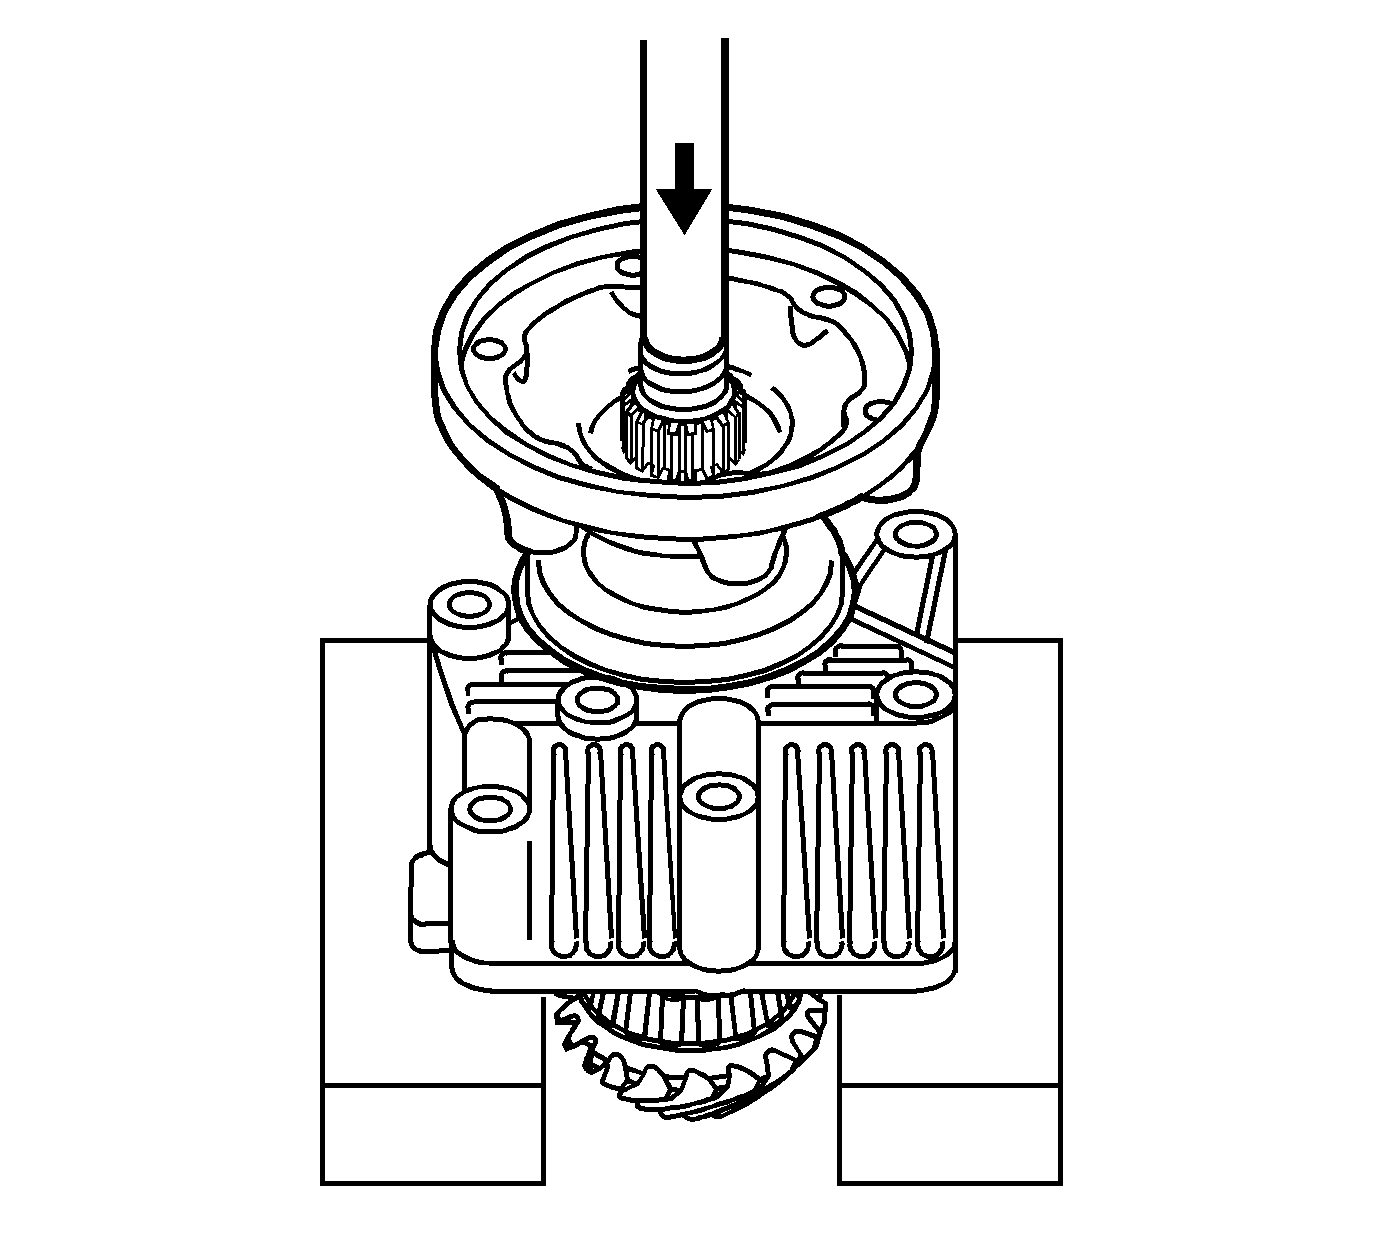
- Press the flange (1) onto the driven shaft.
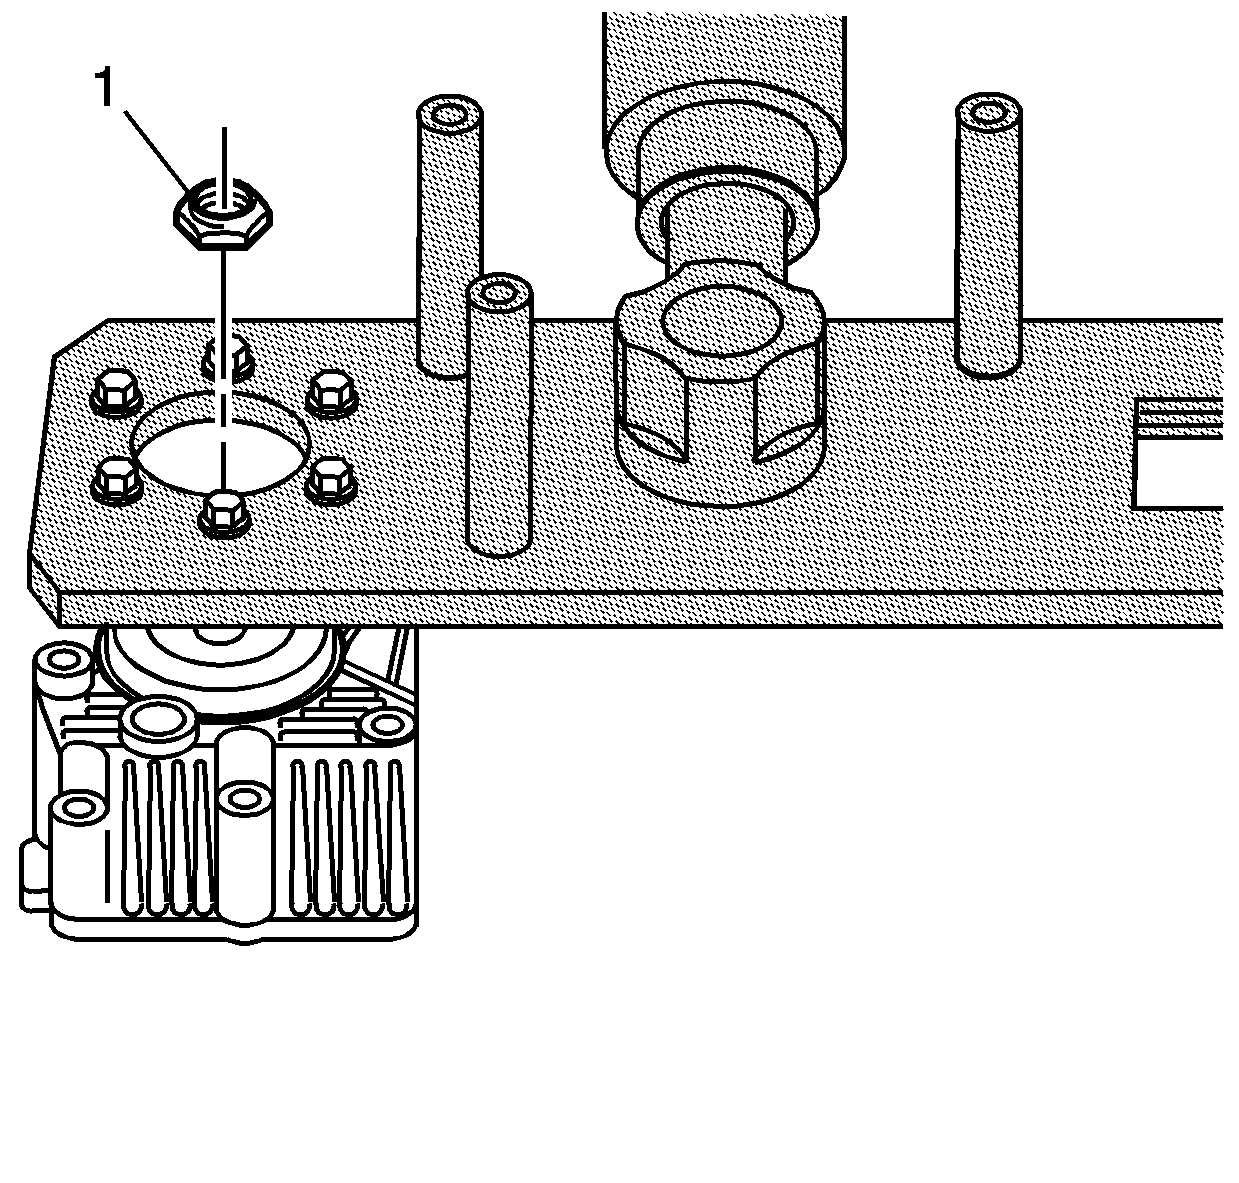
- Install the extension housing assembly to the J 44755 (2) using M8 x 1.25 bolts (1).
- Install the flange nut (1) onto the driven shaft.
- Remove the extension housing assembly from the J 44755 .
- Measure the rotating torque of the driven shaft in both directions.
- When reusing drivenshaft bearings, the rotating torque should equal the value recorded during disassembly.
- Reinstall J 44755 to tighten the flange nut as required to achieve the proper rotating torque value. Do NOT loosen the flange nut to achieve the proper torque or a NEW spacer must be installed.
- Apply sealant GM P/N 12346004 (Canadian P/N 10953480), or equivalent to both sides of the shim.
- Align the reference marks and install the shim (2) to the transfer case.
- Install the extension housing (1) and bolts (3) to the shim and transfer case.
- Install the extension housing drain plug (1) and gasket to the extension housing.
- Remove the extension housing fill plug (2) and gasket.
- Fill the extension housing with gear oil. Refer to Transfer Case Fluid Replacement .
- Install the extension housing fill plug and gasket.
- Install the vent hose (2) and clamp (1). Refer to Vent Hose Assembly Replacement .
- Install the propeller shaft. Refer to Propeller Shaft Replacement in Propeller Shaft.
- Lower the vehicle.
Notice: Refer to Fastener Notice in the Preface section.
Tighten
Tighten the bolts to 25 N·m (18 lb ft).
Tighten
Tighten the flange nut to 200 N·m (148 lb ft).
Tighten
A properly assembled shaft and NEW bearings should have a rotating torque of 1.5 N·m (13 lb in).
Tighten
Tighten the extension housing bolts to 32 N·m (24 lb ft).
Tighten
Tighten the plug to 32 N·m (24 lb in).
Tighten
Tighten the plug to 28 N·m (21 lb in).
