For 1990-2009 cars only
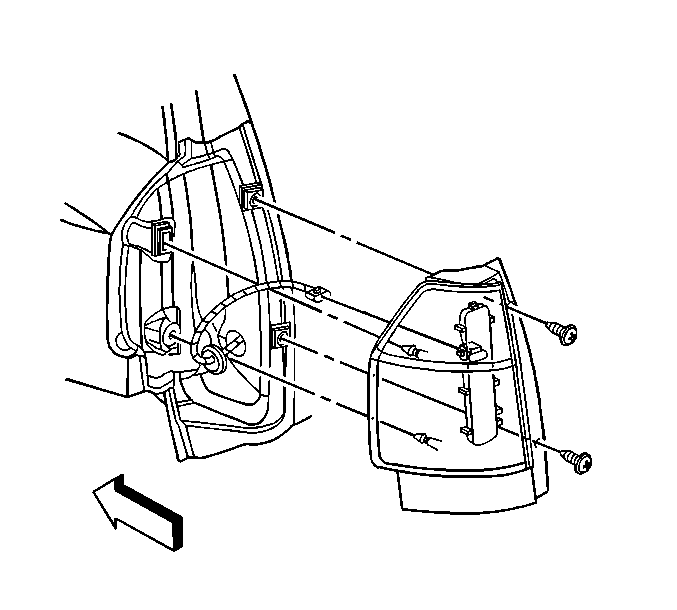
Tail Lamp Replacement TrailBlazer
Removal Procedure
- Remove the 2 screws that retain the tail lamp assembly to the body.
- Pull the assembly directly rearward in order to release the 2 locking pins.
- Disconnect the tail lamp electrical connector.
- Remove the lamp assembly from the vehicle.
- Remove the tail lamp circuit board. Refer to Tail Lamp Circuit Board Replacement .
Installation Procedure
- Install the tail lamp circuit board. Refer to Tail Lamp Circuit Board Replacement .
- Connect the tail lamp electrical connector.
- Push the tail lamp assembly directly forward in order to seat the 2 locking pins.
- Install the 2 tail lamp assembly retaining screws.
Notice: Refer to Fastener Notice in the Preface section.
Tighten
Tighten the screws to 1.9 N·m (17 lb in).
Tail Lamp Replacement Isuzu
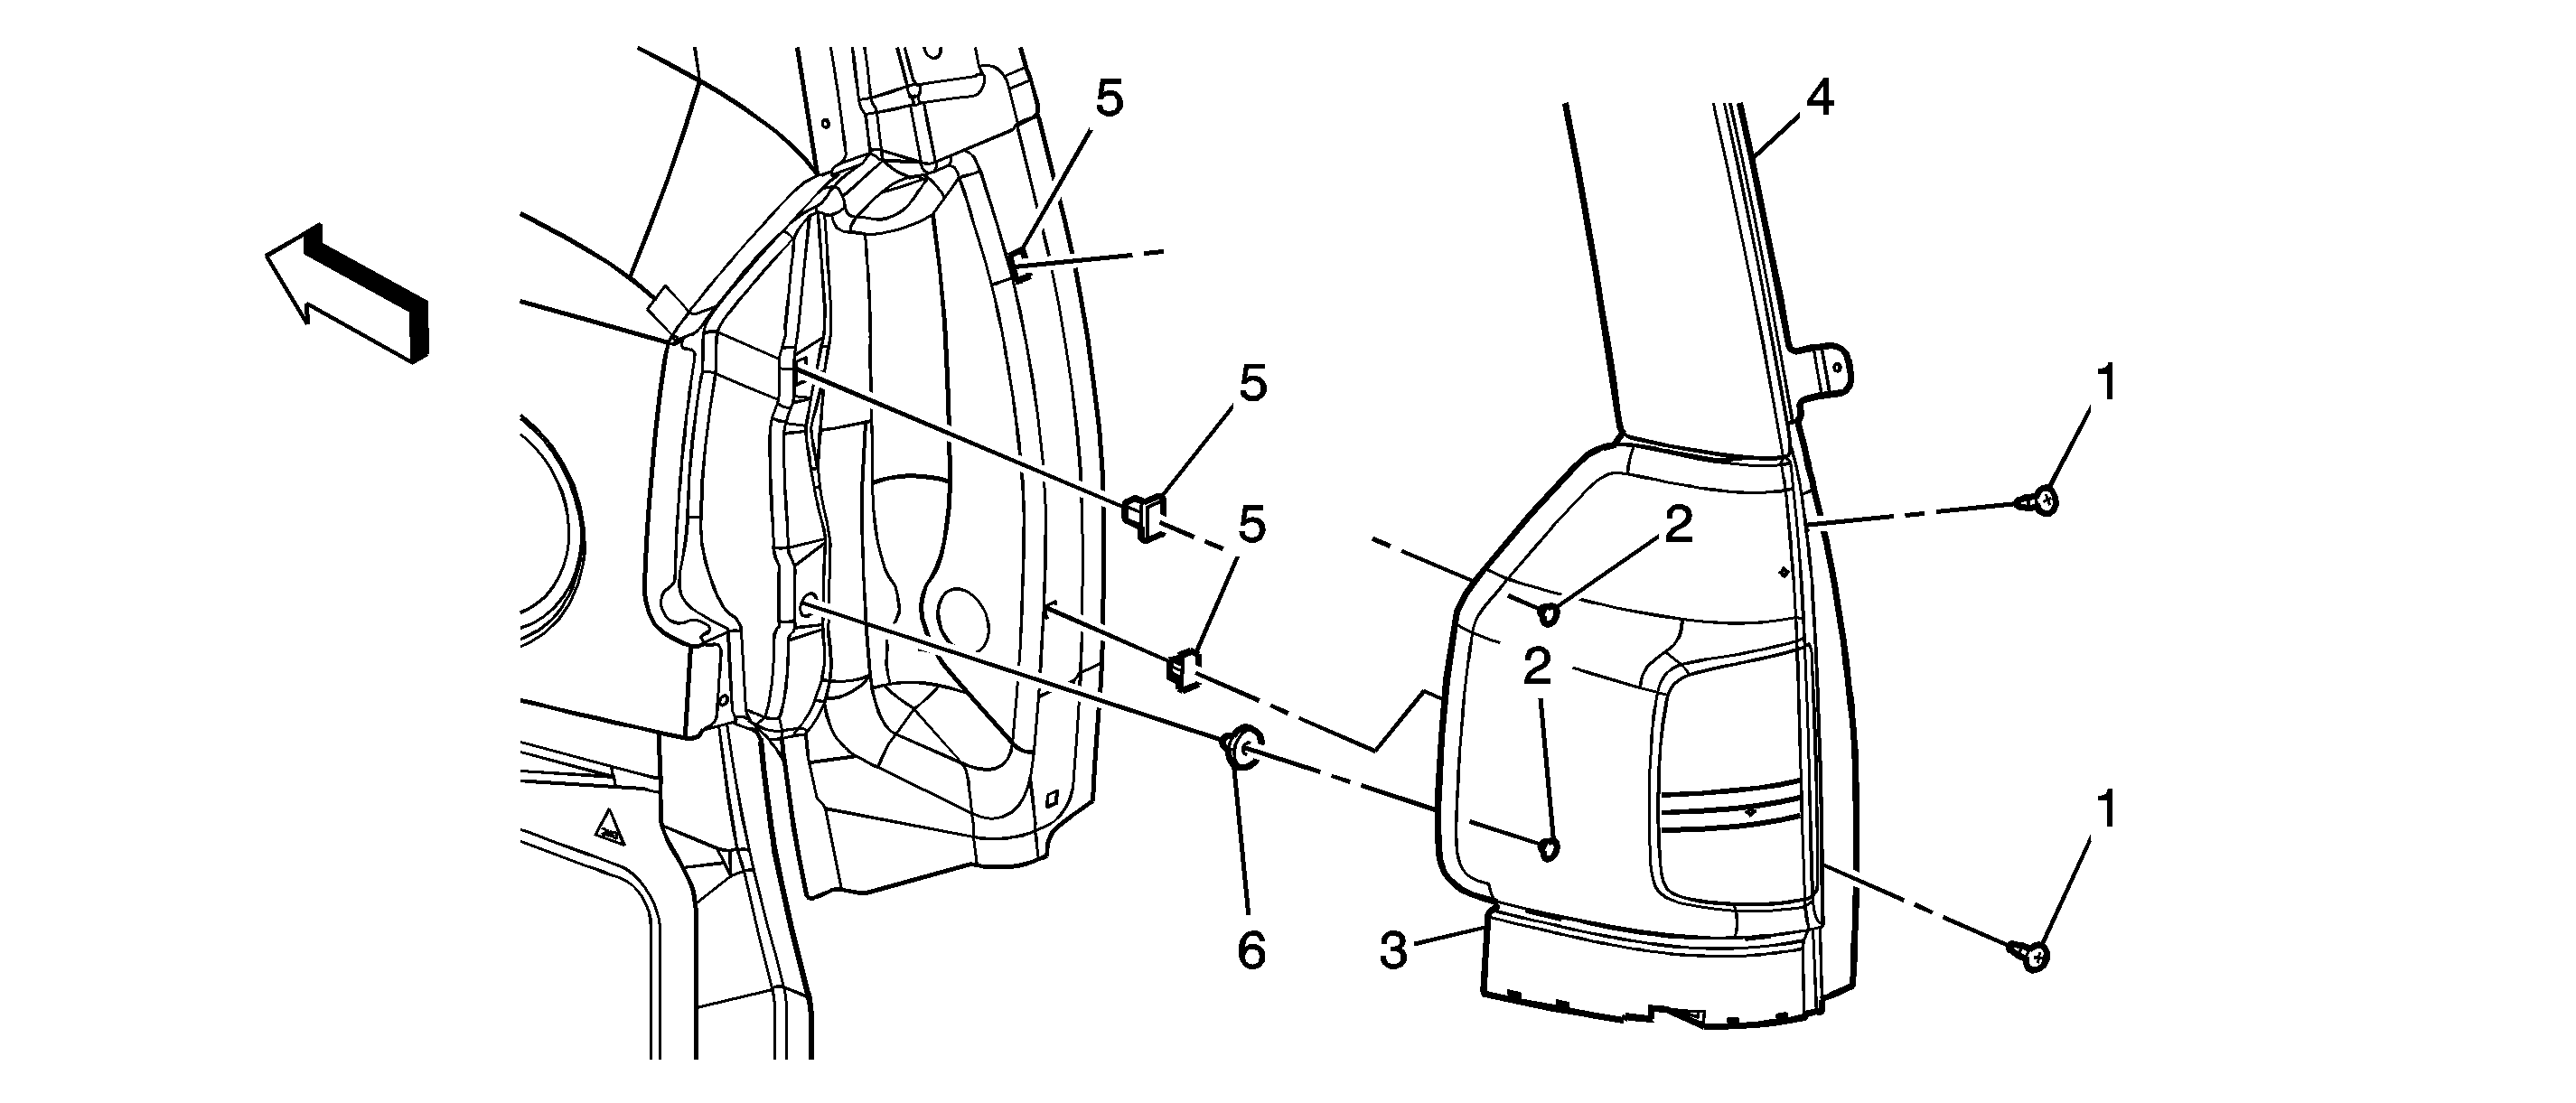
Callout | Component Name | ||||
|---|---|---|---|---|---|
|
Notice: Refer to Fastener Notice in the Preface section. Fastener Tightening Specifications: Refer to Fastener Tightening Specifications . Preliminary ProcedureOpen the liftgate in order to access the rear tail lamp screws. | |||||
1 | Tail Lamp Assembly Screws (Qty: 2) Tip Tighten | ||||
2 | Locating Pins (Qty: 2) | ||||
3 | Tail Lamp Lower Cover | ||||
4 | Liftgate Upper Reveal Molding Tip | ||||
5 | Filler Nuts (Qty: 2) Tip | ||||
6 | Filler Retainers (Qty: 2) Tip
| ||||
