For 1990-2009 cars only
Removal Procedure
- Apply tape to the liftgate around the area of the molding.
- Open the liftgate.
- Remove the bolts retaining the high mounted stop lamp. Refer to High Mount Stop Lamp Replacement .
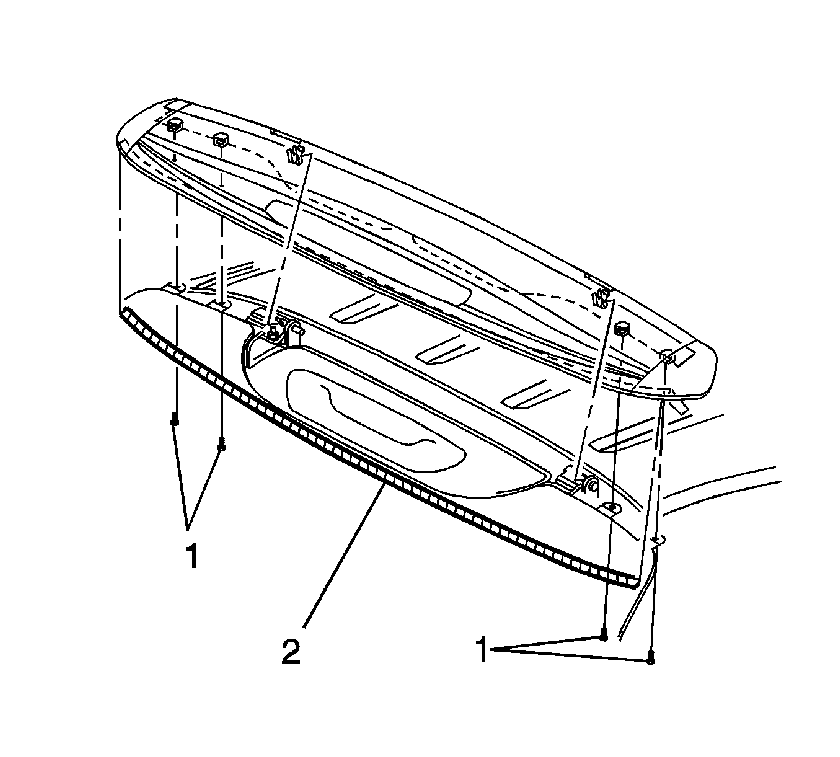
- Remove the retaining bolts (1) that secure the molding to the top edge of the liftgate.
- Separate the bottom edge of the molding from the window using a plastic, flat-bladed tool to release the adhesive strip (2) from the window.
- Remove the molding from the vehicle.
Notice: Use a plastic, flat-bladed tool to prevent paint damage when removing an emblem/name plate.
Installation Procedure
- Clean any remaining adhesive from the window surface using varnish makers and painters (VMP) naptha.
- Wipe the surface with a clean cloth to remove all traces of the cleaner.
- Using a clean dauber, apply adhesion promoter to the window surface where the adhesive strip will contact the window (1).
- Remove the protective film (2) from the inner molding surface.
- Remove the plastic film from one side of the adhesive strip and install on the lower edge of the molding surface (3).
- Remove the remaining plastic film from the adhesive strip.
- Insert the molding tabs (4) under the liftgate hinge pins (5).
- Hand roll the lower edge of the molding to the liftgate to ensure proper adhesion.
- Install the bolts retaining the high mount stop lamp. Refer to High Mount Stop Lamp Replacement .
- Install the molding retaining bolts.
- Remove the tape from around the liftgate molding.

Notice: Refer to Fastener Notice in the Preface section.
Tighten
Tighten the bolts to 5 N·m (44 lb in).
