Lubricant/Oil Leak from Front Area of Vehicle (Install Washer/Shim Between Oil Pan and Front Axle Housing Assembly)

| Subject: | Lubricant/Oil Leak From Front Area of Vehicle (Install Washer/Shim Between Oil Pan and Front Axle Housing Assembly) |
| Models: | 2004-2005 Buick Rainier |
| 2004-2005 Chevrolet TrailBlazer, TrailBlazer EXT |
| 2004-2005 GMC Envoy, Envoy XL, Envoy XUV |
| with 4.2L L6 Engine (VIN S -- RPO LL8) and Four Wheel or All Wheel Drive |
Condition
Some customers may comment on an oil leak from the front area of the vehicle.
Diagnosis may show the area of concern is at the axle case/housing half sealing surface adjacent to the pinion seal.
Cause
The front axle case/housing and the engine oil pan are mounted to each other on these vehicles. Casting variations in both the oil pan and the axle case/housing may cause hard contact between these two items where contact is not intended. When this happens, the front axle case/housing may distort when tightened to the oil pan. This may cause a leak path between the front axle case halves.
Correction
Follow the service procedure below to repair this condition.
- Raise and support the vehicle. Refer to Lifting and Jacking the Vehicle in General Information (SI Document ID #744862).
- Diagnose the source of the leak. Refer to Front Axle Lubricant Leak Diagnosis (SI Document ID #700713).
- Reference mark the relationship of the propeller shaft to the front axle pinion yoke.
- Remove the yoke retainer bolts and yoke retainers from the front axle pinion yoke.
- Disconnect the propeller shaft from the front axle pinon yoke. Wrap the bearing caps with tape in order to prevent the loss of bearing rollers.
- Position the front of the driveshaft so that the rear most front axle case/housing bolt can be removed.
- Remove the rear most front axle case/housing to oil pan bolt. Upon removal of the bolt, a gap my appear between the front axle case/housing and the oil pan. This may indicate a interference condition between the front axle case/housing and the oil pan.
- Loosen the next two forward axle mounting bolts in order to gain proper clearance.
- Install one washer/shim, P/N 2436165 between the front axle case/housing and the oil pan at the rear most mounting hole as shown above.
- Install the front axle to oil pan bolt.
- Clean the underside of the vehicle with appropriate cleaner.
- Remove the tape from the front driveshaft bearing caps.
- Align the reference marks made during removal.
- Install the propeller shaft to the front axle pinion yoke.
- Install the yoke retainers and the bolts.
- Remove the front axle oil fill plug.
- Fill the front drive axle with the proper fluid SAE 75W-90 Synthetic Axle Lubricant, P/N 89021677 (Canadian P/N 89021678) or equivalent, meeting GM Specification 9986115.
- Install the front axle oil fill plug.
- Lower the vehicle.
| • | If the source of the leak is something other than the case/housing half sealing surface, continue with the appropriate SI procedure to repair the leak source. |
| • | If the source of the leak is the case/housing halves, continue with the next step. |
Important: Observe the position of all the driveline components. Accurately mark the relationship of the components before removal. These components include the propeller shafts, the drive axles, the pinion flanges, and the output shafts. Reassemble all components in the exact relationship to each other as they were before removal. Follow the specifications, the torque values, and any measurements obtained prior to disassembly.
Notice: When removing the propeller shaft, do not attempt to remove the shaft by pounding on the yoke ears or using a tool between the yoke and the universal joint. If the propeller shaft is removed by using such means, the injection joints may fracture and lead to premature failure of the joint.
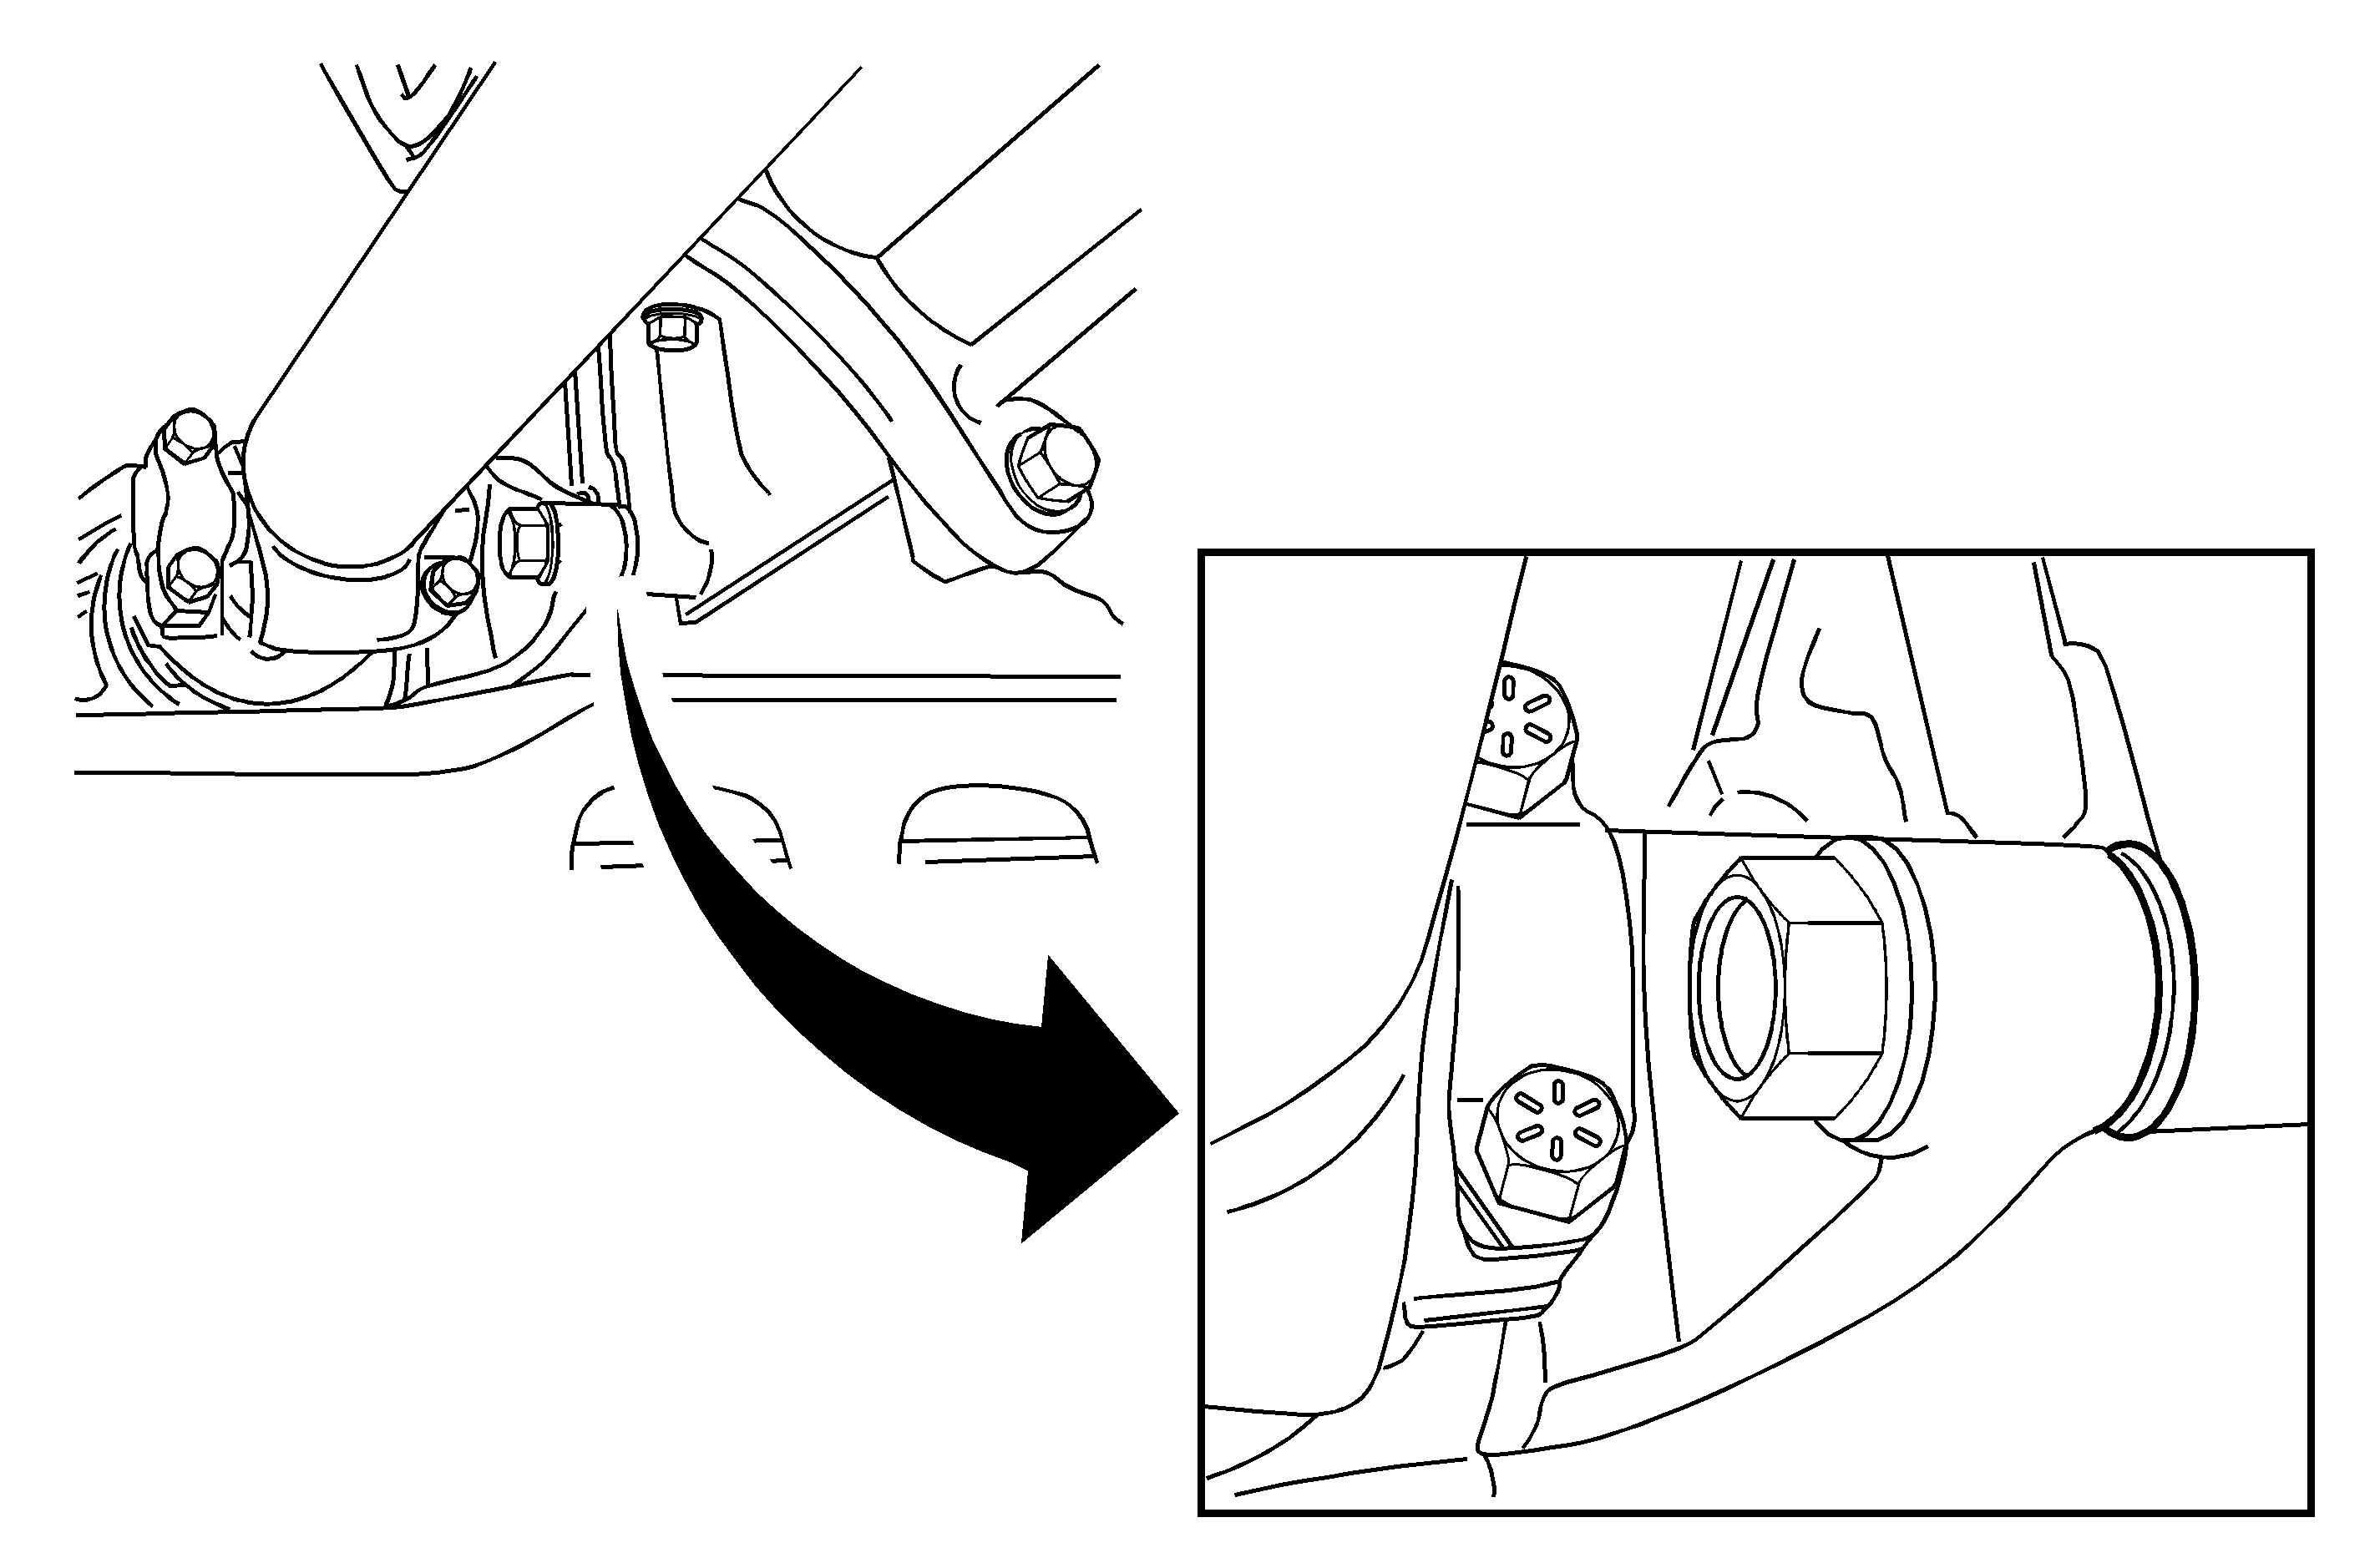
Important: ONLY install ONE washer/shim in the most rearward mounting position as shown above.
Tighten
Tighten the three front drive axle mounting bolts to 85 N·m (63 lb ft).
Tighten
Tighten the front propeller shaft yoke clamp bolts to 20 N·m (15 lb ft).
Specification
The oil level should be between 0-13 mm (0-0.5 in) below the fill plug opening.
Tighten
Tighten the fill plug to 32 N·m (24 lb ft).
Parts Information
Part Number | Description | Qty |
|---|---|---|
2436165 | Washer/Spacer | 1 |
89021677 (in Canada use 89021678) | SAE 75W-90 Synthetic Axle Lubricant | 1 |
Parts are currently available from GMSPO.
Warranty Information
For vehicles repaired under warranty, use:
Labor Operation | Description | Labor Time |
|---|---|---|
F9703 | Washer/Spacer, Frt Axle to Oil Pan - Install | 0.6 hr |
