For 1990-2009 cars only
Tools Required
J 39400-A Halogen Leak Detector
Removal Procedure
- Remove the HVAC module - auxiliary assembly. Refer to Auxiliary HVAC Module Replacement .
- Remove the heater core - auxiliary. Refer to Auxiliary Heater Core Replacement .
- Remove the inverted TORX studs from the evaporator block - auxiliary.
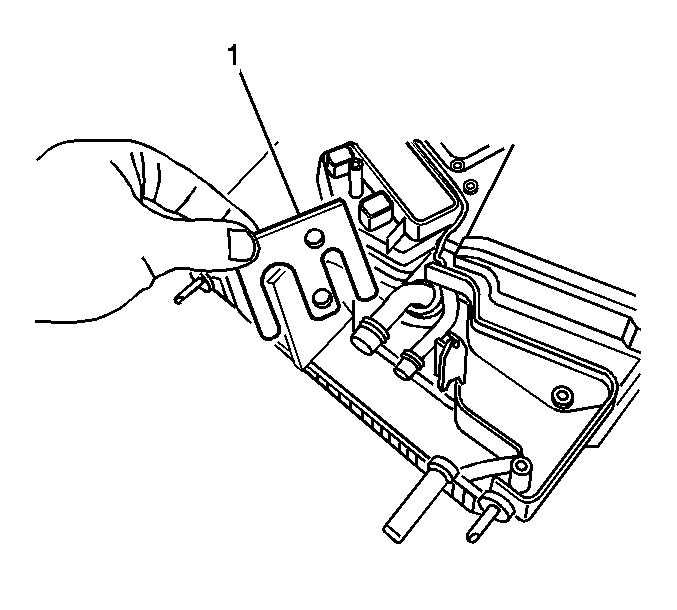
- Remove the backing plate (1) from the evaporator core.
- Remove the screws from the blower motor control processor - auxiliary.
- Remove the blower motor control processor - auxiliary.
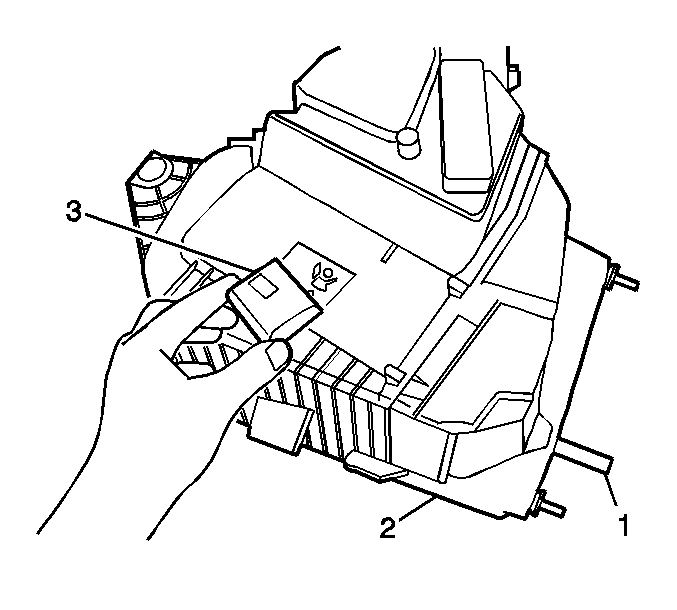
- Remove the screws from the HVAC module - auxiliary case sump (2).
- Remove the HVAC module - auxiliary case sump (2).
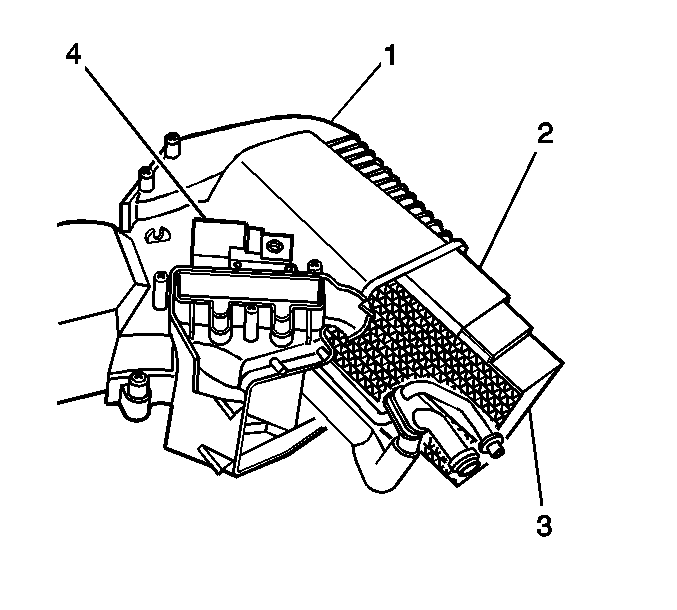
- Remove the evaporator core (3) from the HVAC module - auxiliary (1).
- Carefully remove the foam insulator (2) from around the evaporator core - auxiliary (3).
Installation Procedure
- If replacing the evaporator core, add the proper amount of refrigerant oil to the evaporator. Refer to Refrigerant System Capacities for the capacity information.
- Transfer the foam insulator (2) to the replacement evaporator core-auxiliary (3).
- Transfer the thermal expansion valve-auxiliary to the replacement evaporator core - auxiliary.
- Install the HVAC module - auxiliary case sump (2).
- Install the screws to the HVAC module - auxiliary case sump.
- Install the blower motor control processor - auxiliary.
- Install the backing plate (1) to the evaporator core - auxiliary.
- Install the evaporator block - auxiliary.
- Install the inverted TORX studs to the evaporator block - auxiliary.
- Install the heater core-auxiliary. Refer to Auxiliary Heater Core Replacement .
- Install the HVAC module - auxiliary assembly. Refer to Auxiliary HVAC Module Replacement .
- Leak test the fittings of the component using the J 39400-A .
Install the evaporator core - auxiliary (3) to the rear HVAC module - auxiliary (1).
Notice: Refer to Fastener Notice in the Preface section.
Tighten
Tighten the screws to 2 N·m (18 lb in).
Tighten
Tighten the TORX studs to 2 N·m (18 lb in).
