For 1990-2009 cars only
The caster and camber adjustments are made by loosening the lower control arm adjustment bolts and repositioning the lower control arm.
Important: Before adjusting the caster and camber angles, jounce the front bumper 3 times to allow the vehicle to return to normal height.
Measure and adjust the caster and the camber with the vehicle at curb height. The front suspension Z dimension and the rear suspension D dimension are indicated in Trim Heights. Refer to Trim Height Inspection .- For an accurate reading, do not push or pull on the tires during the alignment process.
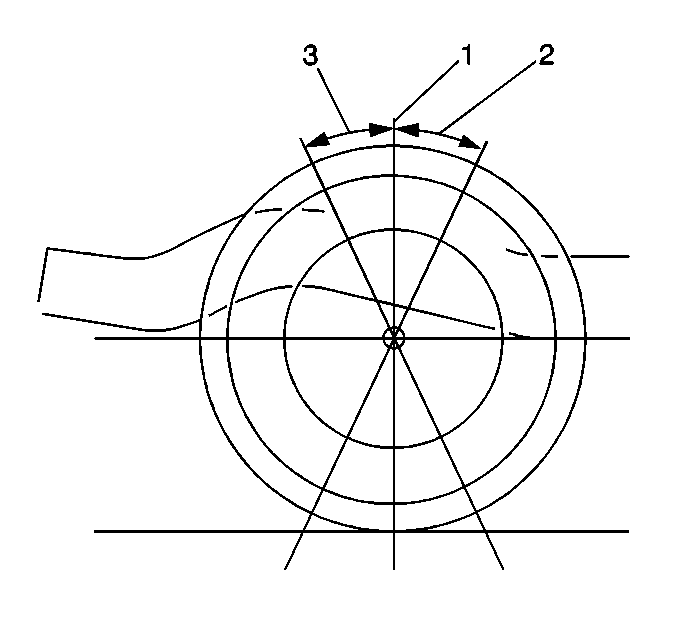
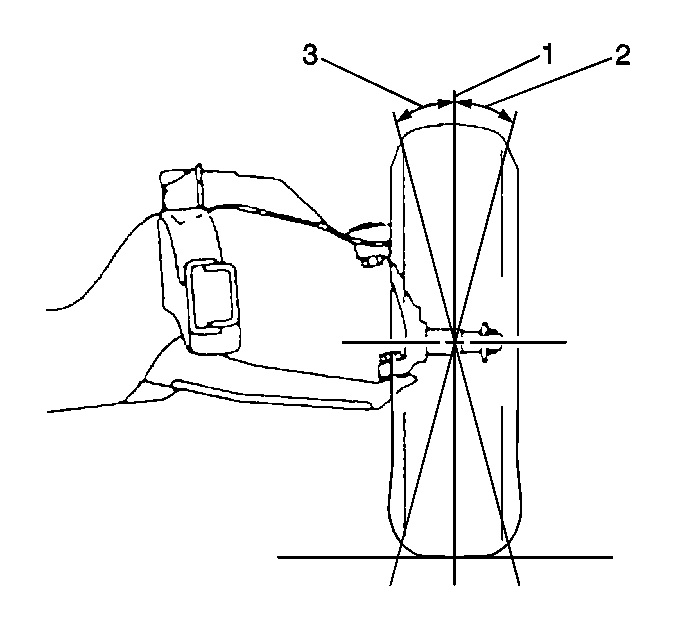
- Determine the caster (2, 3) angle.
- Determine the camber (2, 3) angle.
- Loosen the lower control arm adjustment bolts (1).
- Adjust the caster and the camber angle by repositioning the lower control arm (2) until the specifications have been met.
- Tighten the front lower control arm bracket mounting bolts to 265 N·m (195 lb ft).
- Tighten the rear lower control arm bracket mounting bolts to 240 N·m (177 lb ft).
- Verify that the caster and the camber are still within specifications. Refer to Wheel Alignment Specifications .
- When the caster and camber are within specifications, adjust the toe. Refer to Front Toe Adjustment .
Notice: Refer to Fastener Notice in the Preface section.
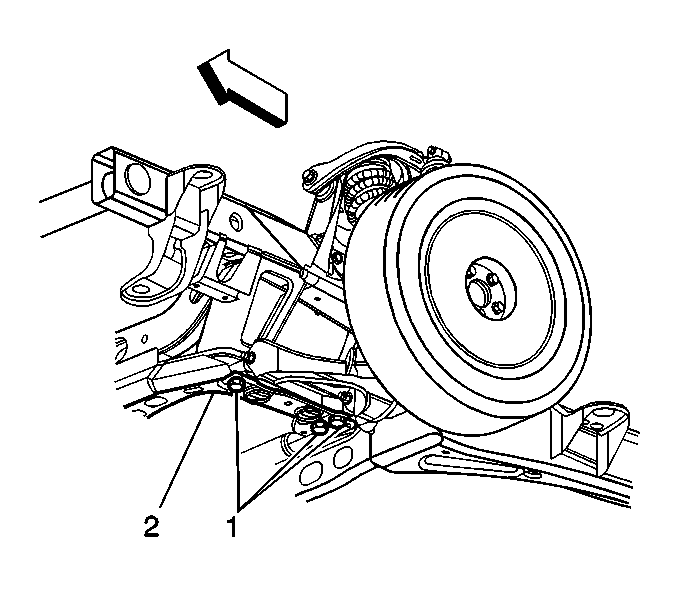
When the adjustments are complete, hold the lower control arm in position so that the specifications do not change while tightening the lower control arm adjustment bolts.
Tighten
