Engine Mount Replacement - Right Side 2 Wheel Drive
Removal Procedure
- Raise and support the vehicle. Refer to Lifting and Jacking the Vehicle in General Information.
- Remove the front tire and wheels. Refer to Tire and Wheel Removal and Installation in Tires and Wheels.
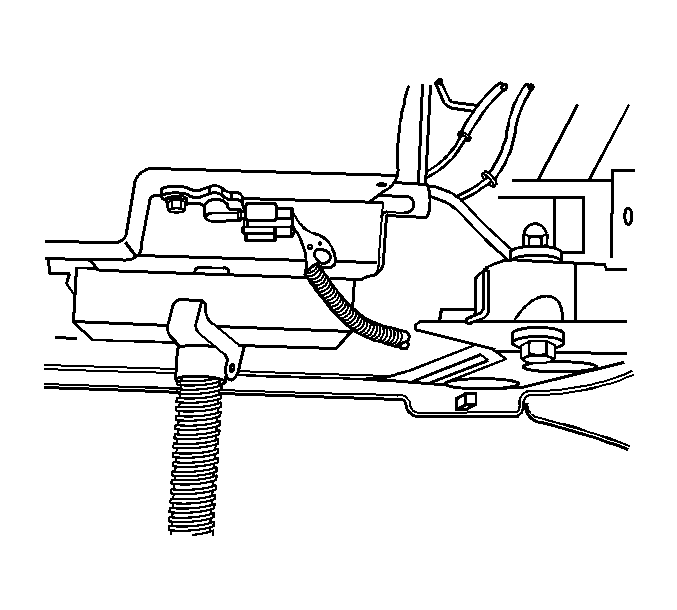
- Remove the engine protection shield. Refer to Engine Protection Shield Replacement in Frame and Underbody.
- Remove the shock module. Refer to Shock Absorber and Spring Assembly Replacement in Front Suspension.
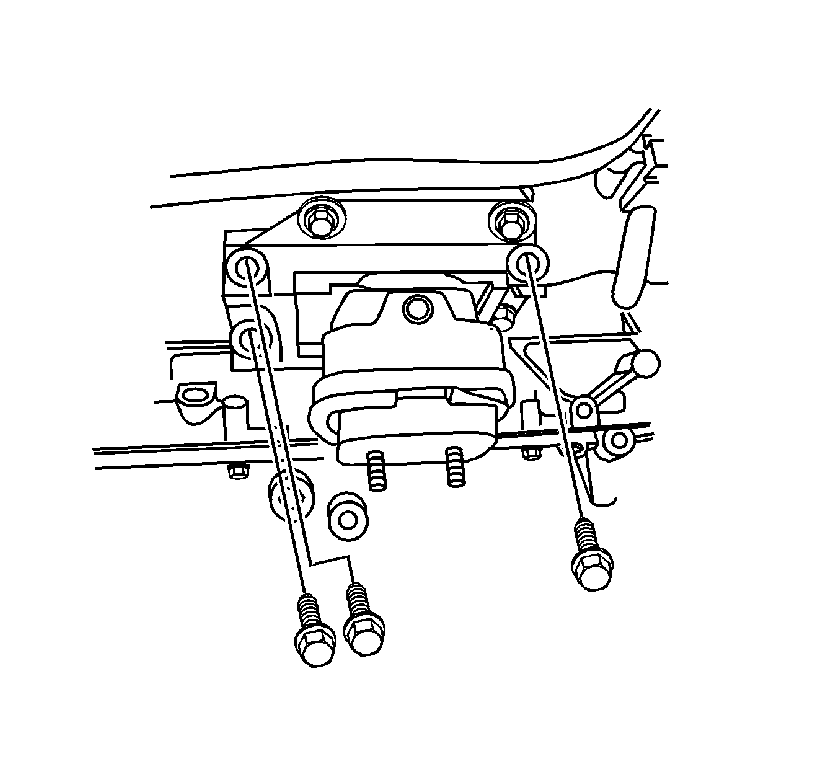
- Remove the lower engine mount retaining nuts from the engine mount frame bracket.
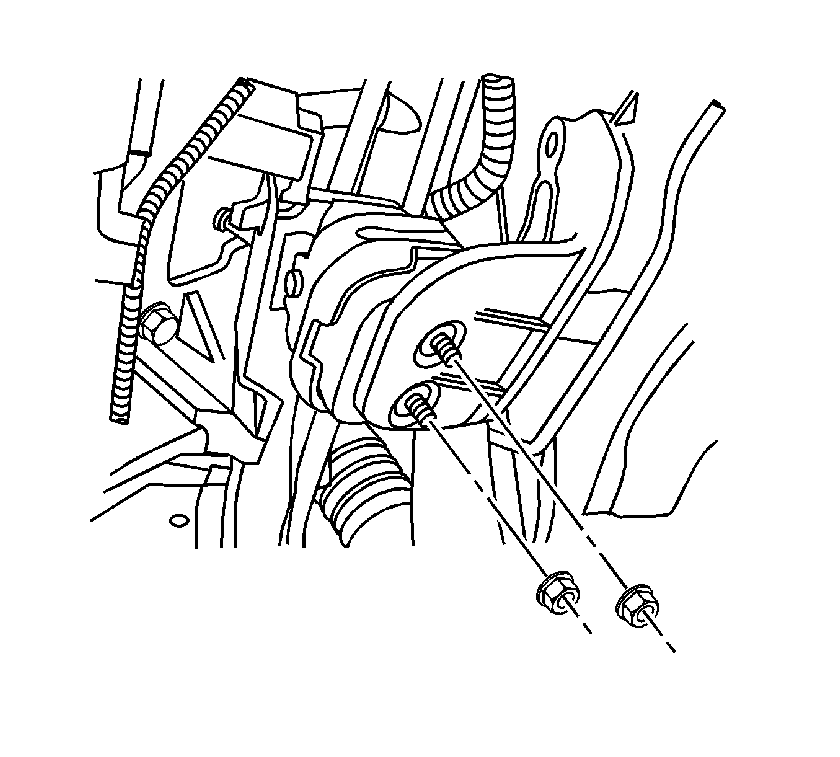
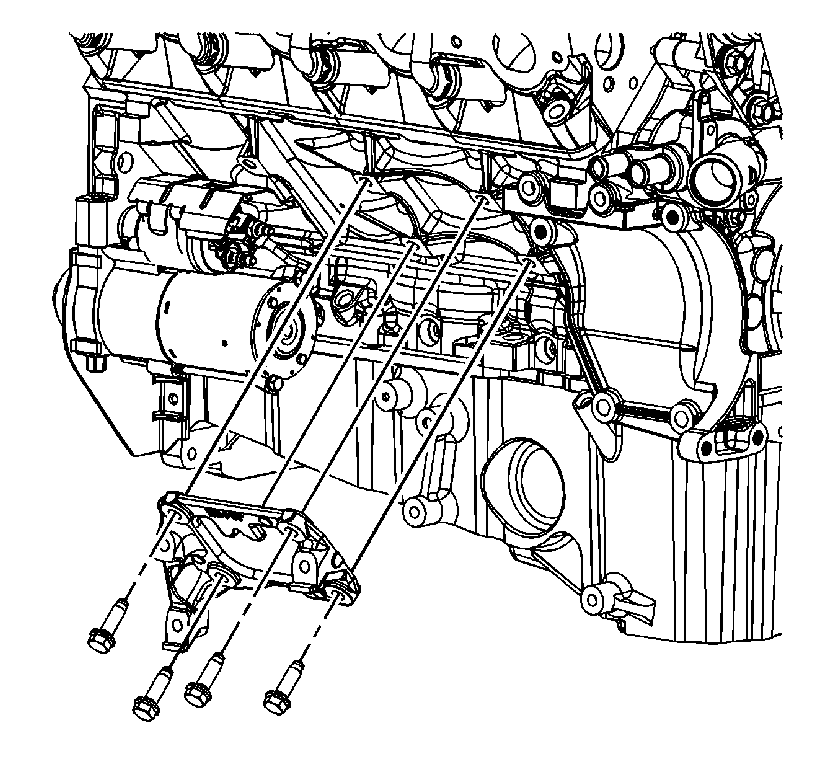
- Remove the 3 mounting bolts from the upper engine mount bracket to engine block bracket.
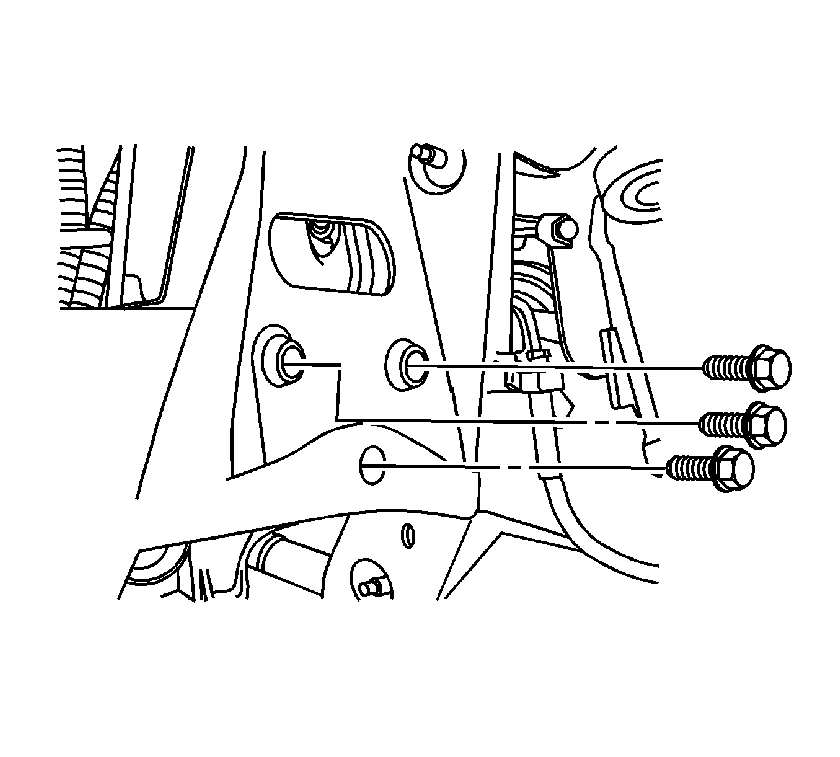
- Remove the 3 frame engine mount bracket retaining bolts.
- Install a pole jack underneath the oil pan.
- Insert a block of wood between the oil pan and the pole jack.
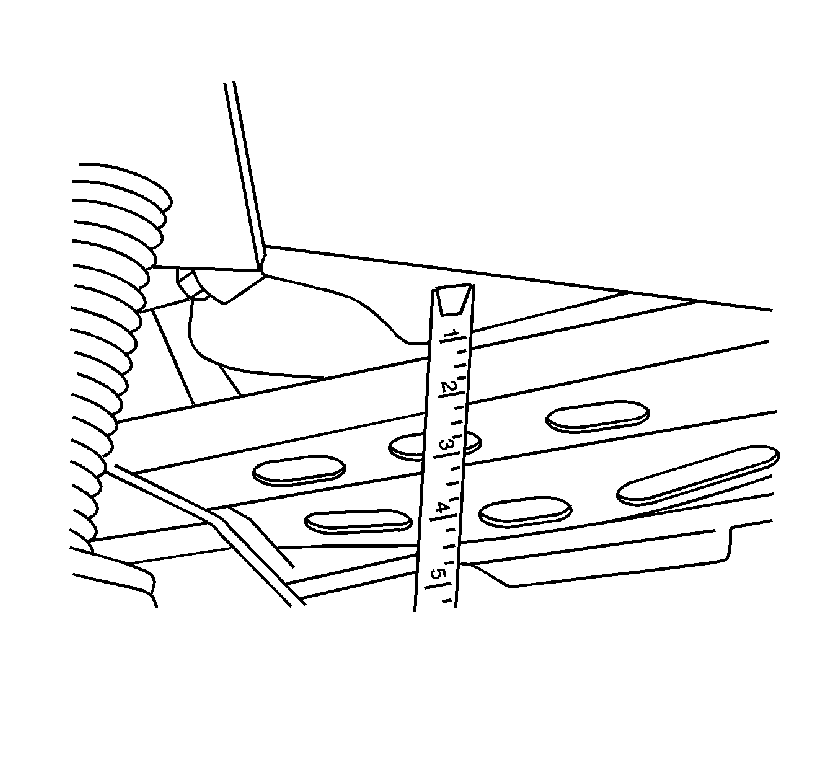
- Raise the engine 2 ¼ inches measuring from the bottom of the oil pan to the front edge of the transmission support crossmember.
- Shift the engine towards the left side of the frame.
- Remove the engine mount frame bracket from the frame.
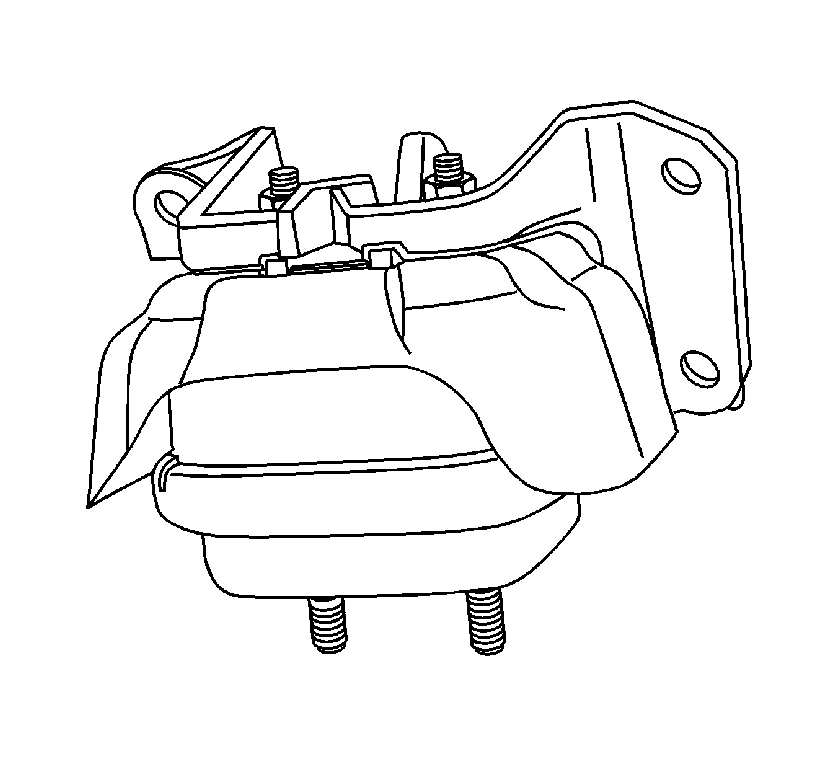
- Remove the engine mount with upper engine mount bracket as an assembly.
- Separate the engine mount from the upper engine mount bracket.
- Remove the engine mount bracket spacer if damaged.
Installation Procedure
- Install the engine mount bracket spacer if it has been replaced.
- Install the engine mount to the upper engine mount bracket.
- Install the engine mount to engine.
- Install the engine mount frame bracket to the frame.
- Install the engine mount frame bracket retaining bolts.
- Shift engine back to the right side of the frame.
- Install the left side engine mount frame bracket.
- Install the left side engine mount frame bracket retaining bolts.
- Lower the engine, making sure to align engine mount studs with holes in frame bracket.
- Remove the pole jack and block of wood.
- Tighten the engine mount nuts.
- Install the shock module. Refer to Shock Absorber and Spring Assembly Replacement in Front Suspension.
- Install the Engine Protection Shield. Refer to Engine Protection Shield Replacement in Frame and Underbody.
- Install the front tire and wheels. Refer to Tire and Wheel Removal and Installation in Tires and Wheels.
- Lower the vehicle. Refer to Lifting and Jacking the Vehicle in General Information.
Notice: Refer to Fastener Notice in the Preface section.
Tighten
Torque the engine mount bracket spacer bolts to 50 N·m (37 lb ft).
Important: Make sure that the cut out side of the engine mount shield is positioned away from the engine.
Tighten
Tighten the engine mount nuts to 50 N·m (37 lb ft)
Tighten
Torque the engine mount bolts to 50 N·m (37 lb ft).
Tighten
Torque the engine mount frame bracket retaining bolts to 100 N·m
(74 lb ft).
Tighten
Torque the left side engine mount frame bracket retaining bolts to 100 N·m
(74 lb ft).
Tighten
Torque the engine mount nuts to 50 N·m (37 lb ft).
Engine Mount Replacement - Right Side 4 Wheel Drive
Removal Procedure
- Raise and support the vehicle. Refer to Lifting and Jacking the Vehicle in General Information.
- Remove the front tire and wheels. Refer to Tire and Wheel Removal and Installation in Tires and Wheels.
- Remove the engine protection shield. Refer to Engine Protection Shield Replacement in Frame and Underbody.
- Remove the shock module. Refer to Shock Absorber and Spring Assembly Replacement in Front Suspension.
- Remove the left side wheel drive shaft. Refer to Wheel Drive Shaft Replacement in Wheel Drive Shafts.
- Remove the front differential carrier. Refer to Differential Carrier Assembly Replacement in Front Drive Axle.
- Remove the lower engine mount retaining nuts from the engine mount frame bracket.
- Remove the 3 mounting bolts from the upper engine mount bracket to engine block bracket.
- Remove the 3 frame engine mount bracket retaining bolts.
- Install a pole jack underneath the oil pan.
- Insert a block of wood between the oil pan and the pole jack.
- Raise the engine 2 ¼ inches measuring from the bottom of the oil pan to the front edge of the transmission support crossmember.
- Shift the engine towards the left side of the frame.
- Remove the engine mount frame bracket from the frame.
- Remove the engine mount with upper engine mount bracket as an assembly.
- Separate the engine mount from the upper engine mount bracket.
- Remove the engine mount bracket spacer if damaged.
Installation Procedure
- Install the engine mount bracket spacer if it has been replaced.
- Install the engine mount to the upper engine mount bracket.
- Install the engine mount to engine.
- Install the engine mount frame bracket to the frame.
- Install the engine mount frame bracket retaining bolts.
- Shift the engine back towards the right side of the frame.
- Install the left side engine mount frame bracket.
- Install the left side engine mount frame bracket retaining bolts.
- Lower the engine, making sure to align engine mount studs with holes in frame bracket.
- Remove the pole jack and block of wood.
- Tighten the engine mount nuts.
- Install the shock module. Refer to Shock Absorber and Spring Assembly Replacement in Front Suspension.
- Install the front differential carrier. Refer to Differential Carrier Assembly Replacement in Front Drive Axle.
- Install the left side wheel drive shaft. Refer to Wheel Drive Shaft Replacement in Wheel Drive Shafts.
- Install the Engine Protection Shield. Refer to Engine Protection Shield Replacement in Frame and Underbody.
- Install the front tire and wheels. Refer to Tire and Wheel Removal and Installation in Tires and Wheels.
- Lower the vehicle. Refer to Lifting and Jacking the Vehicle in General Information.
Notice: Refer to Fastener Notice in the Preface section.
Tighten
Torque the engine mount spacer bolts to 50 N·m (37 lb ft).
Important: Make sure that the cut out side of the engine mount shield is positioned away from the engine.
Tighten
Tighten the engine mount nuts to 50 N·m (37 lb ft)
Tighten
Torque the engine mount bolts to 50 N·m (37 lb ft).
Tighten
Torque the engine mount frame bracket retaining bolts to 100 N·m
(74 lb ft).
Tighten
Torque the left side engine mount frame bracket retaining bolts to 100 N·m
(74 lb ft).
Tighten
Torque the engine mount nuts to 50 N·m (37 lb ft).
