Outside Rearview Mirror Glass Replacement w/o DE7
Removal Procedure
Caution: When working with any type of glass or sheet metal with exposed or rough edges, wear approved safety glasses and gloves in order to reduce the chance of personal injury.
- Apply pressure to the lower inboard corner of the mirror face.
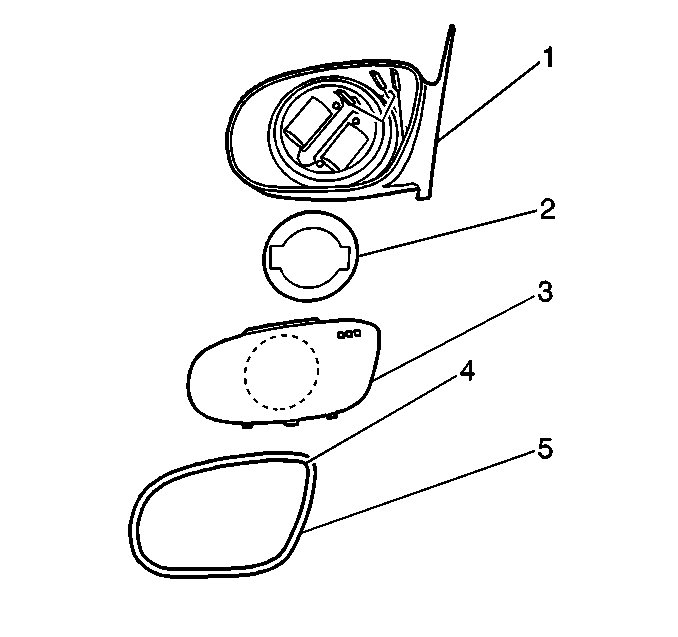
- Grasp the mirror backing plate (3) at the upper outboard corner.
- Twist downward and pull back in order to remove the mirror face from the mirror assembly.
- Disconnect the electrical connectors.

Installation Procedure
Caution: When working with any type of glass or sheet metal with exposed or rough edges, wear approved safety glasses and gloves in order to reduce the chance of personal injury.
- Connect the electrical connectors.
- Install the insulator (2)
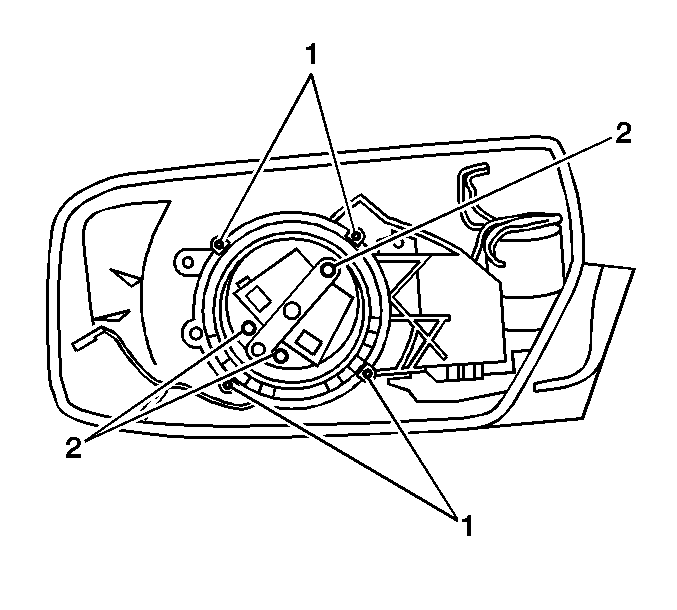
- Align the latches on the mirror backing plate to the tabs (1) on the power mirror motor.
- Carefully press the mirror and backing plate into place until an audible click is heard.
- Verify proper operation of the power mirror.


Outside Rearview Mirror Glass Replacement w/ DE7
Removal Procedure
Caution: When working with any type of glass or sheet metal with exposed or rough edges, wear approved safety glasses and gloves in order to reduce the chance of personal injury.
- Apply pressure to the lower inboard corner of the mirror face.
- Grasp the mirror backing plate (3) at the upper outboard corner.
- Twist downward and pull back in order to remove the mirror face from the mirror assembly.
- Disconnect the electrical connectors.

Installation Procedure
Caution: When working with any type of glass or sheet metal with exposed or rough edges, wear approved safety glasses and gloves in order to reduce the chance of personal injury.
- Connect the electrical connectors.
- Install the insulator (2)
- Align the latches on the mirror backing plate to the tabs on the power mirror motor.
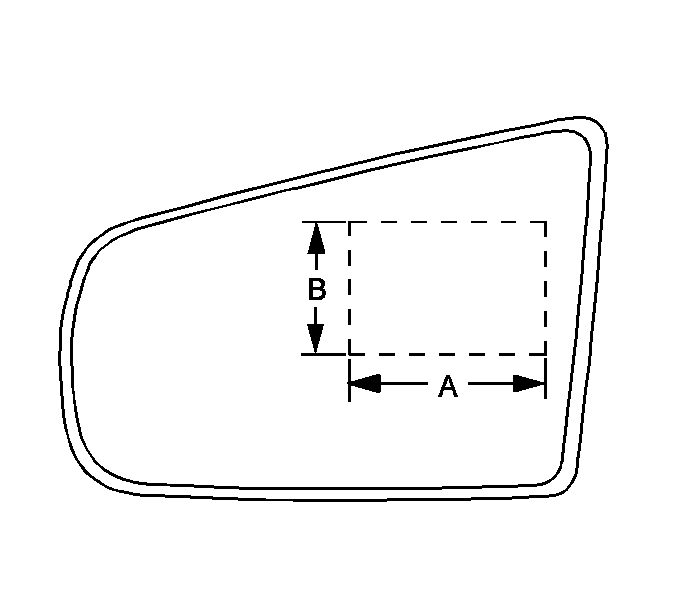
- Place a 6 (B) x 9 (A) cm (2 x 3 in) block of wood in the indicated target area. This will distribute pressure evenly.
- Carefully press the mirror and backing plate into place until an audible click is heard.
- Verify proper operation of the power mirror.


Important: In order to avoid damaging electrochromatic mirrors, yellowing and/or silver delamination, pressure must not be applied to the center of the mirror.
