Special Tools
| • | EN-48108 Rear Main Oil Seal Installer |
| • | J-23444-A Extreme Press Lubricant - 1/4 Ounce Tube |
Caution: Do not remove the protective sleeve from the seal. The sleeve assures the seal is installed correctly and protects the seal from damage. If removed, the EN-48108 installation tool will not work.
Caution: Clean the crankshaft sealing surface with a clean, lint-free towel. Inspect lead-in edge of crankshaft for burrs/sharp edges that could damage the rear main oil seal. Remove burrs/sharp edges with crocus cloth before proceeding.
Caution: Do not remove protective nylon sleeve prior to installation. The rear main oil seal installation tool is designed to install the rear main seal with the protective sleeve in place. Never apply or use any oil, lubricants or sealing compounds on the crankshaft rear main oil seal.
Note: Before replacement of the new design crankshaft rear main oil seal, ensure the positive crankcase ventilation (PCV) system is operating correctly.
A new design crankshaft rear main oil seal and installation tool, EN-48108 Rear Main Oil Seal Installer , has been released. This seal incorporates features that improve high mileage durability. Replace the crankshaft rear main oil seal with the new design rear main oil seal, GM P/N 12592195 (Canadian P/N 12592195).
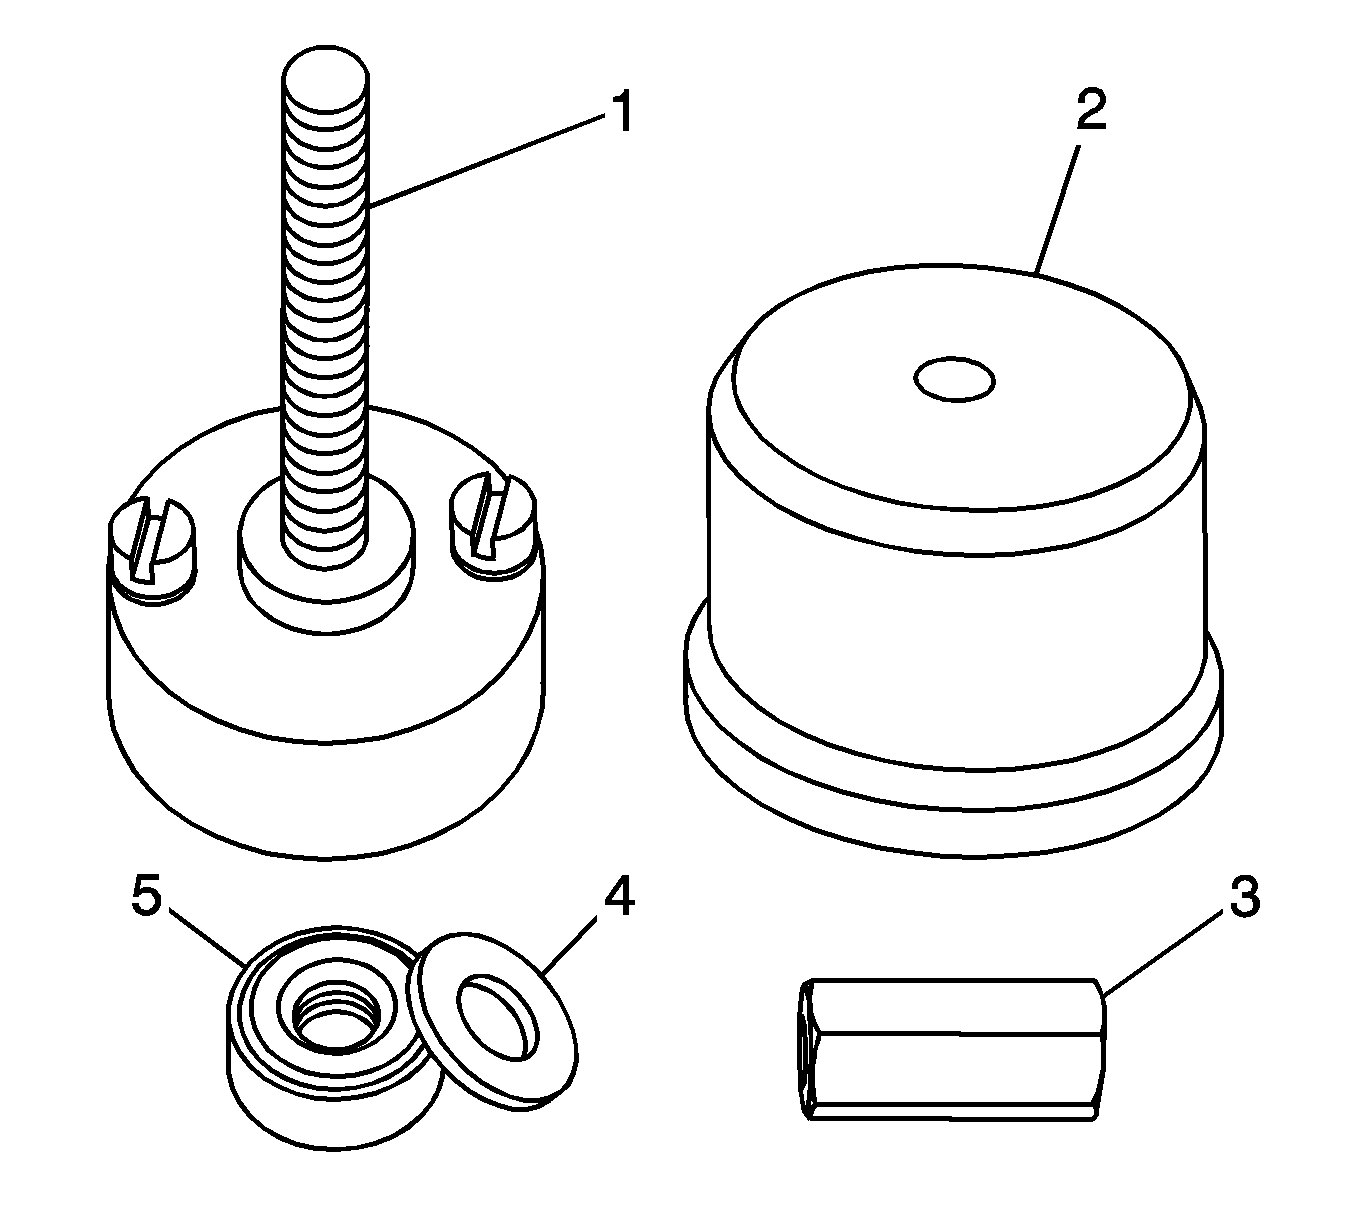
The EN-48108 Installer has a unique design to allow the technician to easily install the rear main seal squarely to the correct depth and direction. Before proceeding with installation, review the illustration to become familiar with the following components:
| • | Mandrel (1) |
| • | Drive Drum (2) |
| • | Drive Nut (3) |
| • | Washer (4) |
| • | Bearing (5) |
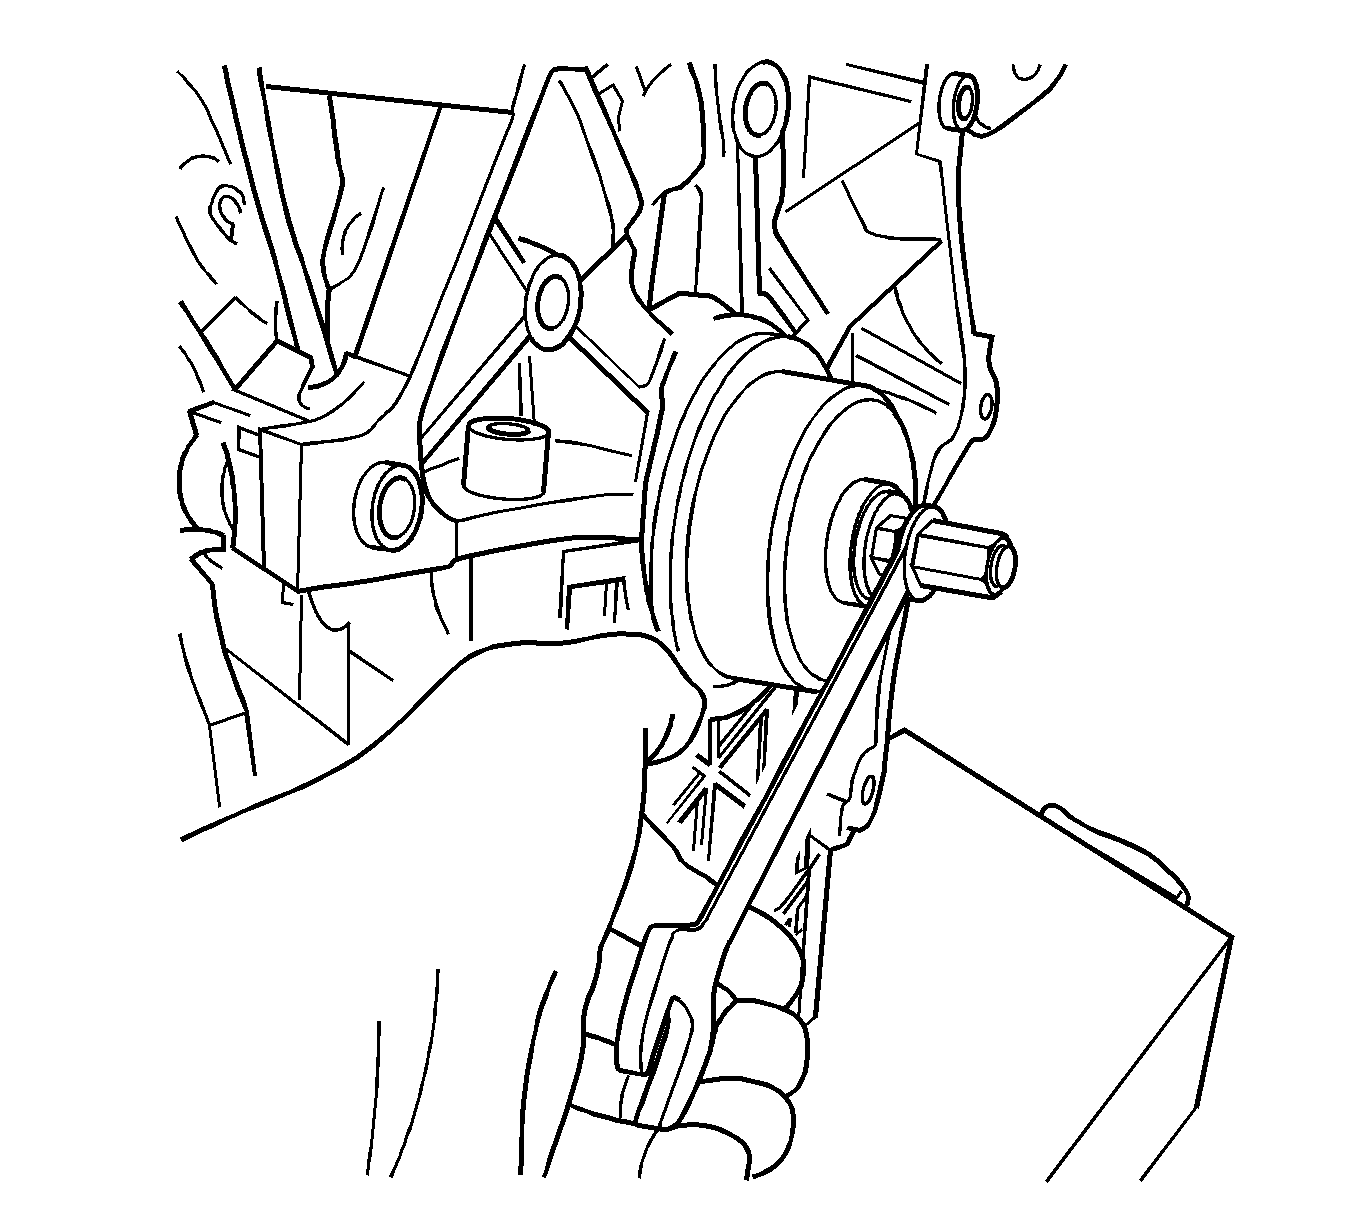
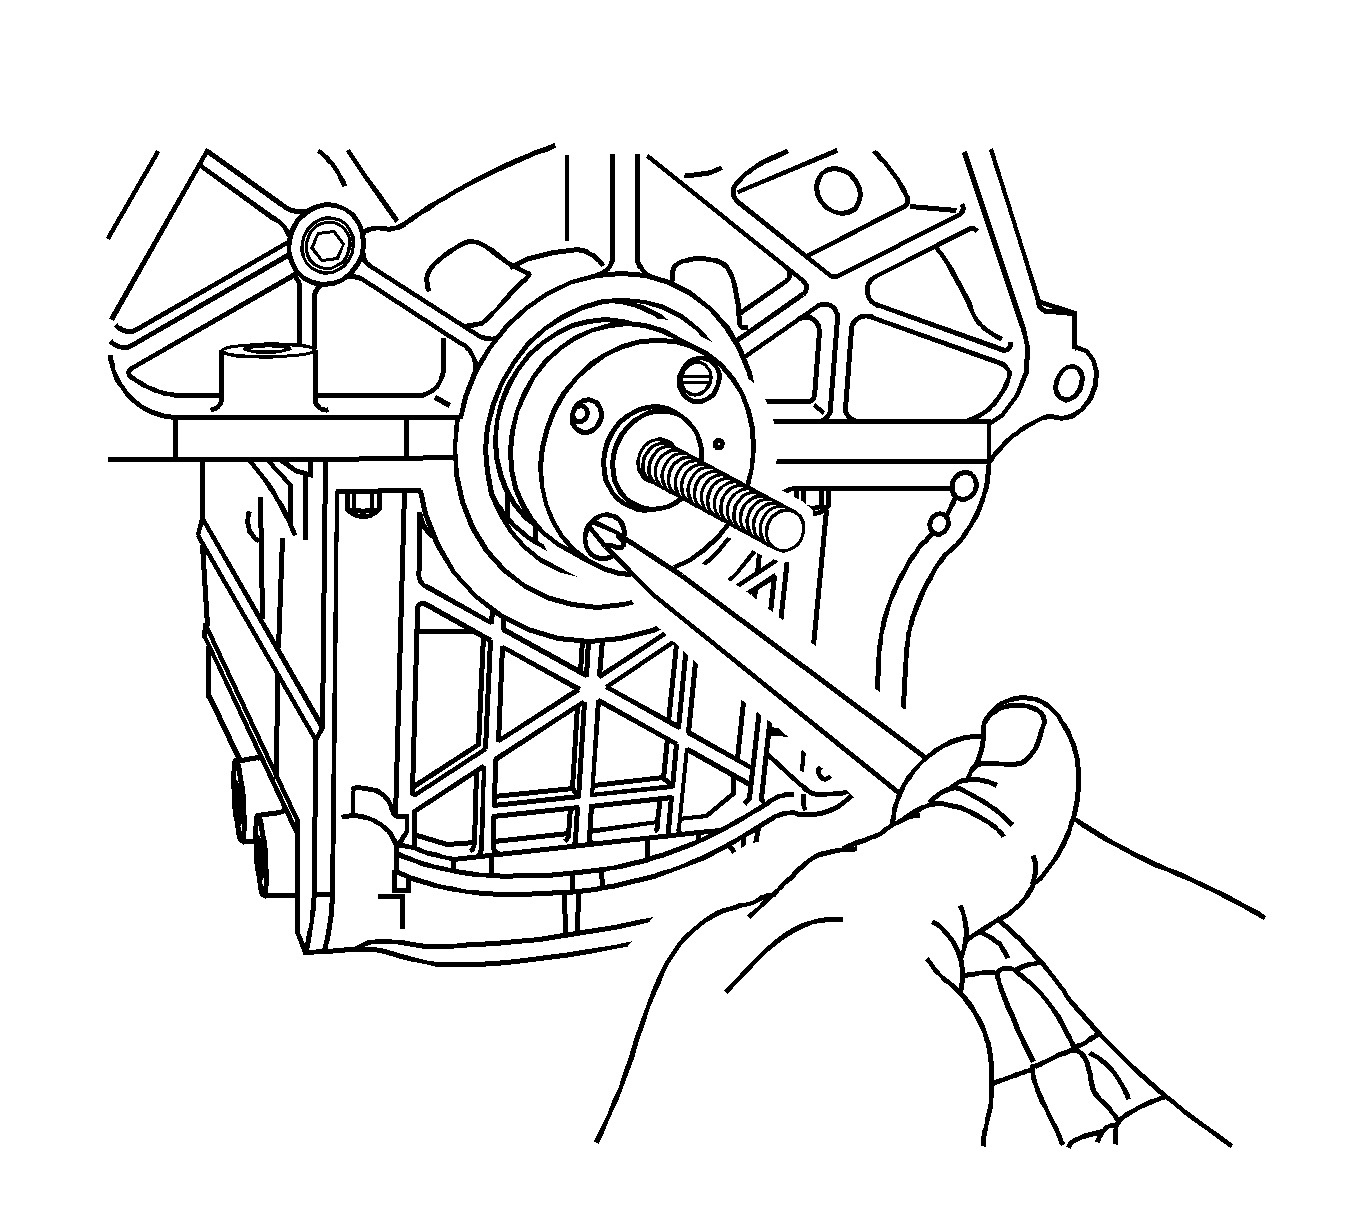
- Align the mandrel dowel pin to the dowel pin hole in the crankshaft.
- Using a large flat-blade screwdriver, tighten the 2 mandrel screws to the crankshaft. Ensure the mandrel is snug to the crankshaft hub.
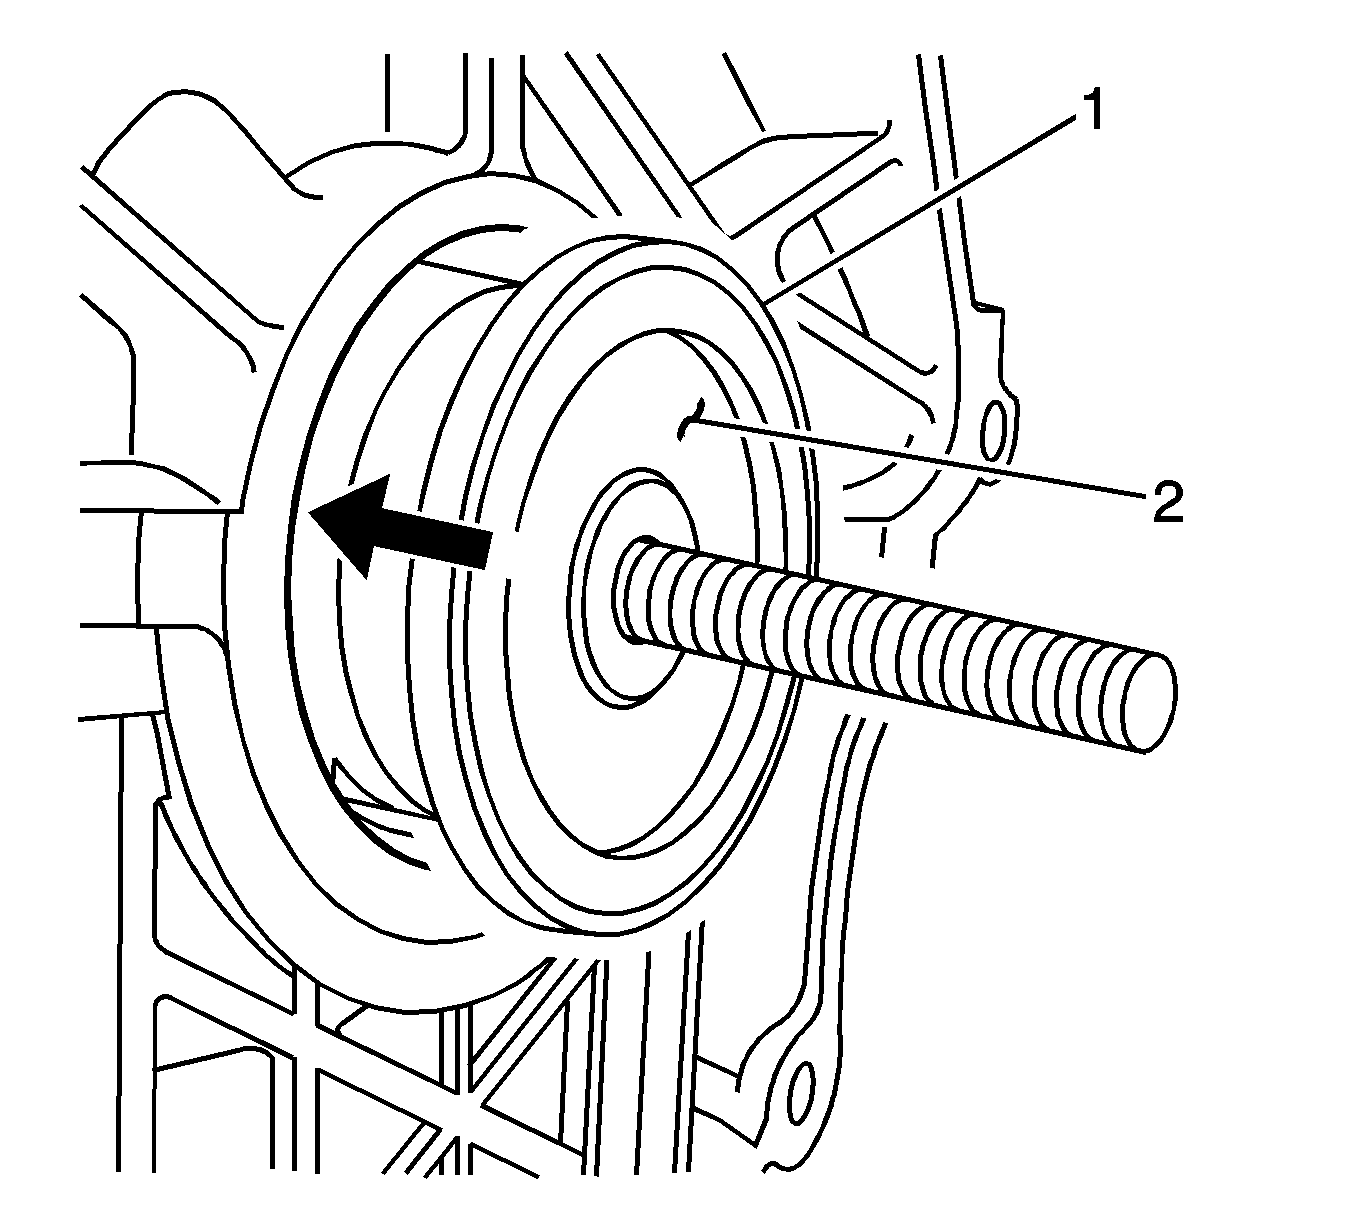
- Install the rear main seal (1), with the protective nylon sleeve attached (2), onto the mandrel. The seal, if properly installed, will center on a step that protrudes from the center of the mandrel. As an error proof, the seal will fit only 1 way onto the mandrel.
- Install the outer drive drum onto the mandrel.
- Install the bearing, washer, and drive nut onto the threaded shaft.
- Using a wrench, turn the drive nut on the mandrel, which will push the seal into the engine block bore. Turn the wrench until the drive drum is snug and flush against the engine block.
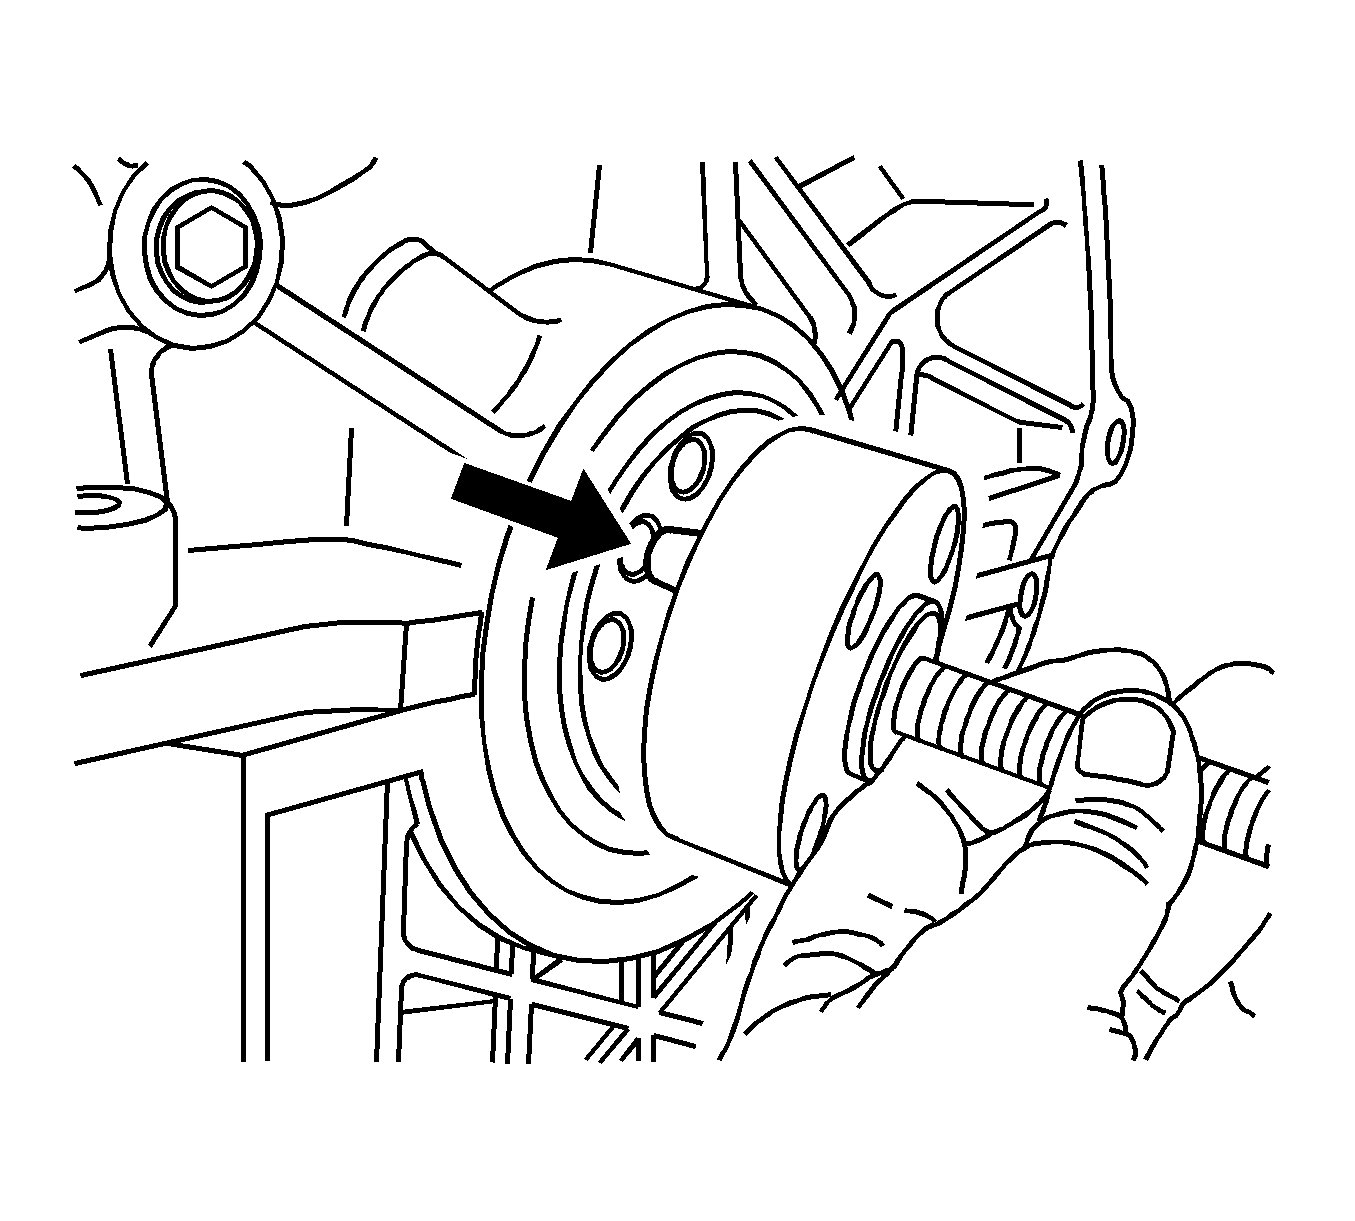
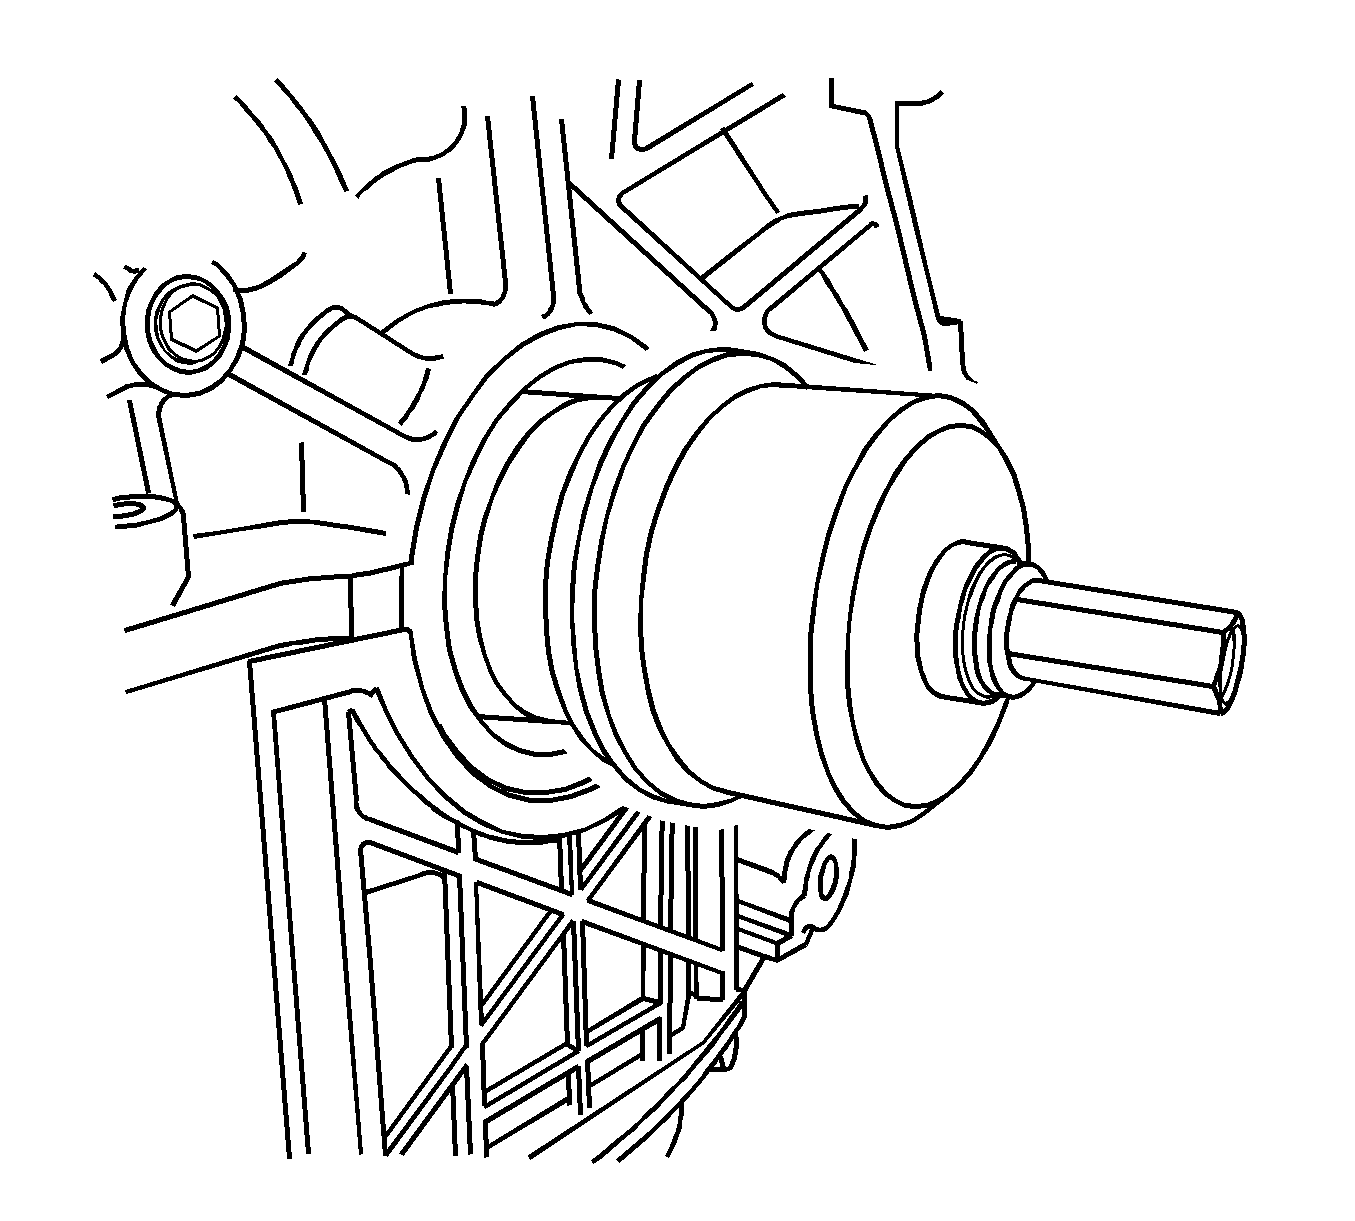
- Loosen and remove the drive nut, washer, bearing, and drive drum. Discard the protective nylon sleeve.
- Verify that the seal has seated properly.
- Use a flat-blade screwdriver in order to remove the 2 attachment screws from the mandrel and remove the mandrel from the crankshaft hub.
- Install the engine flywheel. Refer to Engine Flywheel Replacement .
- Install the transmission. Refer to Transmission Replacement .
- Inspect for proper fluid levels.
- Inspect for leaks.
Note: Before installing the outer drive drum, bearing, washer, and drive nut onto the threaded shaft, apply a small amount of the extreme pressure lubricant J-23444-A Extreme Press Lubricant - 1/4 Ounce Tube , provided in the tool kit.