For 1990-2009 cars only
Special Tools
J 45059 Angle Meter
Removal Procedure
- Drain the cooling system. Refer to Cooling System Draining and Filling.
- Drain the engine oil. Refer to Engine Oil and Oil Filter Replacement.
- Lower the vehicle.
- Remove the lower intake manifold. Refer to Lower Intake Manifold Replacement.
- Remove the valve rocker arms and pushrods. Refer to Valve Rocker Arm and Push Rod Replacement.
- Remove the exhaust manifold. Refer to Exhaust Manifold Replacement - Right Side.
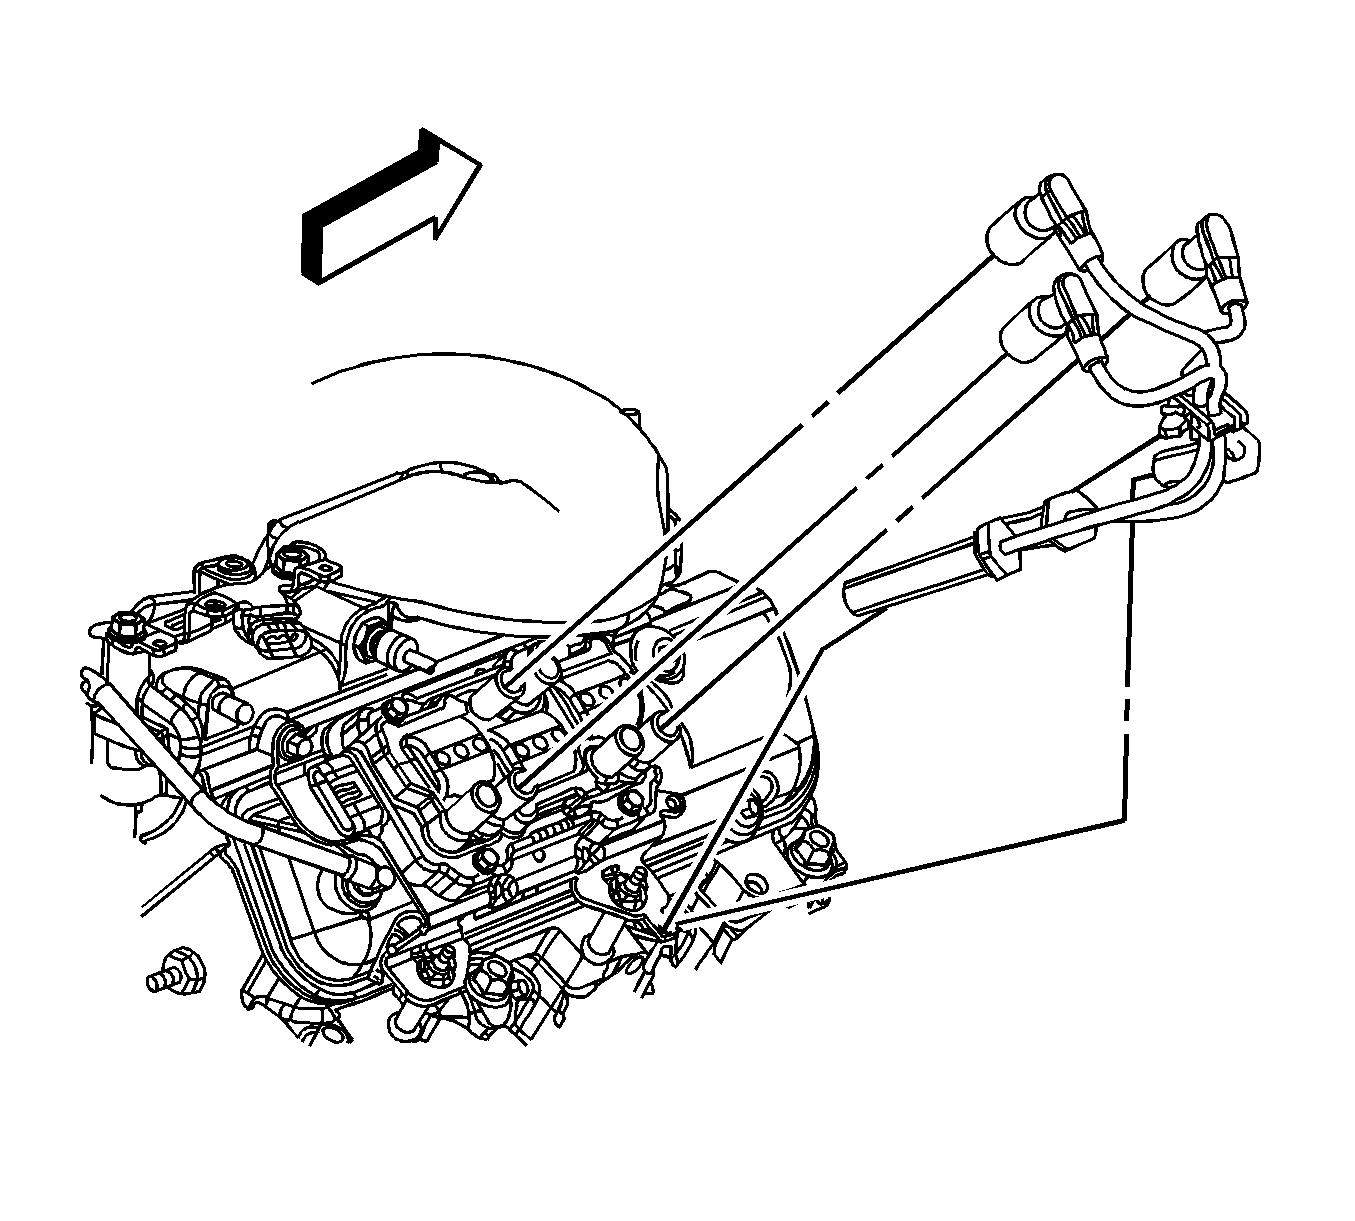
- Disconnect the right spark plug wires from the spark plugs.
- Remove the spark plug wire clip from the bracket.
- Disconnect and remove the right spark plug wires from the ignition coil.
- Remove the right spark plugs. Refer to Spark Plug Replacement.
- Remove the Power Steering Fluid Reservoir. Refer to Power Steering Fluid Reservoir Replacement.
- Remove Drive Belt Tensioner. Refer Drive Belt Tensioner Replacement
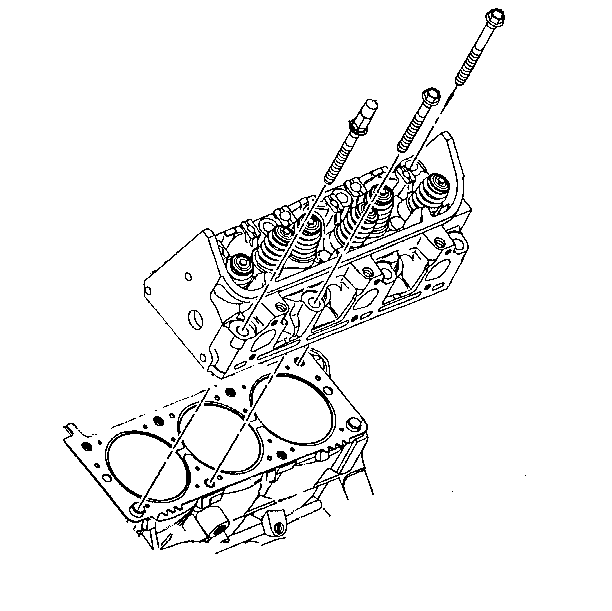
- Remove and discard the cylinder head bolts.
- Remove the cylinder head.
- Remove and discard the cylinder head gasket.
- Remove the cylinder head locator dowel pins, if necessary.
Installation Procedure
- Install the cylinder head locator dowel pins, if necessary.
- Inspect the cylinder head locator dowel pins for proper installation.
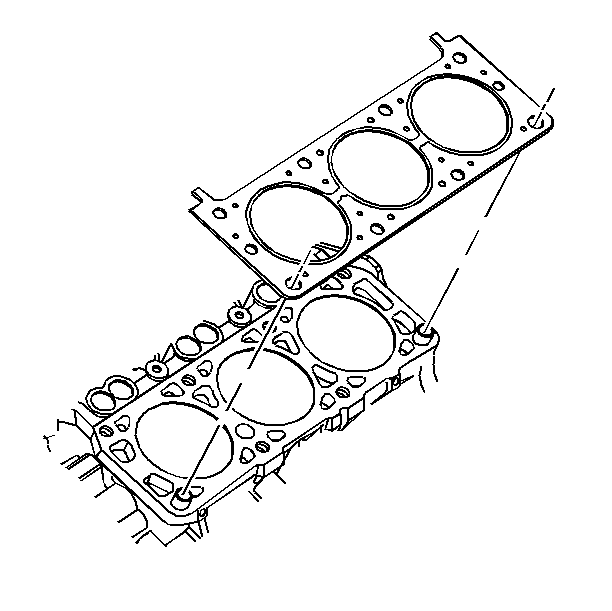
- Install a NEW cylinder head gasket.
- Install the cylinder head onto the locator pins and the engine.
- Install NEW cylinder head bolts finger tight.
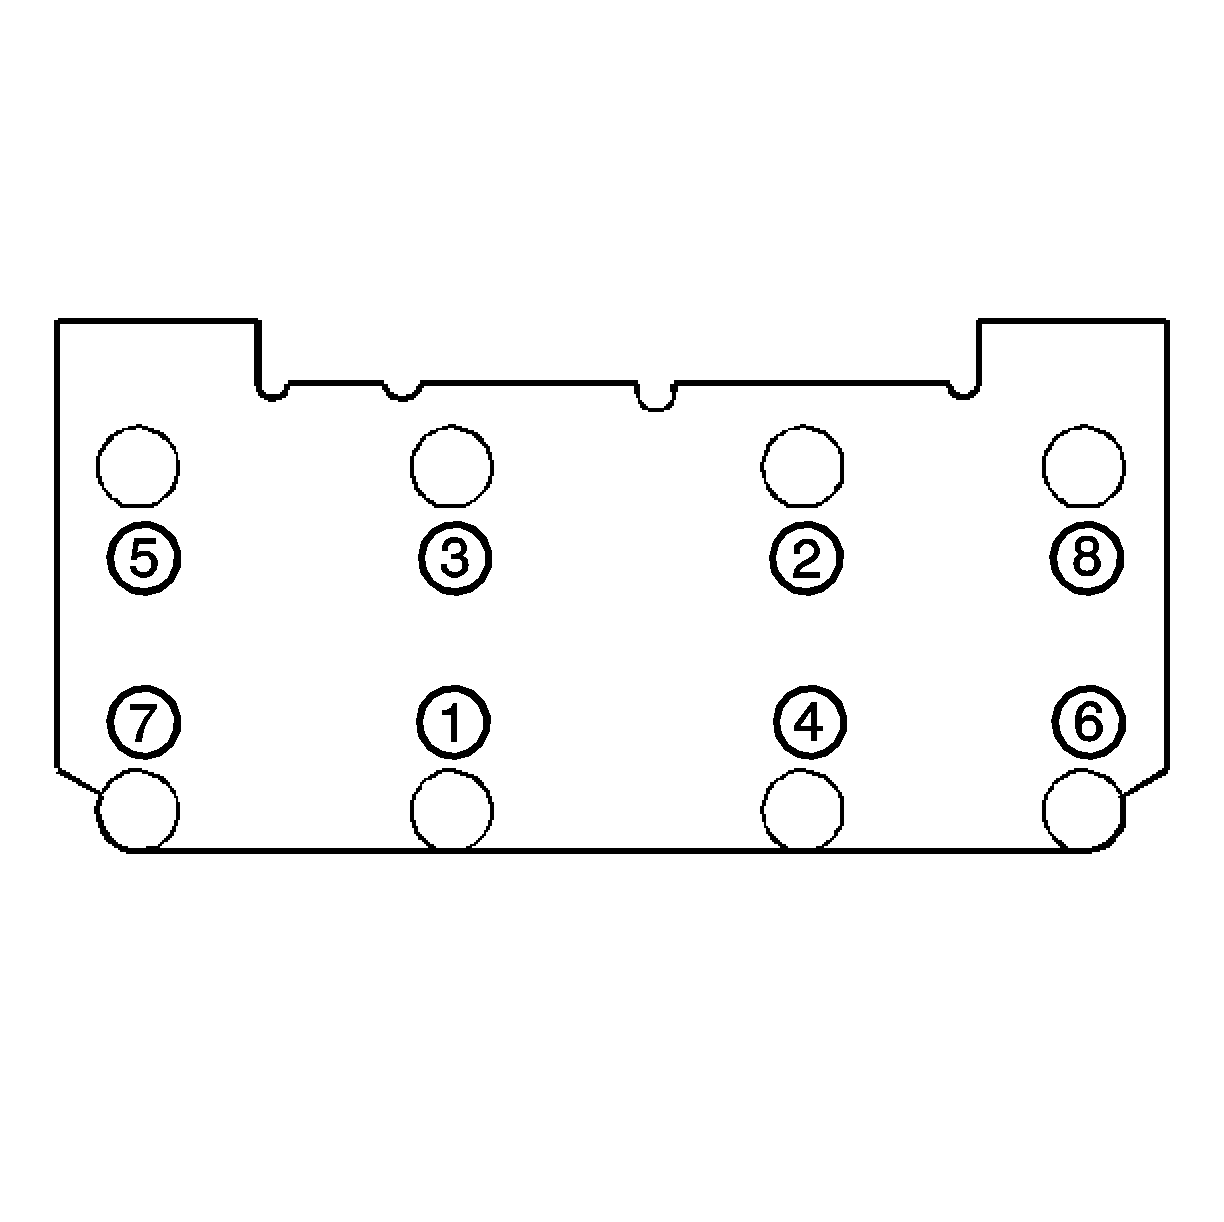
- Install the NEW small hex cylinder head bolts (5 and 8).
- Install the NEW large hex cylinder head bolts (1, 2, 3, 4, 6 and 7).
- Install the generator. Refer to Generator Replacement.
- Install the right spark plugs. Refer to Spark Plug Replacement.
- Install and connect the right spark plug wires to the ignition coil.
- Install the spark plug wire clip to the bracket.
- Connect the right spark plug wires to the spark plugs.
- Install the exhaust manifold. Refer to Exhaust Manifold Replacement - Right Side.
- Install the valve rocker arms and pushrods. Refer to Valve Rocker Arm and Push Rod Replacement.
- Install the lower intake manifold. Refer to Lower Intake Manifold Replacement.
- Fill the engine with oil. Refer to Engine Oil and Oil Filter Replacement.
- Fill the cooling system. Refer to Cooling System Draining and Filling.
- Inspect for leaks.
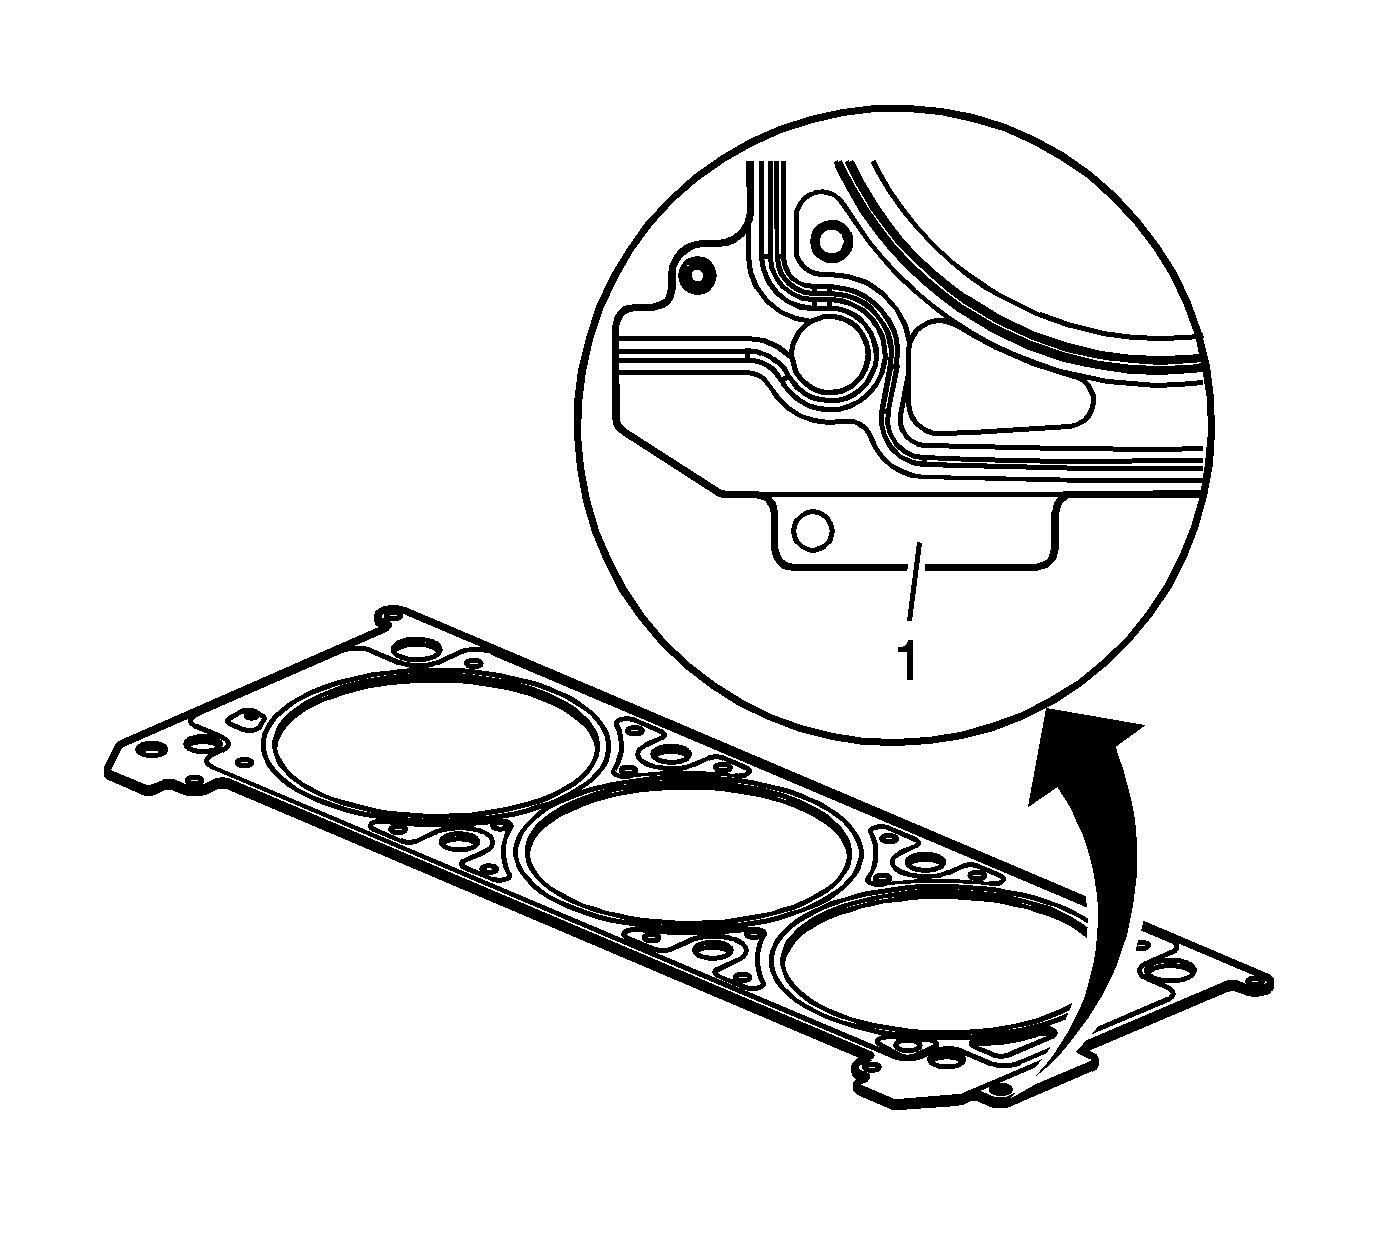
Caution: Head gaskets are specific for right hand and left hand applications, and also must be installed with the correct side facing up. Note the markings (1) on the head gaskets for proper installation. Failure to do so may lead to engine damage.
Caution: This component uses torque-to-yield bolts. When servicing this component do not reuse the bolts, New torque-to-yield bolts must be installed. Reusing used torque-to-yield bolts will not provide proper bolt torque and clamp load. Failure to install NEW torque-to-yield bolts may lead to engine damage.
Caution: Refer to Fastener Caution in the Preface section.
| 7.1. | Tighten the cylinder head bolts a first pass in sequence to 60 N·m (44 lb ft). |
| 7.2. | Tighten the cylinder head bolts a final pass in sequence to 140 degrees using the J 45059 . |
