For 1990-2009 cars only
Removal Procedure
- Remove power steering reservoir. refer to Power Steering Fluid Reservoir Replacement.
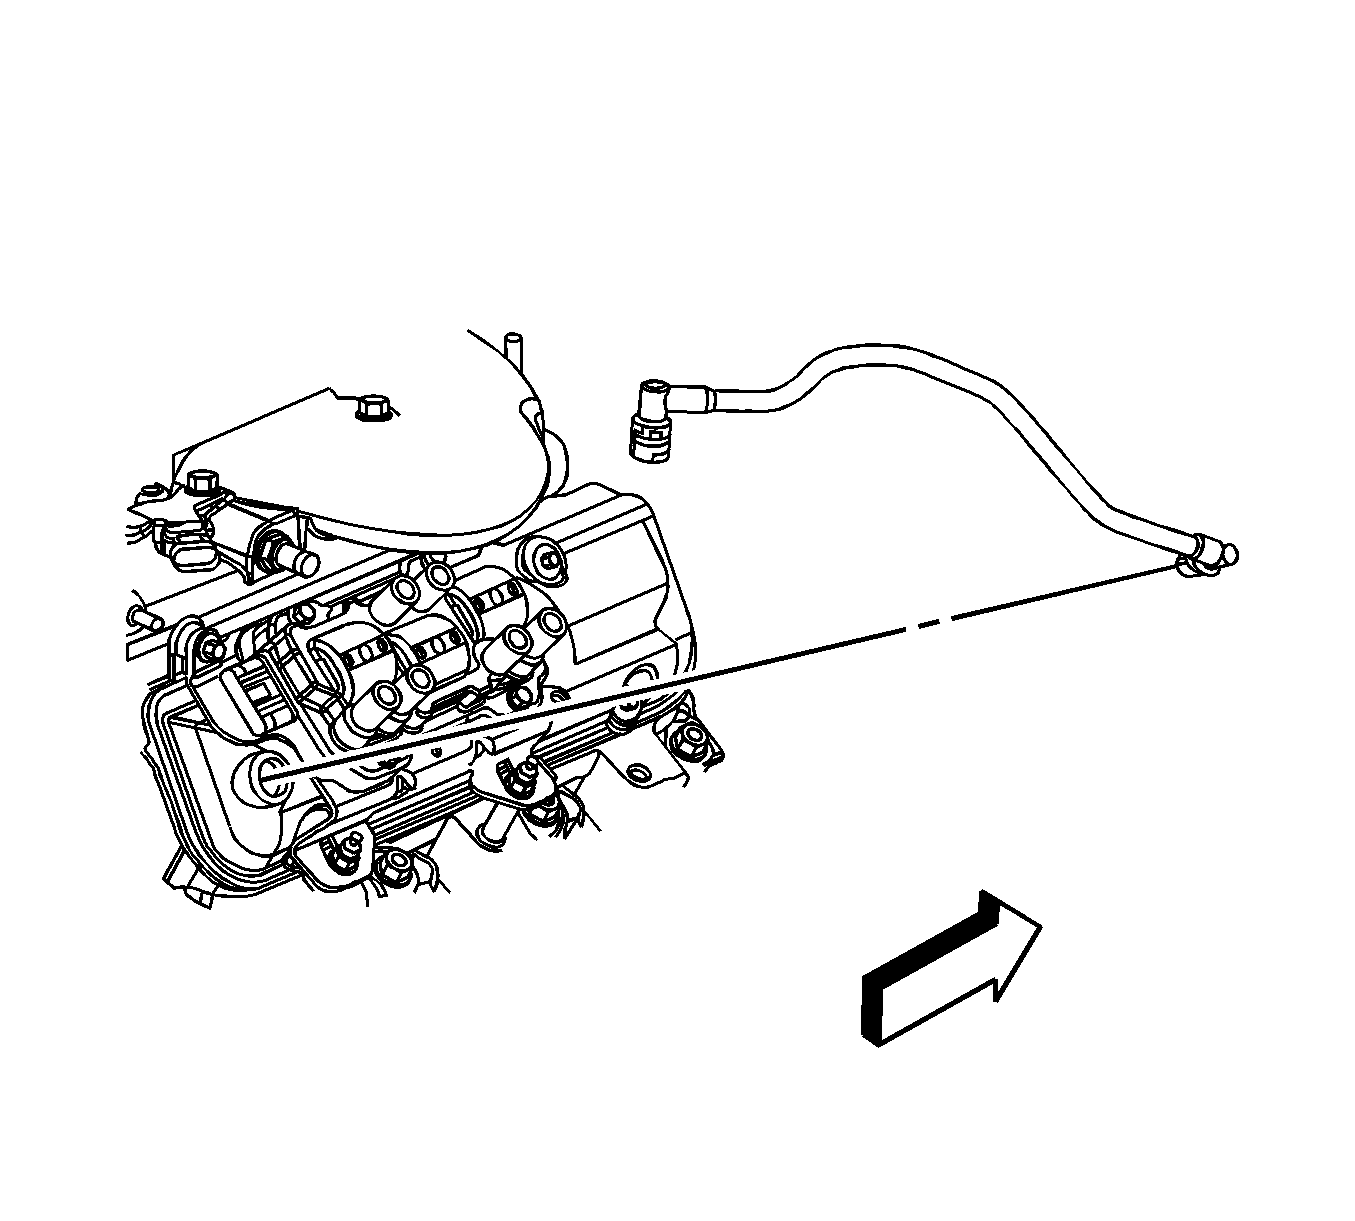
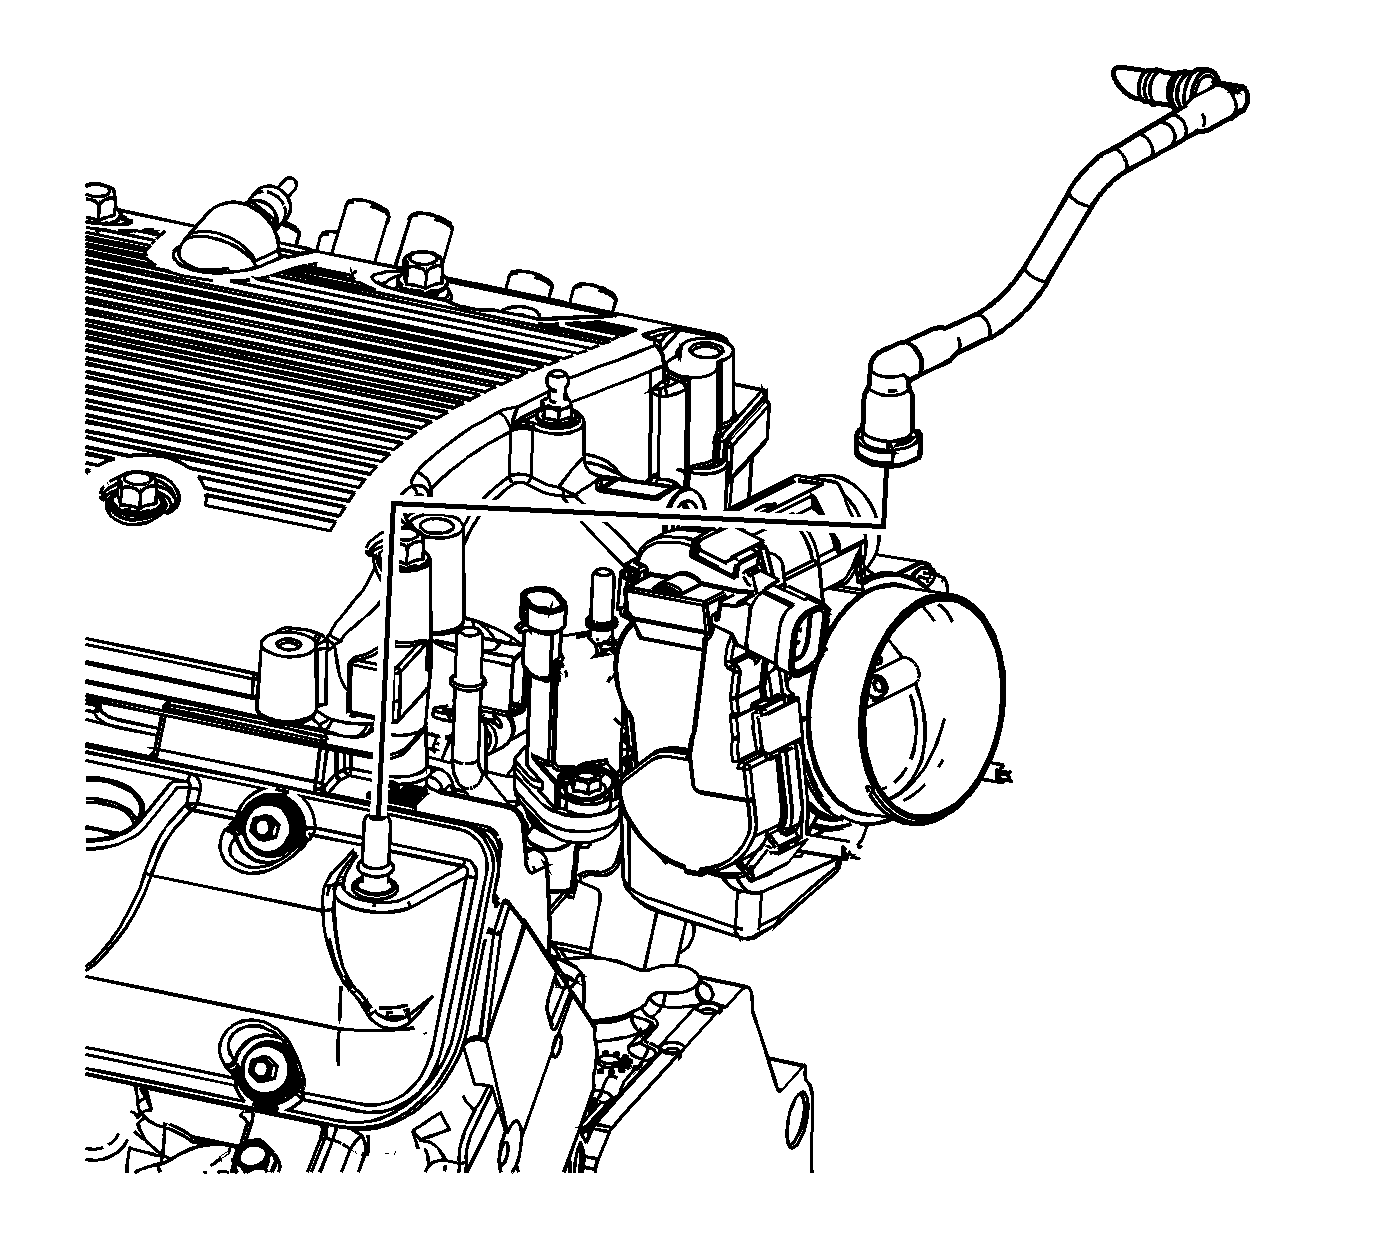
- Disconnect the positive crankcase ventilation (PCV) fresh air tube from the air cleaner outlet duct. Refer to Plastic Collar Quick Connect Fitting Service.
- Remove the PCV fresh air tube from the right side valve rocker arm cover.
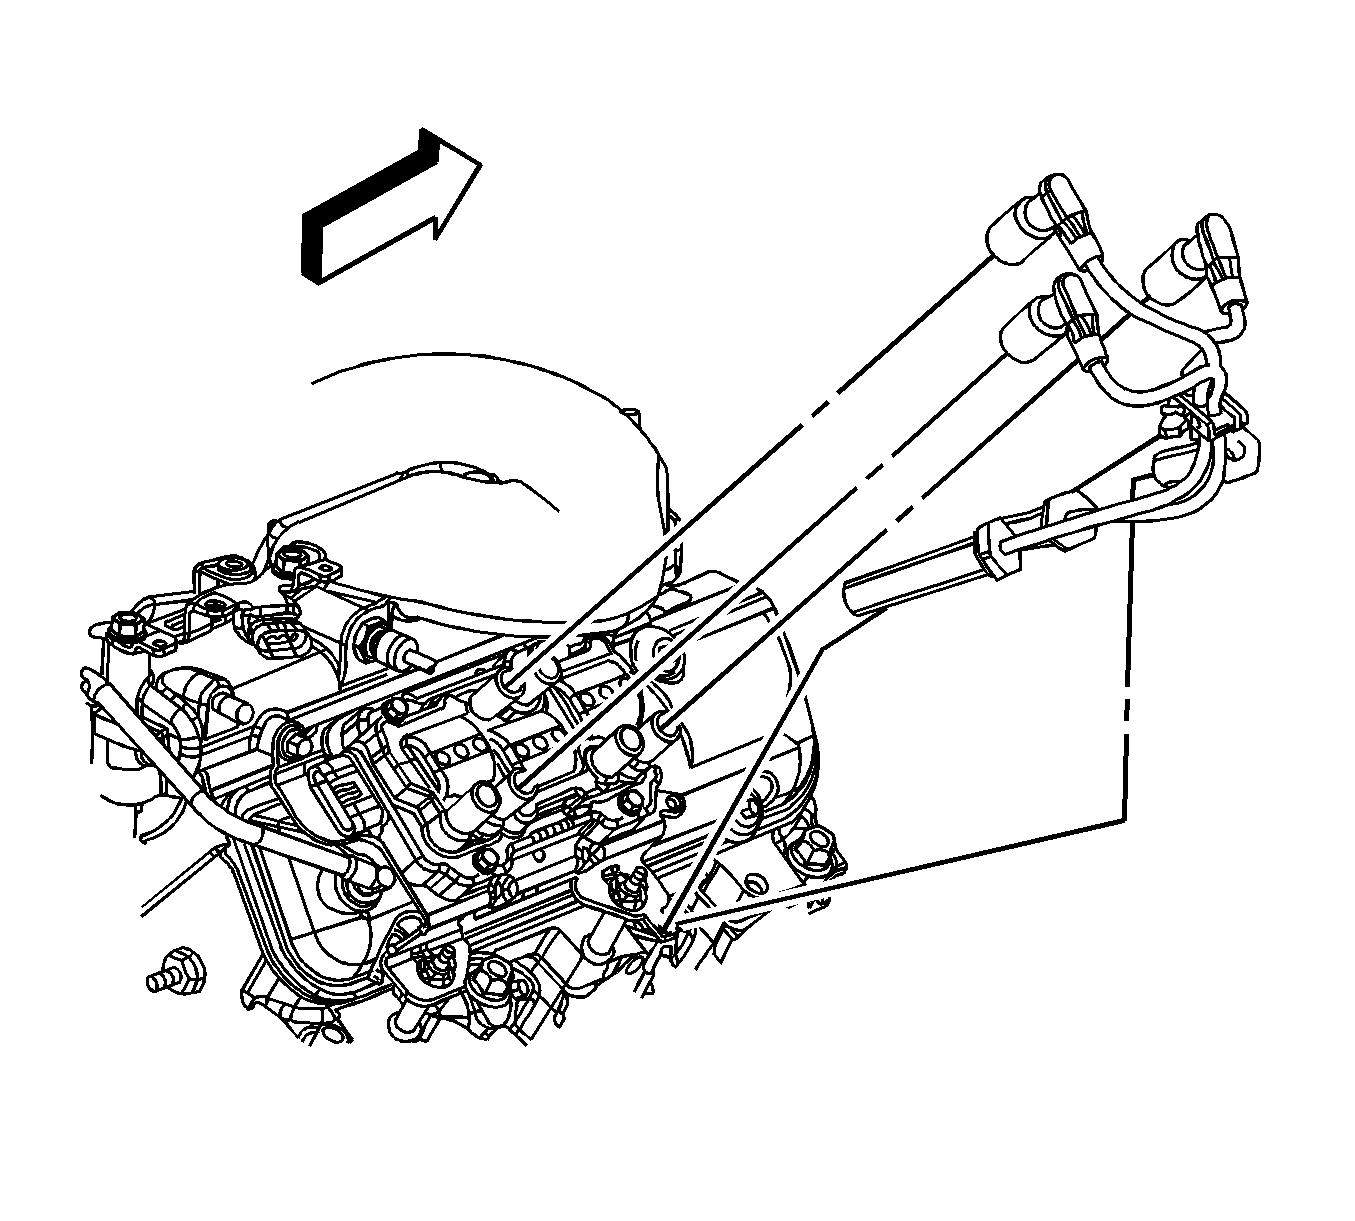
- Disconnect the left side spark plug wires from the ignition coil.
- Disconnect the right side spark plug wires from the spark plugs.
- Disconnect the right side spark plug wires from the ignition coil.
- Remove the right side spark plug harness clip from the ignition coil bracket.
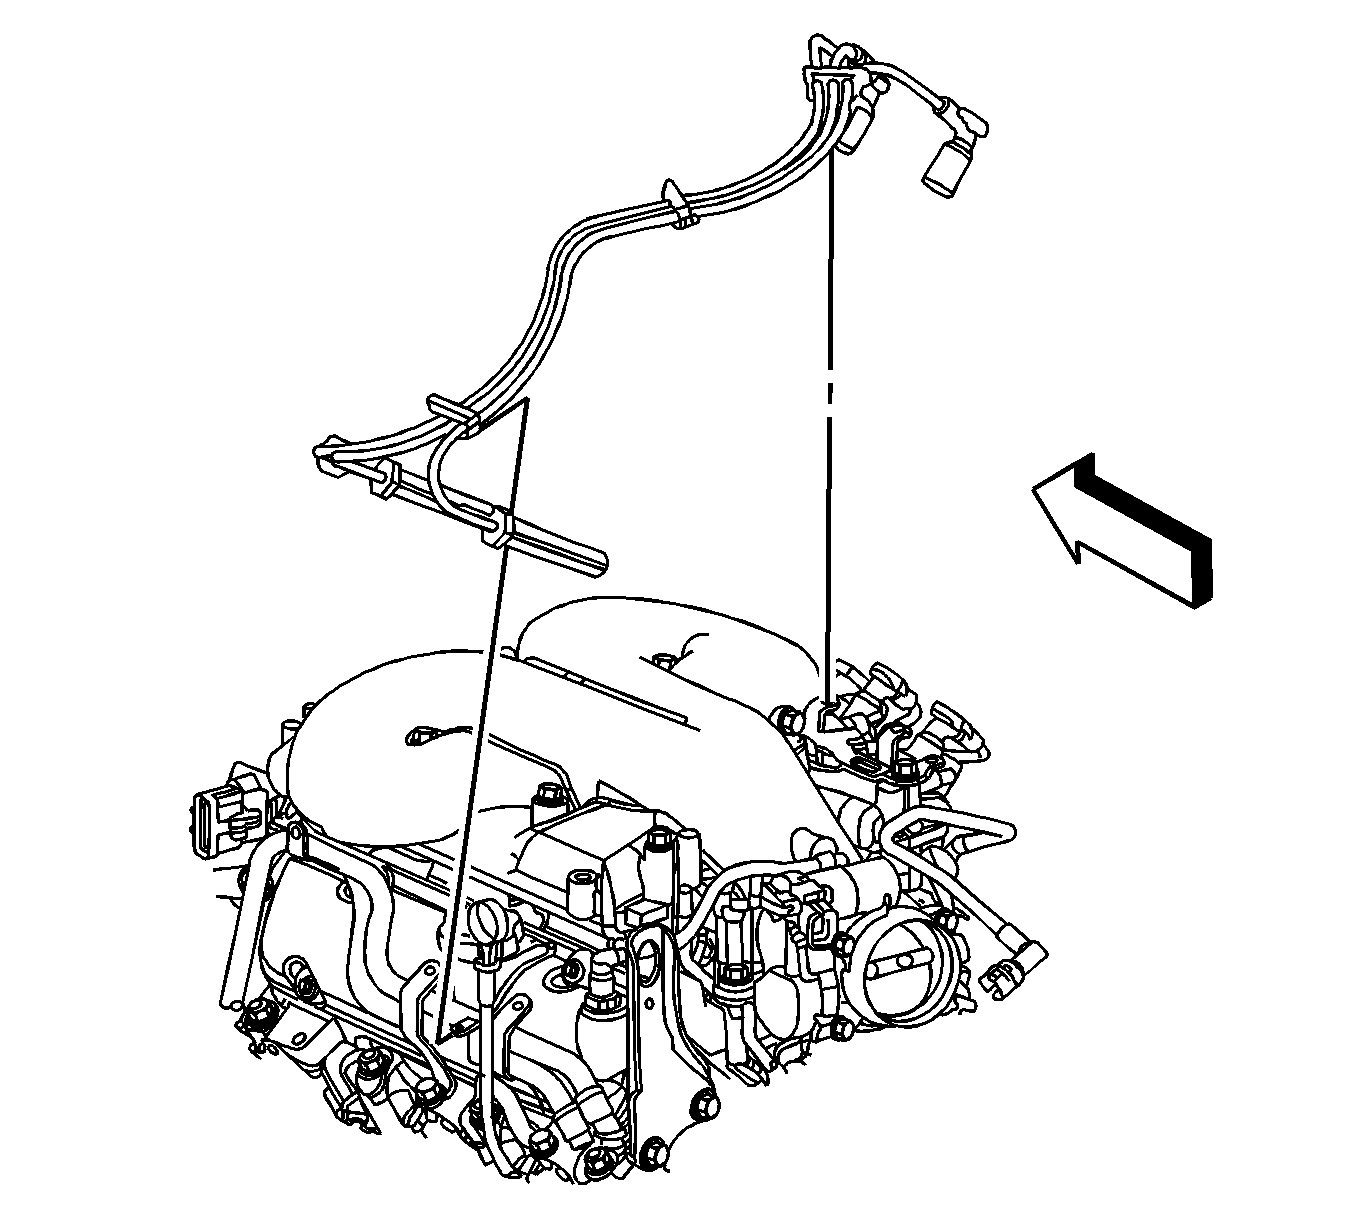
- Remove the spark plug harness.
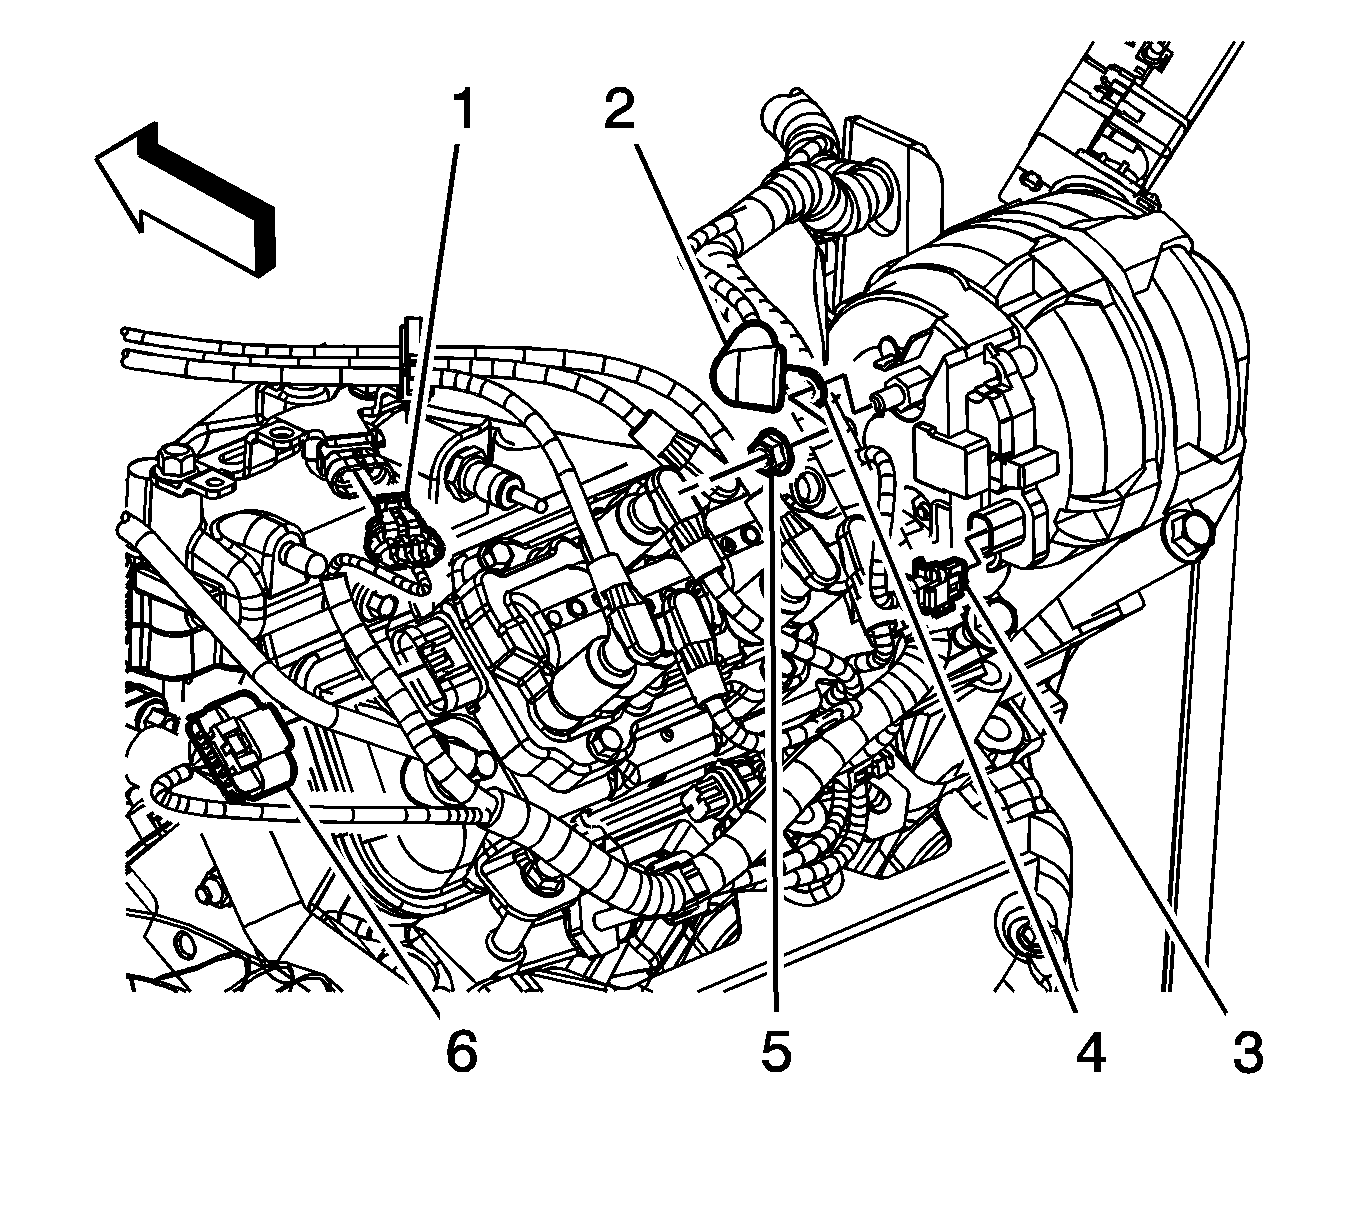
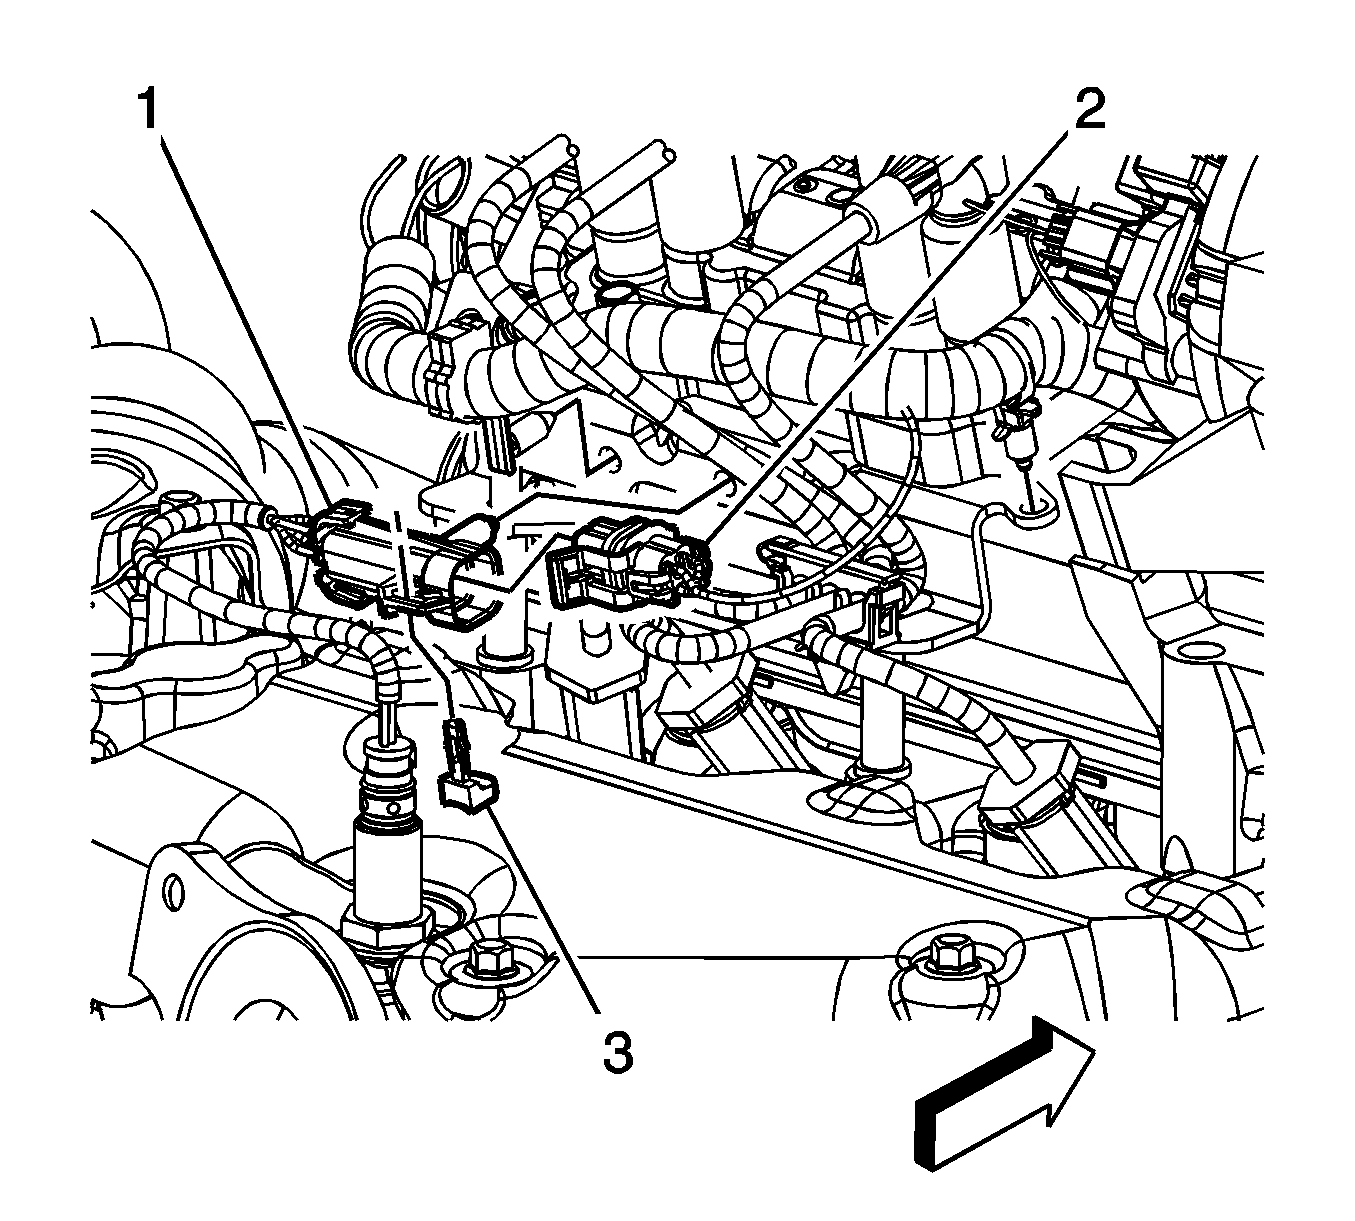
- Disconnect the manifold absolute pressure (MAP) sensor electrical connector (1).
- Disconnect the ignition coil electrical connector (6).
- Remove the engine harness clip from the ignition coil bracket.
- Remove the heated oxygen sensor (HO2S) electrical connector clip (1) from the ignition coil bracket.
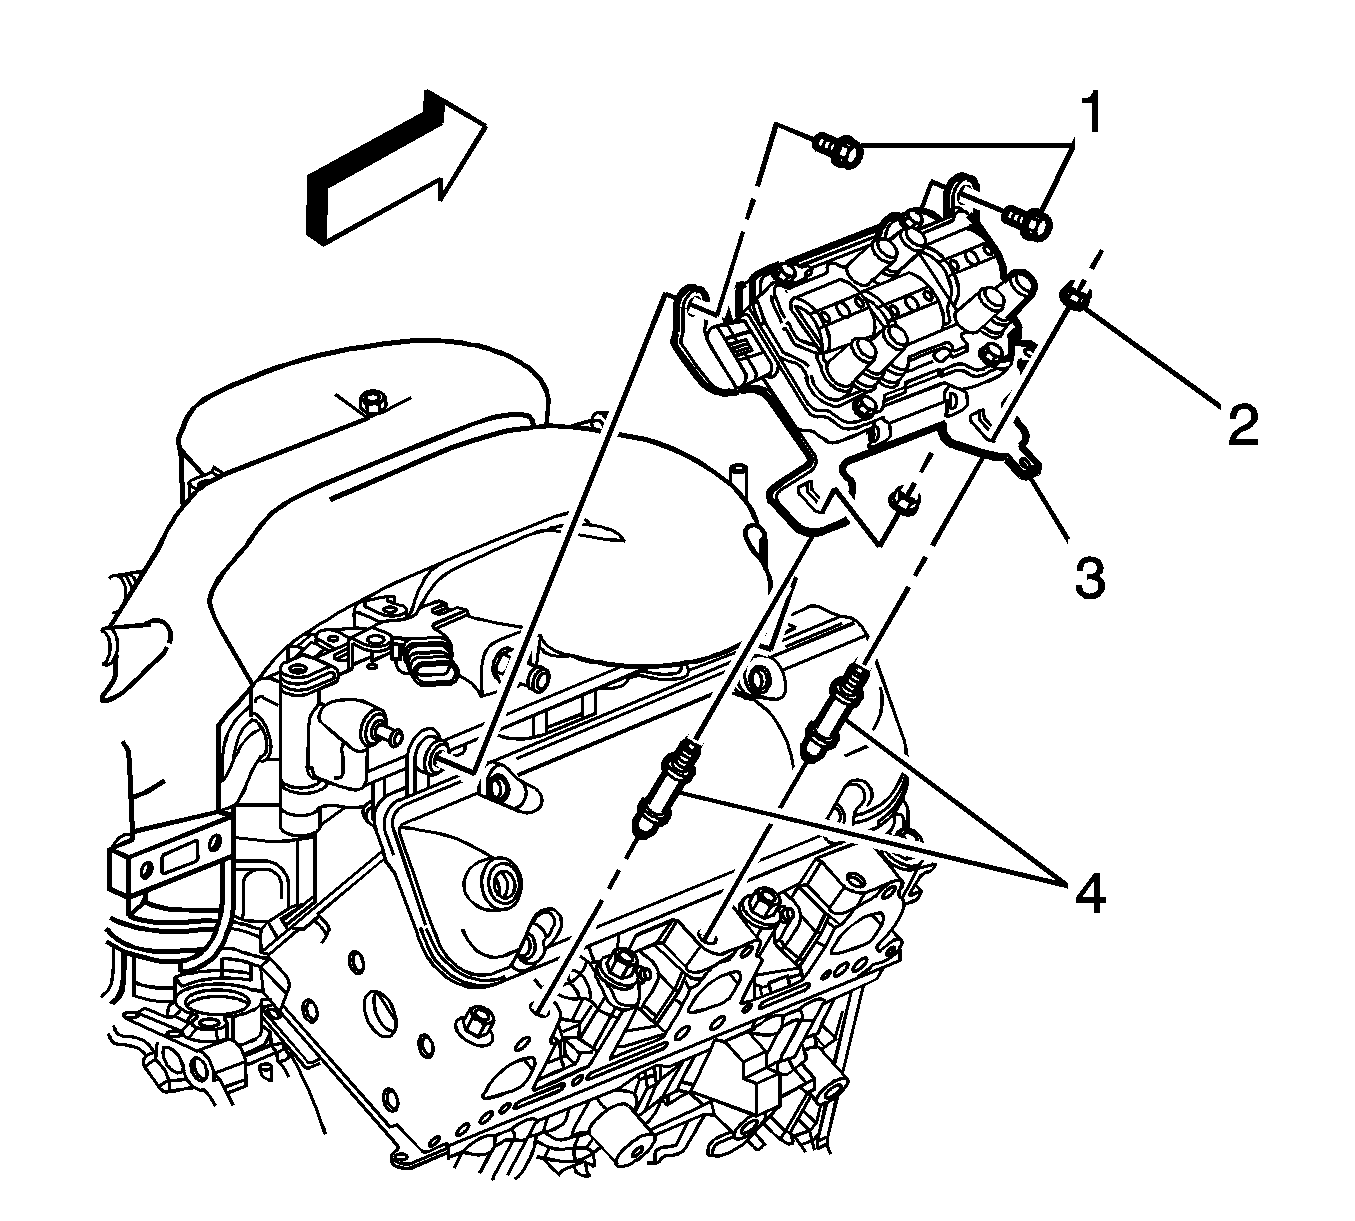
- Remove the ignition coil bracket nuts (2).
- Remove the ignition coil bracket bolts (1).
- Remove the ignition coil.
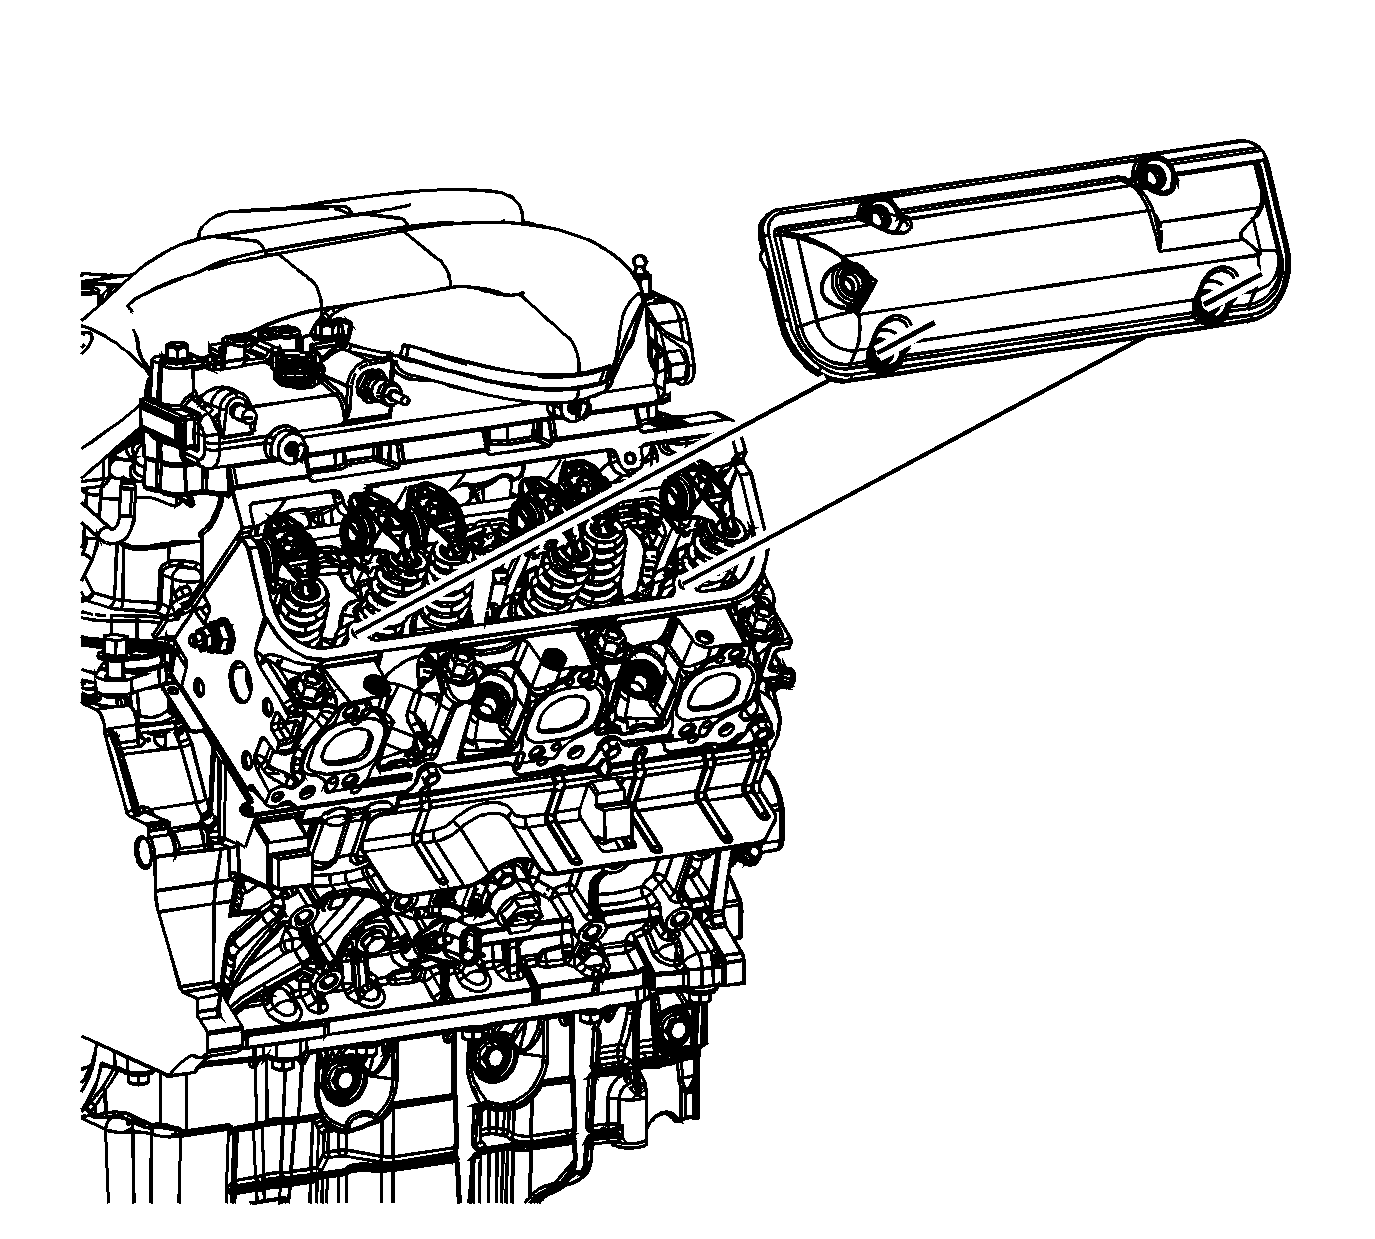
- Loosen the valve rocker arm cover bolts.
- Remove the valve rocker arm cover. Bump the end of the cover with the palm of your hand or a soft rubber mallet if the cover adheres to the cylinder head.
- Cut the room temperature vulcanizing (RTV) sealer in the channel where the intake, cylinder head and valve rocker arm cover meet with a suitable tool.
- Remove the valve cover gasket.
- Clean the sealing surface on the cylinder head with degreaser.
Note: When removing the valve rocker arm cover, ensure the gasket stays in place attached to the cylinder head.
Installation Procedure
Note: All gasket mating surfaces need to be free of oil and foreign material. Use cleaner to clean the surfaces. Refer to Adhesives, Fluids, Lubricants, and Sealers for the 3.9L engine.
- Install a NEW valve rocker arm cover gasket into the groove in the valve rocker arm cover. Ensure that the gasket is properly seated in the groove of the valve rocker arm cover.
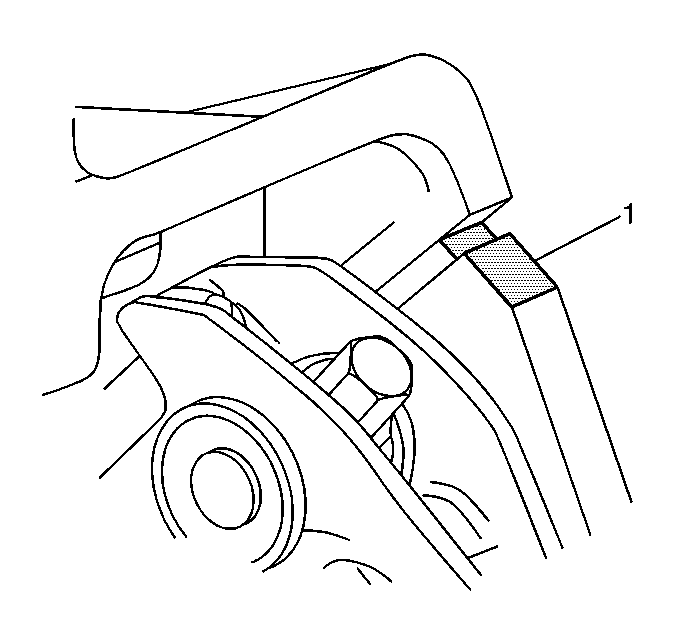
- Apply sealant at the cylinder head to the surfaces where the cylinder head and intake manifold meet (1). Refer to Adhesives, Fluids, Lubricants, and Sealers for the 3.9L engine.
- Install a new gasket to the valve rocker arm cover. Ensure that the gasket is properly seated in the groove of the valve rocker arm cover.
- Install the right valve rocker arm cover.
- Tighten the valve rocker arm cover bolts.
- Install the ignition coil.
- Install the ignition coil bracket bolts (1).
- Install the ignition coil bracket nuts (2).
- Install the HO2S electrical connector clip (1) to the ignition coil bracket.
- Install the engine harness clip to the ignition coil bracket.
- Connect the ignition coil electrical connector (6).
- Connect the MAP sensor electrical connector (1).
- Install the spark plug harness.
- Connect the right side spark plug wires to the spark plugs.
- Connect the right side spark plug wires to the ignition coil.
- Install the right side spark plug harness clip to the ignition coil bracket.
- Connect the left side spark plug wires to the ignition coil.
- Install the PCV fresh air tube to the right side valve rocker arm cover.
- Connect the PCV fresh air tube to the air cleaner outlet duct. Refer to Plastic Collar Quick Connect Fitting Service.
- Install the generator. Refer to Generator Replacement.
Caution: Refer to Fastener Caution in the Preface section.
Note: Use an alternating criss-cross pattern when tightening the valve rocker cover bolts. Failure to do so may result in oil leakage from the valve cover due to improper seating of the gasket.
Tighten
Tighten the bolts to 10 N·m (89 lb in).
Tighten
Tighten the bolts/nuts to 25 N·m (18 lb ft).