Radiator Replacement LZ9
Special Tools
J 38185 Hose Clamp Pliers
Removal Procedure
- Partially drain the cooling system. Refer to Cooling System Draining and Filling.
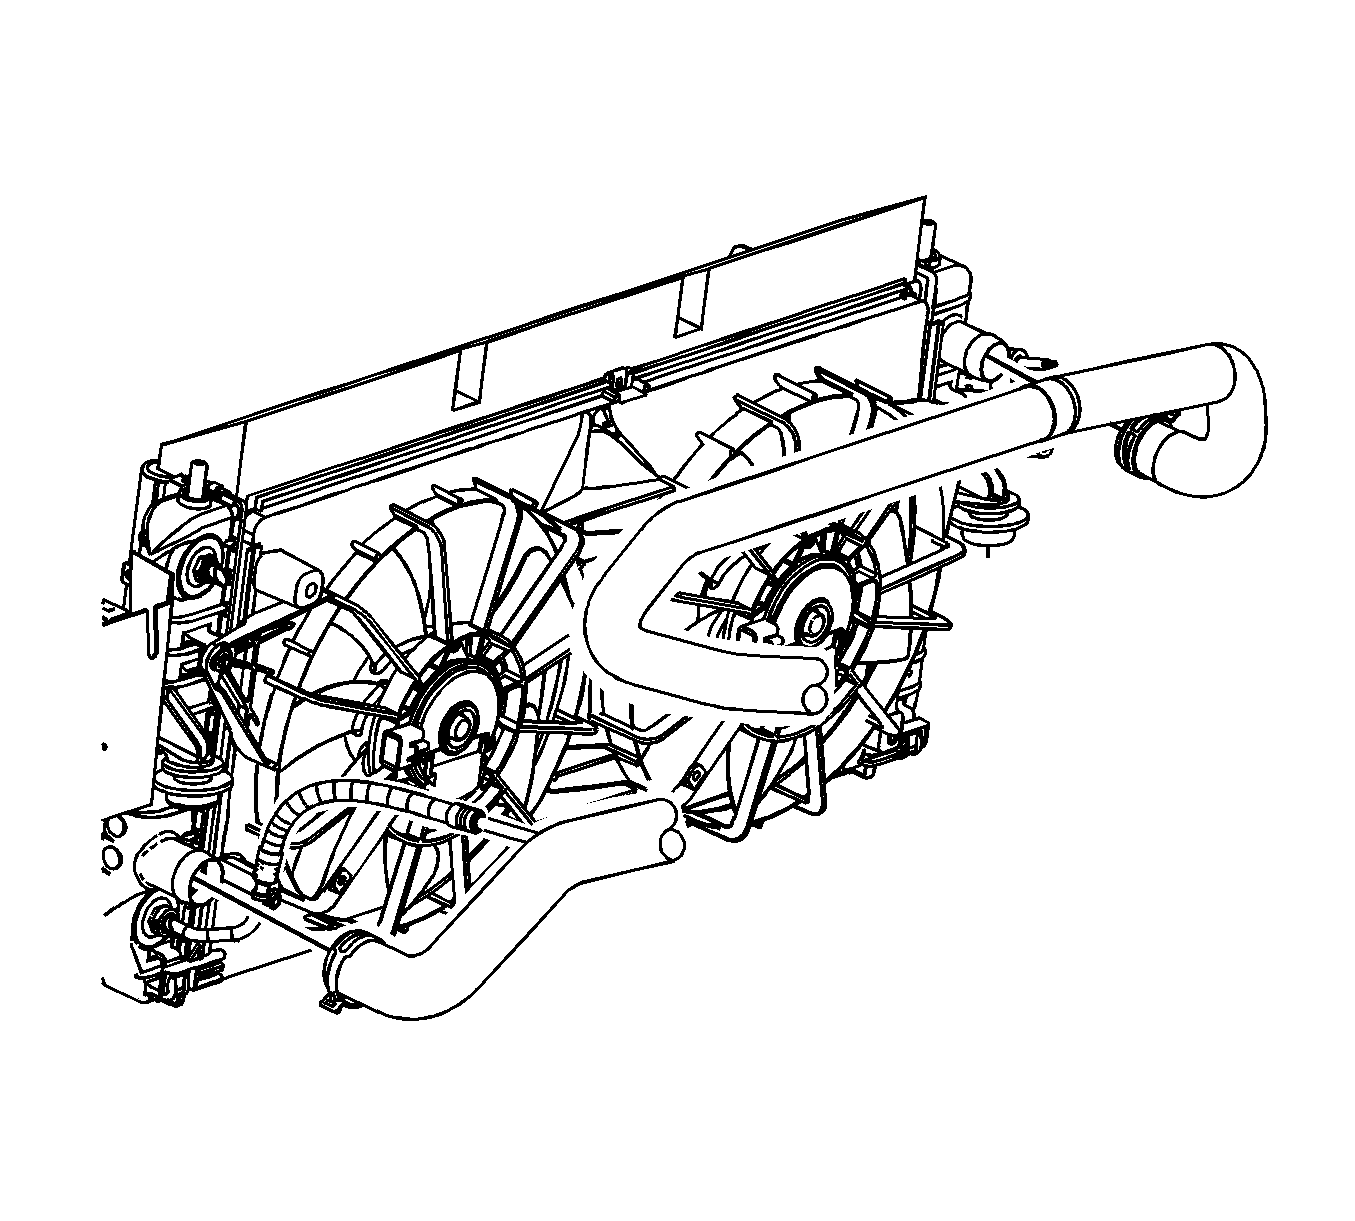
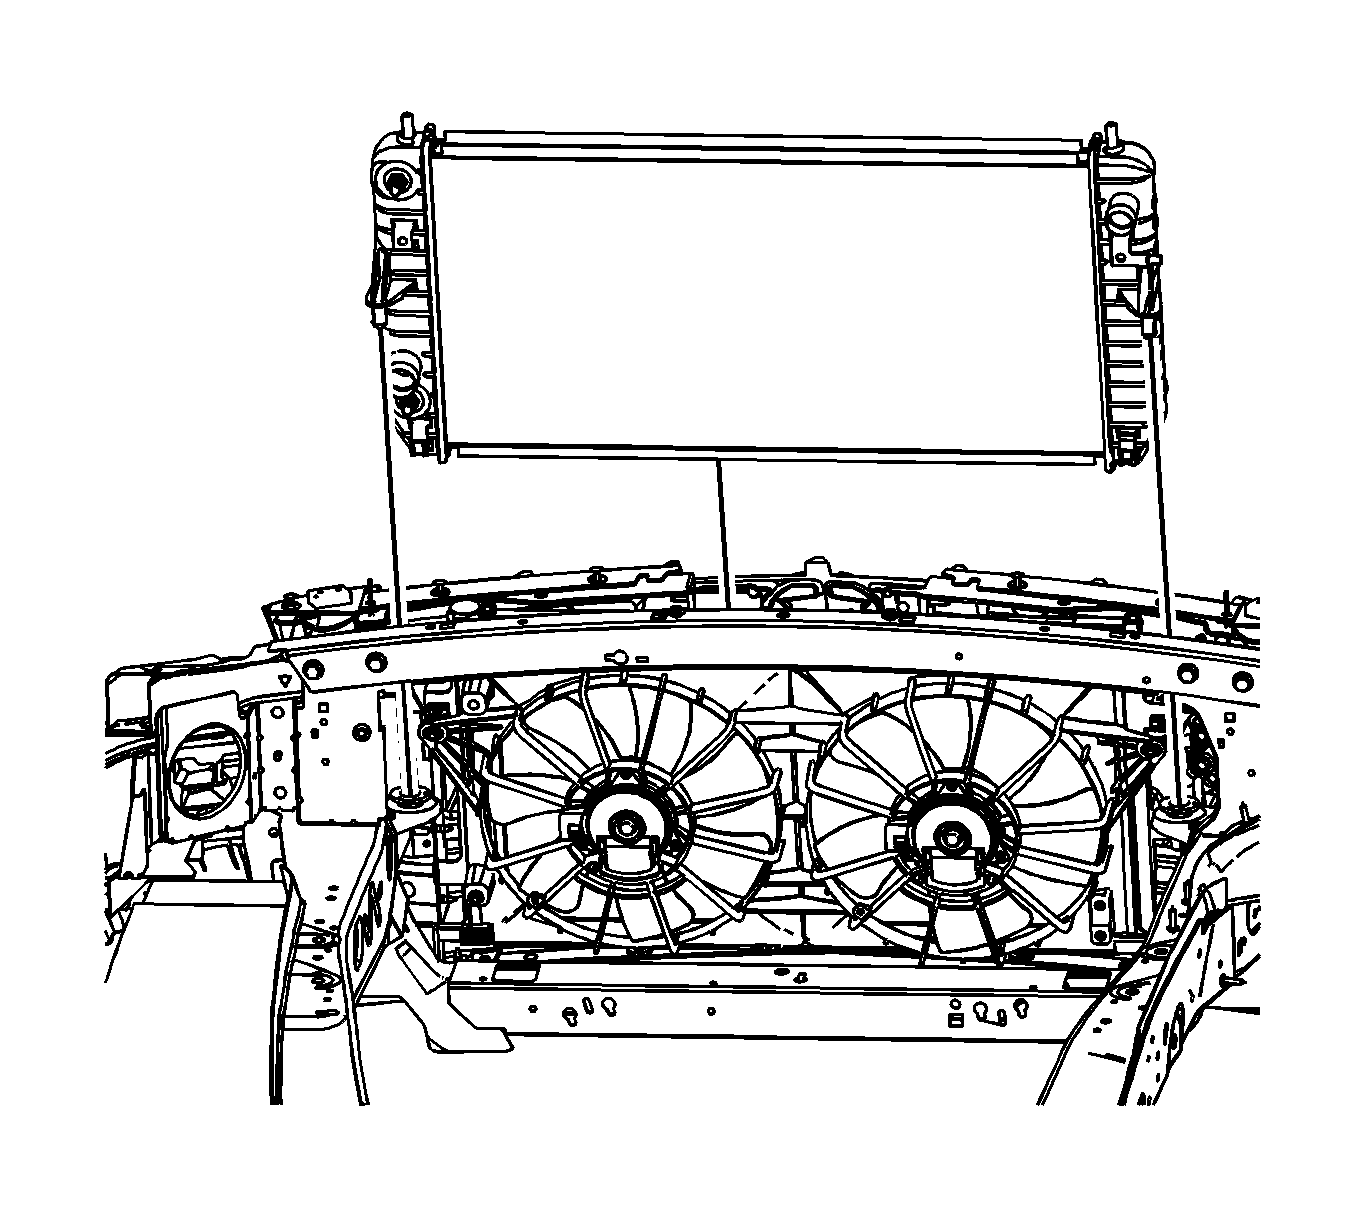
- Remove the cooling fan shroud assembly. Refer to Engine Coolant Fan Shroud Replacement.
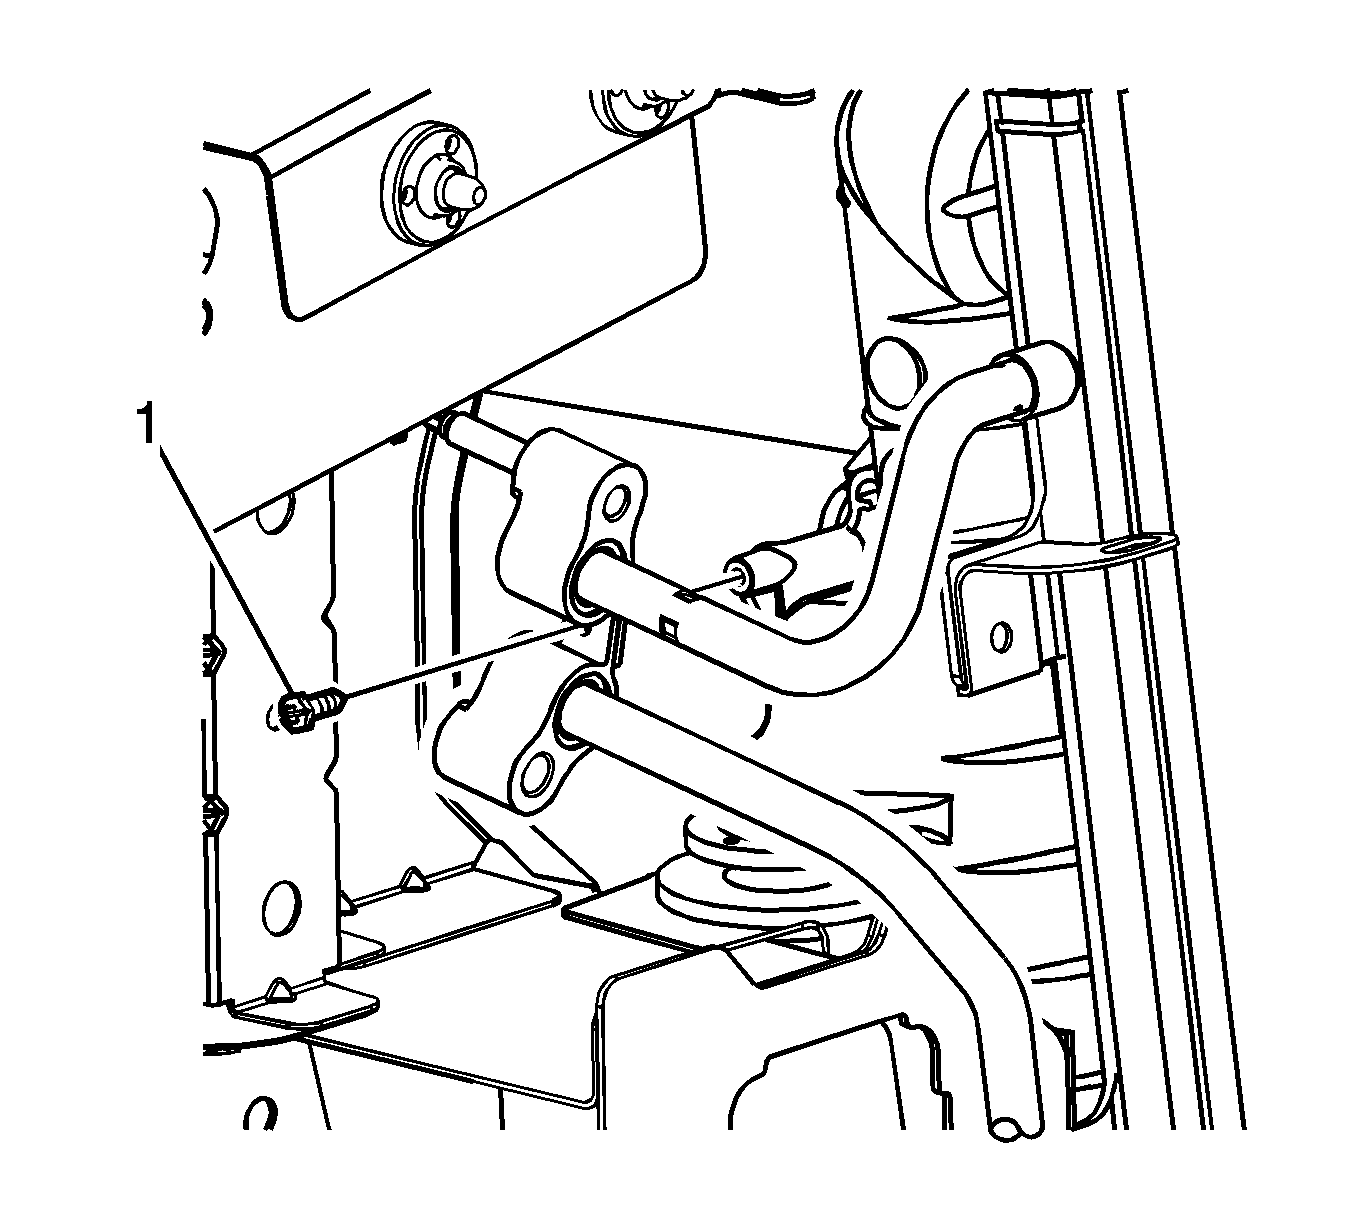
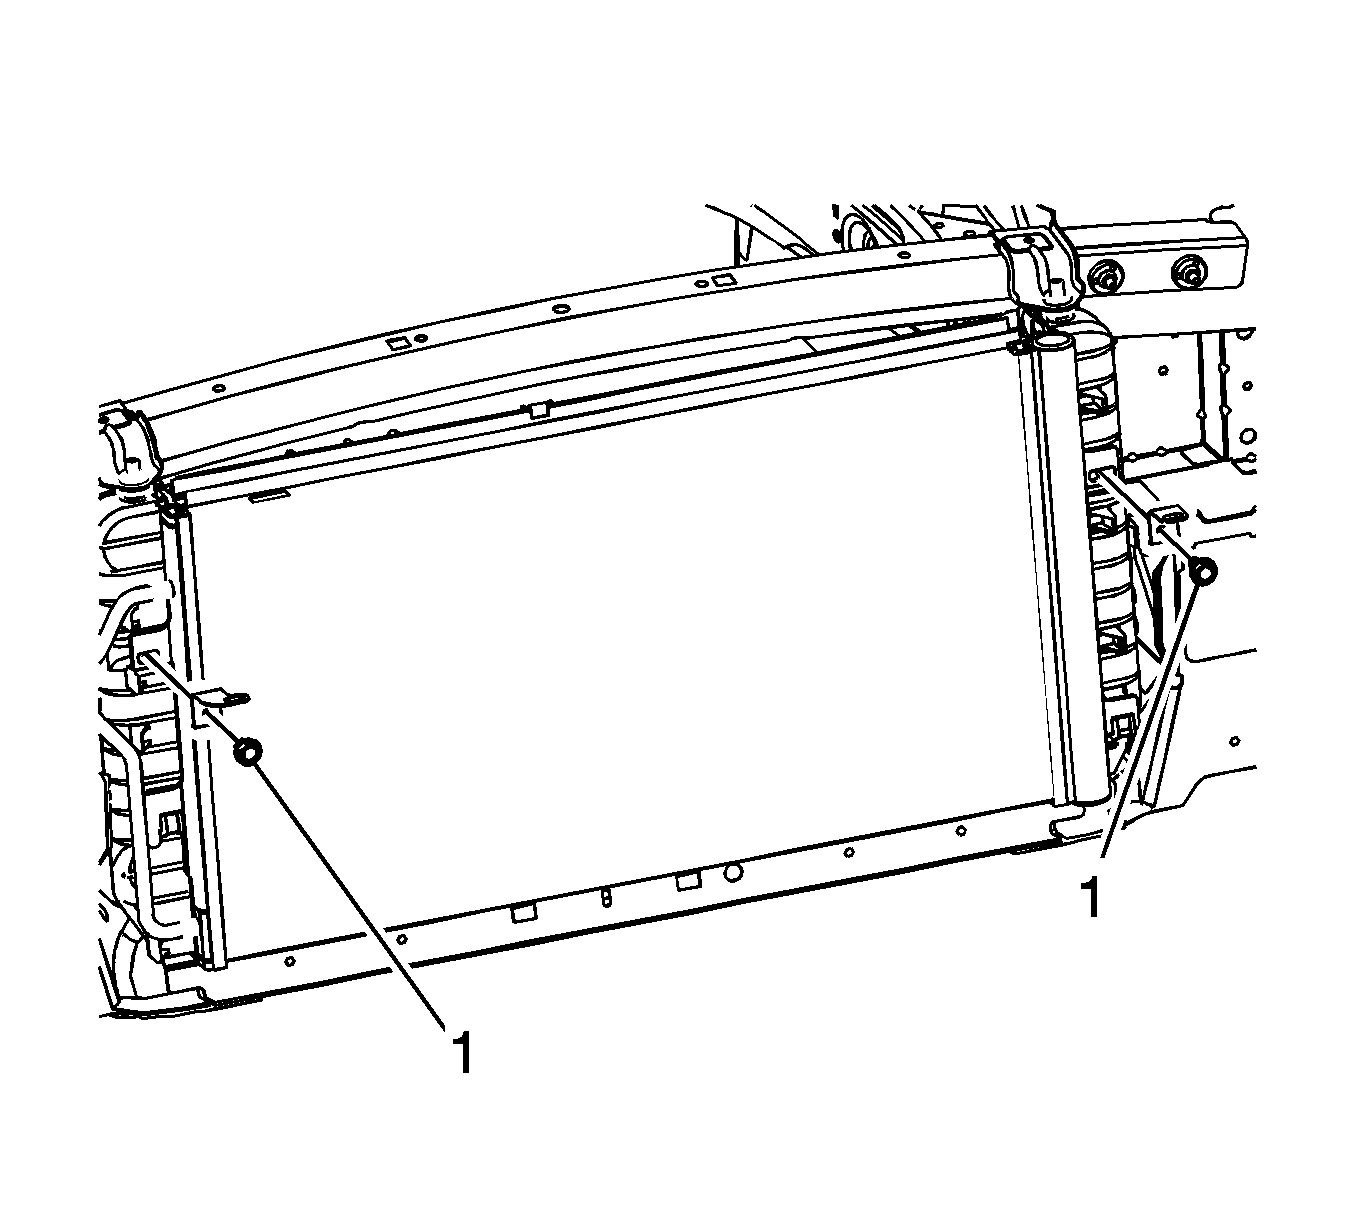
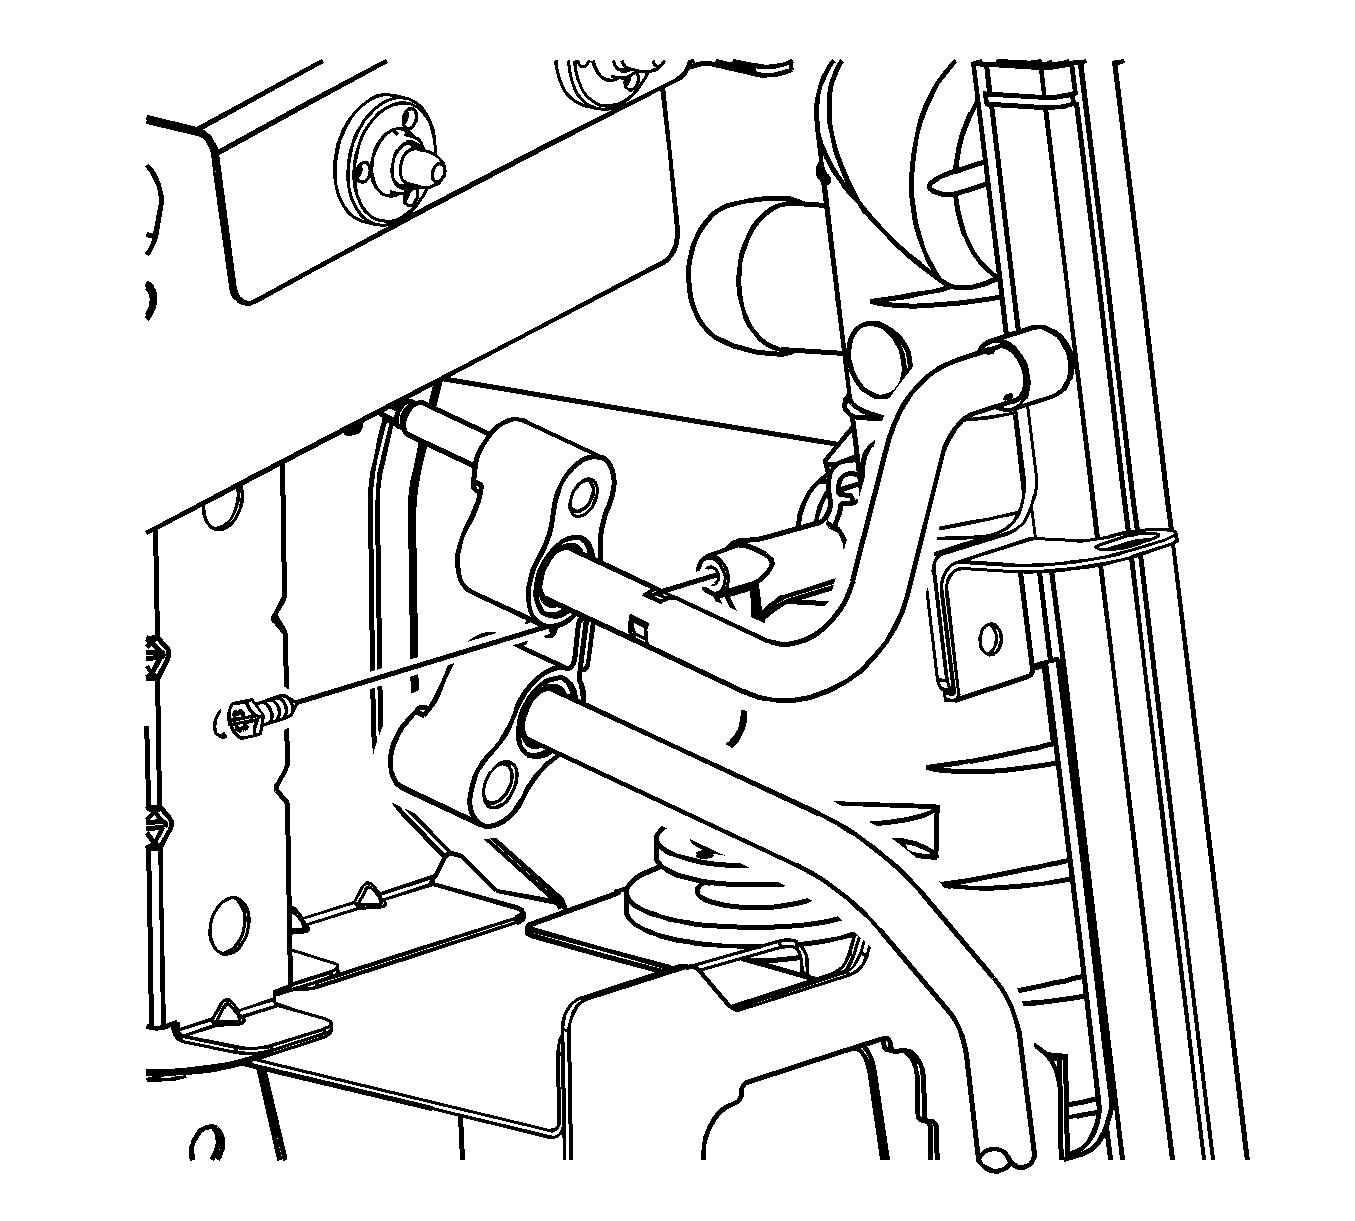
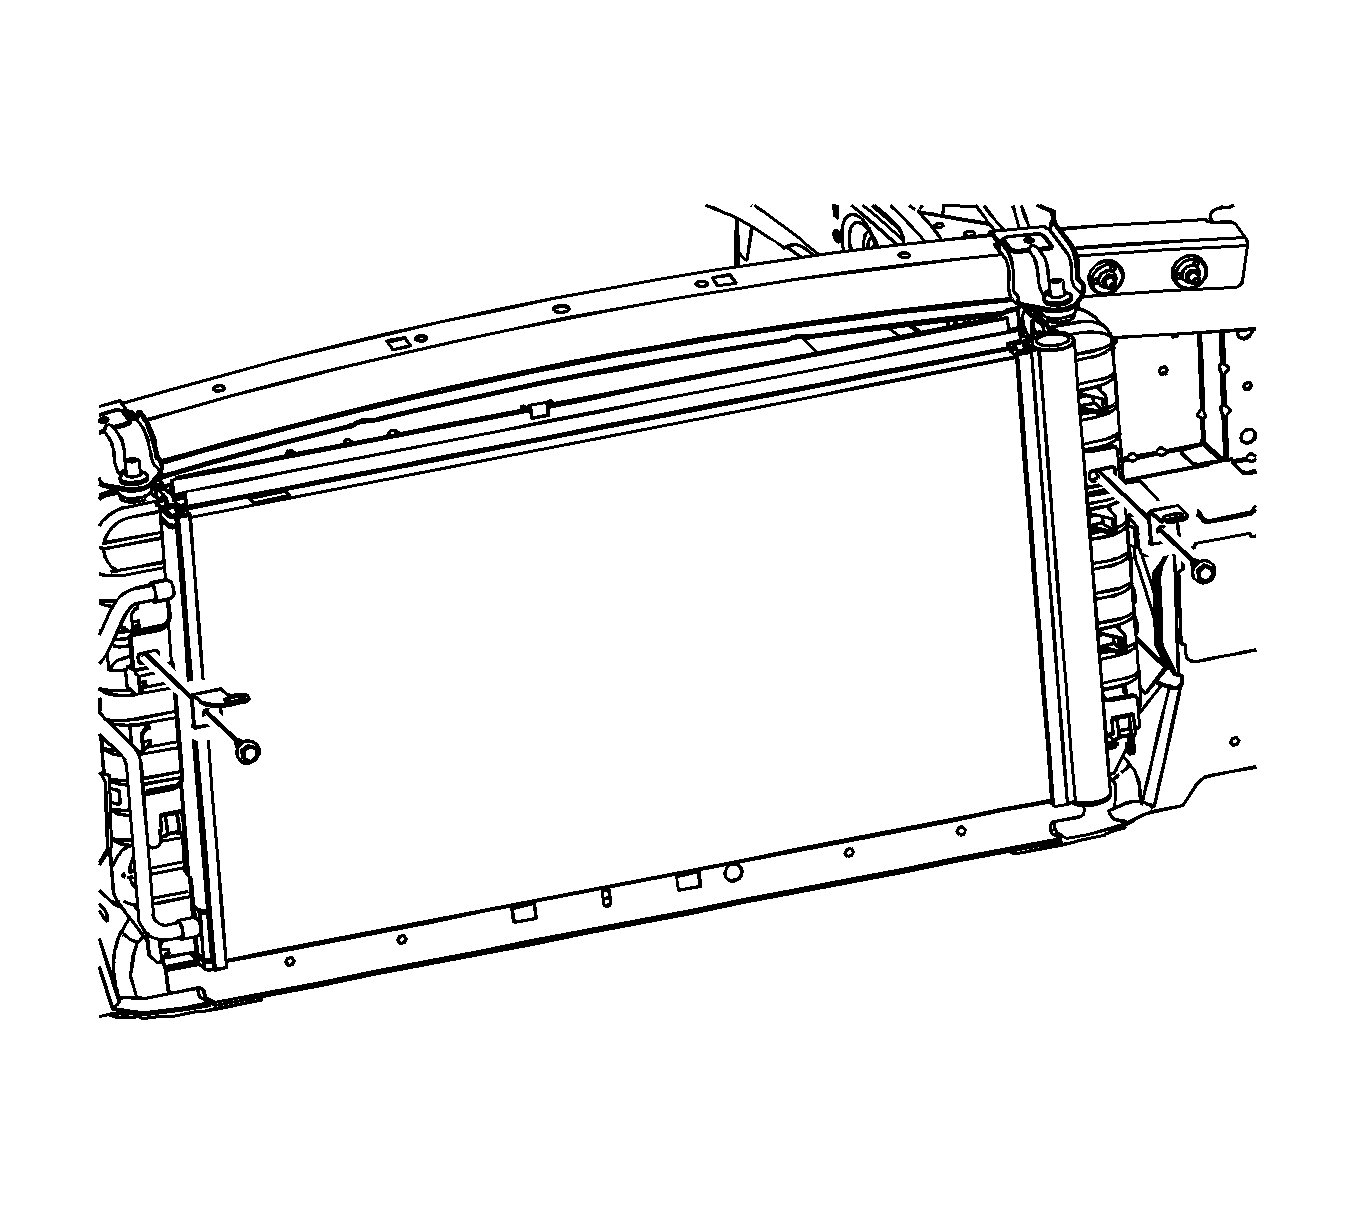
- Remove the condenser line to radiator retaining bolt (1).
- Using J 38185 Hose Clamp Pliers reposition the hose clamp from the radiator outlet hose.
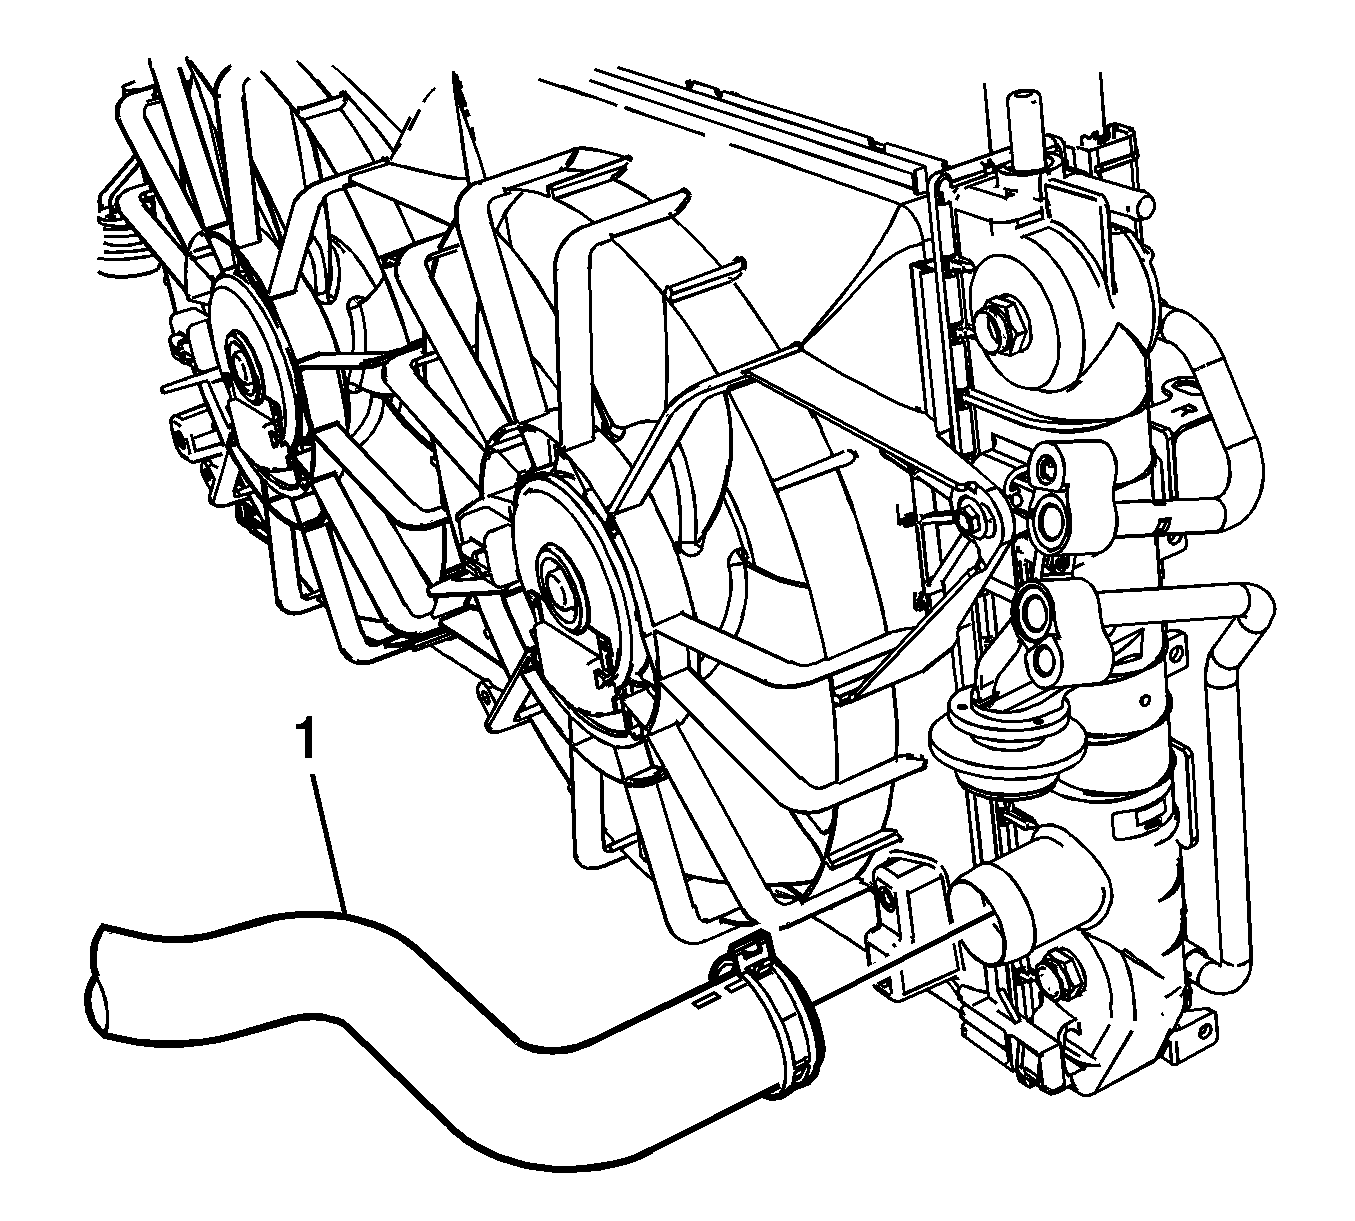
- Remove the radiator outlet hose (1) from the radiator.
- Using J 38185 Hose Clamp Pliers reposition the hose clamp from the radiator inlet hose.
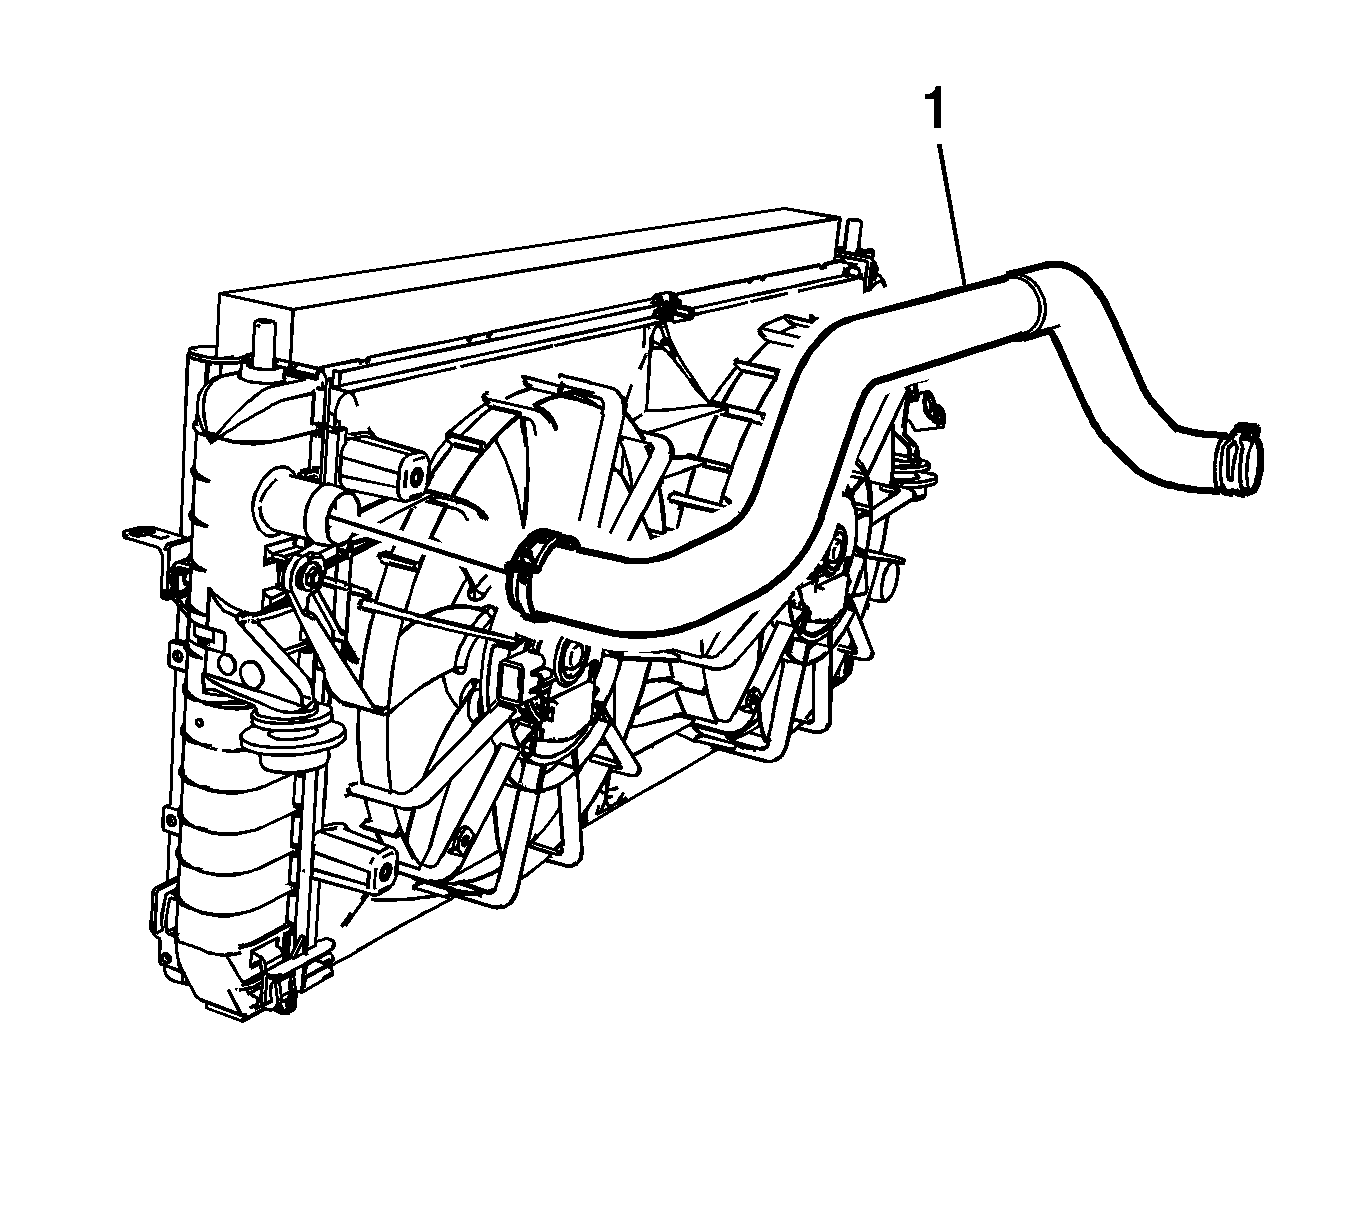
- Remove the radiator inlet hose (1) from the radiator.
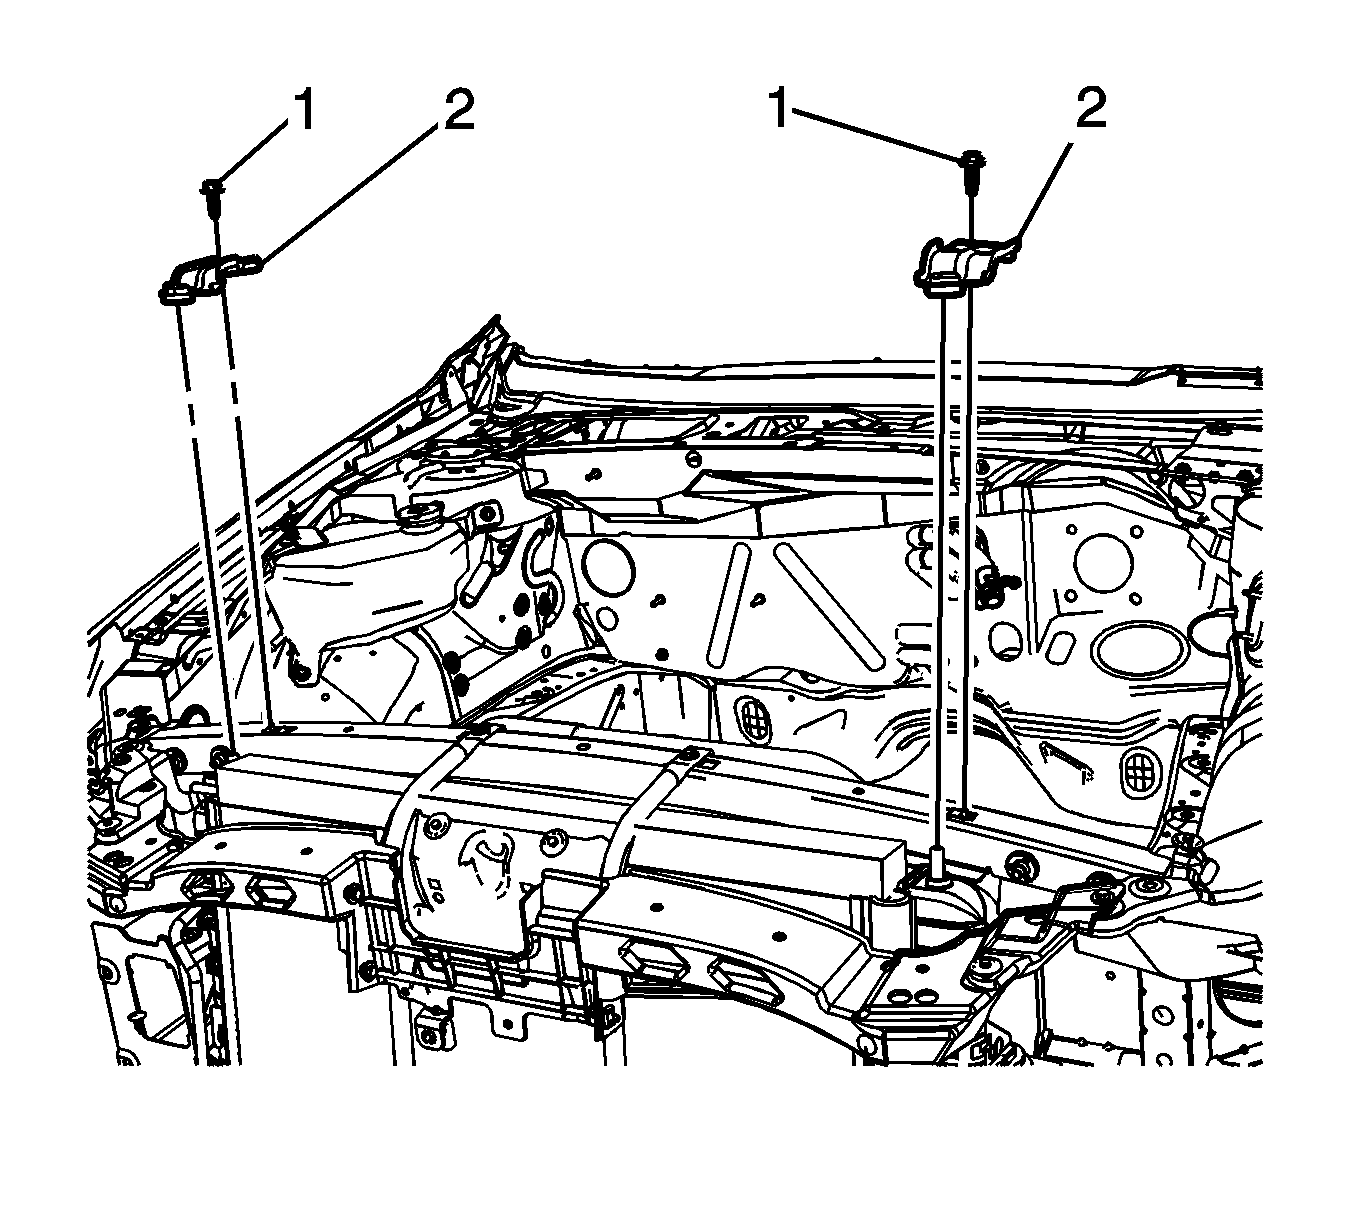
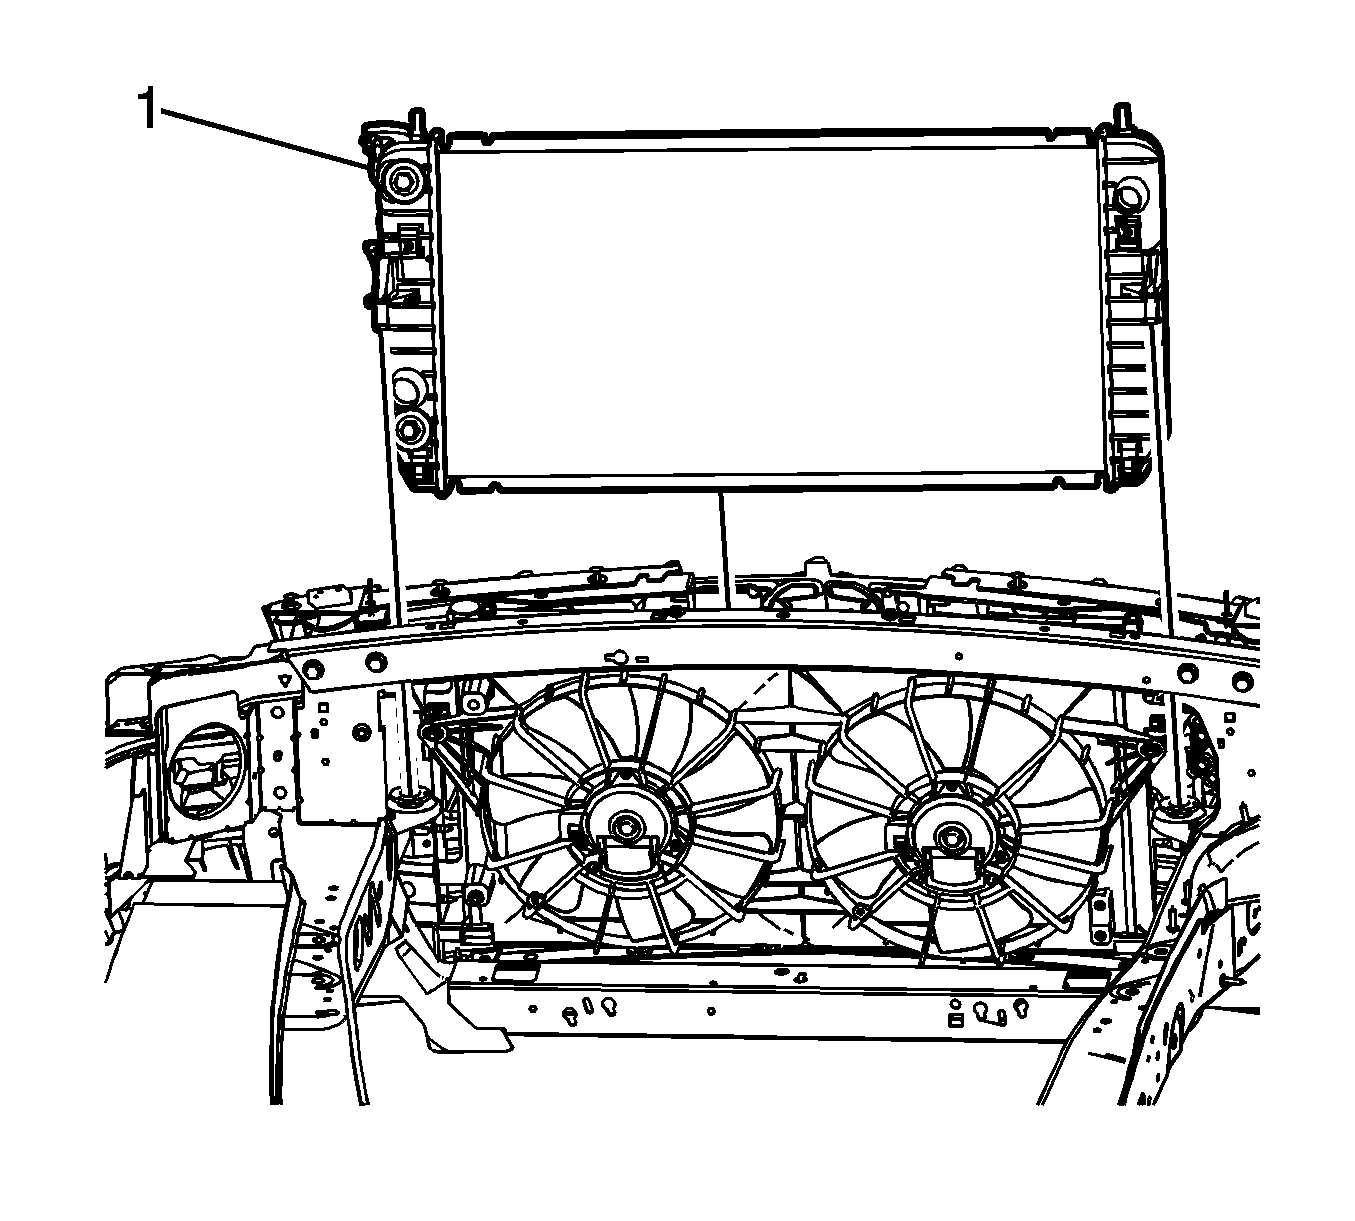
- Remove the upper radiator bracket bolts (1).
- Remove the upper radiator brackets (2).
- Remove the condenser mounting bolts (1).
- Lift the condenser upward slightly in order to release the lower feet from the lower mounting features located at the front of the radiator.
- Lift the radiator (1) up and out the vehicle.

Note: Care should be taken when removing the condenser not to damage the lower attachment points of both the radiator and condenser.
Installation Procedure
- Install the radiator (1) to the vehicle.
- Position the condenser, aligning the lower feet to the lower mounting features located at the front of the radiator.
- Install the condenser mounting bolts (1).
- Install the radiator outlet hose (1) to the radiator.
- Using J 38185 Hose Clamp Pliers reposition the radiator outlet hose clamp.
- Install the radiator inlet hose (1) to the radiator.
- Using J 38185 Hose Clamp Pliers reposition the radiator inlet hose clamp to the radiator.
- Install the upper radiator brackets (2).
- Install the upper radiator bracket bolts (1).
- Install the condenser line to radiator retaining bolt (1).
- Install the cooling fans. Refer to Engine Coolant Fan Replacement.
- Fill the cooling system. Refer to Cooling System Draining and Filling.
Note: Care should be taken when installing the condenser not to damage the lower attachment points of both the radiator and condenser.
Caution: Refer to Fastener Caution in the Preface section.
Note: The bolts retaining the condenser to the radiator end tanks are a special length and should be the ONLY bolts used upon reinstallation. The use of longer bolts will damage the radiator end tanks.
Tighten
Tighten the bolts to 13 N·m (115 lb in).
Tighten
Tighten the bolts to 25 N·m (18 lb ft).
Tighten
Tighten the bolts to 6 N·m (53 lb in).
Radiator Replacement LD8
Tools Required
J 38185 Hose Clamp Pliers
Removal Procedure
- Partially drain the cooling system. Refer to Cooling System Draining and Filling.
- Remove the cooling fan shroud assembly. Refer to Engine Coolant Fan Shroud Replacement.
- Remove the condenser line to radiator retaining bolt.
- Using J 38185 Hose Clamp Pliers reposition the hose clamps from the radiator outlet hose.
- Remove the radiator outlet hose from the radiator.
- Remove the condenser mounting bolts.
- Lift the condenser upward slightly in order to release the lower feet from the lower mounting features located at the front of the radiator.
- Lift the radiator up and out the vehicle.
Note: Care should be taken when removing the condenser not to damage the lower attachment points of both the radiator and condenser.
Installation Procedure
- Install the radiator to the vehicle.
- Position the condenser, aligning the lower feet to the lower mounting features located at the front of the radiator.
- Install the condenser mounting bolts and tighten to 13 N·m (115 lb in).
- Install the radiator outlet hose to the radiator.
- Using J 38185 Hose Clamp Pliers reposition the radiator outlet hose clamp.
- Install the condenser line to radiator retaining bolt and tighten to 6 N·m (53 lb in).
- Install the cooling fans. Refer to Engine Coolant Fan Replacement.
- Fill the cooling system. Refer to Cooling System Draining and Filling.
Note: Care should be taken when installing the condenser not to damage the lower attachment points of both the radiator and condenser.
Caution: Refer to Fastener Caution in the Preface section.
Note: The bolts retaining the condenser to the radiator end tanks are a special length and should be the ONLY bolts used upon reinstallation. The use of longer bolts will damage the radiator end tanks.
