GM Service Manual Online
For 1990-2009 cars only

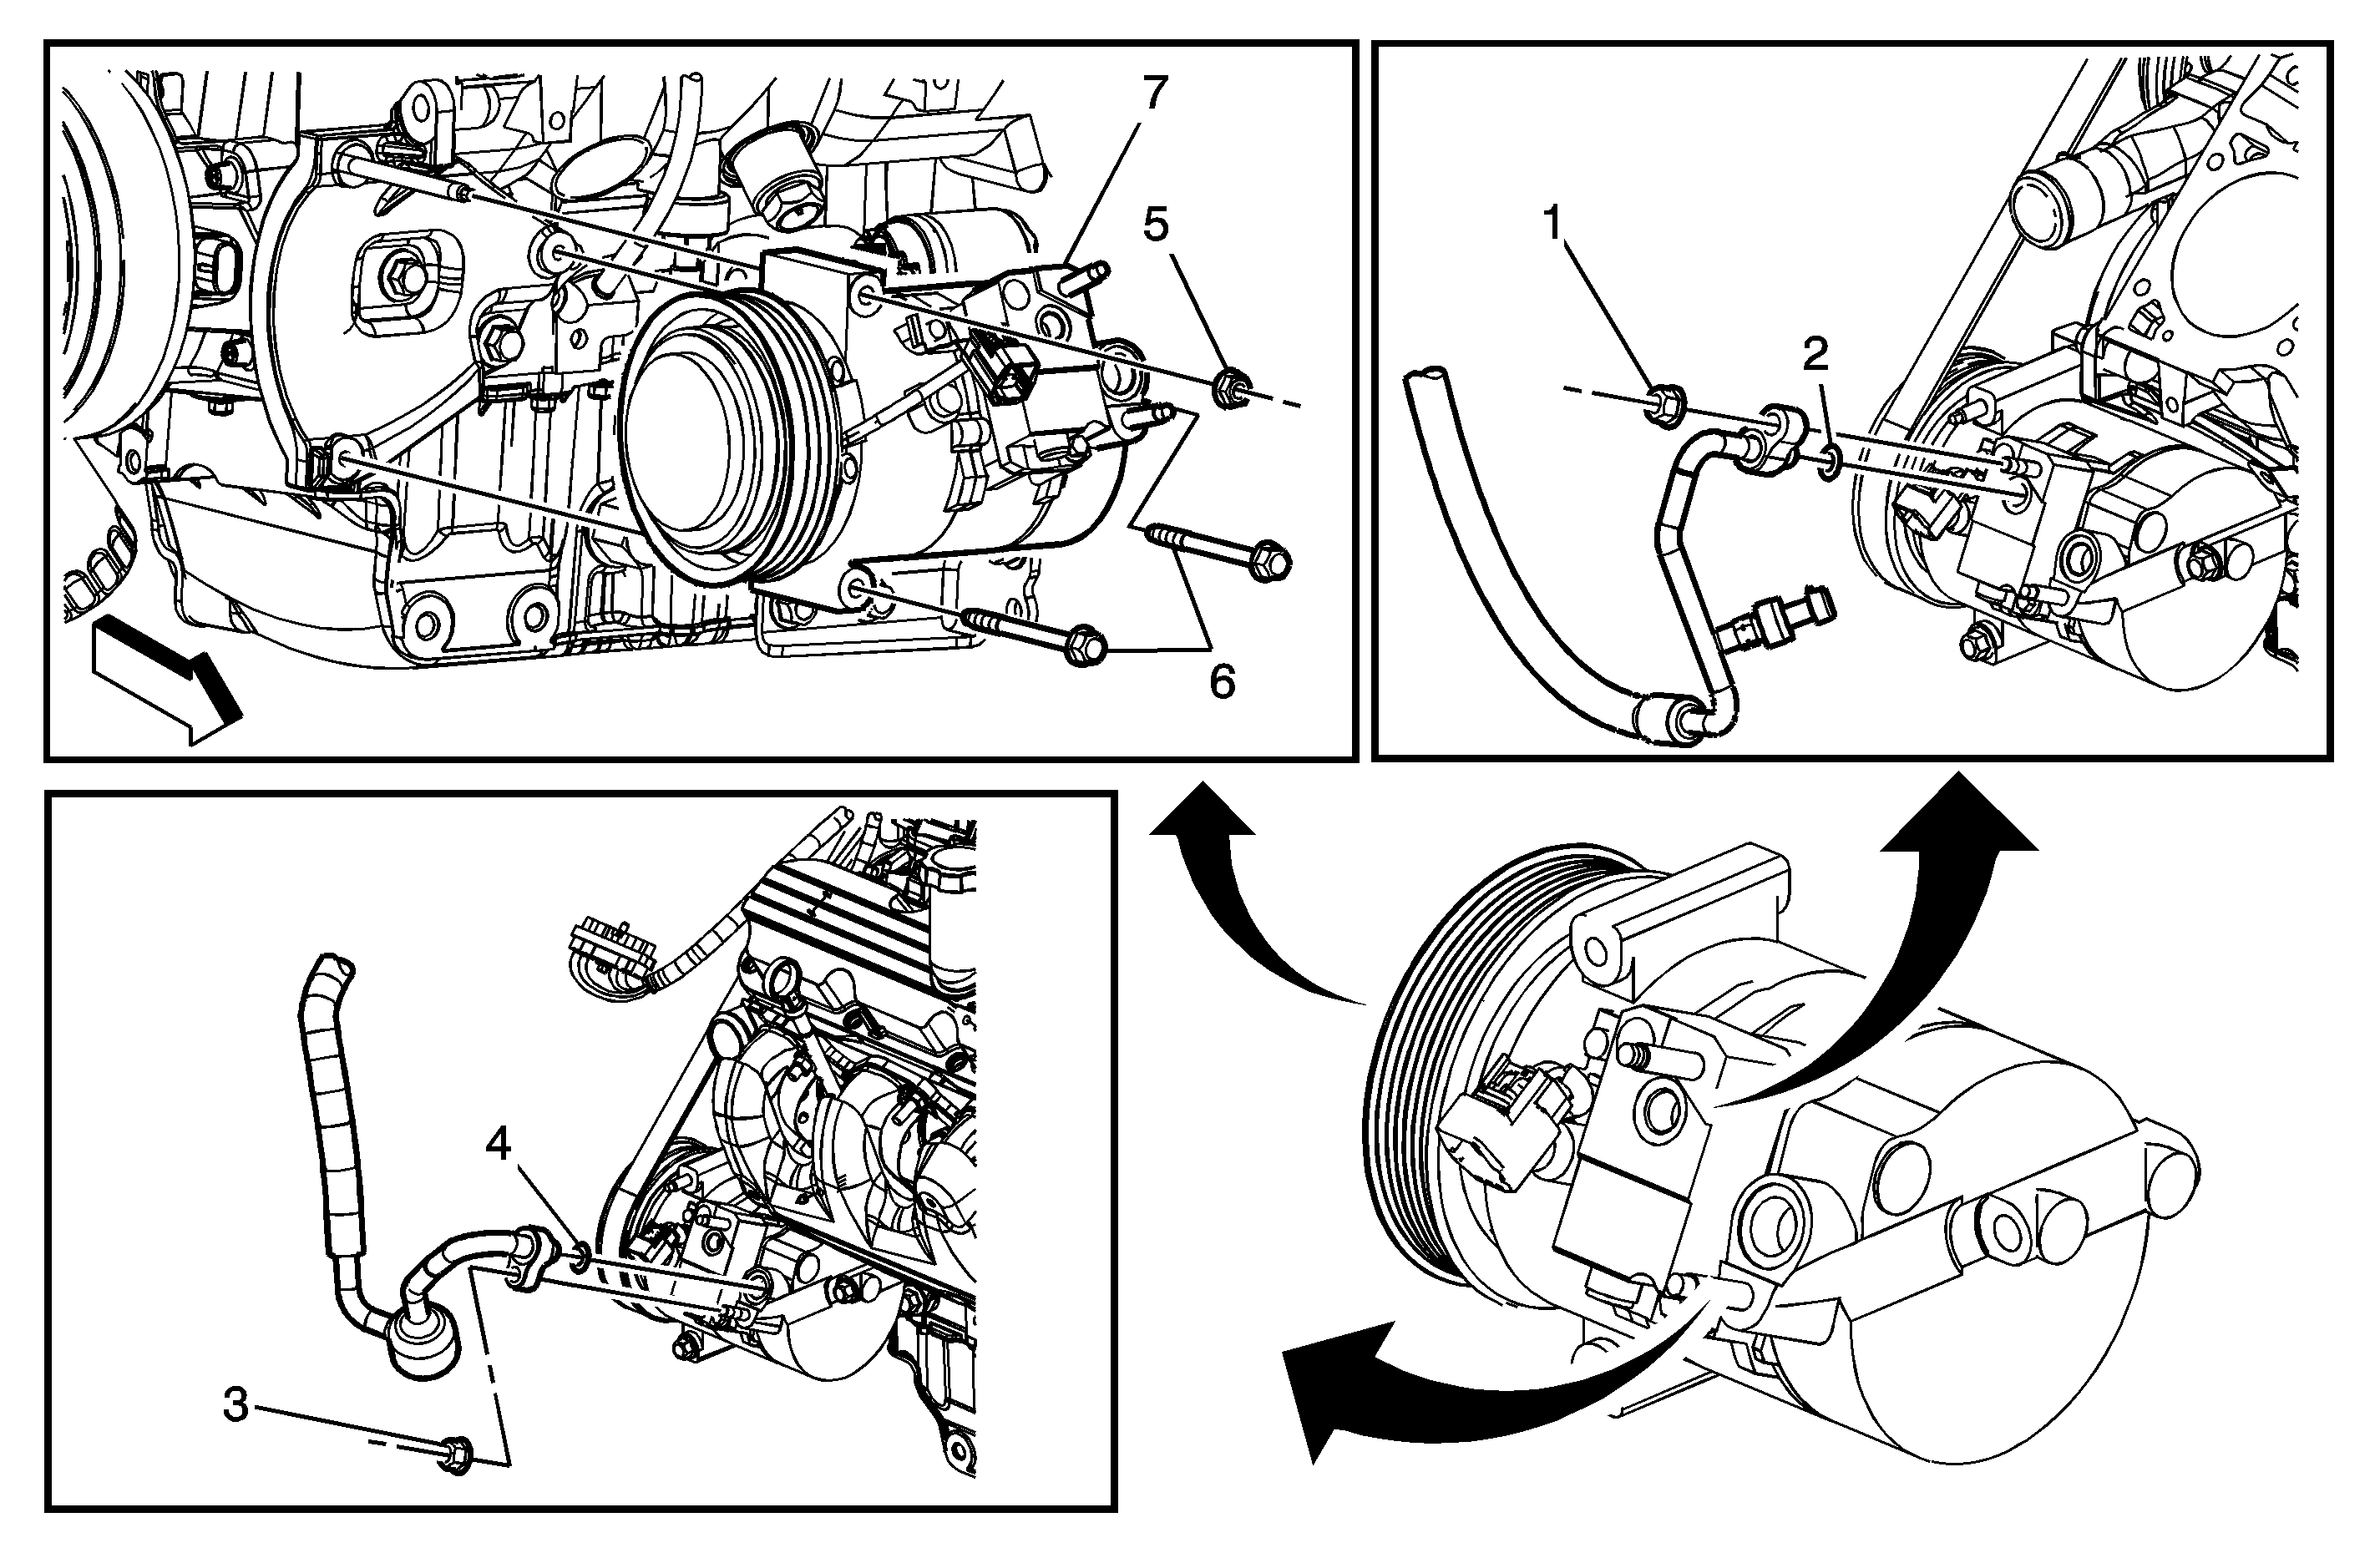
Air Conditioning Compressor Replacement L26


Object Number: 1671275  Size: MF

Callout

Component Name

Notice: Refer to Fastener Notice in the Preface section.

Fastener Tightening Specifications: Refer to Fastener Tightening Specifications

Preliminary Procedure

  1. Recover the refrigerant from the air conditioning (A/C) system. Refer to Refrigerant Recovery and Recharging
  2. Remove the drive belt. Refer to Drive Belt Replacement
  3. Important: Seal the compressor suction and discharge ports after the hoses are removed in order to keep contaminants from entering the compressor and oil from draining out of the compressor during removal.

  4. Disconnect the A/C compressor electrical connector.

1

A/C Compressor Discharge Hose Retaining Nut

Tighten
16 N·m (12 lb ft)

2

Sealing Washer

Tip
Remove and discard the sealing washer. Refer to Sealing Washer Replacement

3

A/C Compressor Suction Hose Retaining Nut

Tighten
16 N·m (12 lb ft)

4

Sealing Washer

Tip
Remove and discard the sealing washer. Refer to Sealing Washer Replacement

5

A/C Compressor Retaining Nut

Tighten
25 N·m (18 lb ft)

6

A/C Compressor Retaining Bolt (Qty: 2)

Tighten
25 N·m (18 lb ft)

7

A/C Compressor

Tip
Add proper amount of PAG oil. Refer to Air Conditioning Compressor Oil Balancing

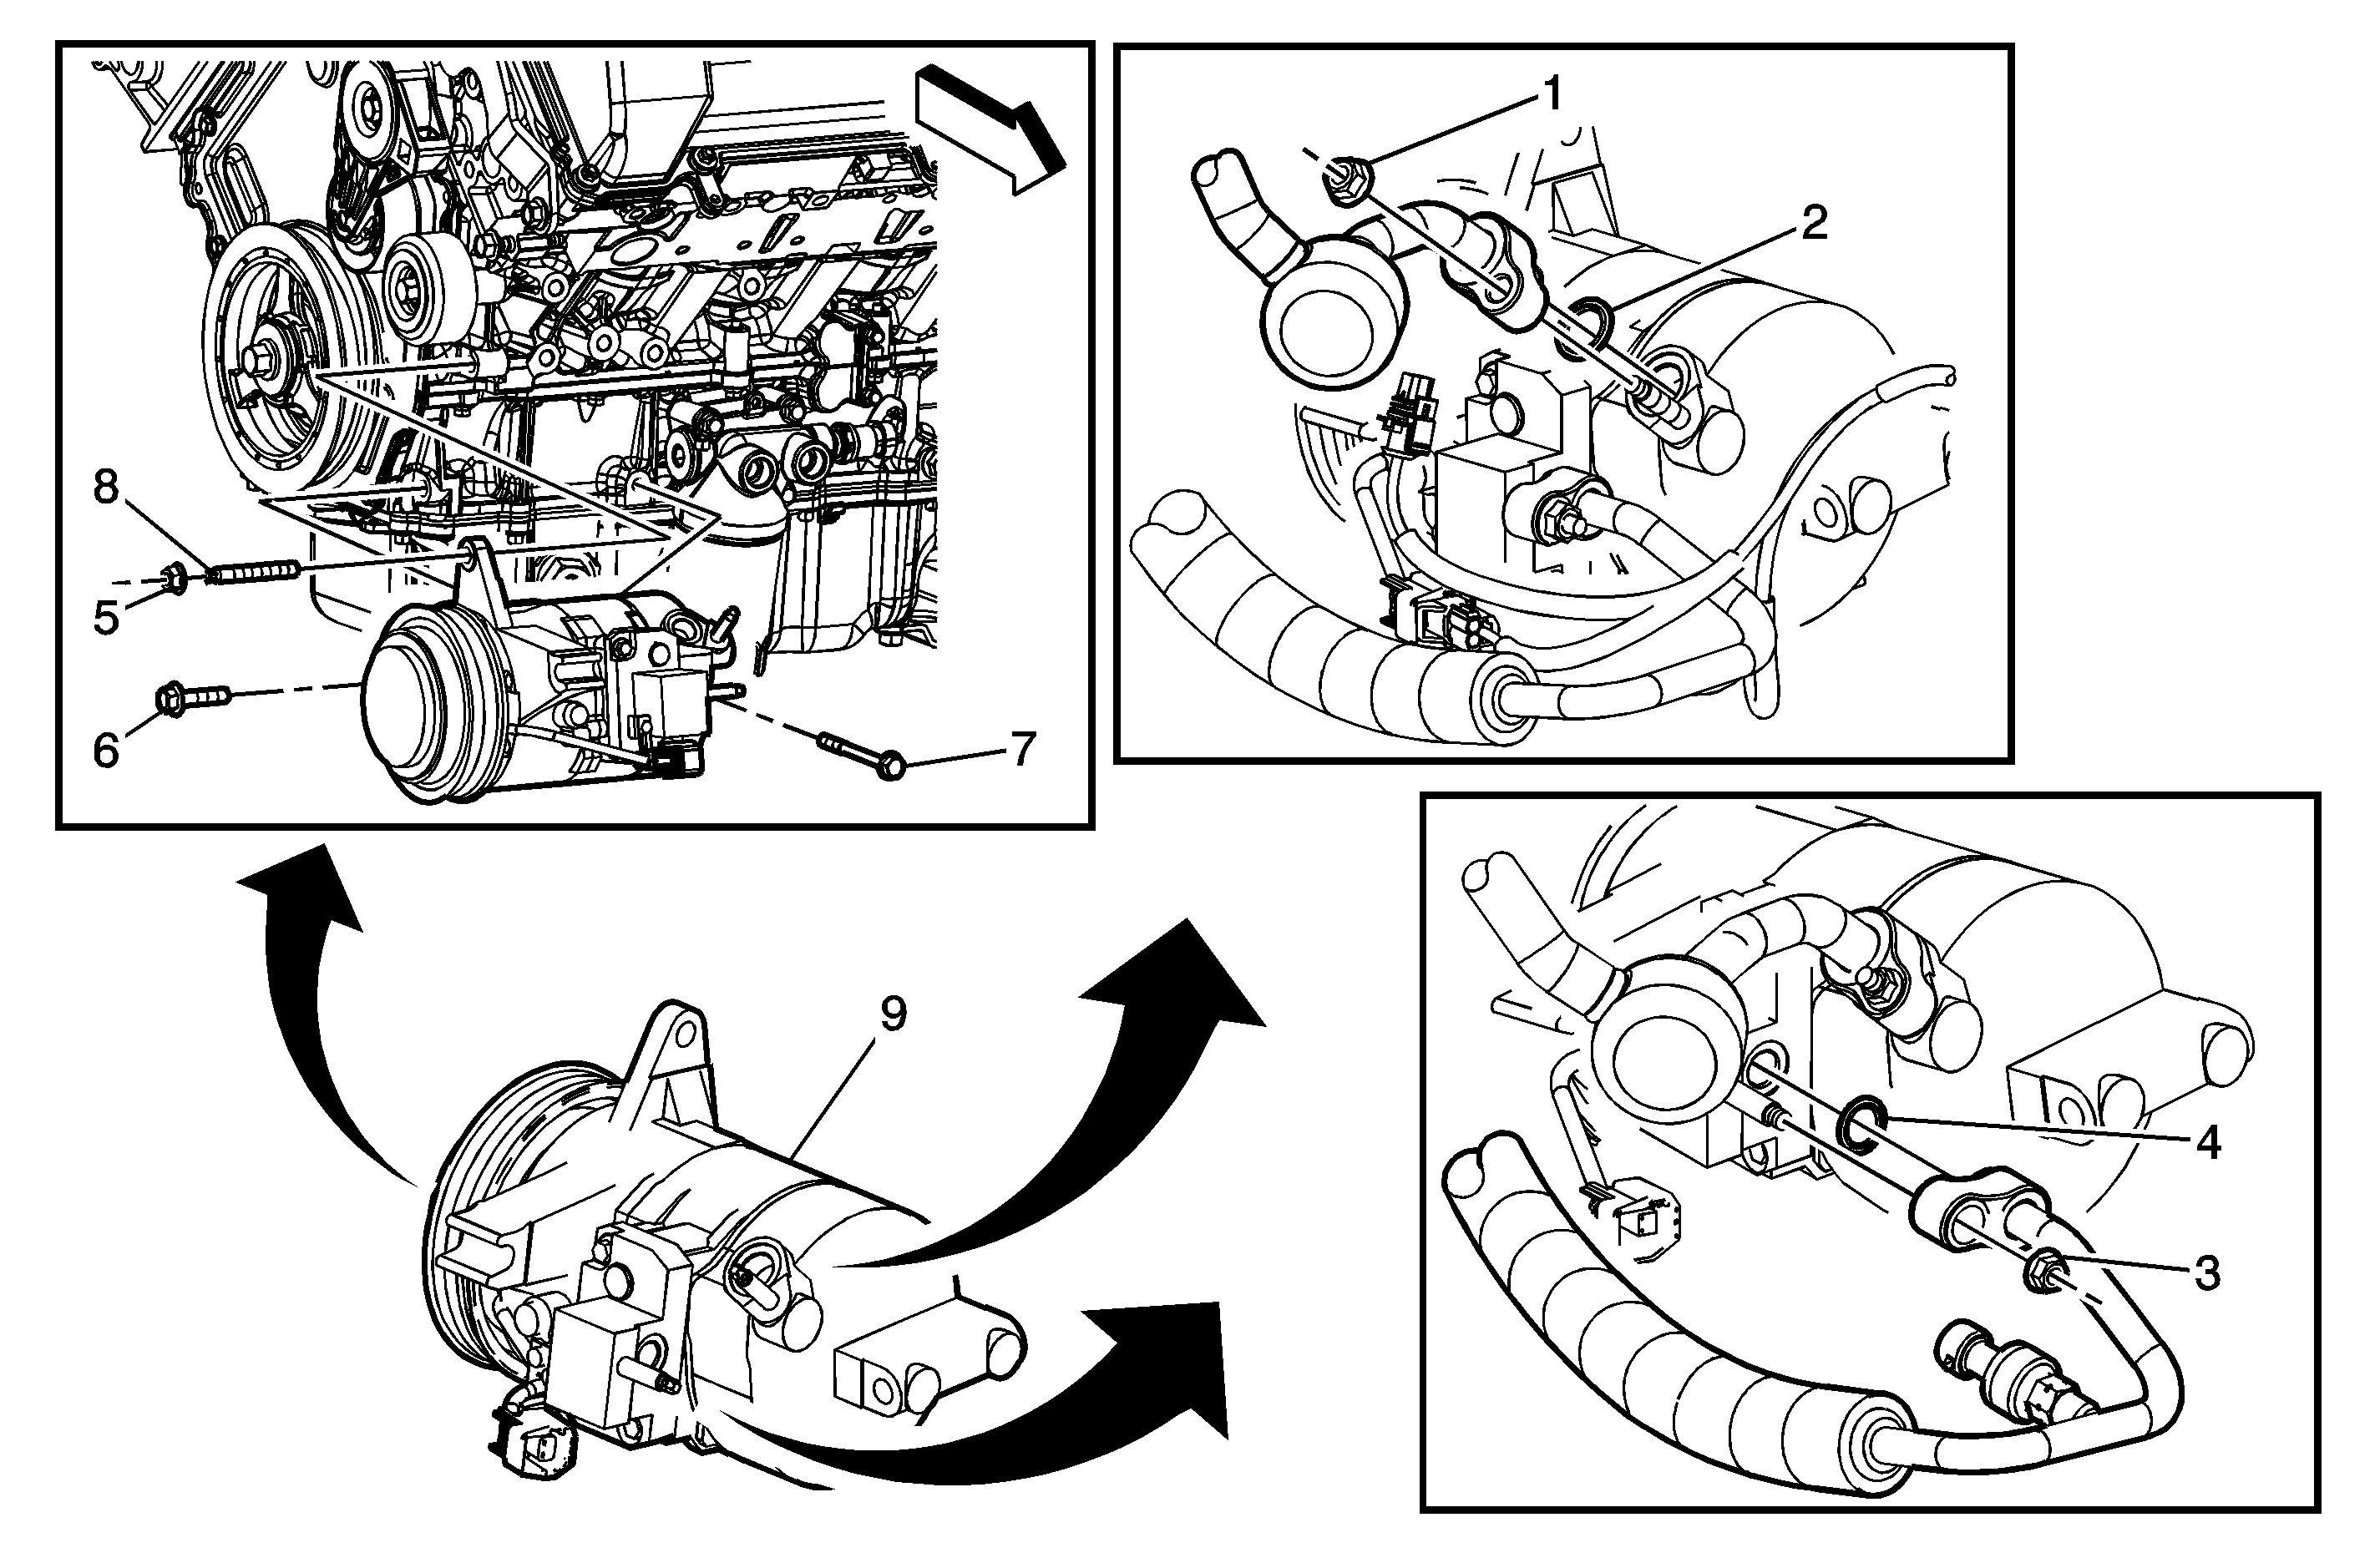
Air Conditioning Compressor Replacement LD8


Object Number: 1656294  Size: MF

Callout

Component Name

Notice: Refer to Fastener Notice in the Preface section.

Fastener Tightening Specifications: Refer to Fastener Tightening Specifications

Preliminary Procedure

  1. Recover the refrigerant from the air conditioning (A/C) system. Refer to Refrigerant Recovery and Recharging
  2. Remove the drive belt. Refer to Drive Belt Replacement
  3. Raise and support the vehicle. Refer to Lifting and Jacking the Vehicle
  4. Remove the right front tire. Refer to Tire and Wheel Removal and Installation
  5. Remove the lower air deflector. Refer to Front Air Deflector Replacement
  6. Remove the washer solvent container. Refer to Windshield Washer Solvent Container Replacement
  7. Remove the brake line retaining clips from the engine frame in order to allow the brake lines to move during removal of the A/C compressor.
  8. Important: Seal the compressor suction and discharge ports after the hoses are removed in order to keep contaminants from entering the compressor and oil from draining out of the compressor during removal.

  9. Disconnect the A/C compressor electrical connector.

1

A/C Compressor Suction Hose Retaining Nut

Tighten
16 N·m (12 lb ft)

2

Sealing Washer

Tip
Remove and discard the sealing washer. Refer to Sealing Washer Replacement

3

A/C Compressor Discharge Hose Retaining Nut

Tighten
16 N·m (12 lb ft)

4

Sealing Washer

Tip
Remove and discard the sealing washer. Refer to Sealing Washer Replacement

5

A/C Compressor Retaining Nut

Tighten
25 N·m (18 lb ft)

6

A/C Compressor Front Retaining Bolt

Tighten
25 N·m (18 lb ft)

7

A/C Compressor Rear Retaining Bolt

Tighten
25 N·m (18 lb ft)

8

A/C Compressor Retaining Stud

Tighten
25 N·m (18 lb ft)

9

A/C Compressor