Tools Required
| • | J 41623-B Cooler Quick Connect Tool |
| • | J 41160 Transmission Jack Adapter |
| • | J 42640 Steering Column Anti-Rotation Pin |
Removal Procedure
- Lock the steering column by installing J 42640 into the underside of the steering column.
- Disconnect the negative battery cable. Refer to Battery Negative Cable Disconnection and Connection .
- Remove the front compartment sight shield. Refer to Front Compartment Sight Shields Replacement .
- Remove the air cleaner assembly. Refer to Air Cleaner Assembly Replacement .
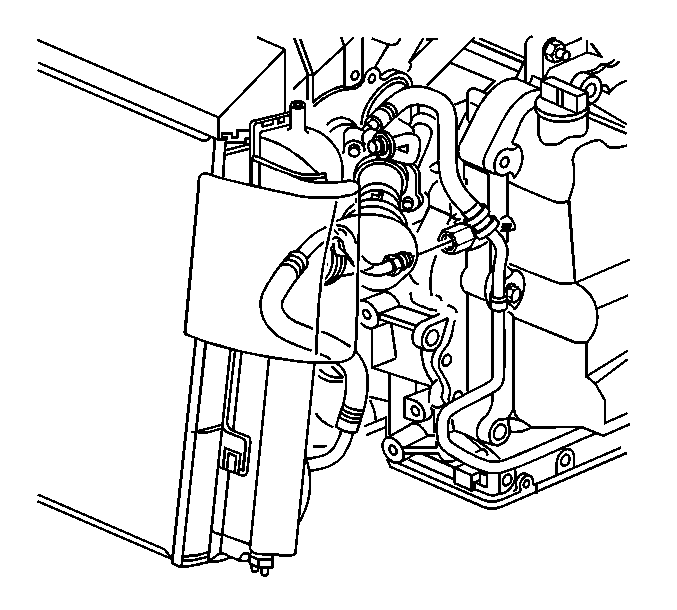
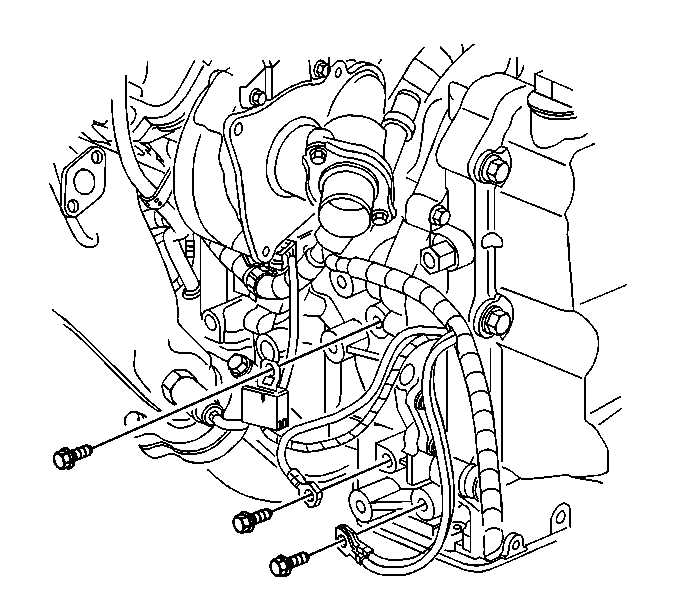
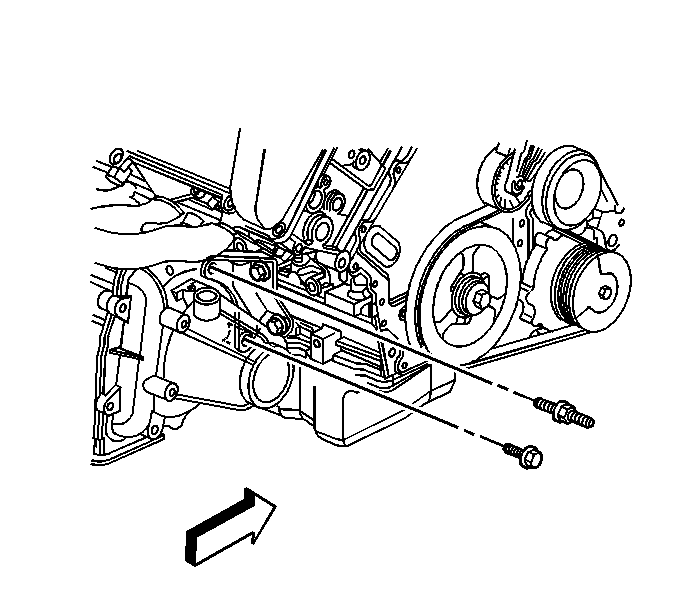
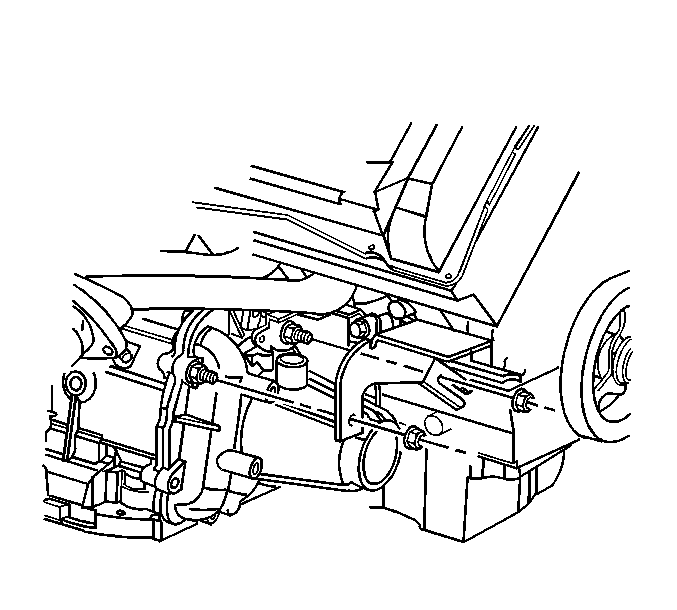
- Remove the range select cable terminal from the transaxle range select lever.
- Remove the nuts securing both the range selector cable bracket and heater pipe to the transaxle.
- Remove the range selector cable with bracket and heater pipe from the transmission case and position aside.
- Remove the Magnasteer wire from the retaining clip.
- Disconnect the master cylinder brake pipe retainers from the side rail.
- Remove the brake pipe retainers from the side rail and using mechanics wire, support the brake pipes above the side rail.
- Reposition the main wiring harness to gain access to the upper transaxle to engine bolts.
- Remove the transaxle to engine upper bolts. The lower bolt will temporally retain the transaxle and will be removed from the underside of the vehicle.
- Place a drain pan under the vehicle.
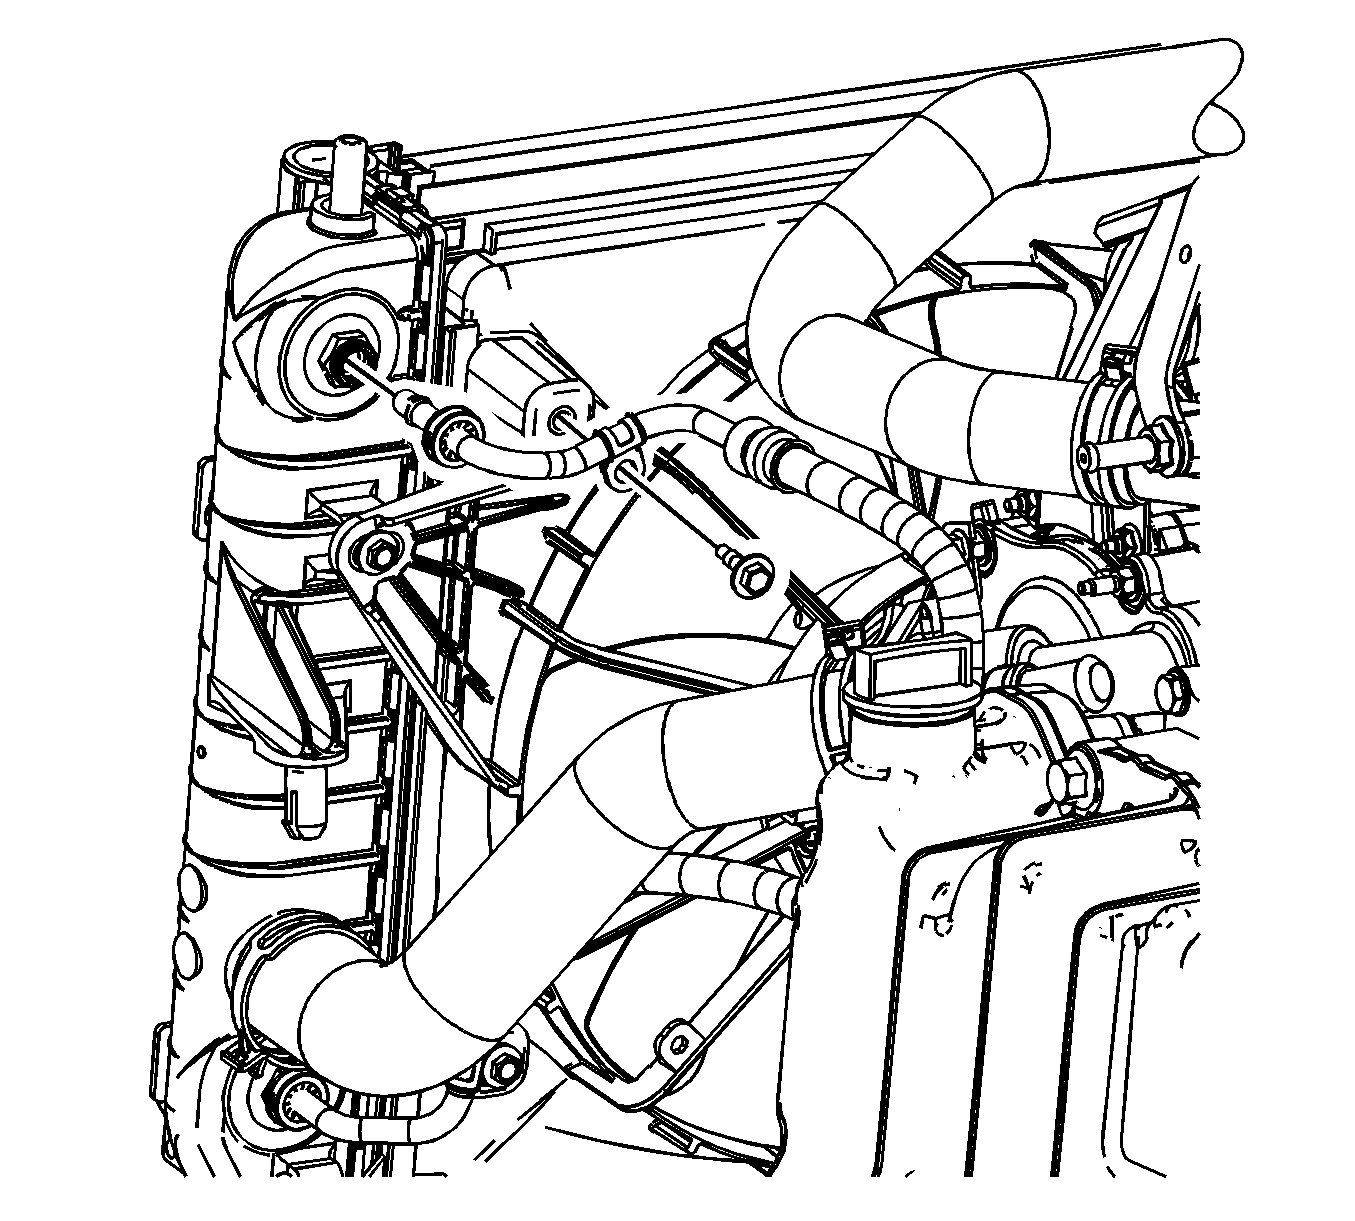
- Remove the upper transaxle oil cooler pipe retaining bolt from the radiator fan shroud.
- Disconnect the upper transaxle oil cooler pipe from the radiator using the J 41623-B . Install plugs in the oil cooler pipe and the radiator to prevent fluid loss and contamination.
- Disconnect the lower transaxle oil cooler pipe from the transaxle using the J 41623-B . Install plugs in the oil cooler pipe and the transaxle to prevent fluid loss and contamination.
- Disconnect the transaxle vent tube from the transaxle.
- Install the engine support fixture. Refer to Engine Support Fixture .
- Raise and support the vehicle. Refer to Lifting and Jacking the Vehicle .
- Remove the front tire and wheel assembly. Refer to Tire and Wheel Removal and Installation .
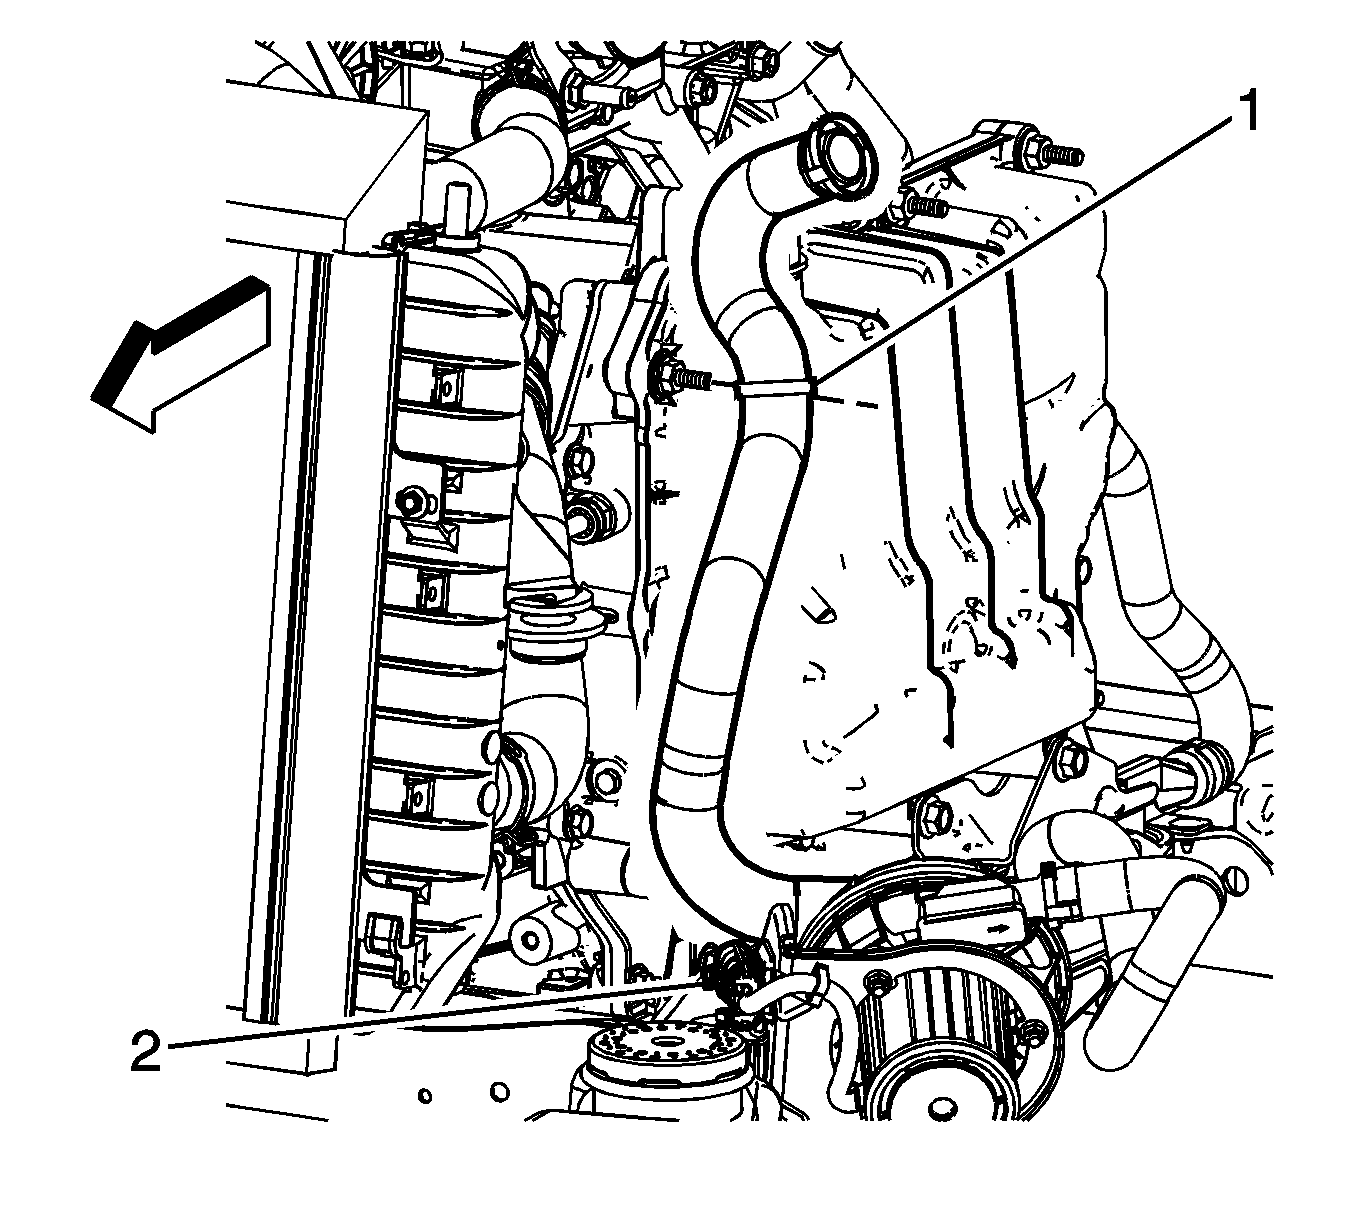
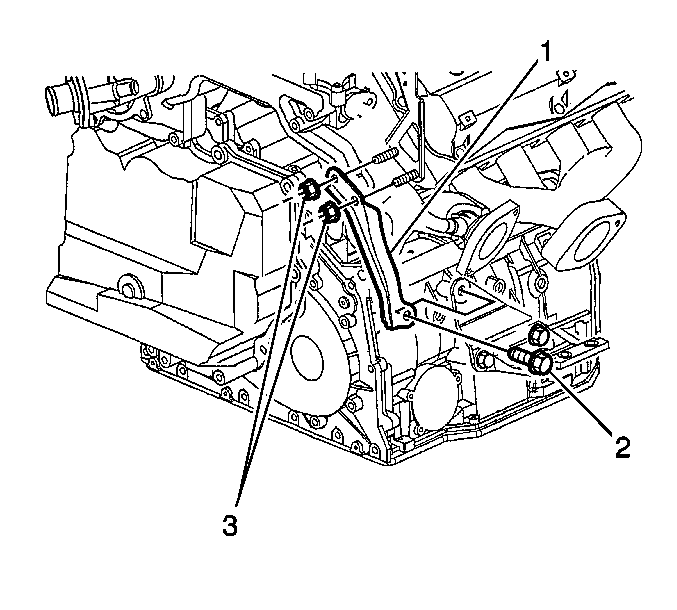
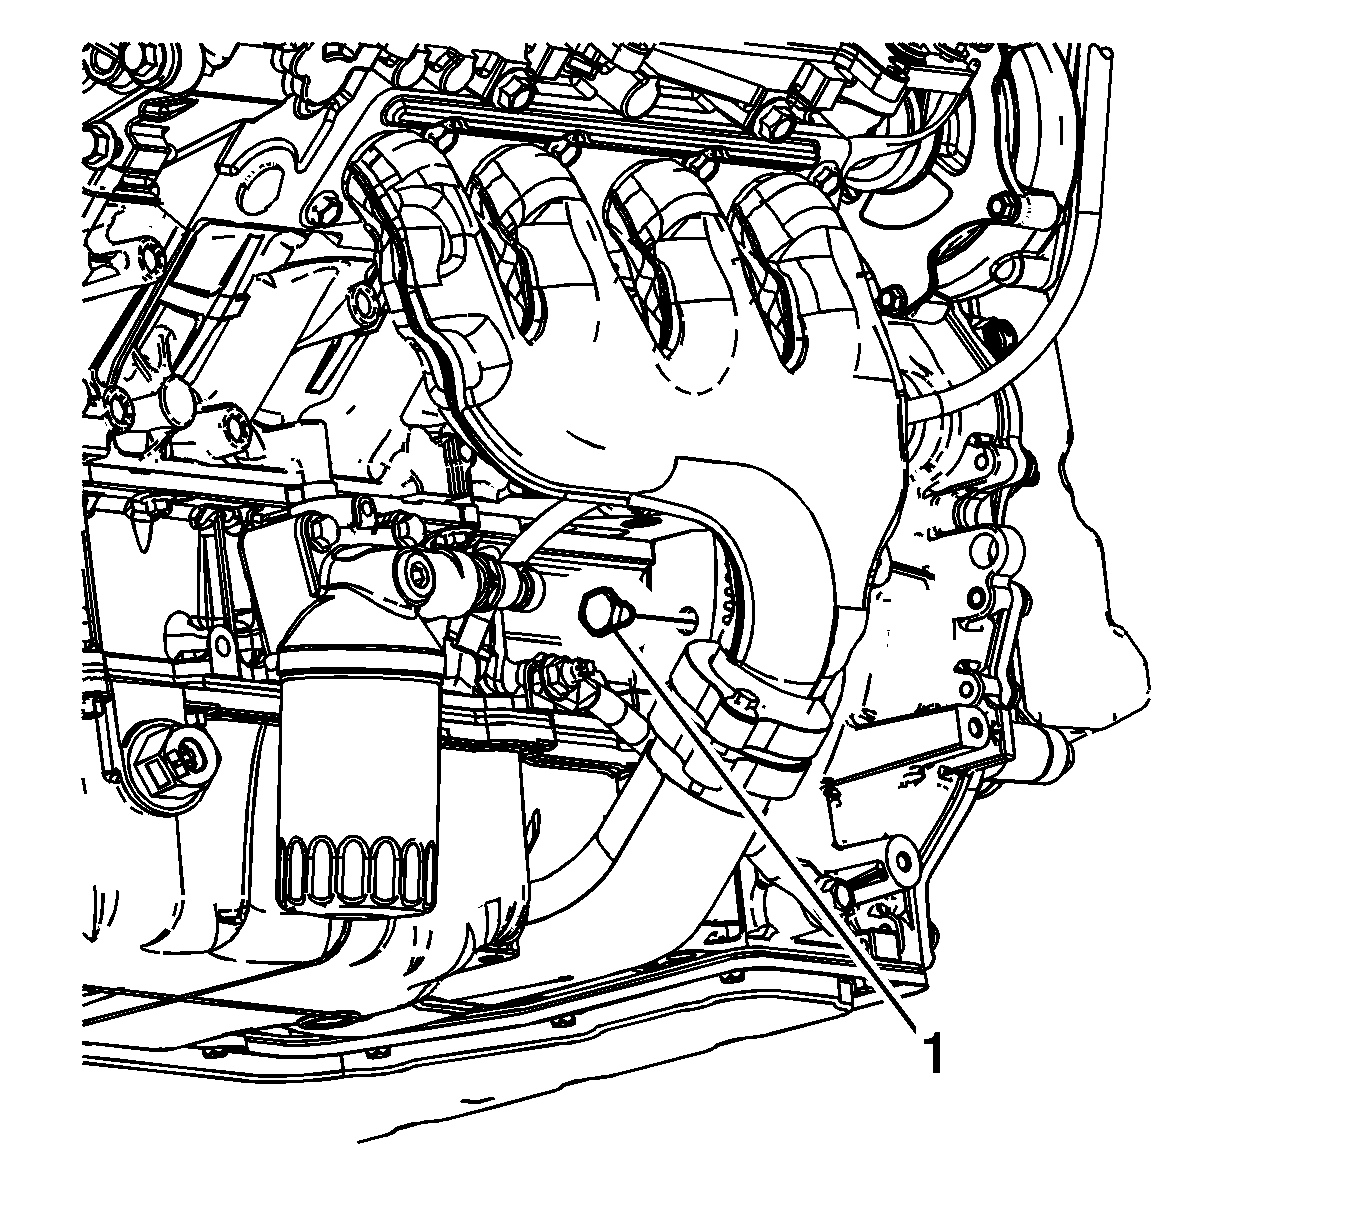
- Remove the secondary air injection (AIR) reaction intake pipe retainer (1) from the transaxle.
- Disconnect the AIR pump electrical connector.
- Disconnect the AIR hose (2) from the AIR pipe (1).
- Secure the vehicle to the front hoist pads.
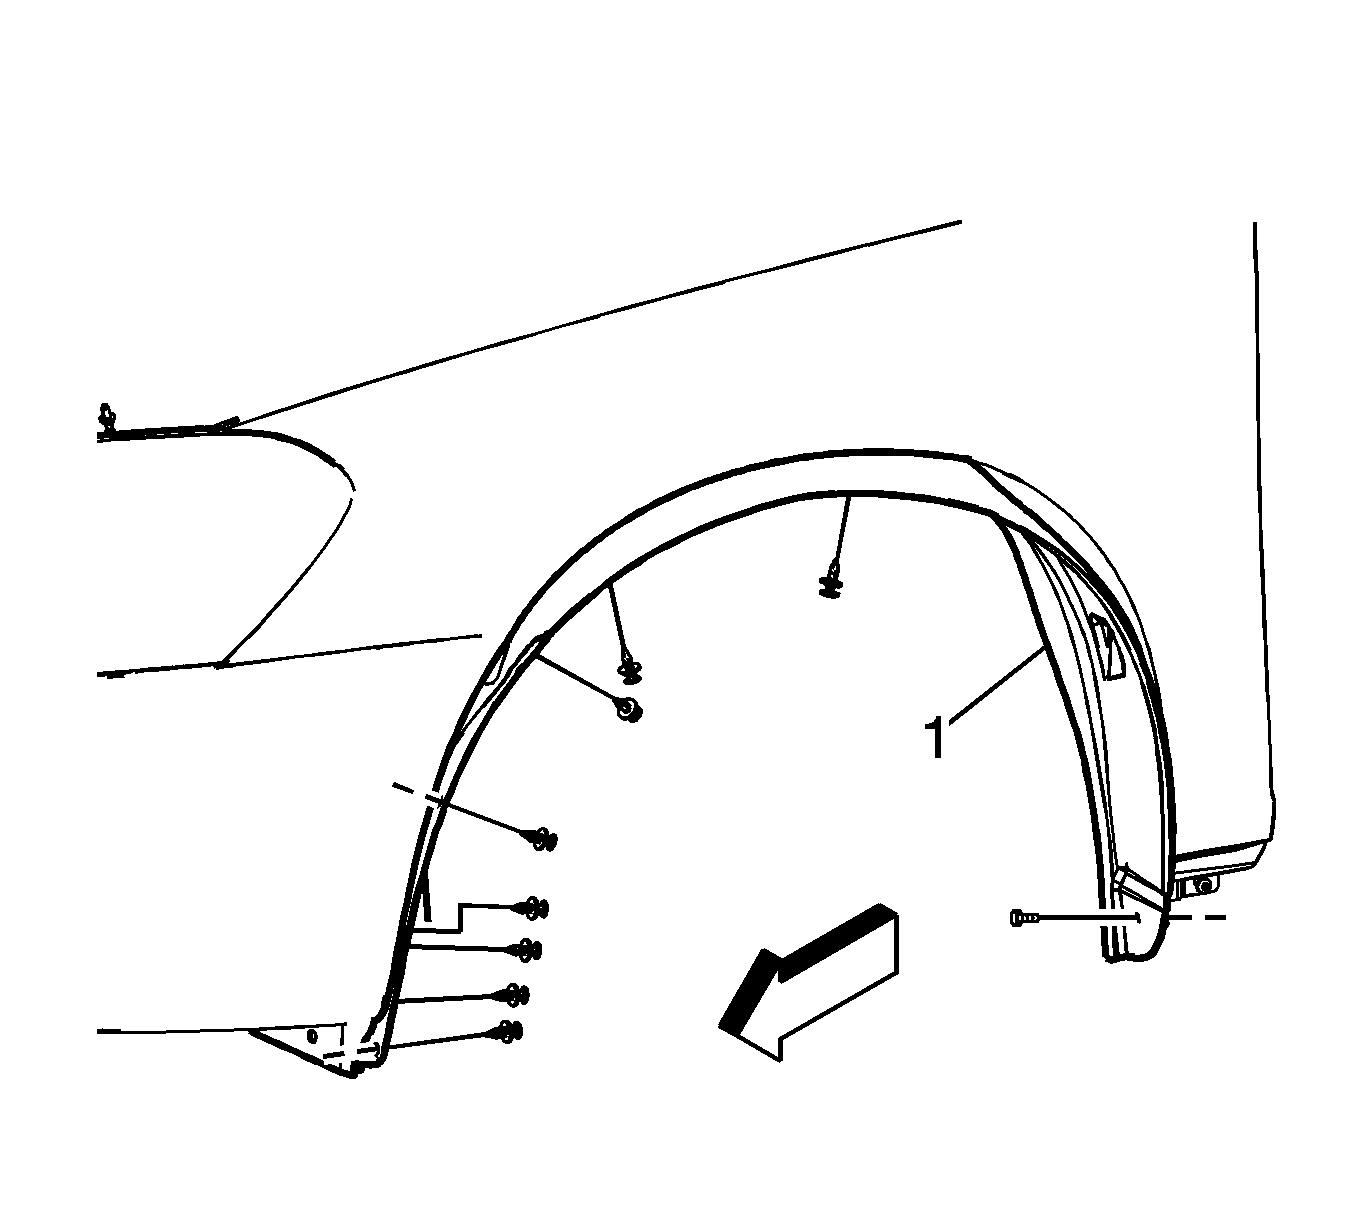
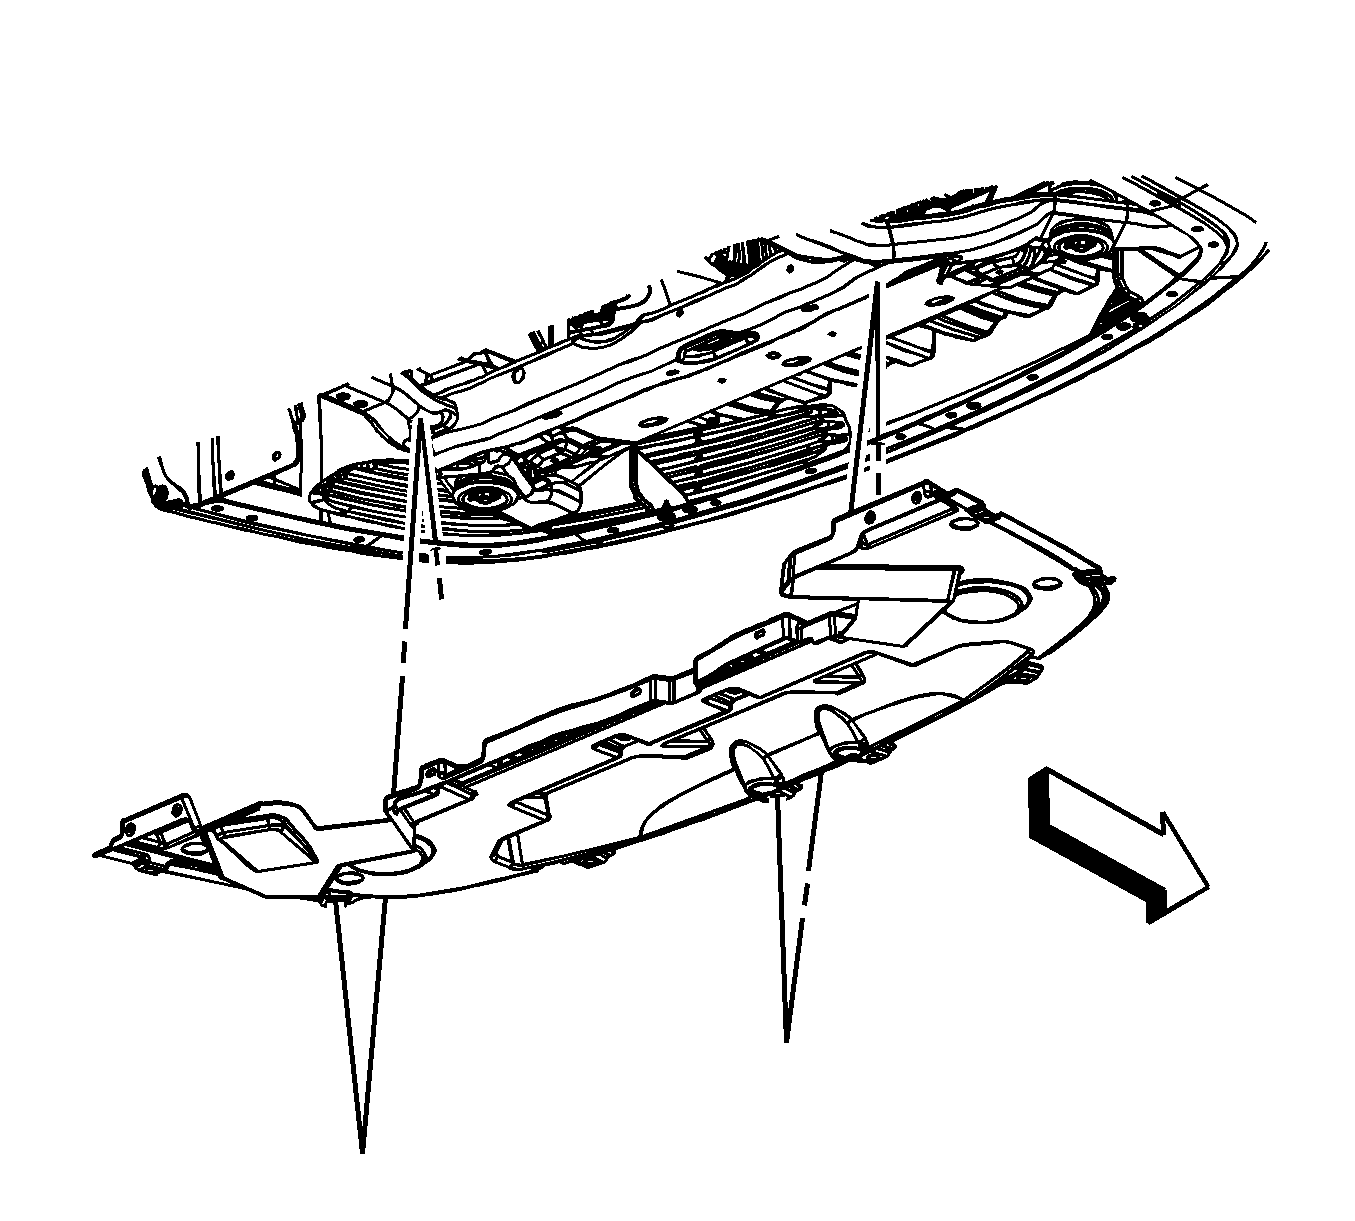
- Remove the left front wheelhouse liner (1). Refer to Front Wheelhouse Liner Replacement .
- Remove the air deflector extension. Refer to Front Wheelhouse Liner Replacement .
- Remove the stabilizer shaft links. Refer to Stabilizer Shaft Link Replacement .
- Swing the stabilizer shaft downward in order to gain access to the power steering gear retaining bolts.
- Remove the intermediate shaft lower pinch bolt.
- Disconnect the intermediate shaft from the power steering gear.
- Remove the power steering gear heat shield. Refer to Steering Gear Heat Shield Replacement .
- Remove the power steering gear mounting bolts.
- Remove the power steering line retainers from the frame.
- Secure the power steering gear to the exhaust manifold.
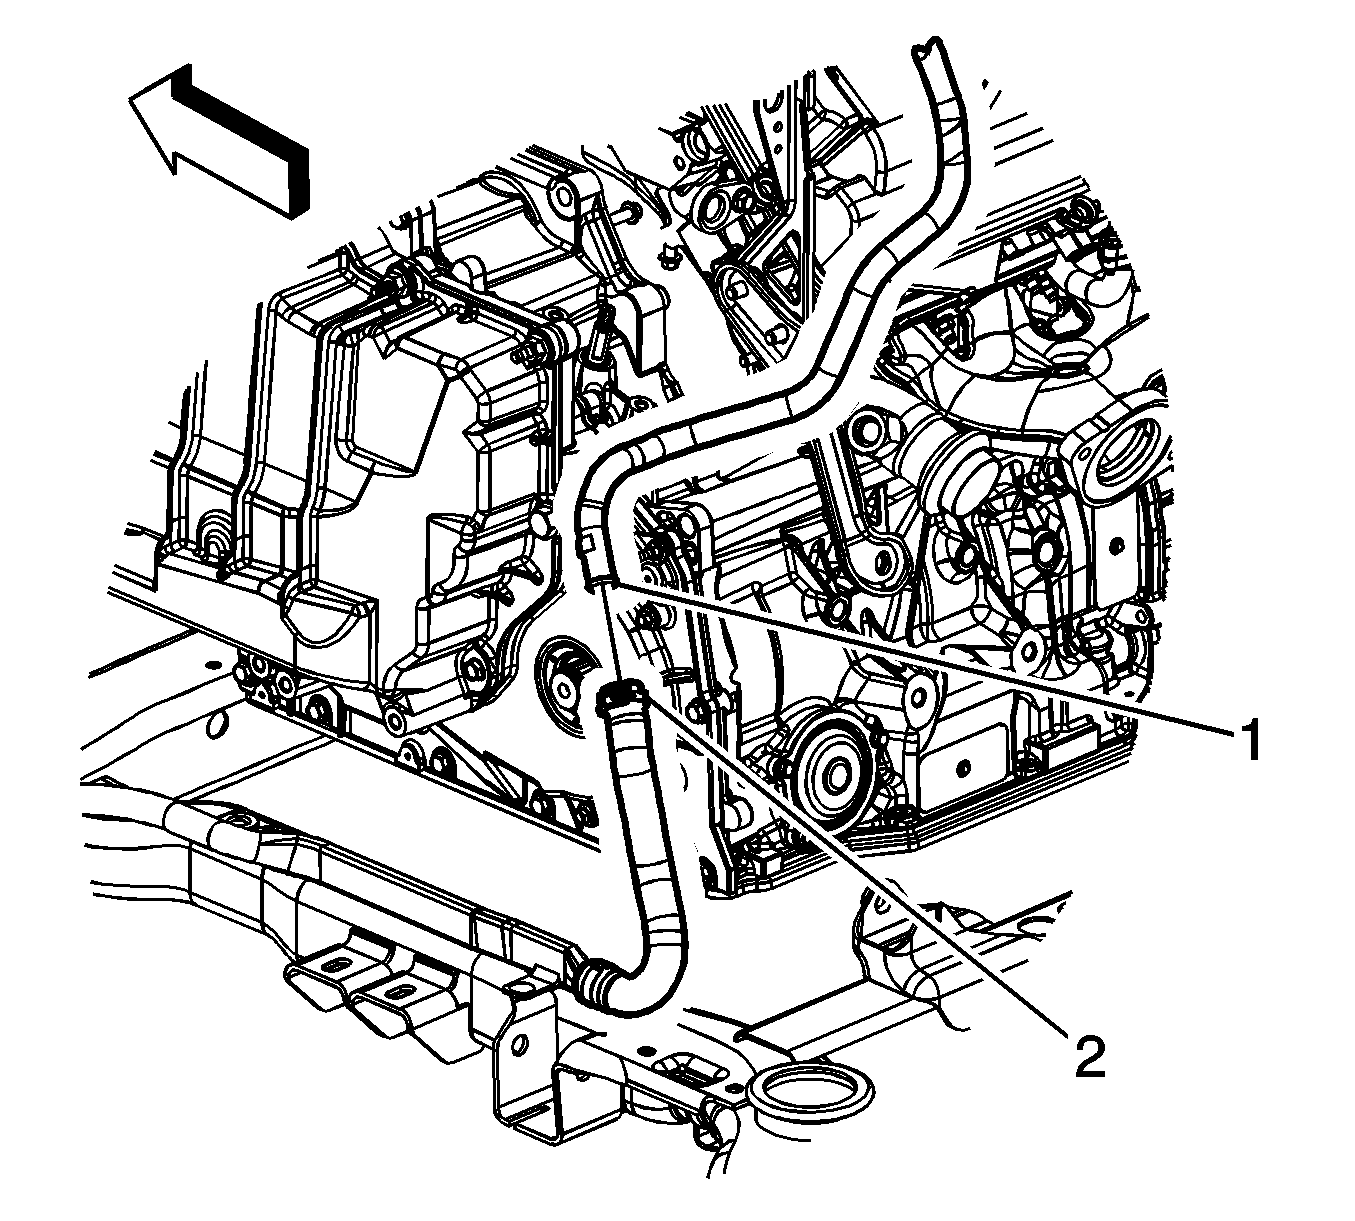
- Remove the mounting bolts (2) in order to allow removal of the brake pressure modulator valve from the bracket.
- Remove the brake line retainers (1) from the frame.
- Remove the frame. Refer to Front Frame Replacement .
- Disengage the right and left drive shafts (2) from the transaxle (1). The drive shafts do not have to be removed from the wheels. Refer to Wheel Drive Shaft Replacement .
- Using mechanic's wire, support the wheel drive shafts out of the way by tying them up to the strut spring.
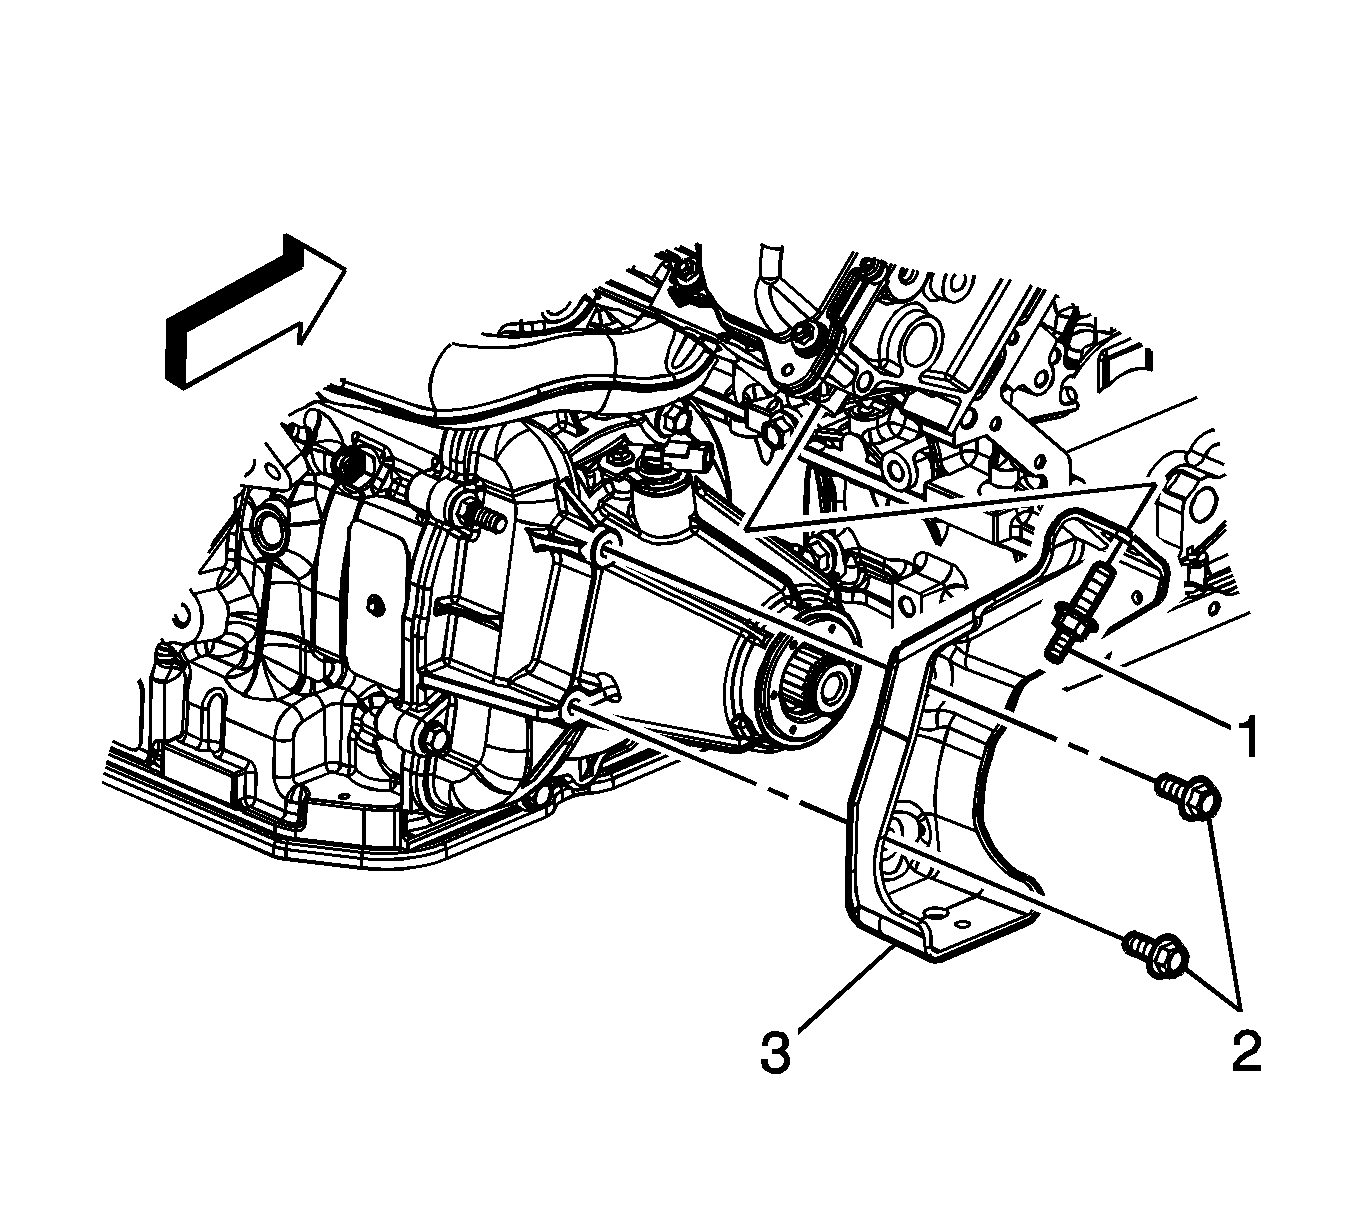
- Remove the bolt securing the left transaxle brace to the transaxle.
- Loosen the nut securing the left transaxle brace to the engine.
- Remove the left transaxle brace from the powertrain assembly.
- Remove the 3 ground connections from the side of the transaxle.
- Disconnect the transaxle main electrical harness connector.
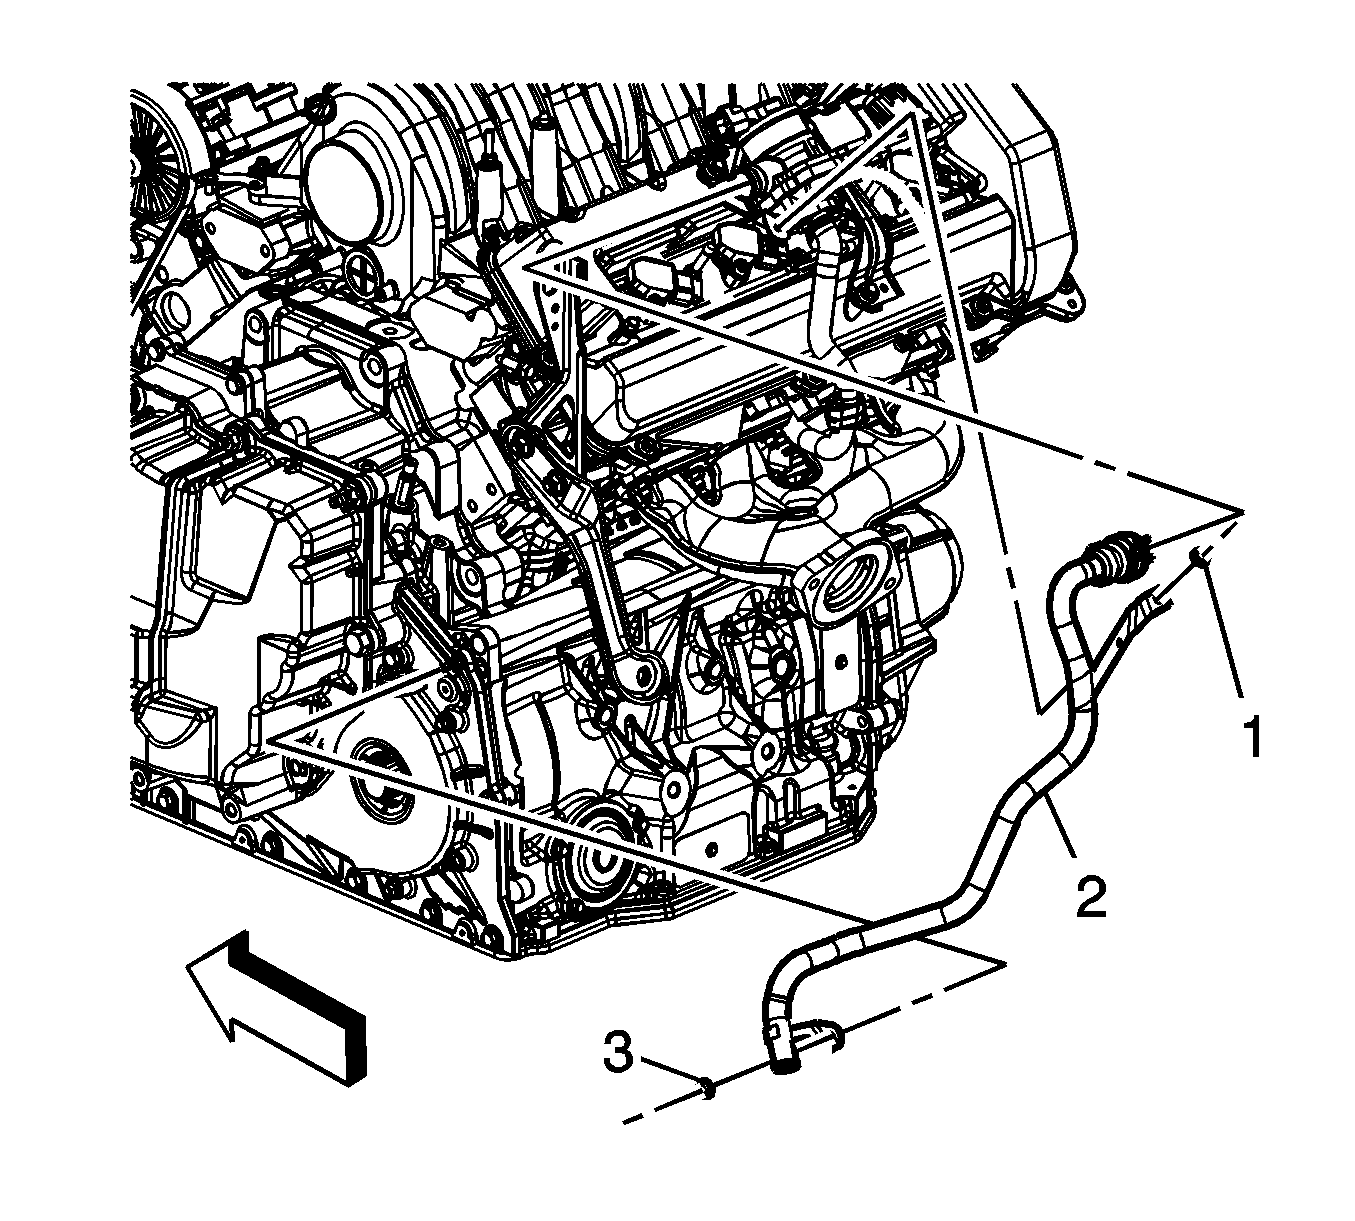
- Remove the bolt (2) securing the left transaxle brace (1) to the transaxle.
- Remove the nut (3) securing the AIR pipe to the transaxle.
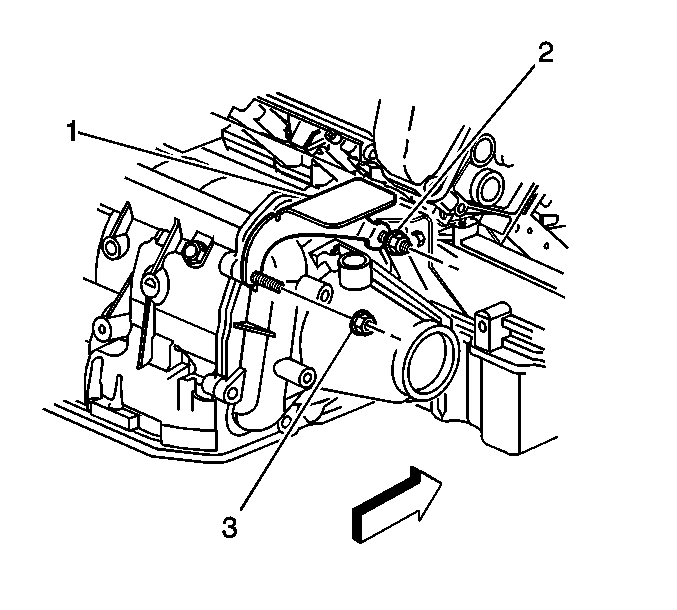
- Remove the nuts (2, 3) securing the vehicle speed sensor heat shield (1) to the transaxle.
- Remove the vehicle speed sensor heat shield (1) from the vehicle.
- Disconnect the vehicle speed sensor electrical connector.
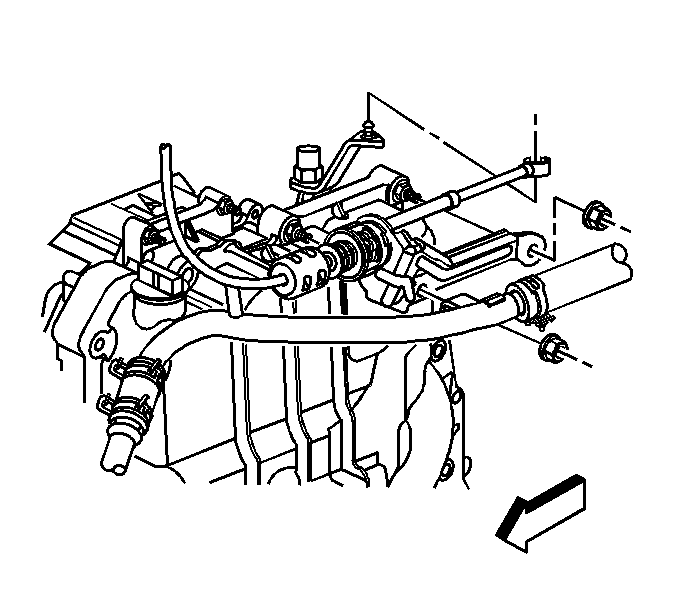
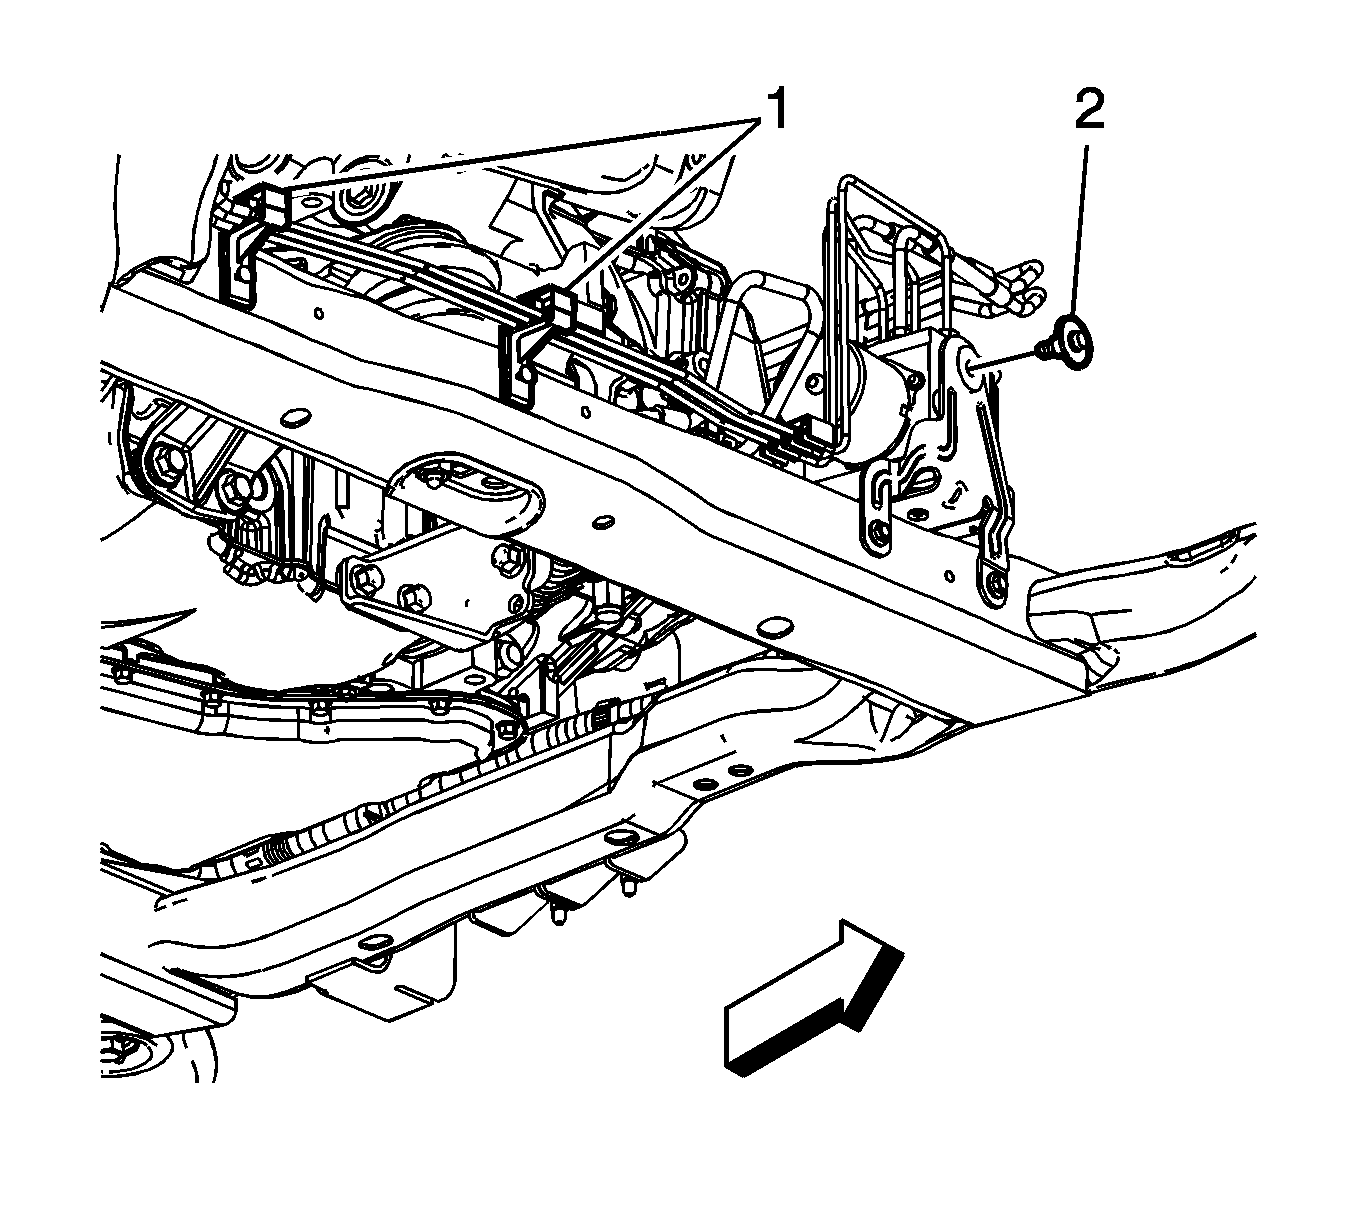
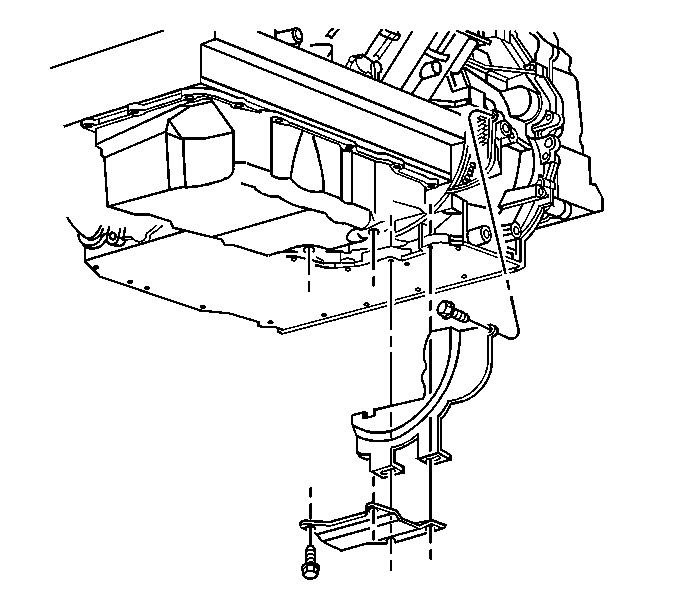
- Remove the bolts (2) securing the rear transaxle mount bracket (3) to the transaxle.
- Remove only the bolts securing the rear transaxle brace to the transaxle.
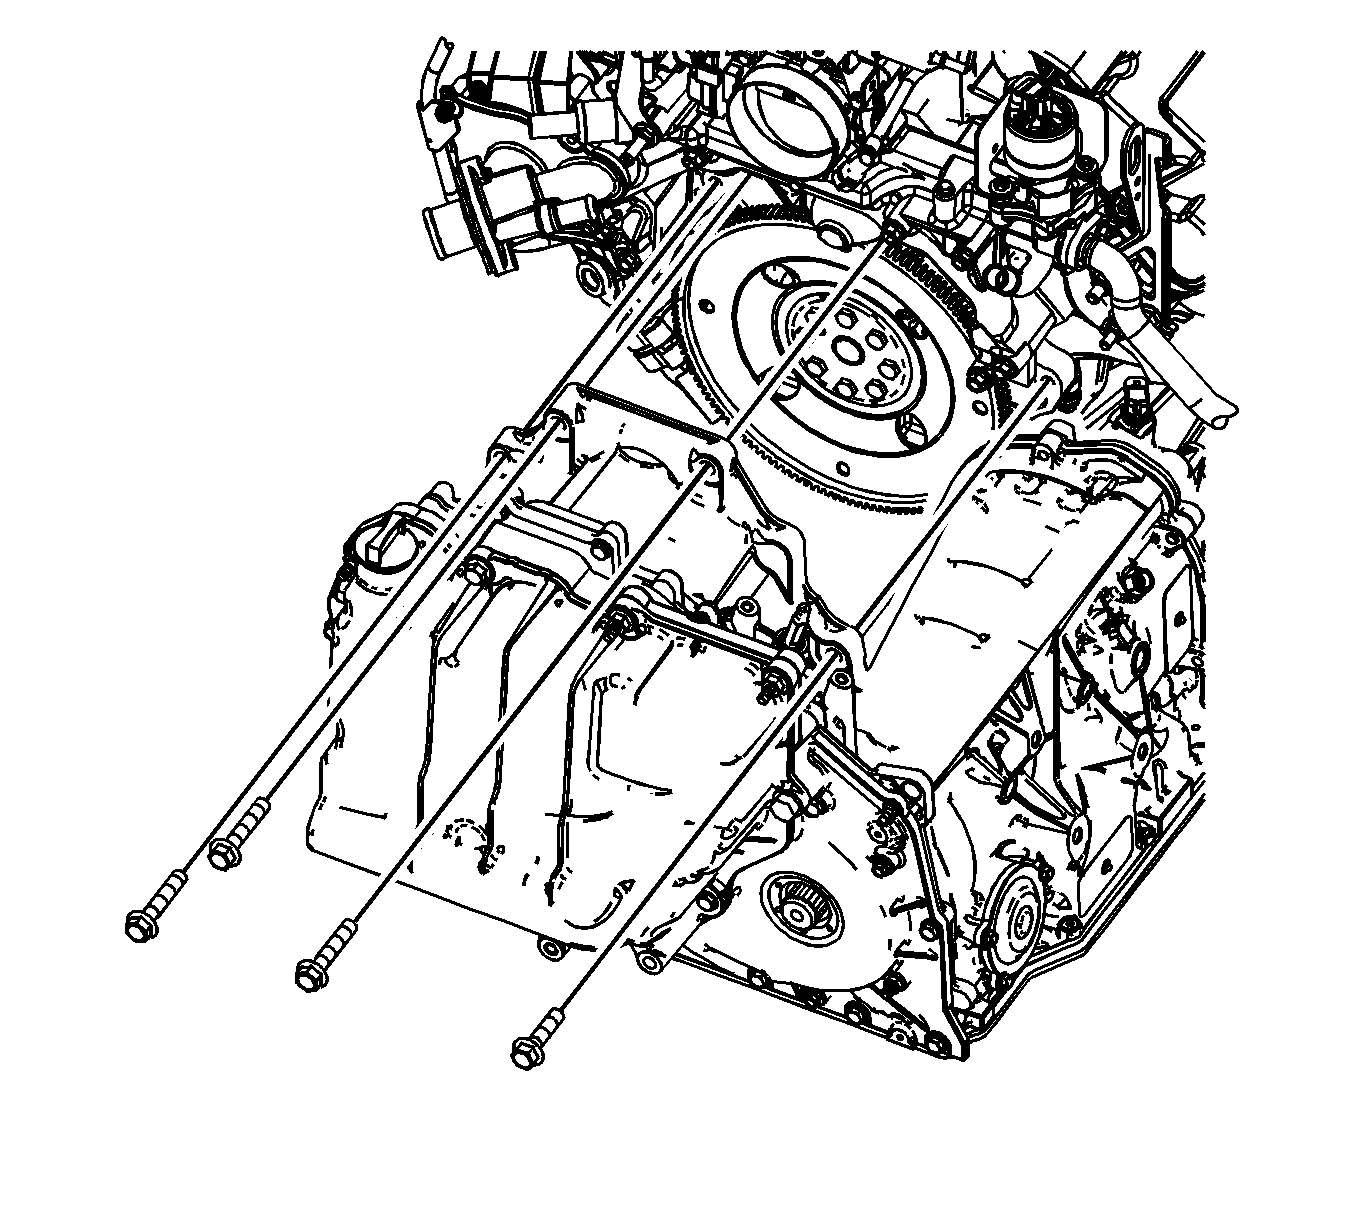
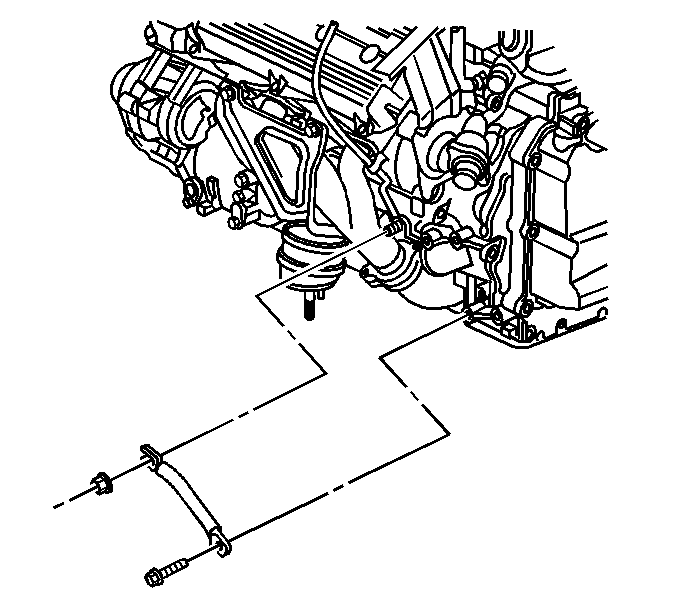
- Remove the transmission to engine oil pan brace. Refer to Transmission Brace Replacement .
- Remove the torque converter cover. Refer to Torque Converter Cover Replacement .
- Remove the flywheel to torque converter bolts (1).
- Position the power steering gear pressure hose to the right side of the vehicle in order to clear the transaxle during removal.
- Support the transaxle using the J 41160 and a suitable transmission jack.
- Secure the J 41160 to the transaxle.
- Remove the remaining transaxle to engine bolt.
- Separate the transaxle from the engine.
- Tilt the transaxle using the support jack enough to allow clearance for the starter nose cone.
- Carefully lower the transaxle from the vehicle.
- Flush the transmission cooler and lines. Refer to Transmission Fluid Cooler Flushing and Flow Test .
- Complete the following if transaxle replacement is necessary:

Notice: The wheels of the vehicle must be straight ahead and the steering column in the LOCK position before disconnecting the steering column or intermediate shaft from the steering gear. Failure to do so will cause the SIR coil assembly to become uncentered, which may cause damage to the coil assembly.
Important: Supporting the brake pipes above the body side rail is necessary while removing the transaxle in order to prevent pinching of the brake pipes.
Caution: To avoid any vehicle damage, serious personal injury or death when major components are removed from the vehicle and the vehicle is supported by a hoist, support the vehicle with jack stands at the opposite end from which the components are being removed and strap the vehicle to the hoist.
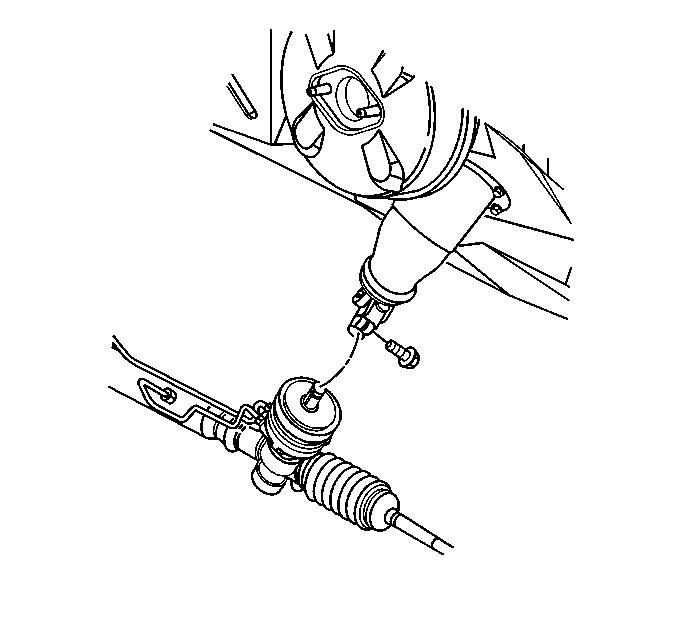
Caution: Failure to disconnect the intermediate shaft from the rack and pinion steering gear stub shaft can result in damage to the steering gear or to the intermediate shaft. This damage may cause loss of steering control, which could result in an accident and possible personal injury.

Important: The following are exceptions while following the frame removal procedure:
• Do not remove the front stabilizer shaft from the frame. • Do not remove the insulators from the frame. • Do not remove the control arms from the frame.

Important: Mark the flywheel to torque converter position so that they can be assembled in the same position.
Important: Ensure clearance is maintained between the transaxle and the following:
• The brake pipes • The power steering pressure hose • The wiring harnesses
| • | Remove the transaxle cooler pipe. Refer to Transmission Fluid Cooler Hose/Pipe Replacement . |
| • | Remove the left transaxle bracket. Refer to Transmission Mount Replacement - Left Side . |
Installation Procedure
- Complete the following if previously removed from the transaxle:
- Carefully raise the transaxle to the engine in a tilted position in order to clear the starter nose cone.
- Align the transaxle with the engine and position the transaxle onto the engine dowels.
- Install the engine to transaxle lower bolt.
- Install the bolts securing the rear transaxle brace to the transaxle.
- Connect the vehicle speed sensor electrical connector.
- Install the vehicle speed sensor heat shield and nuts.
- Install the bolts (2) securing the rear transaxle mount bracket (3) to the transaxle.
- Remove the transmission jack and the J 41160 .
- Install the flywheel to converter bolts (1).
- Install the torque converter cover. Refer to Torque Converter Cover Replacement .
- Install the transmission to engine oil pan brace. Refer to Transmission Brace Replacement .
- Install the right and left drive shafts (2) to the transaxle (1). Refer to Wheel Drive Shaft Replacement .
- Install the nut (3) securing the AIR pipe to the transaxle.
- Install the bolt (2) securing the left transaxle brace (1) to the transaxle.
- Install the 3 ground connections to the side of the transaxle.
- Connect the transaxle main electrical harness connector.
- Install the left transaxle brace to the powertrain assembly.
- Install the bolt securing the left transaxle brace to the transaxle.
- Install the front frame assembly to the vehicle. Refer to Front Frame Replacement .
- Position the brake pressure modulator valve into the bracket.
- Install the mounting bolt (2).
- Install the brake line retainers (1) onto the frame.
- Install the power steering gear mounting bolts.
- Install the power steering line retainers onto the frame.
- Install the power steering gear heat shield. Refer to Steering Gear Heat Shield Replacement .
- Connect the intermediate shaft to the power steering gear.
- Install the intermediate shaft lower pinch bolt.
- Install the stabilizer shaft links. Refer to Stabilizer Shaft Link Replacement .
- Install the air deflector extension. Refer to Front Air Deflector Replacement .
- Install the left front wheelhouse liner (1). Refer to Front Wheelhouse Liner Replacement .
- Connect the AIR hose (2) to the AIR pipe (1).
- Install the AIR intake pipe retainer (1) to the transaxle.
- Connect the AIR pump electrical connector.
- Install the front tire and wheel assembly. Refer to Tire and Wheel Removal and Installation .
- Lower the vehicle.
- Connect the lower transaxle oil cooler pipe to the transaxle. Refer to Transmission Fluid Cooler Hose/Pipe Quick-Connect Fitting Disconnection and Connection .
- Install the upper transaxle oil cooler pipe to the radiator. Refer to Transmission Fluid Cooler Hose/Pipe Quick-Connect Fitting Disconnection and Connection .
- Install the remaining transaxle to engine bolts.
- Remove the engine support fixture. Refer to Engine Support Fixture .
- Install the range selector cable bracket to the studs on the transaxle.
- Install the heater pipe to the stud on the transaxle.
- Install the nuts that retain the heater pipe and the range selector cable bracket to the transaxle.
- Connect the range selector cable terminal to the transaxle range selector lever.
- Install the Magnasteer wire to the retaining clip.
- Install the brake pipe retainers to the side rail.
- Install the air cleaner assembly. Refer to Air Cleaner Assembly Replacement .
- Install the front compartment sight shield. Refer to Front Compartment Sight Shields Replacement .
- Connect the negative battery cable. Refer to Battery Negative Cable Disconnection and Connection .
- Remove the J 42640 from the steering column.
- Fill the transaxle to the proper level. Refer to Fluid Capacity Specifications .
- Add DEXRON® VI transmission fluid as required.
- Check the front suspension alignment, adjust the toe as necessary.
- Clear the transmission adaptive pressures (TAPS). Refer to Transmission Adaptive Functions .
- Check the front end alignment.
- Road test the vehicle and check for transaxle leaks.
| • | Install the left transaxle bracket. Refer to Transmission Mount Replacement - Left Side . |
| • | Install the transaxle cooler pipe. Refer to Transmission Fluid Cooler Hose/Pipe Replacement . |
Important: Ensure clearance is maintained between the transaxle and the following:
• The brake pipes • The power steering pressure hose • The wiring harnesses
Notice: Refer to Fastener Notice in the Preface section.
Tighten
Tighten the bolt to 75 N·m (55 Ib ft).
Tighten
Tighten the bolts to 50 N·m (37 Ib ft).
Tighten
Tighten the nuts to 50 N·m (37 Ib ft).
Tighten
Tighten the bolts to 73 N·m (54 Ib ft).
Important: Line up the flywheel and converter using the alignment marks made during disassembly.
Tighten
Tighten the bolts to 60 N·m (44 Ib ft).
Tighten
Tighten the bolt to 120 N·m (89 Ib ft).
Tighten
Tighten the bolts to 50 N·m (37 Ib ft).
Tighten
Tighten the bolt to 50 N·m (37 Ib ft).
Tighten
Tighten the nut to 50 N·m (37 Ib ft).
Tighten
Tighten the bolt to 10 N·m (89 lb in).
Tighten
Tighten the bolts to 75 N·m (55 lb ft).
Caution: When installing the intermediate shaft make sure that the shaft is seated prior to pinch bolt installation. If the pinch bolt is inserted into the coupling before shaft installation, the two mating shafts may disengage. Disengagement of the two mating shafts will cause loss of steering control which could result in personal injury.
Tighten
Tighten the bolt to 45 N·m (33 lb ft).
Tighten
Tighten the bolts to 75 N·m (55 Ib ft).
Tighten
Tighten the nuts to 25 N·m (18 Ib ft).
