GM Service Manual Online
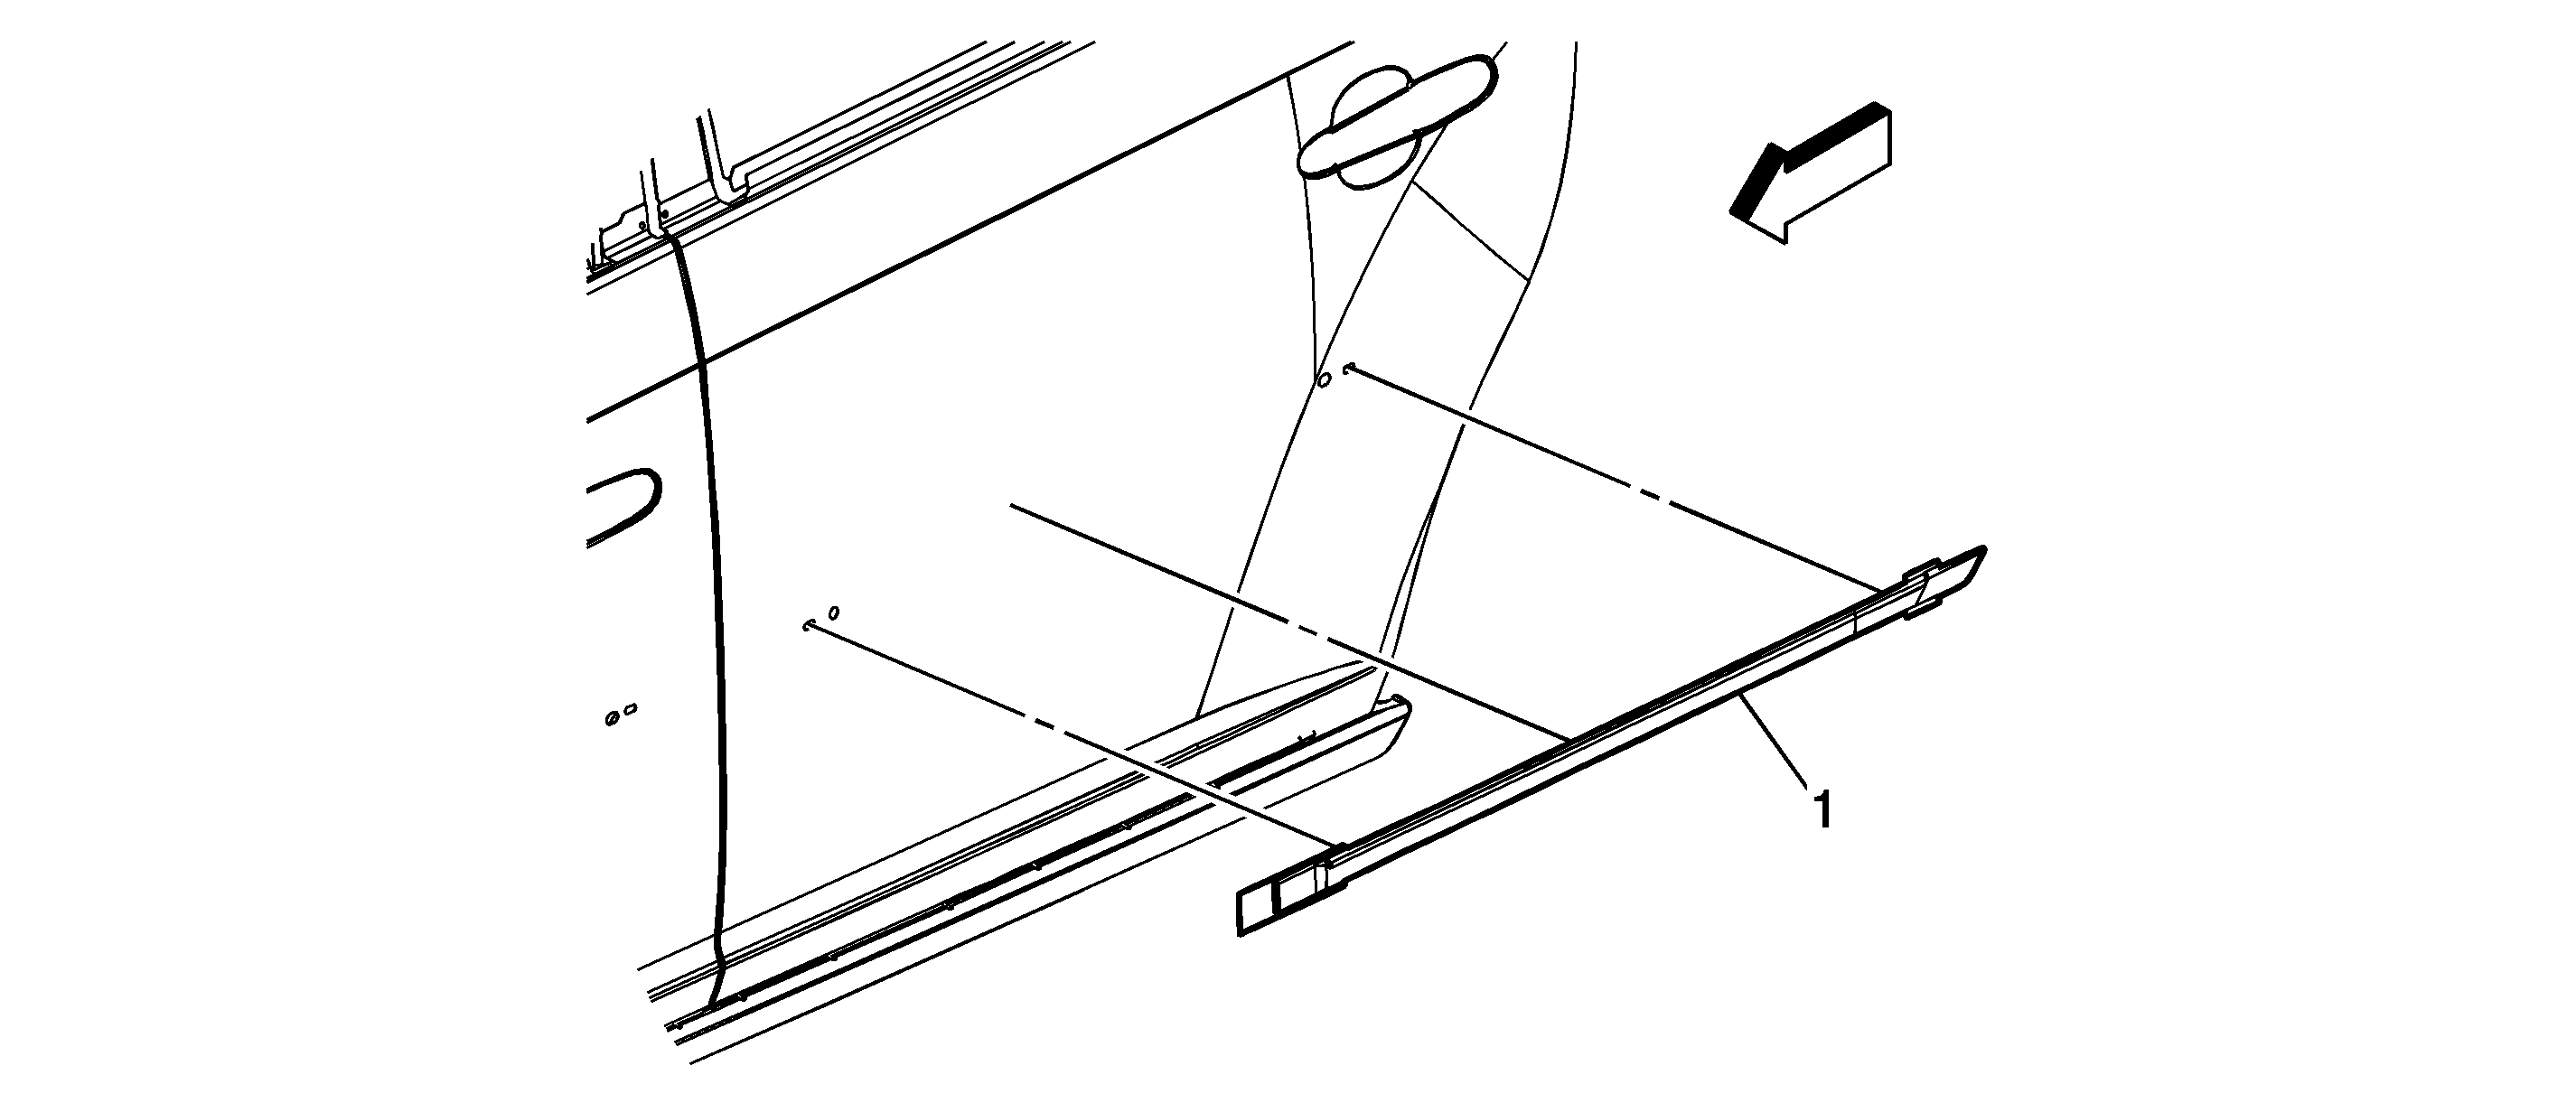
For 1990-2009 cars only

Object Number: 1657165  Size: SF

Callout

Component Name

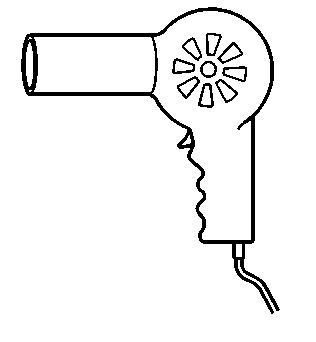
Notice: To avoid paint damage, protect the area surrounding the part which you are removing or installing.

Preliminary Procedure

Use a J 25070 Heat Gun in a circular motion to warm the rear side door center molding prior to removal. Carefully clean the body panel thoroughly prior to bonding the new rear side door center molding to the door.

1

Rear Side Door Center Molding Assembly

Tip

  1. Upon installation of the new rear side door center molding, position the pin on the backside of the molding to the round hole first at the front edge of the rear door then to the oval holes.
  2. Remove the protective liner from the backside of the molding adhesive tape.
  3. Ensure full adhesion of the molding to the door using the palm of the hand with a dry towel working from the front edge of the rear door, rearward down the entire molding.