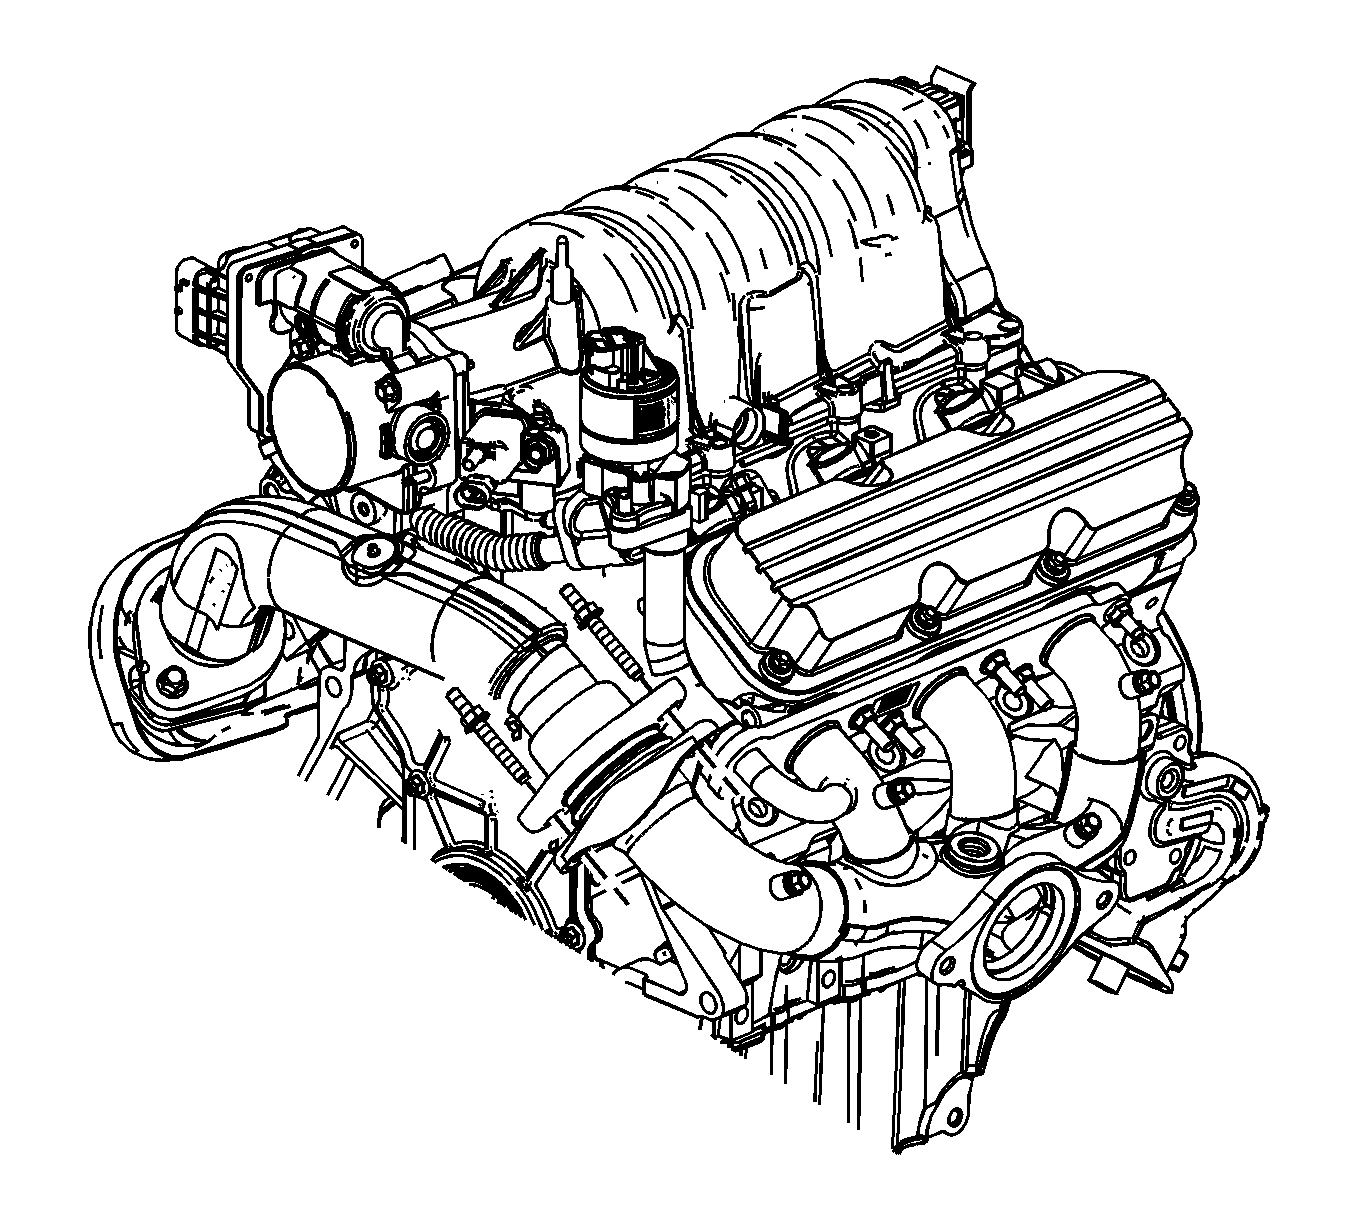
Exhaust Manifold Replacement - Right Side RPO LD8
Tools Required
J 42640 Steering Column Anti-Rotation Pin
Removal Procedure
Caution: In order to avoid being burned, do not service the exhaust system while it is still hot. Service the system when it is cool.
Caution: Always wear protective goggles and gloves when removing exhaust parts as falling rust and sharp edges from worn exhaust components could result in serious personal injury.
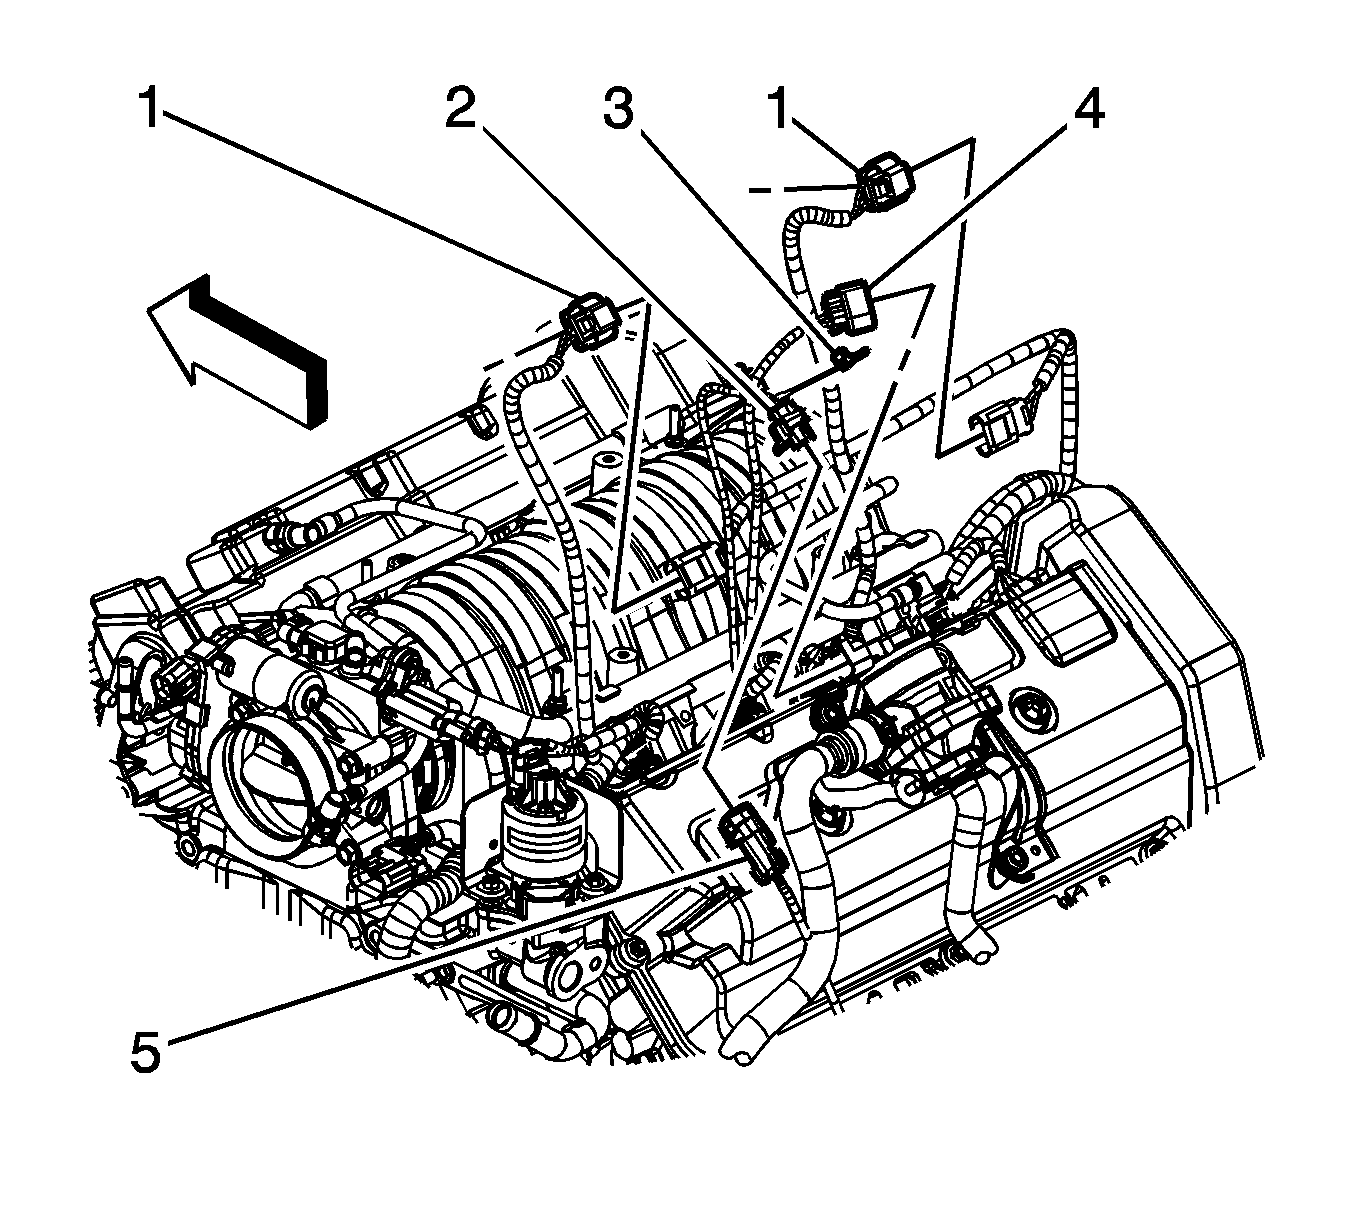
- Remove the connector position assurance (CPA) retainer (3).
- Disconnect the engine harness electrical connector (2) from the heated oxygen sensor (HO2S) .
- Remove the HO2S clip (5) from the secondary air injection (AIR) valve hose bracket.
- Lock the steering column by installing the J 42640 into the underside of the steering column.
- Raise and support the vehicle. Refer to Lifting and Jacking the Vehicle .
- Remove the rear exhaust manifold pipe. Refer to Exhaust Manifold Rear Pipe Replacement .
- Remove the AIR check valve. Refer to Secondary Air Injection Check Valve Replacement .
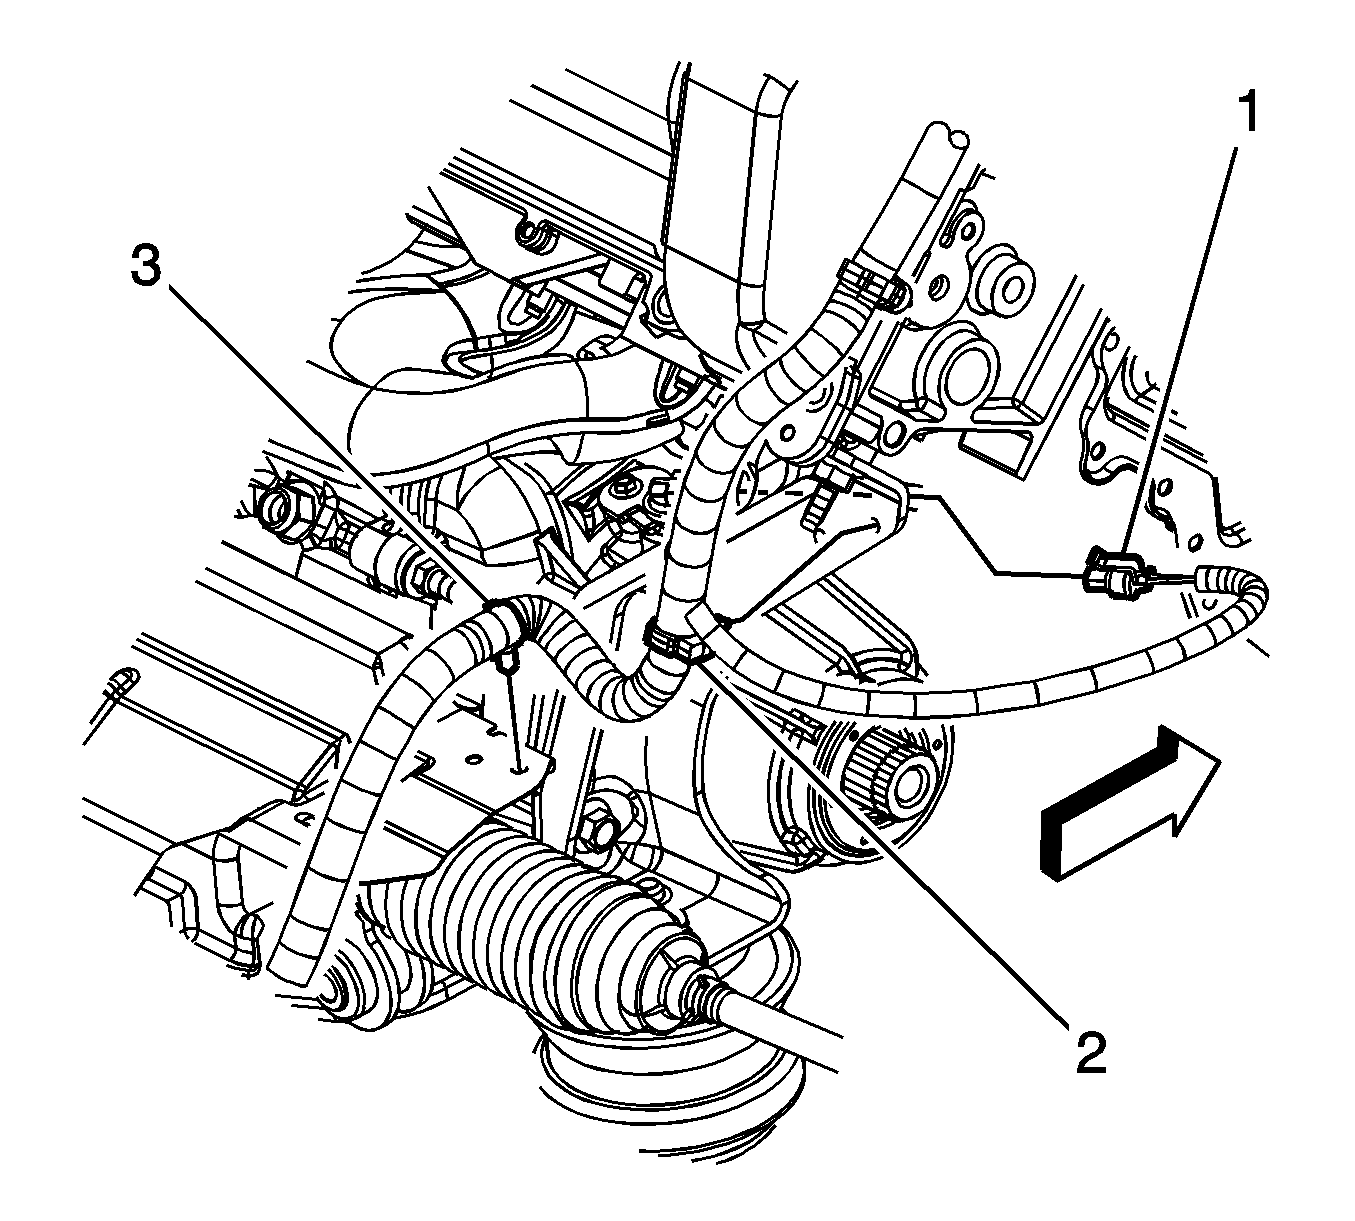
- Disconnect the engine harness clip (2) from the steering gear heat shield.
- Disconnect the engine harness clip (3) from the steering gear heat shield.
- Remove the steering gear heat shield bolts.
- Remove the steering gear heat shield.
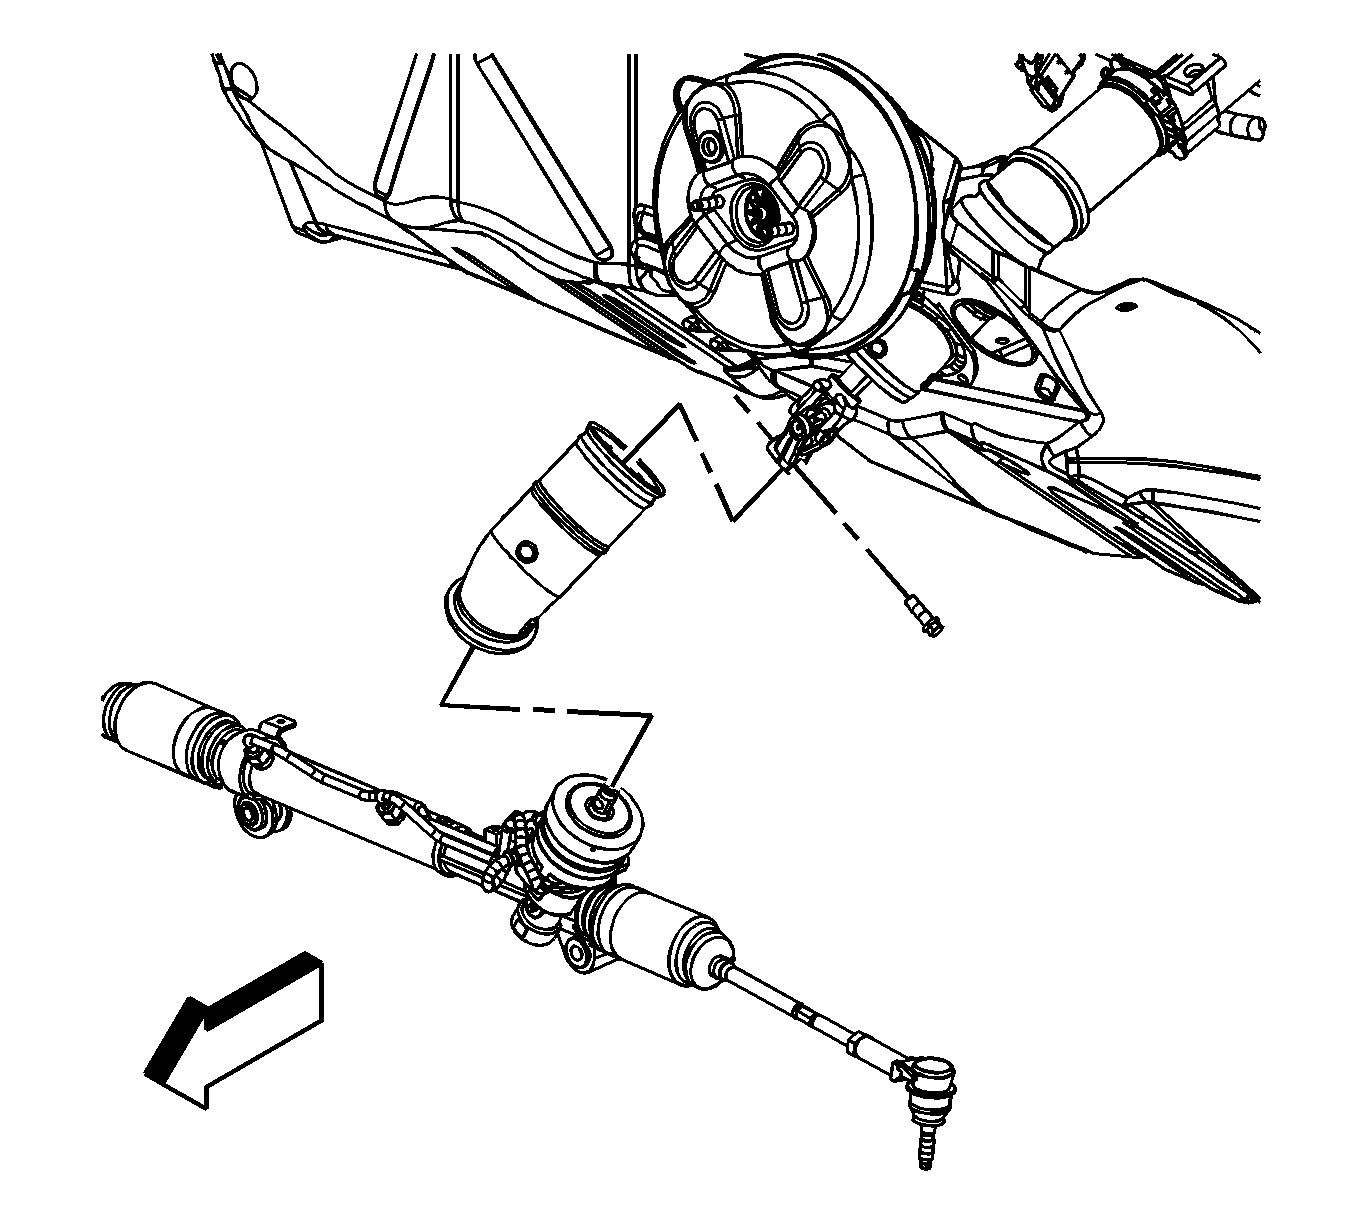
- Disconnect the electronic suspension position sensor link ball studs from the lower control arms.
- Unsnap and remove the intermediate shaft seal.
- Remove the intermediate shaft pinch bolt.
- Separate the intermediate shaft from the steering gear.
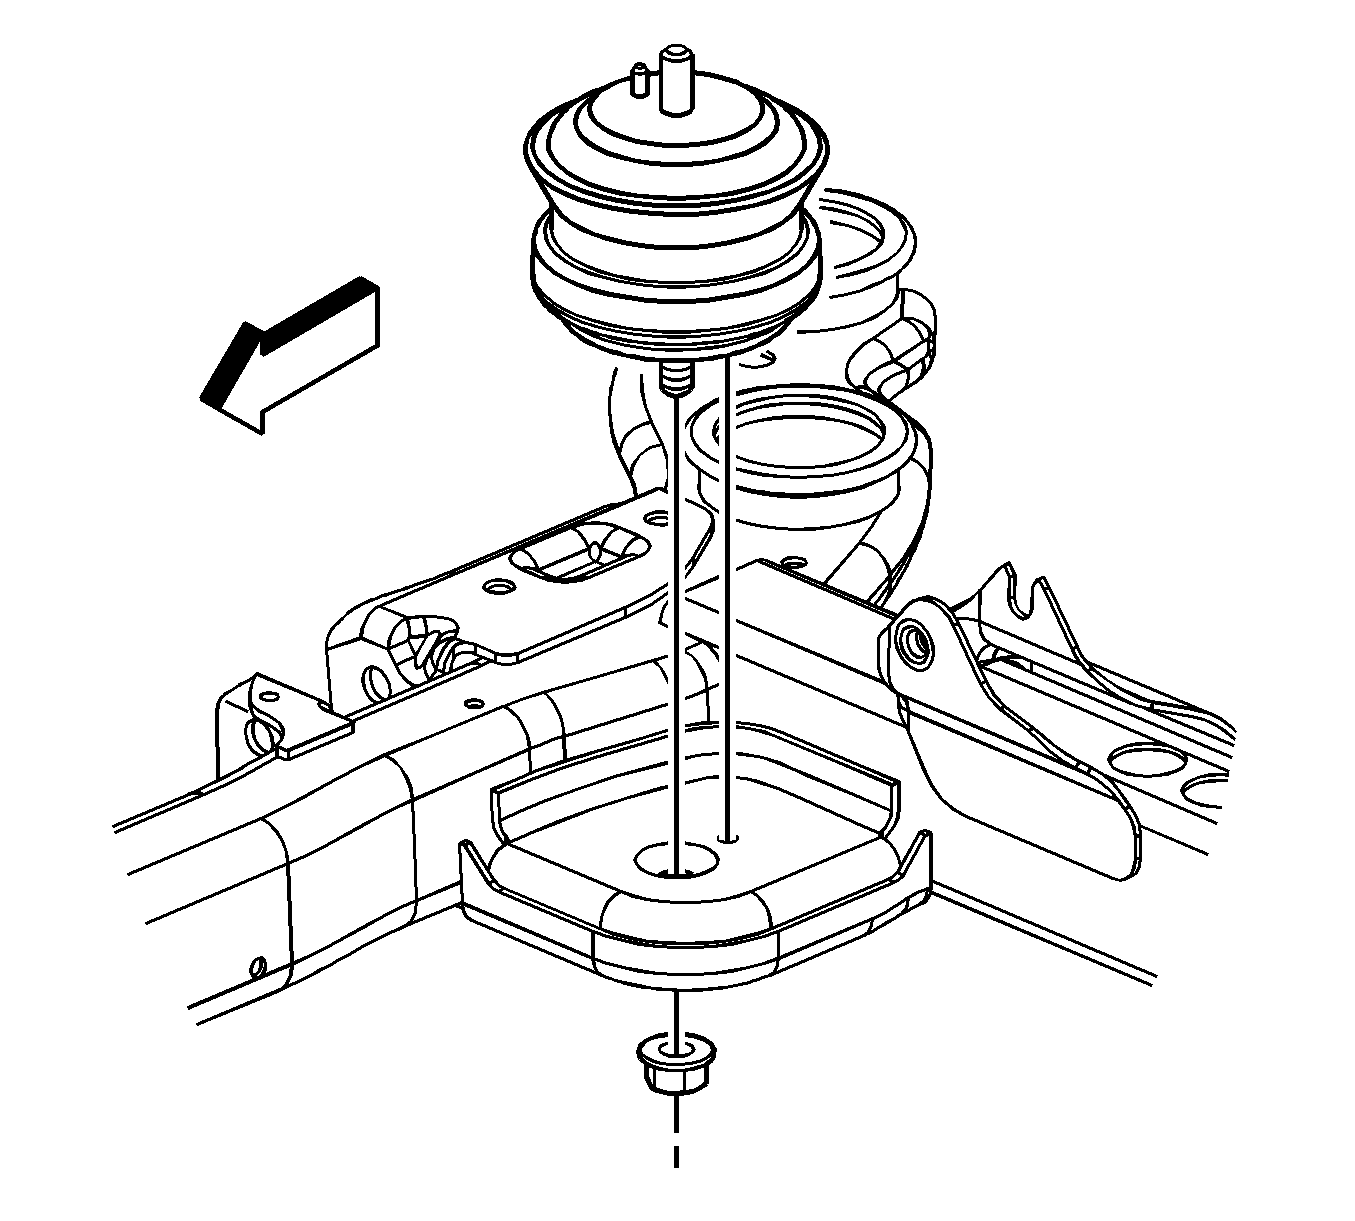
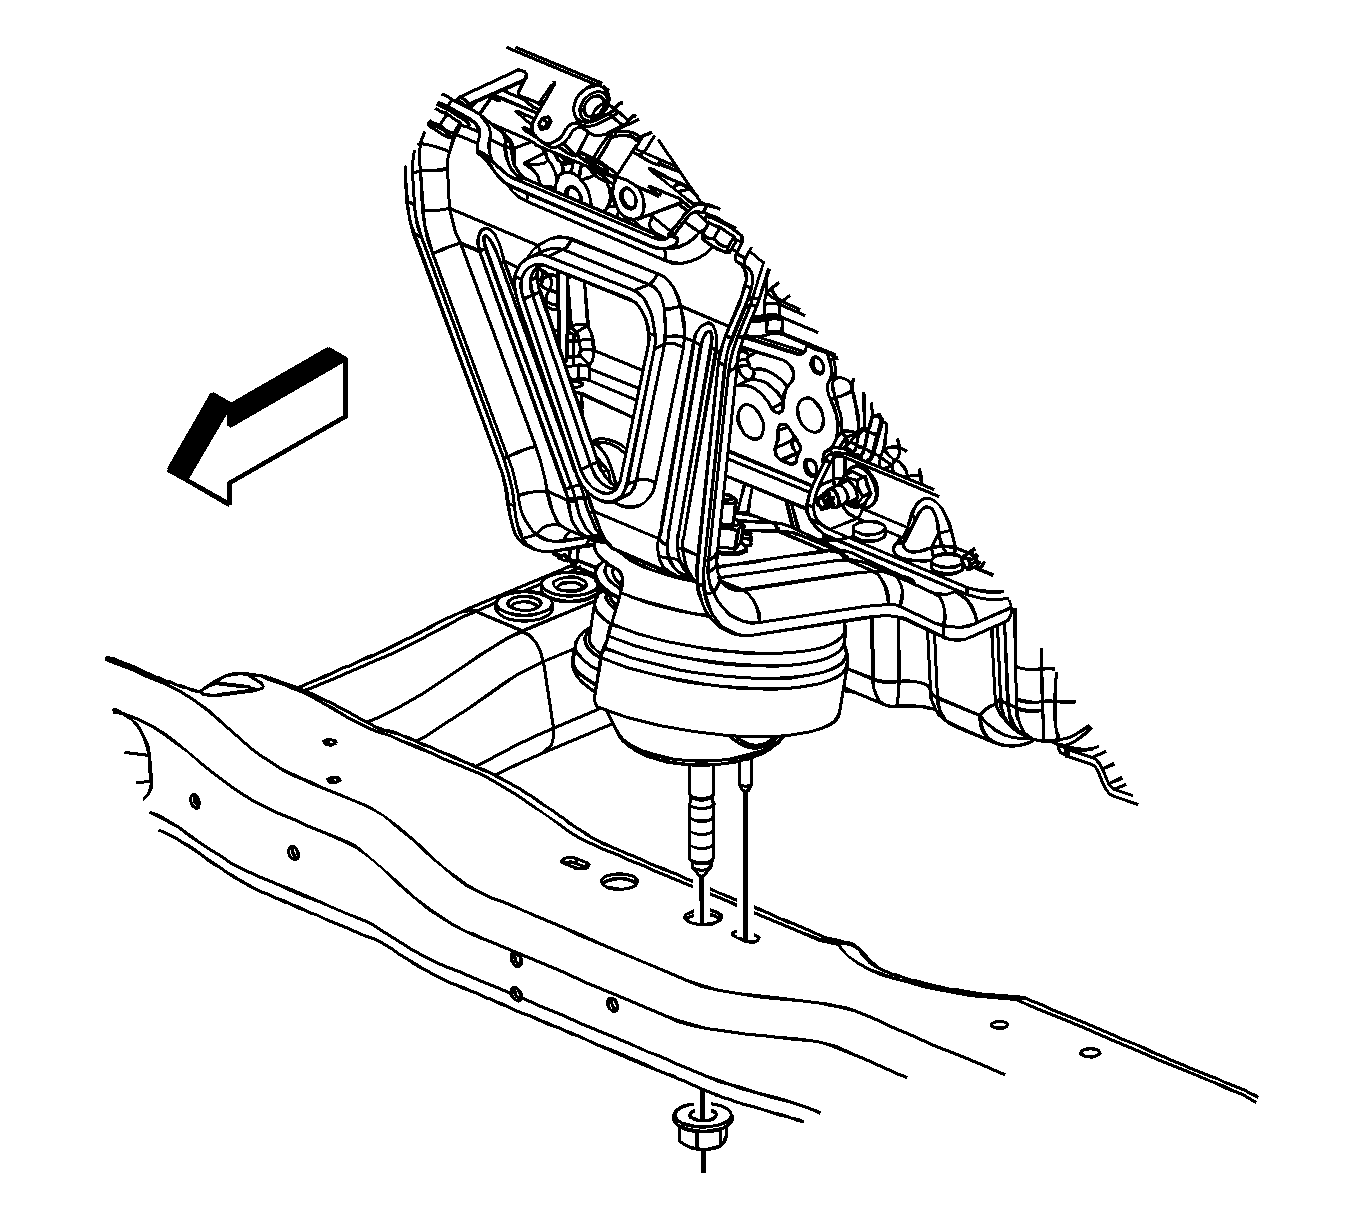
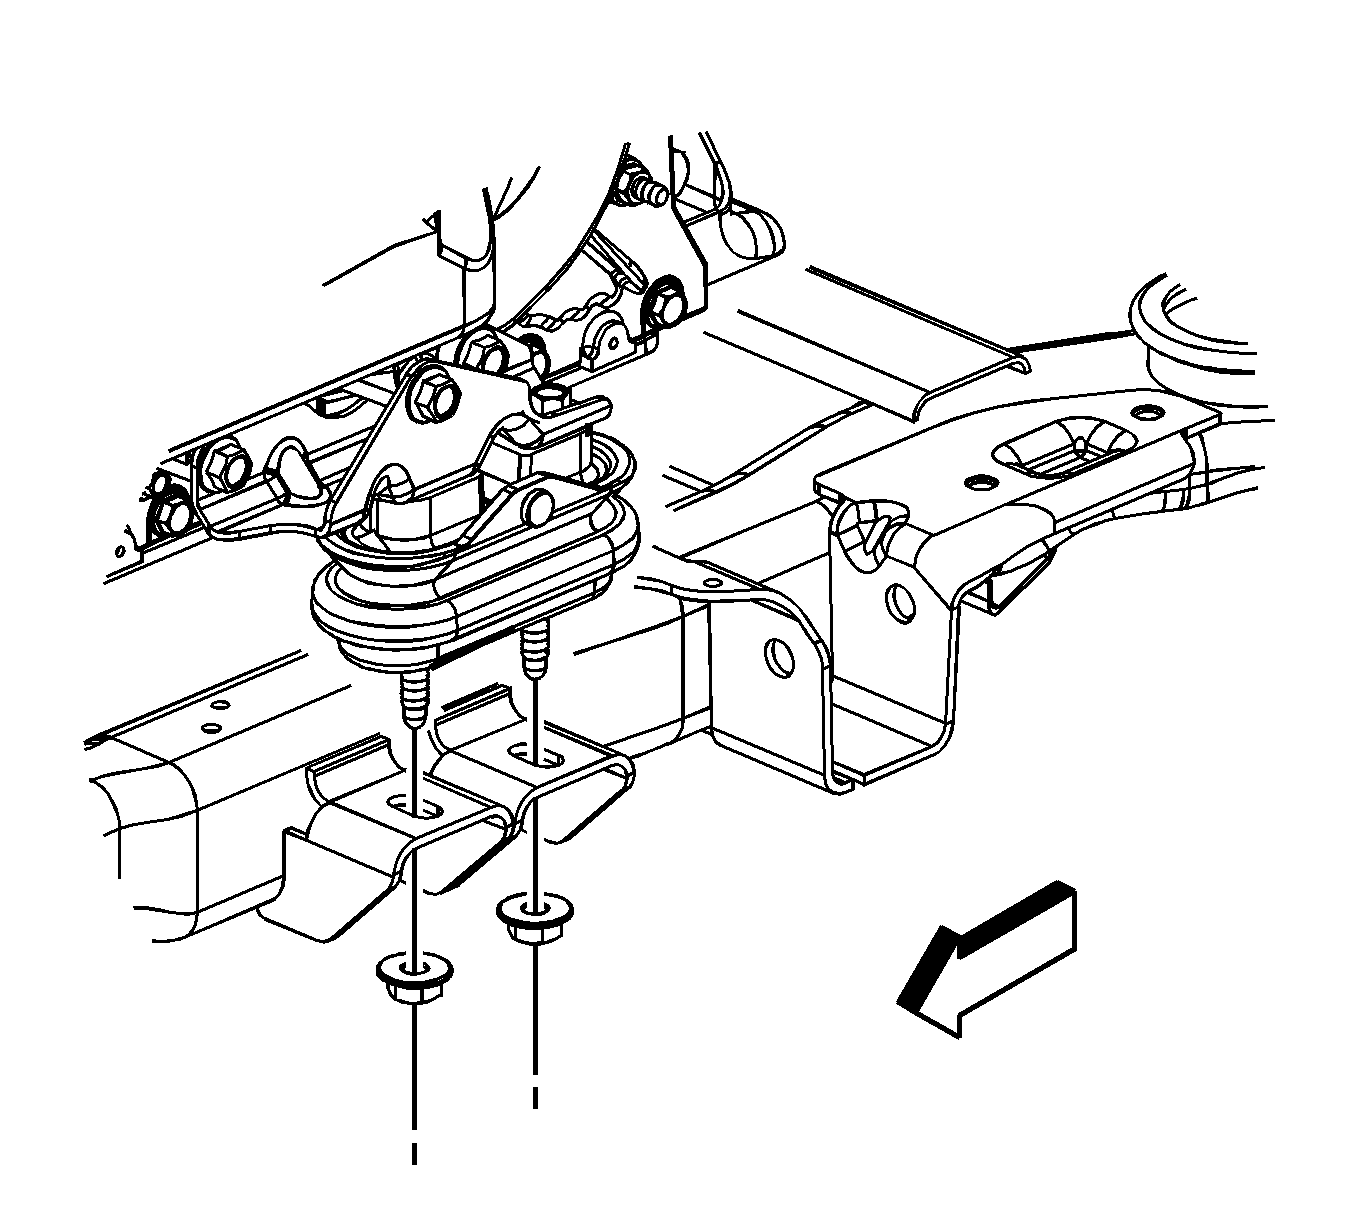
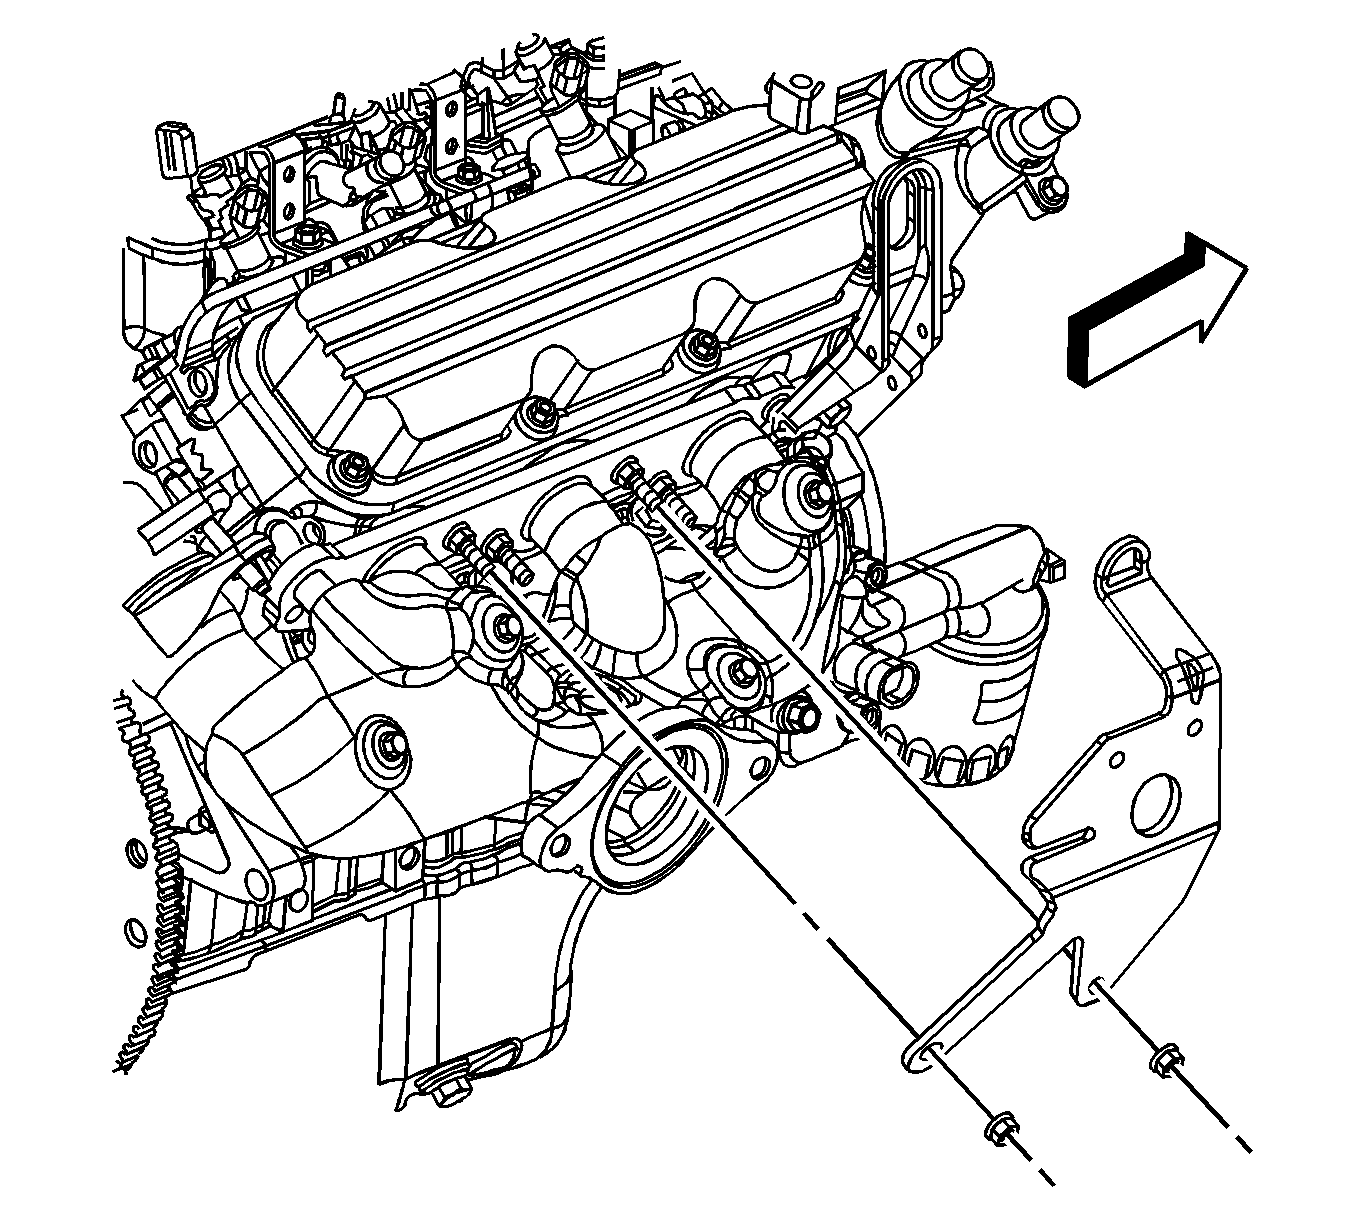
- Remove the right engine mount to frame nut.
- Remove the left engine mount to frame nut.
- Remove the transaxle mount to frame nuts.
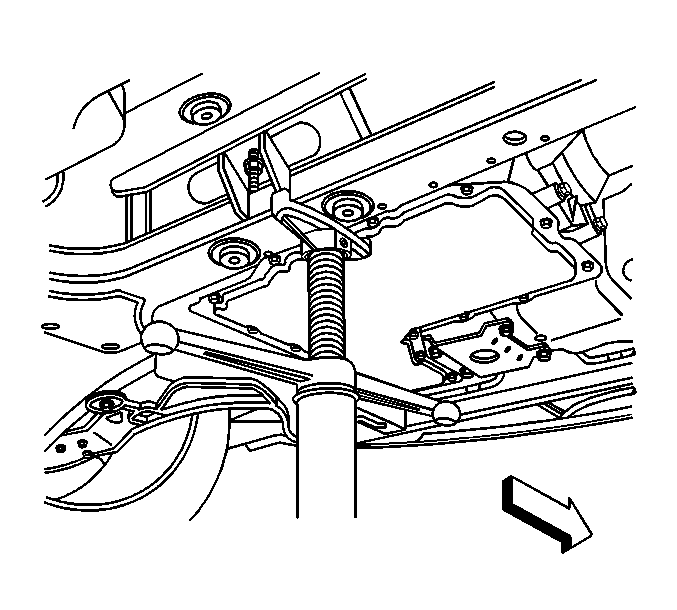
- Support the rear of the frame with a tall screw type jack.
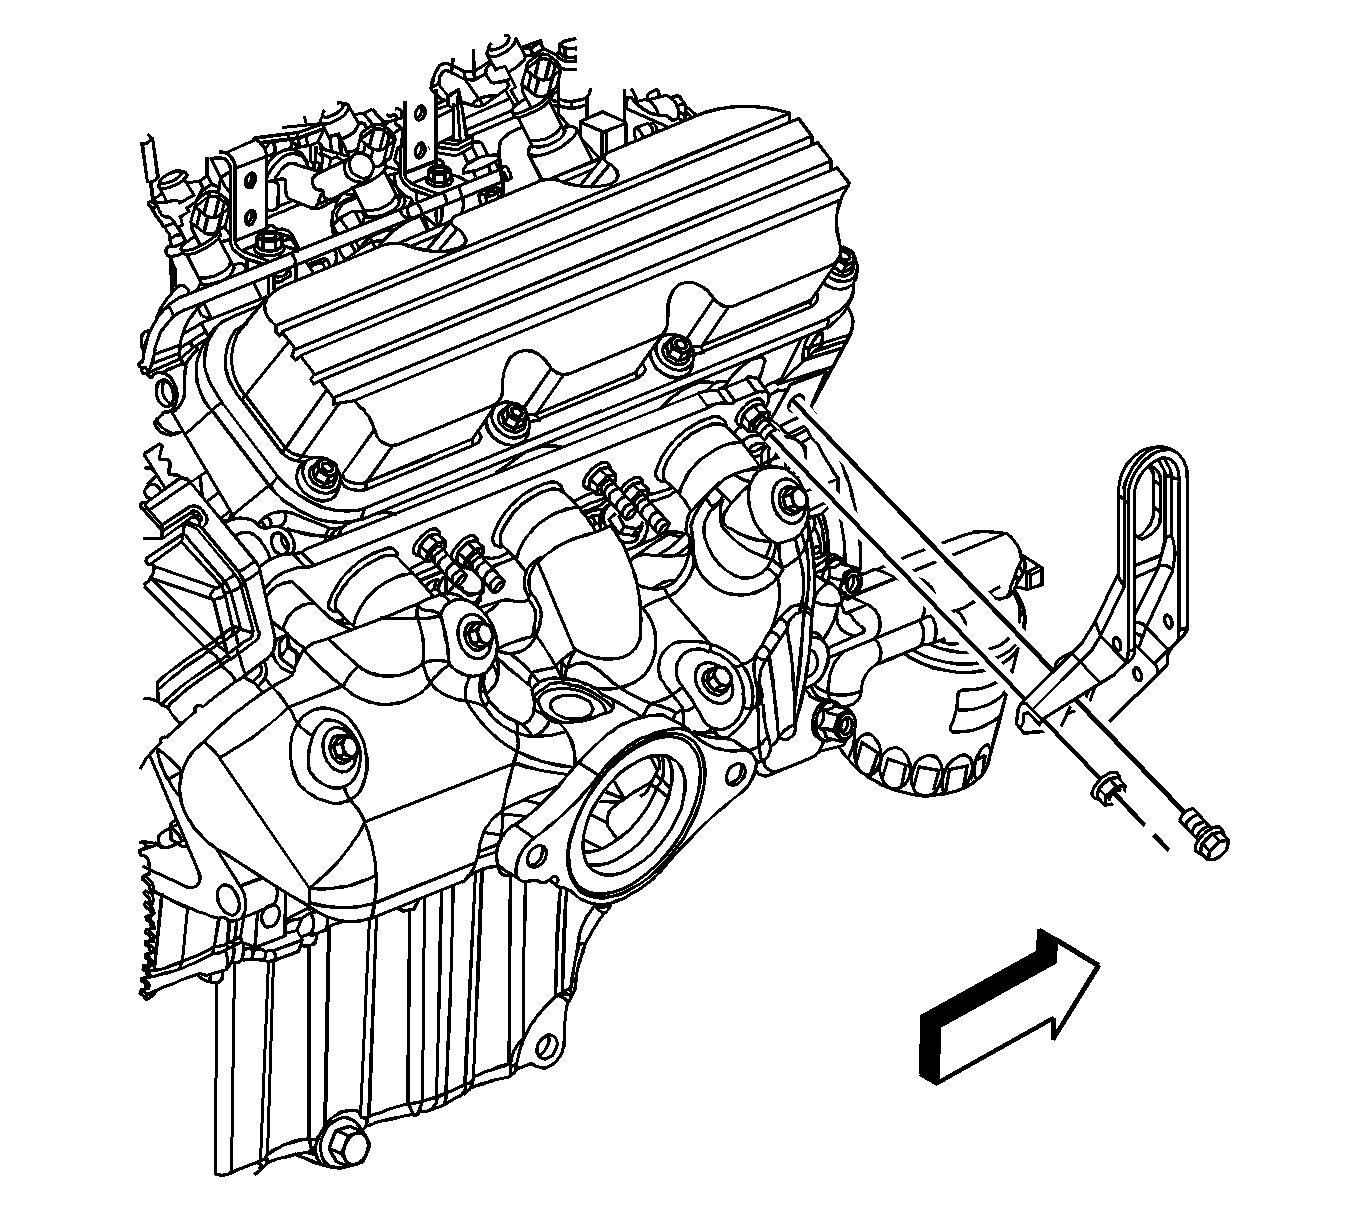
- Remove the 4 rearward engine frame-to-body bolts (1) (left side shown, right side similar).
- Lower the screw type jack approximately 4 cm (1.5 in) allowing the rear of the engine frame to lower.
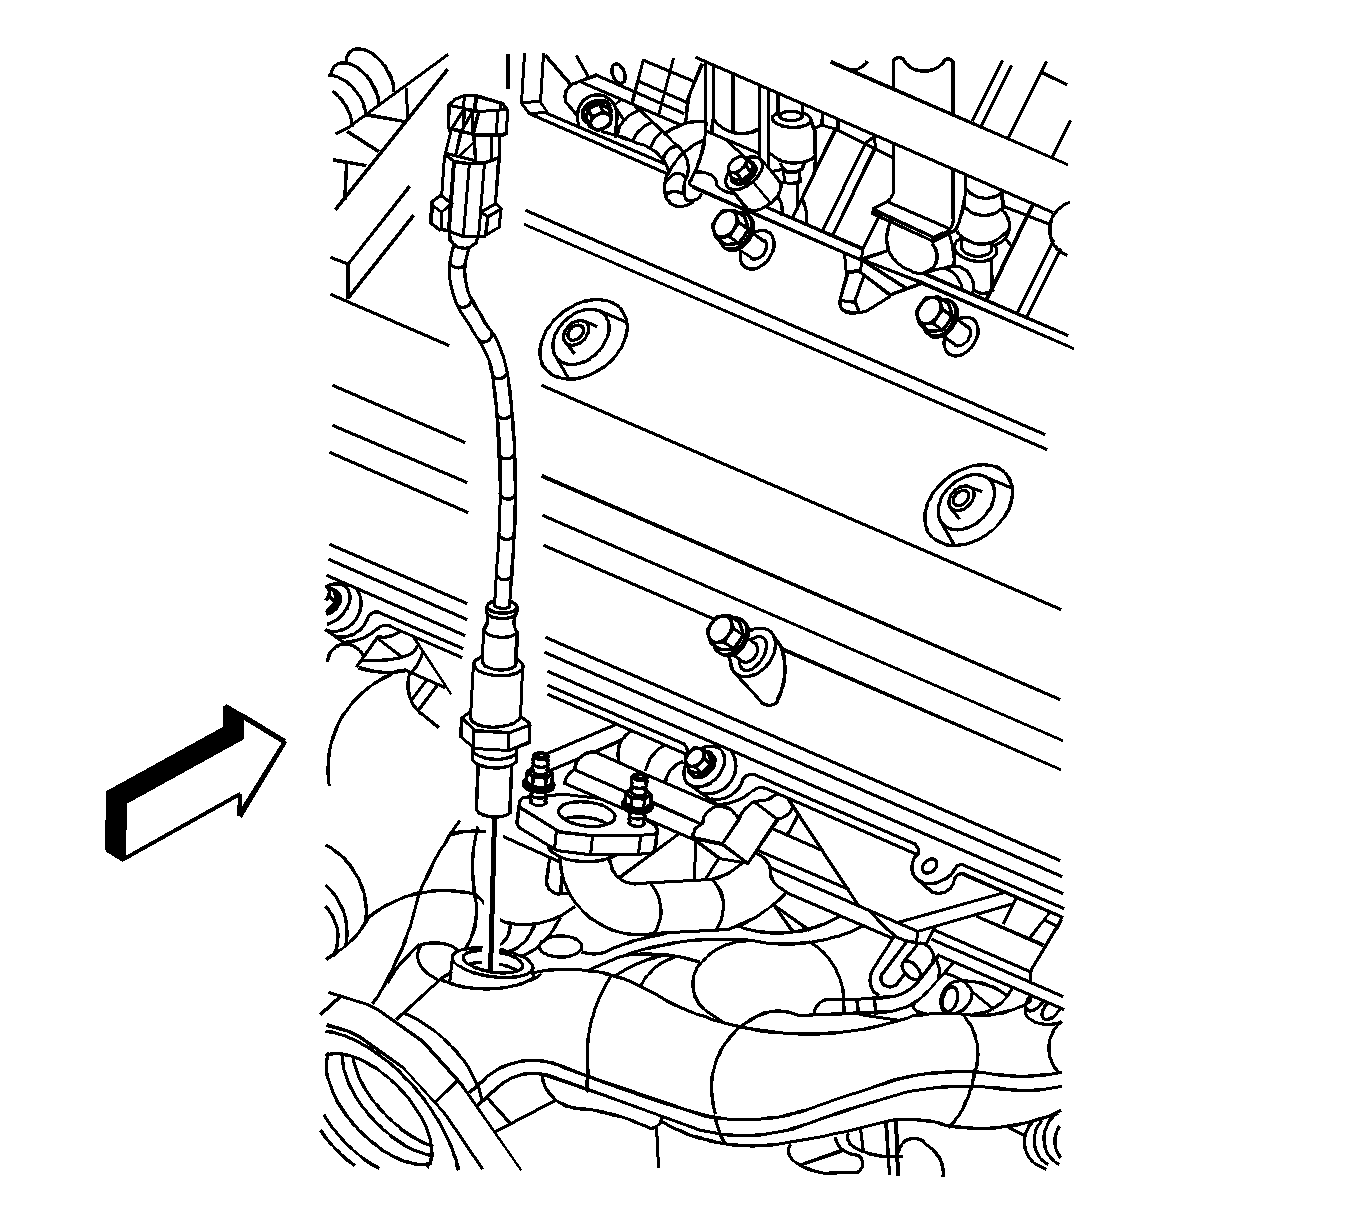
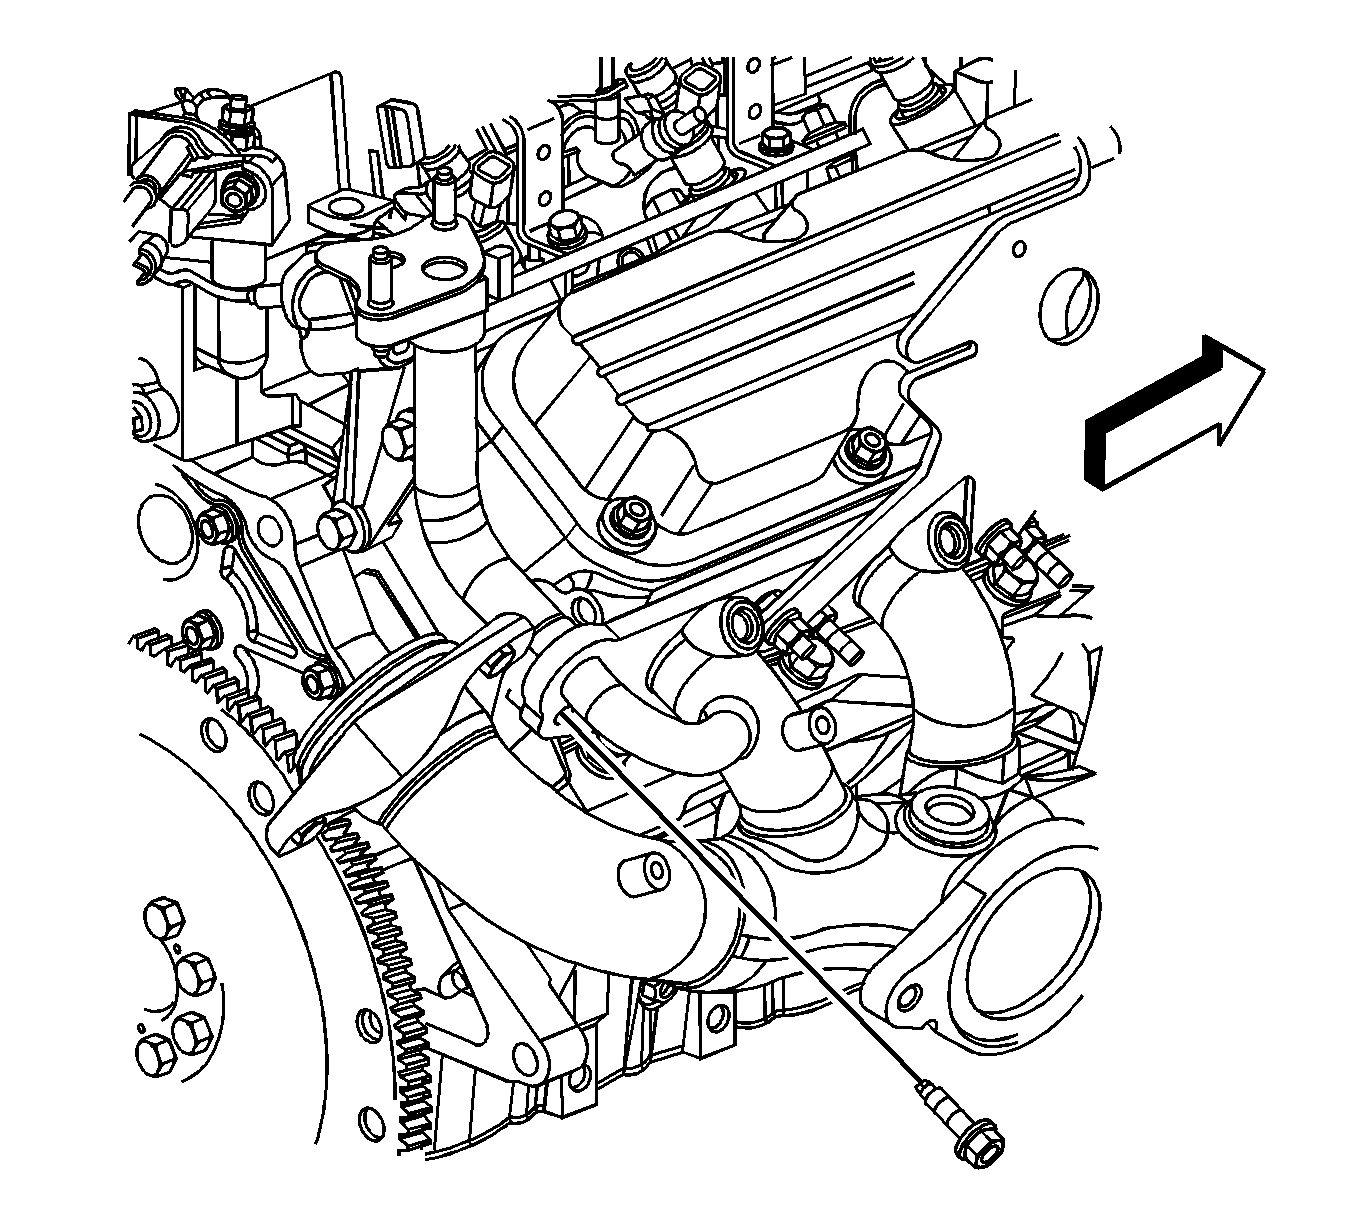
- Remove the HO2S.
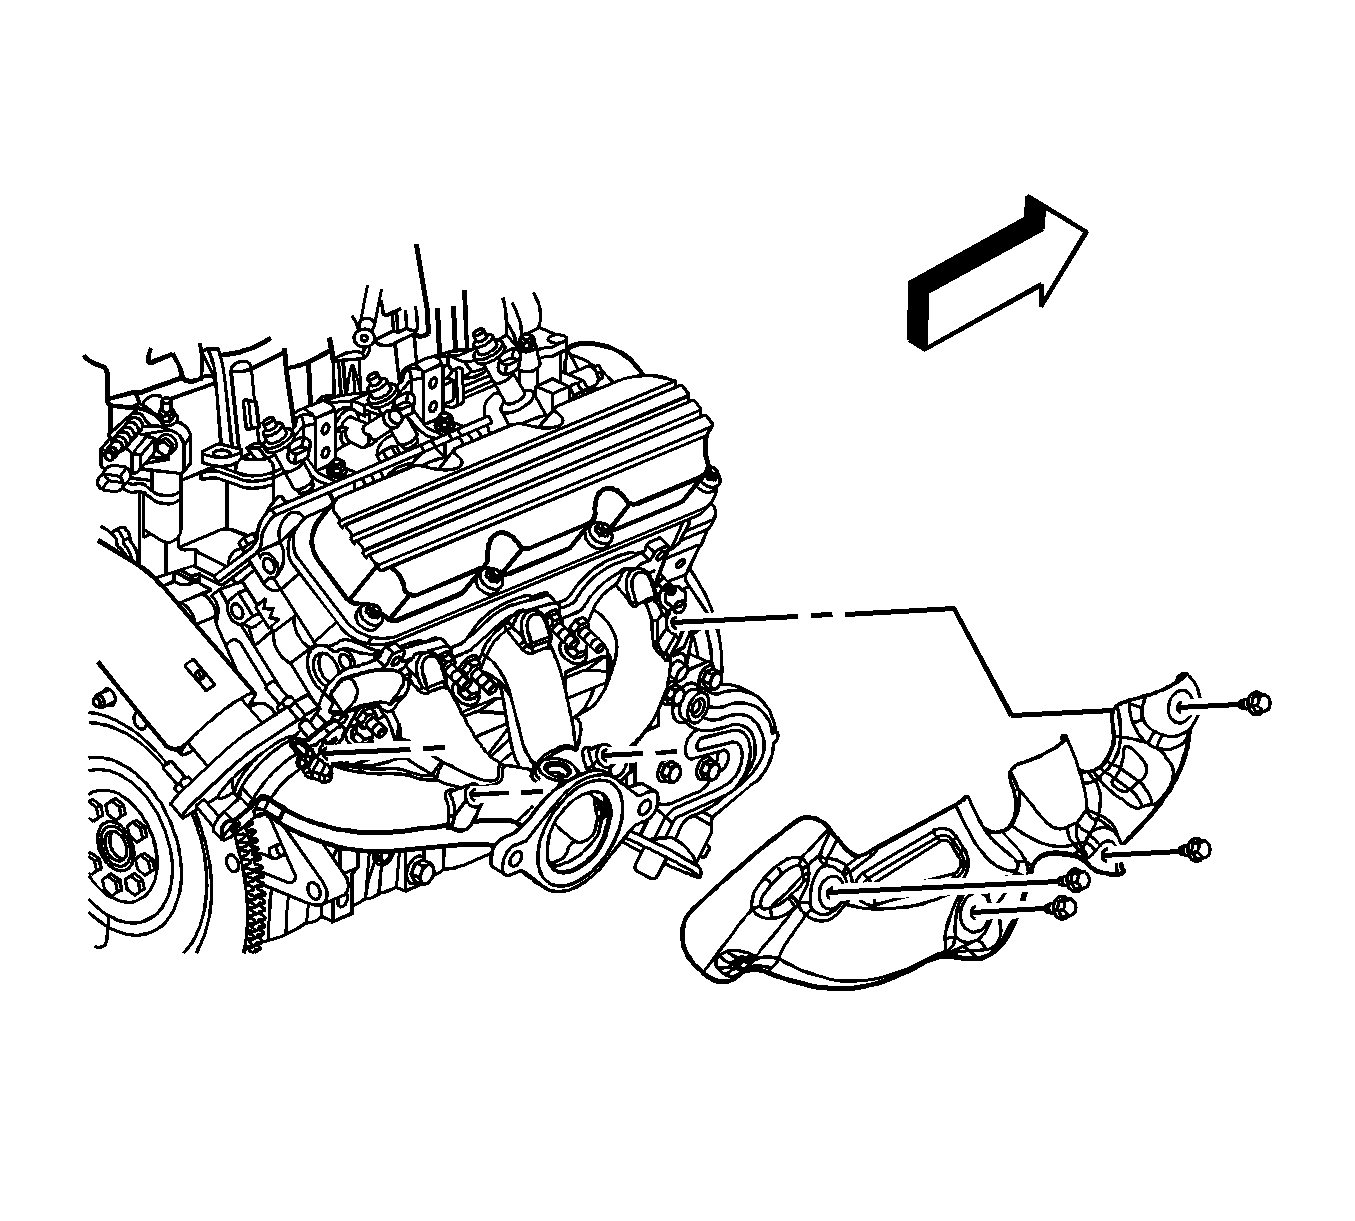
- Remove the exhaust manifold nuts.
- Remove the exhaust manifold (2).
- Remove and discard the exhaust manifold gasket (1).

Notice: The wheels of the vehicle must be straight ahead and the steering column in the LOCK position before disconnecting the steering column or intermediate shaft from the steering gear. Failure to do so will cause the coil assembly in the steering column to become uncentered which will cause damage to the coil assembly.


Caution: Failure to disconnect the intermediate shaft from the rack and pinion stub shaft can result in damage to the steering gear and/or damage to the intermediate shaft. This damage may cause loss of steering control which could result in personal injury.

Installation Procedure
- Install a NEW exhaust manifold gasket (1) onto the cylinder head studs.
- Install exhaust manifold (2).
- Install the exhaust manifold nuts.
- If reusing the old HO2S, coat the threads with anti-seize compound, GM P/N 12377953 or equivalent.
- Install the HO2S.
- Raise the engine frame into position.
- Install the 4 rearward engine frame-to-body bolts (1) (left side shown, right side similar).
- Remove the screw type jack.
- Install the transaxle mount to frame nuts.
- Install the left engine mount to frame nut.
- Install the right engine mount to frame nut.
- Connect the intermediate shaft to the steering gear.
- Install the intermediate shaft pinch bolt.
- Install the intermediate shaft seal.
- Connect the electronic suspension position sensor link ball studs to the lower control arms.
- Install the steering gear heat shield.
- Install the steering gear heat shield bolts.
- Connect the engine harness clip (3) to the steering gear heat shield.
- Connect the engine harness clip (2) to the steering gear heat shield.
- Install the AIR check valve. Refer to Secondary Air Injection Check Valve Replacement .
- Install the rear exhaust manifold pipe. Refer to Exhaust Manifold Rear Pipe Replacement .
- Lower the vehicle.
- Remove the J 42640 .
- Connect the engine harness electrical connector (2) to the HO2S.
- Install the HO2S clip (5) to the AIR valve hose bracket.
- Install the CPA retainer (3).
Notice: Refer to Fastener Notice in the Preface section.
Tighten
Tighten the nuts to 25 N·m (18 lb ft).
Tighten
Tighten the sensor to 41 N·m (30 lb ft).
Tighten
Tighten the bolts to 191 N·m (141 lb ft).
Tighten
Tighten the nuts to 50 N·m (37 lb ft).
Tighten
Tighten the nuts to 80 N·m (59 lb ft).
Tighten
Tighten the nuts to 80 N·m (59 lb ft).
Caution: Failure to disconnect the intermediate shaft from the rack and pinion stub shaft can result in damage to the steering gear and/or damage to the intermediate shaft. This damage may cause loss of steering control which could result in personal injury.
Tighten
Tighten the bolt to 45 N·m (33 lb ft).
Tighten
Tighten the bolts to 9 N·m (80 lb in).
Exhaust Manifold Replacement - Right Side RPO L26
Removal Procedure
Caution: In order to avoid being burned, do not service the exhaust system while it is still hot. Service the system when it is cool.
Caution: Always wear protective goggles and gloves when removing exhaust parts as falling rust and sharp edges from worn exhaust components could result in serious personal injury.
- Remove the intake manifold cover. Refer to Intake Manifold Cover Replacement .
- Remove the right side spark plugs. Refer to Spark Plug Replacement .
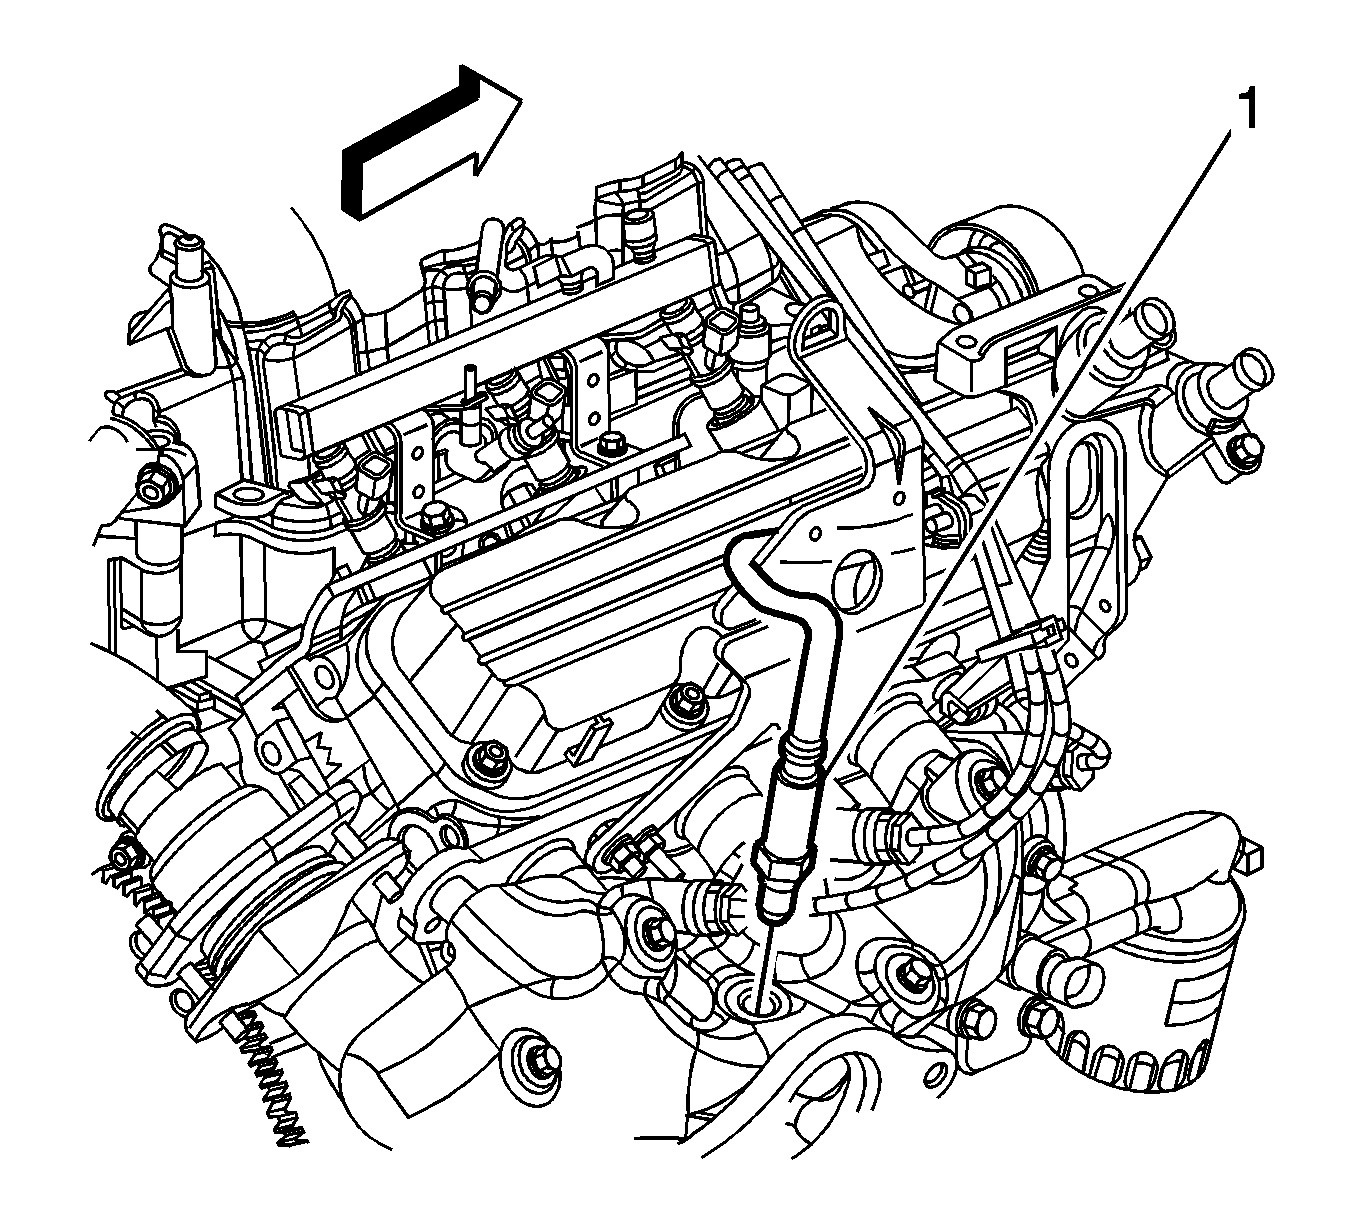
- Disconnect the engine harness electrical connector from the heated oxygen sensor (HO2S).
- Remove the HO2S pigtail clip from the sight shield bracket.
- Remove the HO2S (1) from the exhaust manifold.
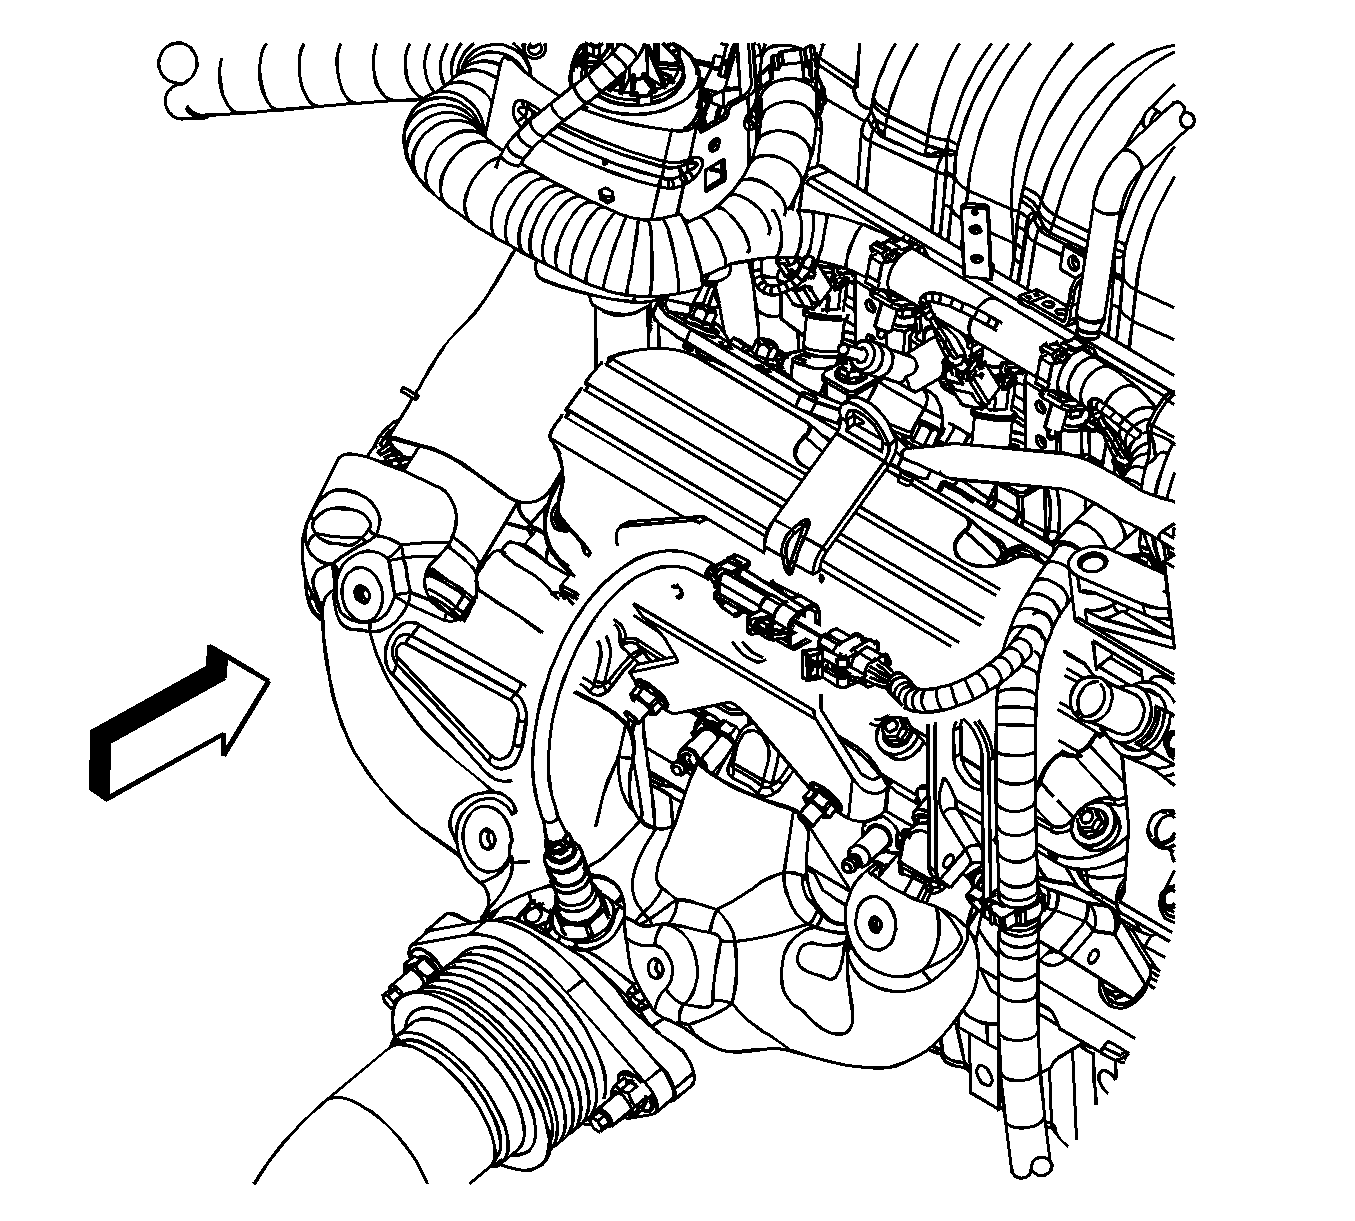
- Remove the power brake booster heat shield nuts.
- Remove the power brake booster heat shield.
- Remove the studs attaching the exhaust crossover to the right exhaust manifold.
- Remove the transaxle fill tube. Refer to Transmission Fluid Filler Tube and Seal Replacement .
- Remove the catalytic converter. Refer to Catalytic Converter Replacement .
- Remove the sight shield bracket nuts and bracket.
- Remove the right engine lift bracket bolt and nut.
- Remove the engine lift bracket.
- Remove the exhaust manifold heat shield bolts and shield.
- Remove the exhaust gas recirculation (EGR) vale adapter pipe bolt.
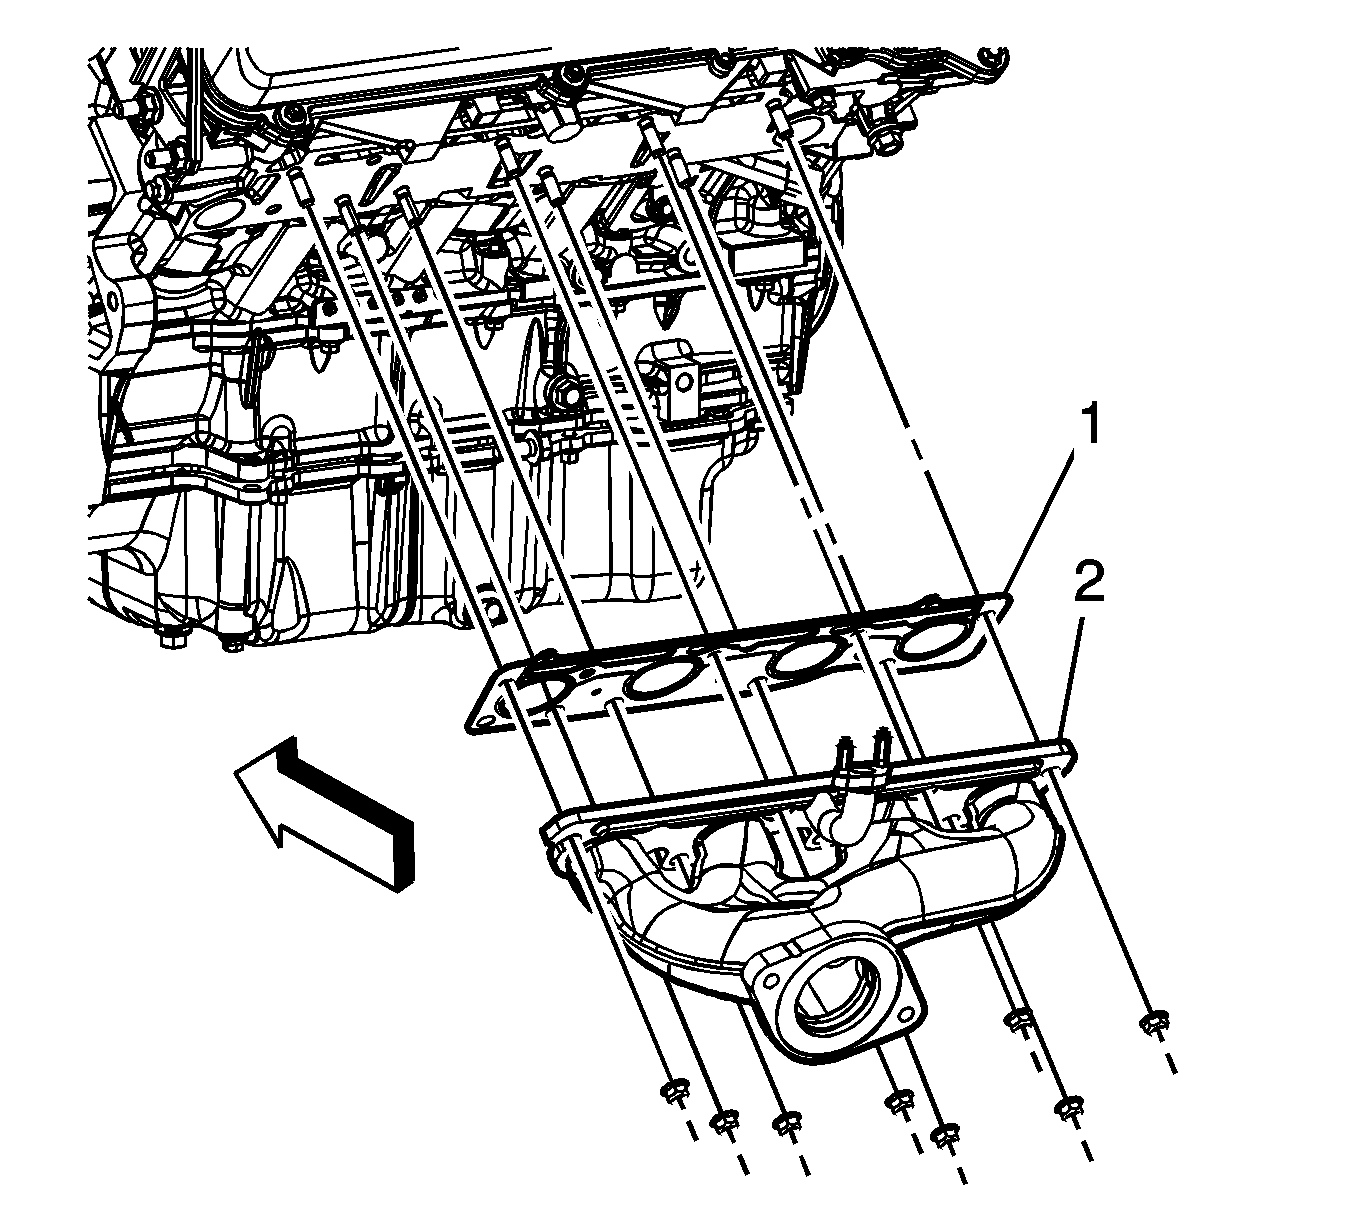
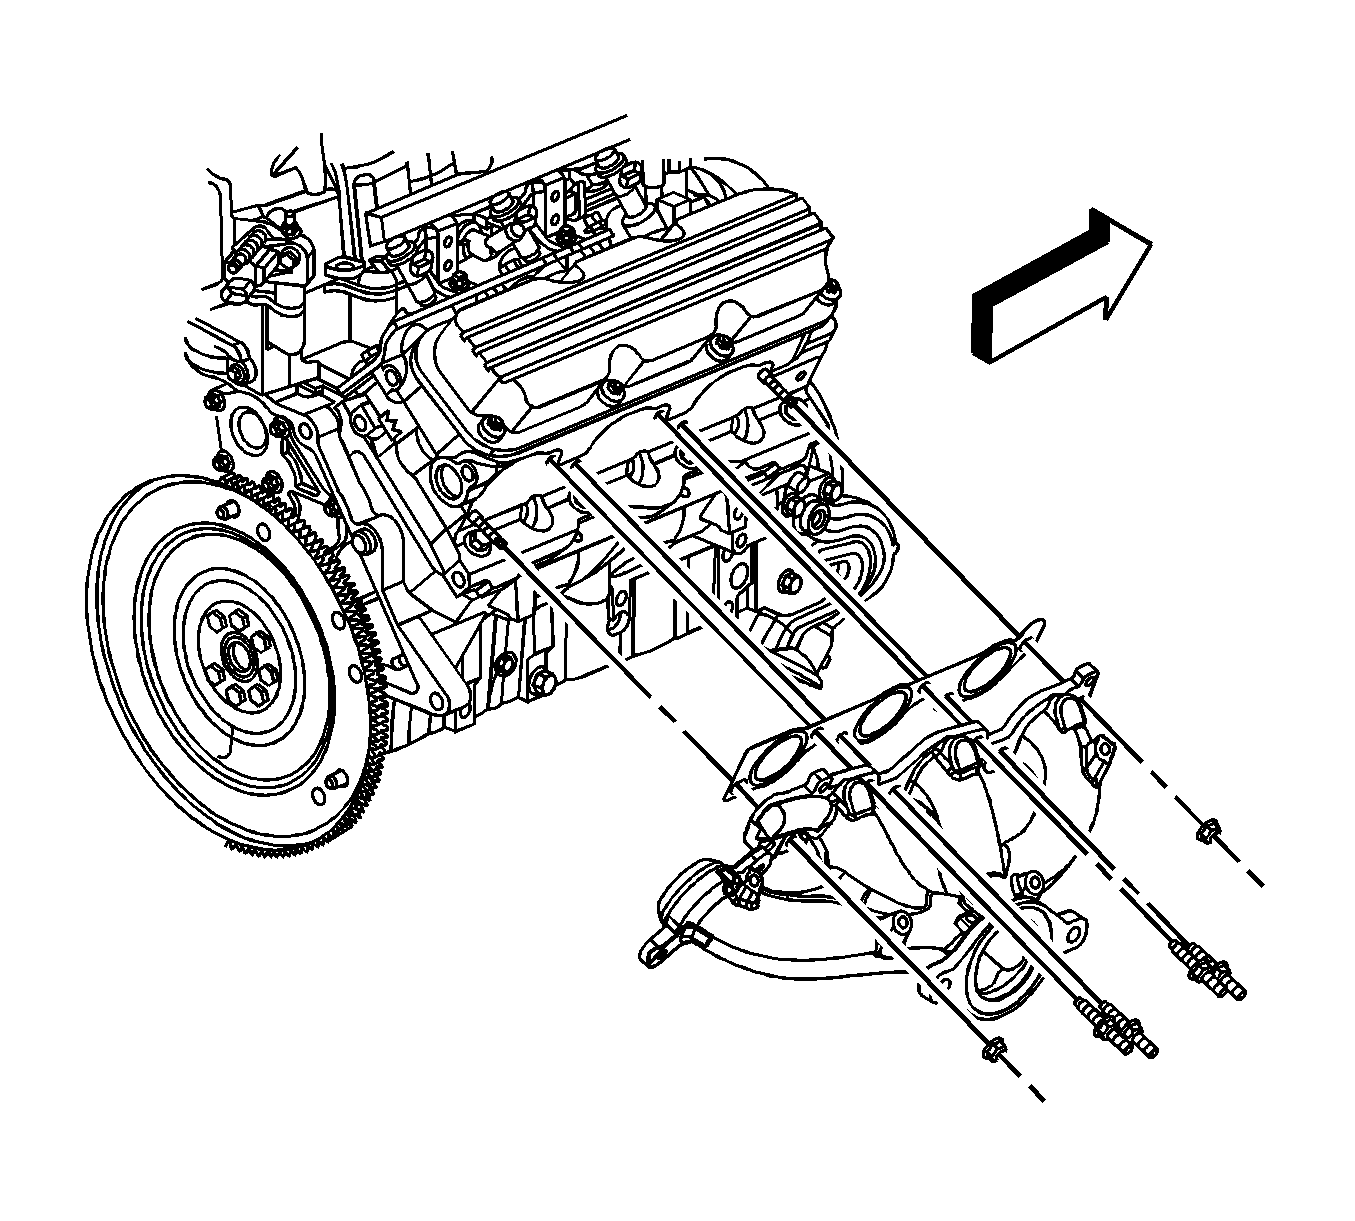
- Remove the exhaust manifold studs and nuts.
- Remove the exhaust manifold.
- Remove and discard the exhaust manifold gasket.
- Remove and discard the exhaust crossover pipe seal from the either the exhaust crossover or the manifold.

Installation Procedure
- Install a NEW exhaust crossover pipe seal to the exhaust manifold.
- Install a NEW exhaust manifold gasket.
- Install the exhaust manifold.
- Install the exhaust manifold studs and nuts.
- Install the EGR valve adapter pipe bolt.
- Position the exhaust manifold heat shield.
- Install the exhaust manifold heat shield bolts.
- Install the engine lift bracket.
- Install the right engine lift bracket bolt and nut.
- Install the sight shield bracket nuts and bracket.
- Install the catalytic converter. Refer to Catalytic Converter Replacement .
- Install the transaxle fill tube. Refer to Transmission Fluid Filler Tube and Seal Replacement .
- Install the studs attaching the exhaust crossover to the right exhaust manifold.
- Install the power brake booster heat shield.
- Install the power brake booster heat shield nuts.
- If reinstalling the old sensor, coat the threads with anti-seize compound GM P/N 12377953, or equivalent.
- Install the HO2S (1) to the exhaust manifold.
- Connect the engine harness electrical connector to the HO2S.
- Install the HO2S pigtail clip to the sight shield bracket.
- Install the right side spark plugs. Refer to Spark Plug Replacement .
- Install the intake manifold cover. Refer to Intake Manifold Cover Replacement .
Notice: Refer to Fastener Notice in the Preface section.
Tighten
| • | Tighten the studs to 30 N·m (22 lb ft). |
| • | Tighten the nuts to 25 N·m (18 lb ft). |
Tighten
Tighten the bolt to 25 N·m (18 lb ft).
Tighten
Tighten the bolts to 10 N·m (89 lb in).
Tighten
Tighten the bolt/nut to 25 N·m (18 lb ft).
Tighten
Tighten the nuts to 30 N·m (22 lb ft).
Tighten
Tighten the studs to 18 N·m (13 lb ft).
Tighten
Tighten the nuts to 20 N·m (15 lb ft).
Important: A special anti-seize compound is used on the HO2S threads. The compound consists of liquid graphite and glass beads. The graphite tends to burn away, but the glass beads remain, making the sensor easier to remove. New, or service replacement sensors already have the compound applied to the threads. If the sensor is removed from an exhaust component and if for any reason the sensor is to be reinstalled, the threads must have anti-seize compound applied before the reinstallation.
Tighten
Tighten the sensor to 42 N·m (31 lb ft).
