For 1990-2009 cars only
Removal Procedure
- Remove the left I/P trim plate. Refer to Instrument Panel Accessory Trim Plate Replacement - Left Side .
- Remove the right I/P trim plate. Refer to Instrument Panel Accessory Trim Plate Replacement - Right Side .
- Raise the tilt steering column to the highest position.
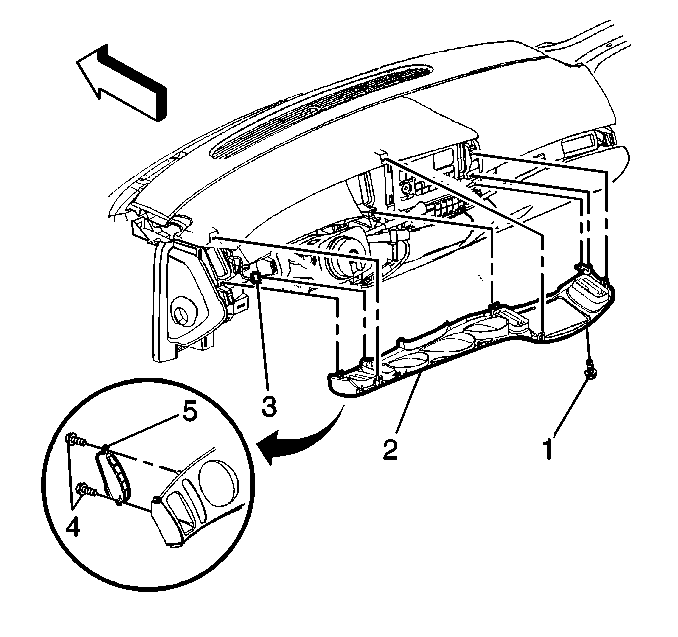
- Remove the 2 fasteners (1).
- Lower the tilt steering column to the lowest position.
- Disengage the 4 clips across the top edge, and the 4 clips across the bottom edge that retain the I/P cluster trim plate to the I/P by gently pulling toward the rear of the vehicle.
- Set the parking brake.
- Move the gear selector lever to the L1 position.
- Tilt the top of the bezel rearward in order to remove.
- Disconnect the electrical connector (3) from the driver information center switch (5).
Installation Procedure
- Connect the electrical connector (3) to the driver information center switch (5).
- Press the I/P cluster trim plate into the I/P. Ensure that the clips line up with the holes in the I/P.
- Install the fasteners (2).
- Install the right I/P trim plate. Refer to Instrument Panel Accessory Trim Plate Replacement - Right Side .
- Install the left I/P trim plate. Refer to Instrument Panel Accessory Trim Plate Replacement - Left Side .
Notice: Refer to Fastener Notice in the Preface section.
Tighten
Tighten the 2 fasteners (1) to 2 N·m (18 lb in).
