Instrument Cluster Trim Panel Replacement Pontiac
Removal Procedure
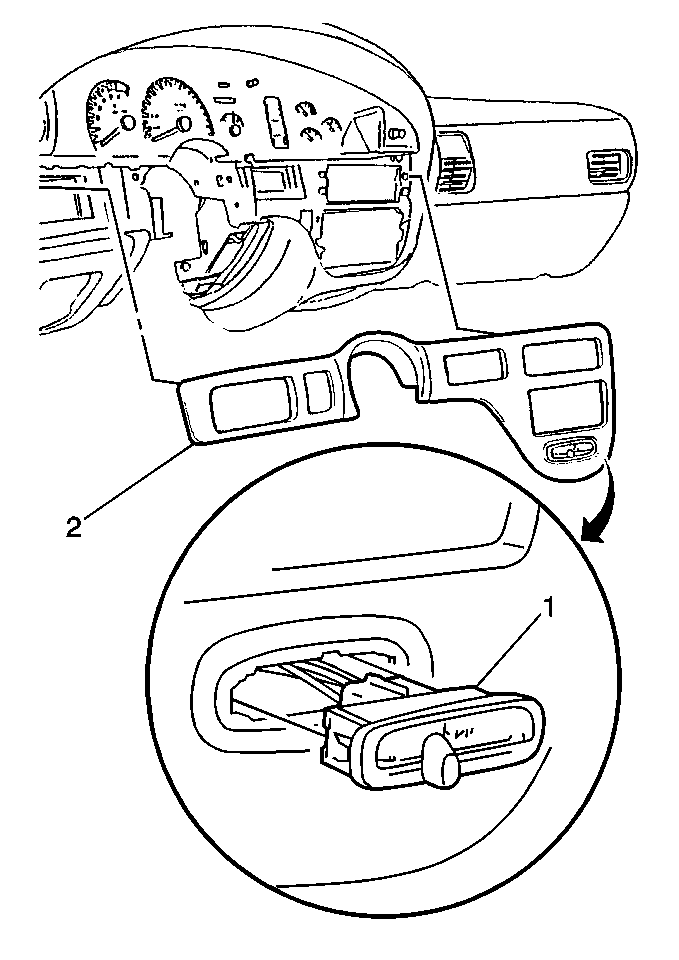
- Carefully prying upward in order to remove the IP lower trim plate (2).
- Disconnect the sub-woofer gain control switch connector (1), if equipped.
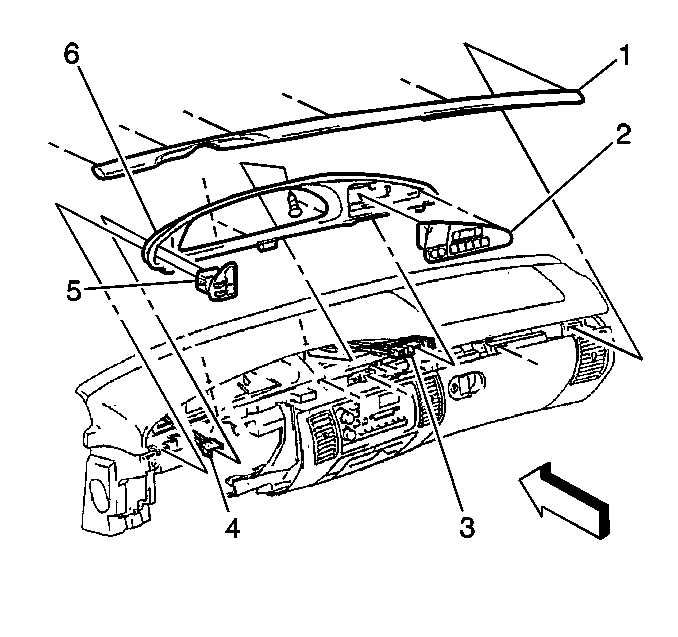
- Remove the IP upper cluster trim plate fasteners from the IP.
- Remove the following components from the head/park light switch:
- Disconnect the cigar lighter connector (1).
- Remove the IP cluster trim plate (4).
Pull the IP trim plate up, then rearward.
| • | The interior lights dimmer knob |
| • | Do not lose the interior lights dimmer knob retainer. |
| • | The twilight sentinel control knob |
Installation Procedure
- Connect the cigar lighter connector (1).
- Carefully insert the tab in order to install the IP upper cluster trim plate (4) to IP assembly.
- Install the following components to the head/park light switch:
- Install the IP cluster trim plate fasteners to the IP.
- Connect the sub-woofer gain control switch connector (1), if equipped.
- Install the IP lower trim plate (2). Press the trim plate into place.
Important: For proper retention, align the retainer in the interior lights dimmer knob before installing.
| • | The interior lights dimmer knob |
| • | The twilight sentinel control knob |
Notice: Use the correct fastener in the correct location. Replacement fasteners must be the correct part number for that application. Fasteners requiring replacement or fasteners requiring the use of thread locking compound or sealant are identified in the service procedure. Do not use paints, lubricants, or corrosion inhibitors on fasteners or fastener joint surfaces unless specified. These coatings affect fastener torque and joint clamping force and may damage the fastener. Use the correct tightening sequence and specifications when installing fasteners in order to avoid damage to parts and systems.
Tighten
Tighten the fasteners to 1.9 N·m (17 lb in).
Instrument Cluster Trim Panel Replacement Oldsmobile
Removal Procedure
- Remove the IP Trim Plate. Refer to Instrument Panel Lower Center Trim Replacement .
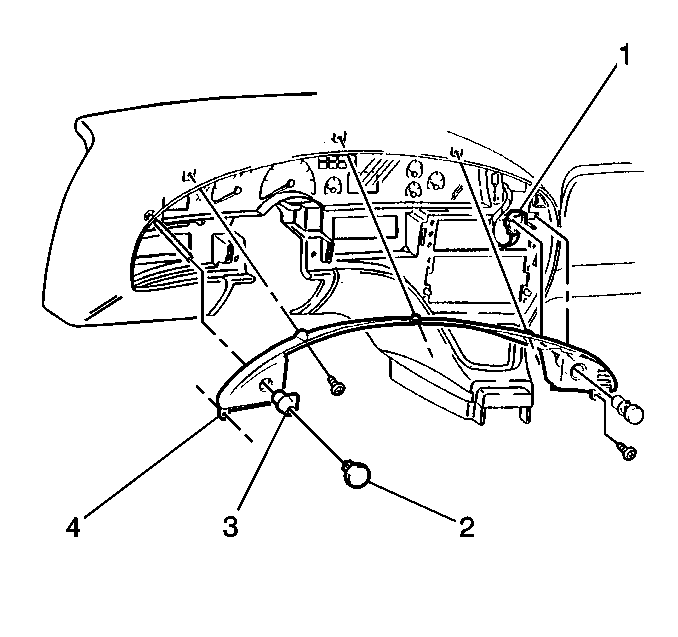
- Remove the fasteners from the cluster trim plate (6).
- Tilt the top of the trim plate rearward. Pull rearward on the bottom of the trim plate (6).
- Disconnect the following components from the connectors (3,4):
- Disconnect the heater and A/C control vacuum harness connector C61, if necessary.
- Remove the heater and A/C control by carefully pushing one side outward.
- Remove the head/park light switch (5) by carefully pushing one side outward.
- Remove the trim plate (6).
| • | The heater and A/C control (2) |
| • | The head/park light switch (5) |
Installation Procedure
- Route the A/C control (3) and headlamp switch (4) electrical connectors through the holes in the cluster trim plate (6).
- Install the trim plate to the IP.
- Install the trim plate to the IP fasteners.
- Connect the heater and A/C control to the electrical connector (3).
- Connect the heater and A/C control vacuum harness connector C61 if necessary.
- Install the heater and A/C control to the trim plate.
- Connect the head/park light switch to the electrical connector (4).
- Install the head/park light switch (5) to the trim plate.
- Install the IP trim plate. Refer to Instrument Panel Lower Center Trim Replacement .
Notice: Use the correct fastener in the correct location. Replacement fasteners must be the correct part number for that application. Fasteners requiring replacement or fasteners requiring the use of thread locking compound or sealant are identified in the service procedure. Do not use paints, lubricants, or corrosion inhibitors on fasteners or fastener joint surfaces unless specified. These coatings affect fastener torque and joint clamping force and may damage the fastener. Use the correct tightening sequence and specifications when installing fasteners in order to avoid damage to parts and systems.
Tighten
Tighten the fasteners to 1.9 N·m (17 lb in).
Instrument Cluster Trim Panel Replacement Buick
Removal Procedure
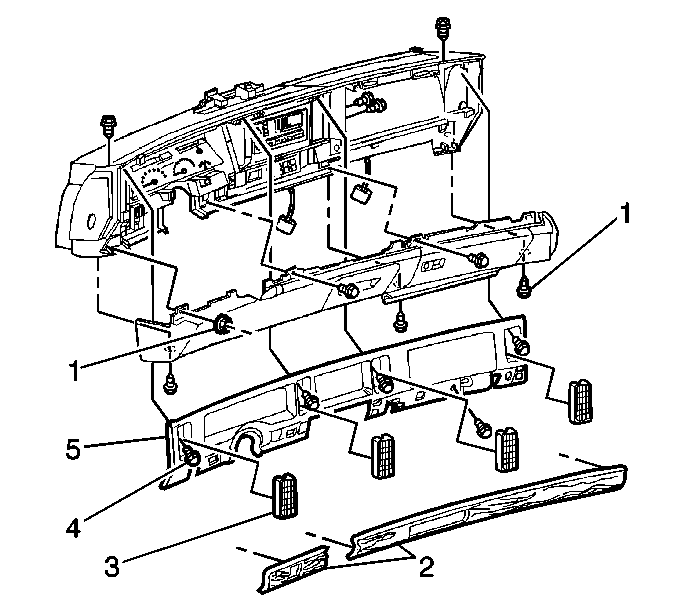
- Carefully pry out the IP lower trim plate (2) in order to remove.
- Carefully pry out the air deflectors (3) in order to remove.
- Remove the IP trim plate fasteners (4).
- Disengage the retaining clips at the top of the trim plate (4).
- Remove the IP trim plate (5).
Important: When removing the fasteners from the air duct openings be careful not to drop the fasteners down the openings.
Installation Procedure
- Align the IP trim plate (5) retaining clips to the IP. Push inward to fasten the trim plate.
- Install the IP trim plate fasteners (4).
- Snap in the air deflectors (3).
- Install the IP lower trim plate (2).
Notice: Use the correct fastener in the correct location. Replacement fasteners must be the correct part number for that application. Fasteners requiring replacement or fasteners requiring the use of thread locking compound or sealant are identified in the service procedure. Do not use paints, lubricants, or corrosion inhibitors on fasteners or fastener joint surfaces unless specified. These coatings affect fastener torque and joint clamping force and may damage the fastener. Use the correct tightening sequence and specifications when installing fasteners in order to avoid damage to parts and systems.
Tighten
Tighten the fasteners to 1.9 N·m (17 lb in).
