POPPING NOISE IN SPEAKER/BOSE SYSTEM- CAUSES AND CORRECTIONS

VEHICLES AFFECTED: 1986-87 DELTA 88, NINETY EIGHT AND TORONADO MODELS
Some 1986 and early 1987 delta 88, ninety-eight and toronado models equipped, with the Delco Bose System may, experience a popping noise heard through the speaker enclosures as the brake is applied or the power seat switch or power window switch is released. The noise in the Delco Bose tuned enclosures is due to back current from. one or ,more of these switches. To suppress popping, follow the procedures in this bulletin as needed.
1986-87 - Ninety Eights and Toronados
POPPING WHEN RELEASING POWER SEAT SWITCH
Parts Required Quantity
P/N 1644291 (Do Not Substitute) 3/Power Seat
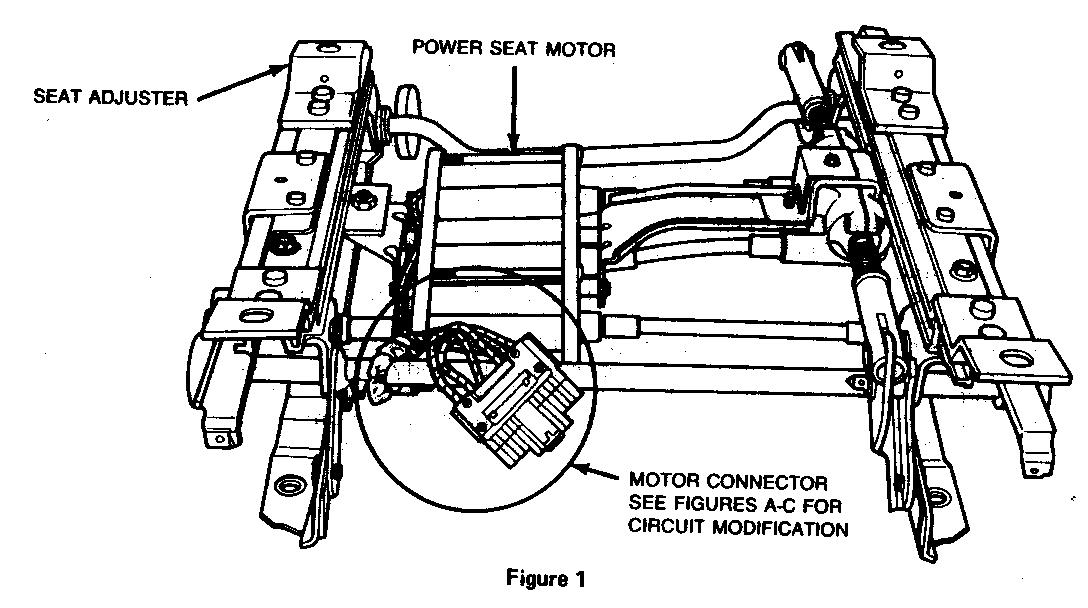
Procedure - Refer to Figure I
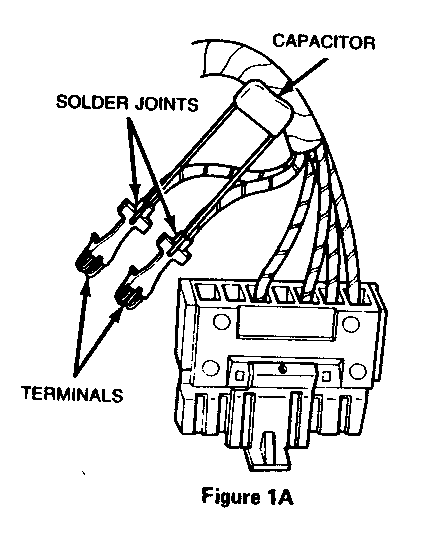
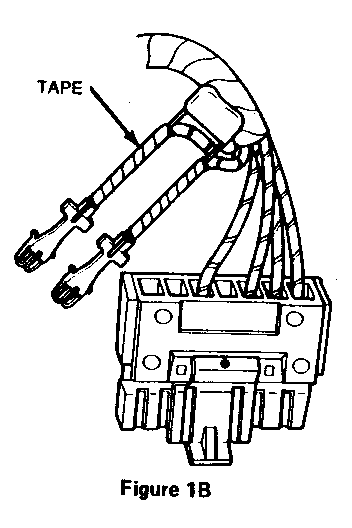
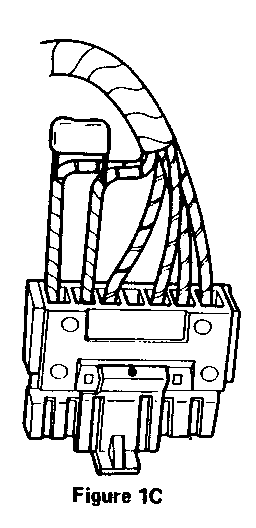
1. With the ignition "off," disconnect the negat-ive battery cable. 2. Remove left power seat trim as described in Section 9 of the Body Service Manual. 3. Disconnect power seat motor six-way connector. 4. Remove left power seat. 5. Using terminal pins, remove blue and yellow wires from connector. (terminals a and b). 6. Solder capacitor P/N 1644291 to the back of the terminals as shown in Figure I-A. Position capacitor leads on top of terminal so that the capacitor is as far from the terminal leads as possible. 7. Tape capacitor leads to wires as shown in Figure 1-B. Be sure to securely wrap tape around capacitor leads so that they are completely insulated. 8. Reinstall terminals into connector. See Figure 1-C. 9. Repeat steps 5-8 for the dark green and dark blue wires. (terminals g and H) 10. Repeat steps 5-8 for the light green and tan wires (terminals d and E) 11. Reinstall power seat. 12. Connect power seat six-way connector to harness. 13. Reinstall power seat trim. 14. Repeat steps 1-13 for right seat.
POPPING WHEN RELEASING WINDOW SWITCH
Parts Required Quantity
P/N 20700250 - Jumper Harness 2 P/N 3816659 - Strap 2
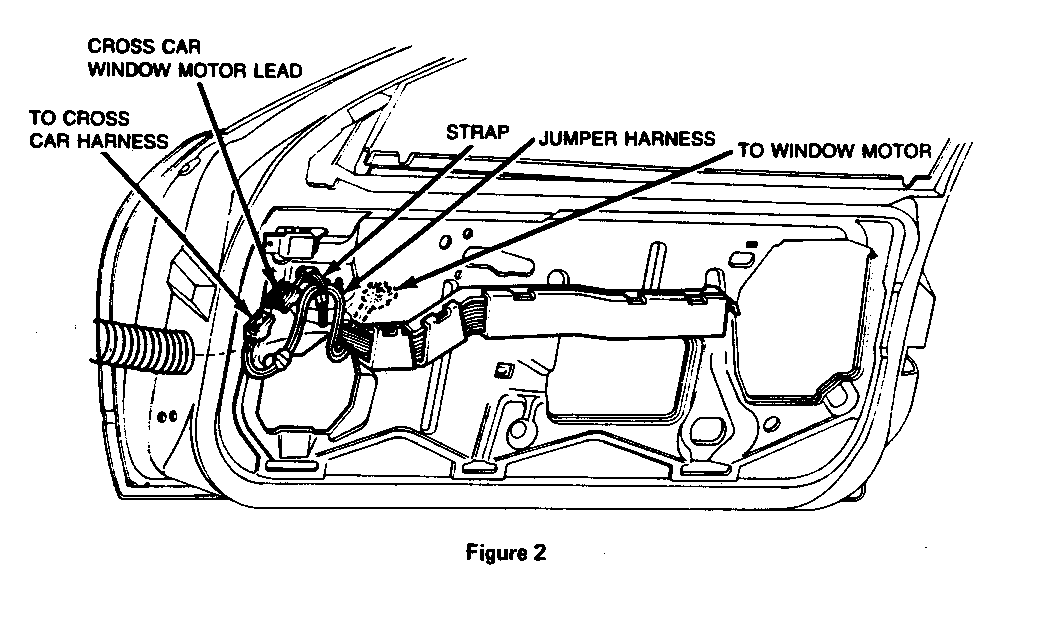
Procedure - Refer to Figure 2
1. With ignition off, disconnect the negative battery cable. 2. Remove left door trim as described in Sectin 5 of the Body Service Manual. 3. Disconnect cross car harness from window motor. 4. Reroute cross car harness window motor lead from behind sheet metal and out the wide oblong opening to the right of the window motor. 5. Connect appropriate end of jumper harness to the cross car harness window motor lead. 6. Reroute the free end of the jumper harness behind the cross car harness and behind the sheet metal. Connect the jumper to the window motor. 7. Secure the jumper harness by strapping the middle of the jumper to the sheet metal between the wide oblong opening and the nearest narrow oblong opening.
NOTICE: Jumper harness should form a smooth curve as shown in Figure 2 below.
8. Reinstall left door trim. 9. Repeat steps 2-8 for the right door. 10. Reconnect the battery.
POPPING WHEN APPLYING BRAKE SWITCH
Parts Required Quantity
P/N 1644291 - capacitor 2
Procedure
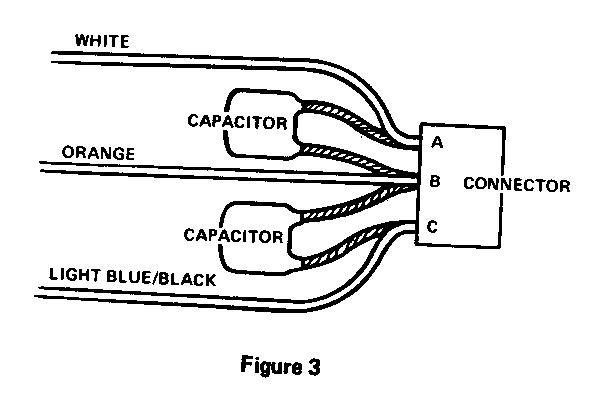
1. With the ignition "off," disconnect the negative battery cable. 2. Turn ignition" off and remove left hand sound insulator as described in Section 5 of the Service Manual. 3. Disconnect electrical connector from brake switch and remove two terminals a and b from brake switch connector body. remove any existing capacitors if present. 4. Install a capacitor, part number 1644291, between terminals "A" and "B. 5. Remove terminal "C" and install the 2nd capacitor as shown between terminals b and c. 6. Solder connections and tape all exposed wires. (Figure la-1c). 7. Reinstall terminals in connector body (WHT. terminal "A", ORN. Terminal "B" and lt.blu/blk in terminal "C") (Figure 3). 8. Connect three cavity jumper harness connector to brake switch. Reinstall left-hand sound insulator.
General Motors bulletins are intended for use by professional technicians, not a "do-it-yourselfer". They are written to inform those technicians of conditions that may occur on some vehicles, or to provide information that could assist in the proper service of a vehicle. Properly trained technicians have the equipment, tools, safety instructions and know-how to do a job properly and safely. If a condition is described, do not assume that the bulletin applies to your vehicle, or that your vehicle will have that condition. See a General Motors dealer servicing your brand of General Motors vehicle for information on whether your vehicle may benefit from the information.
