Rear Brake Caliper Overhaul JL9
Removal Procedure
Caution: Refer to Brake Dust Caution in the Preface section.
Caution: Refer to Brake Fluid Irritant Caution in the Preface section.
- Remove the rear brake caliper from the vehicle. Refer to Rear Brake Caliper Replacement.
- Remove the brake caliper piston from the caliper bore by directing low pressure compressed air into the caliper bore through the fluid inlet hole.
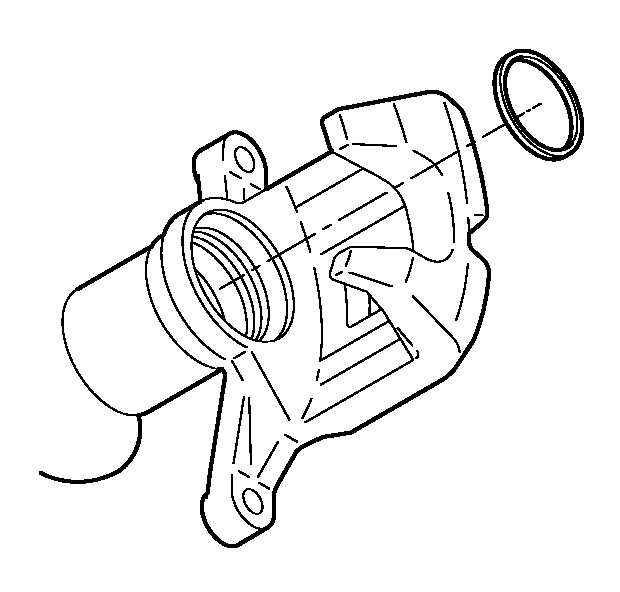
- Remove the retaining ring that secures the dust boot to the caliper housing.
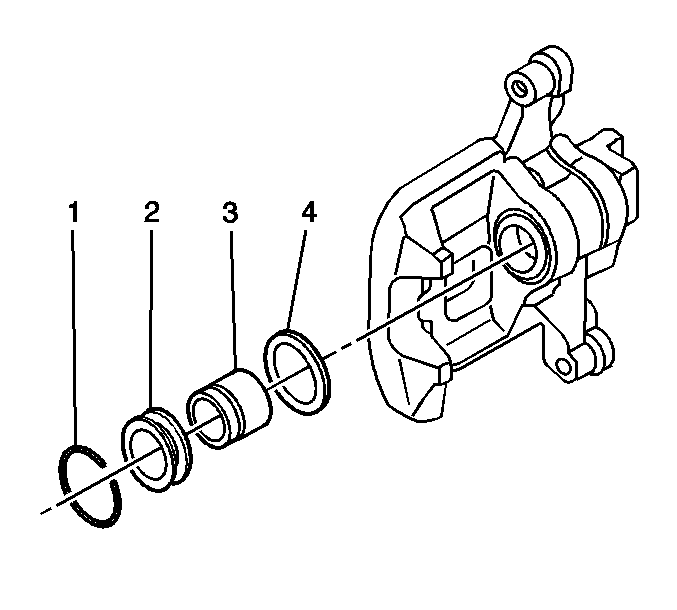
- Remove the piston dust boot seal (2) from the seal counterbore in the caliper. Discard the boot seal.
- Using a small wooden or plastic tool, remove the piston seal (4) from the caliper bore . Discard the piston seal.
- Clean the brake caliper piston bore and seal counterbore, and the caliper piston with denatured alcohol, or equivalent.
- Dry the caliper piston bore and counterbore, and the piston with non-lubricated, filtered air.
- Inspect the caliper bore for cracks, scoring, pitting, excessive rust, and/or excessive corrosion.
- If light rust or light corrosion are present in the caliper bore, attempt to remove the imperfection with a fine emery paper. If the imperfection cannot be removed, replace the caliper assembly.
- If cracks, scoring, pitting, excessive rust, and/or excessive corrosion are present in the caliper bore, replace the caliper assembly.
- Inspect the caliper piston for cracks, scoring, and/or damage to the chrome plating. Replace the caliper piston if any of these conditions exist.
Caution: Do not place fingers in front of the caliper piston(s) in an attempt to catch or protect it when applying compressed air. The piston(s) can fly out with force and could result in serious bodily injury.
Notice: Use clean cloths to pad interior of caliper housing during piston removal. Use just enough air to ease the pistons out of the bores. If the pistons are blown out, even with the padding provided, it may be damaged.
Important: Do not use abrasives to clean the brake caliper piston.
Installation Procedure
- Lubricate the new piston seal (4) with Delco Supreme 11®, GM P/N 12377967 (Canadian P/N 992667), or equivalent DOT-3 brake fluid from a clean, sealed brake fluid container.
- Install the lubricated, new piston seal (4) into the caliper bore.
- Apply a thin coat of Delco Supreme 11®, GM P/N 12377967 (Canadian P/N 992667) or equivalent, DOT-3 brake fluid from a clean, sealed brake fluid container onto the outer surface area of the caliper piston (3).
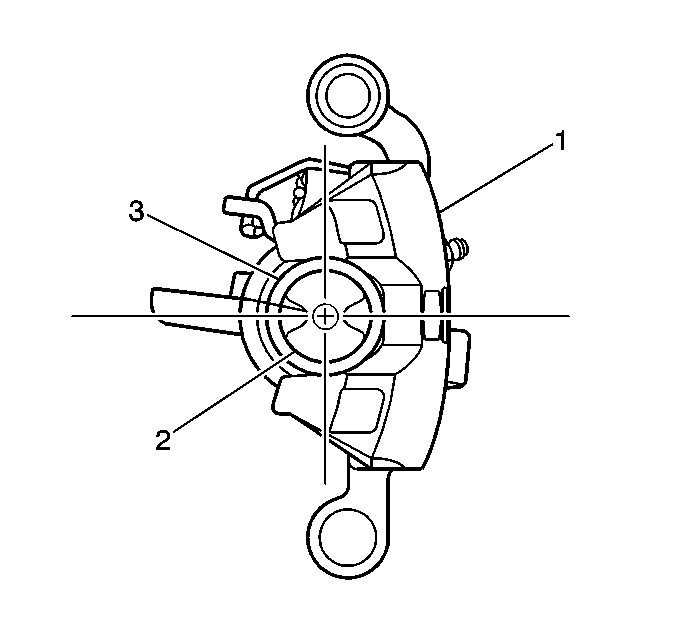
- Install the bottom half of the caliper piston (2) into the caliper bore.
- Install the new piston dust boot seal (1) over the caliper piston (2).
- Compress the caliper piston (2) to the bottom of the caliper bore.
- Fully seat the piston dust boot seal (1) into caliper counterbore.
- Install the retaining ring that secures the dust boot to the caliper housing.
- Install the bleeder valve and cap to the caliper and tighten the valve securely.
- Install the rear brake caliper to the vehicle. Refer to Rear Brake Caliper Replacement.
Rear Brake Caliper Overhaul J65
Removal Procedure
- Remove the rear brake caliper from vehicle. Refer to Rear Brake Caliper Replacement.
- Drain the brake fluid from the caliper assembly.
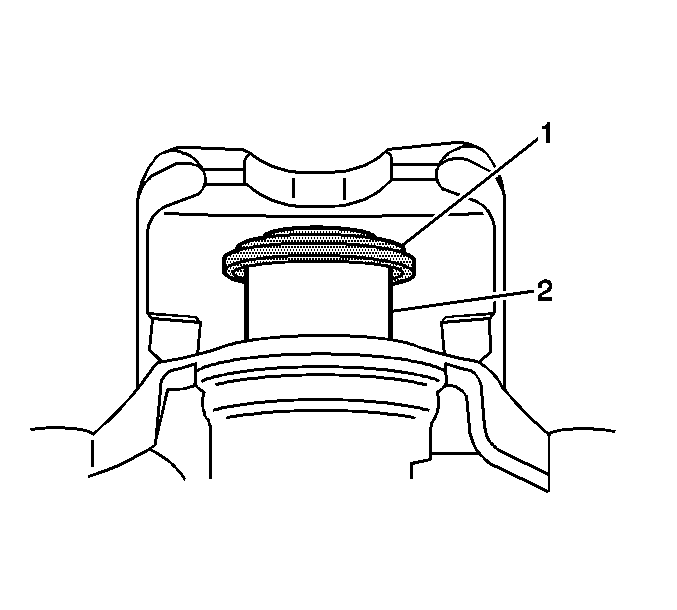
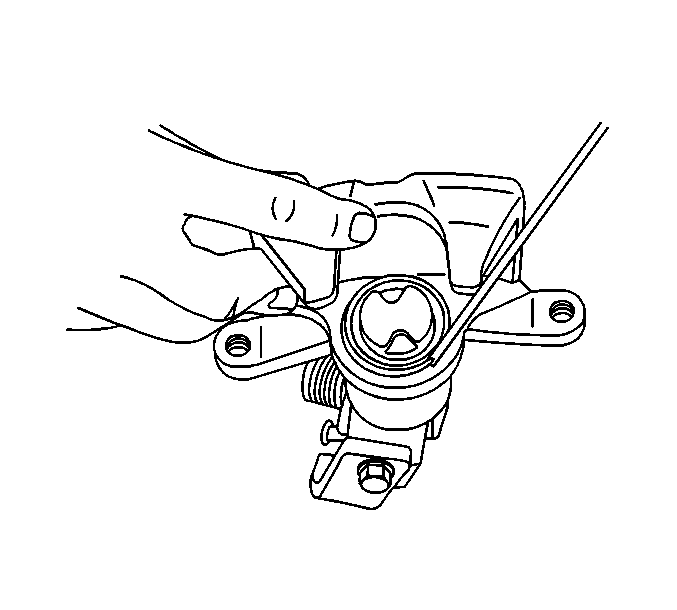
- Using a small wooden or plastic tool, carefully remove the brake caliper piston dust boot seal retaining ring from the groove in the caliper seal counterbore.
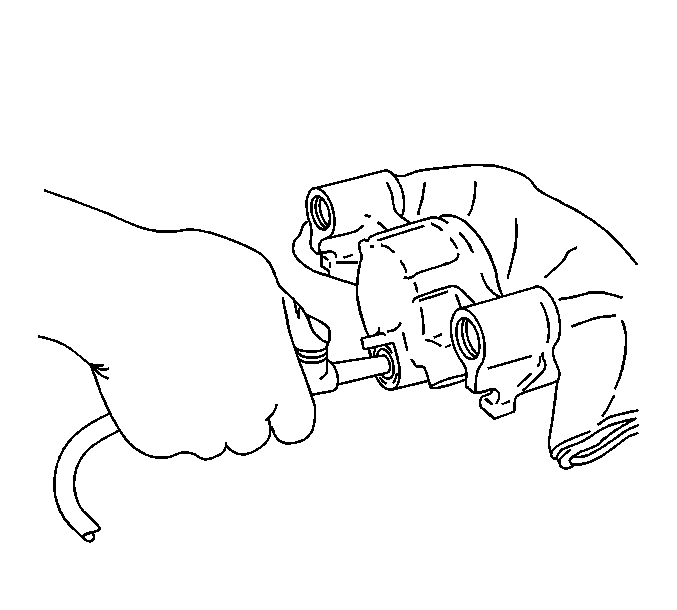
- Place a block of wood against the inside of the caliper body, opposite of the caliper piston.
- Direct low pressure compressed air through the caliper inlet hose to remove the caliper piston.
- Remove the piston dust boot seal (2) from the seal counterbore in the caliper and discard the dust boot seal.
- Using a small wooden or plastic tool, remove the piston seal from the caliper bore and discard the piston seal.
- Inspect the operation of the integral park brake mechanism. Rotate the park brake lever back and forth while observing the movement of the park brake mechanism actuator assembly in the caliper bore.
- If the integral park brake mechanism was not operating properly (binding or seized), replace the brake caliper assembly.
Caution: Refer to Brake Dust Caution in the Preface section.
Caution: Refer to Brake Fluid Irritant Caution in the Preface section.
Notice: Refer to Brake Fluid Effects on Paint and Electrical Components Notice in the Preface section.
Important: If the brake caliper was leaking brake fluid from the REAR of the caliper past the integral park brake actuator shaft seal, replace the brake caliper assembly. The park brake integral mechanism contains a non-serviceable seal which may be allowing brake fluid to leak past it and into the non-serviceable integral park brake mechanism.
Important: The park brake lever, lever return spring and actuator shaft seal are not serviceable components of the integral park brake mechanism . Do not disassemble the integral park brake mechanism.
Installation Procedure
- If cracks, scoring, pitting, excessive rust, and/or excessive corrosion are present in the caliper bore, replace the caliper assembly.
- If light rust or light corrosion are present in the caliper bore, attempt to remove the imperfection with a fine emery paper. If the imperfection cannot be removed, replace the caliper assembly.
- Clean the brake caliper piston bore and seal counterbore, the caliper piston, and the caliper sleeves with denatured alcohol, or equivalent.
- Dry the caliper piston bore and counterbore, the piston, and the sleeves with non-lubricated, filtered air.
- Inspect the caliper piston for cracks, scoring, damage to the chrome plating, and/or damage to the integral adjusting mechanism. Replace the caliper piston if any of these conditions exist.
- Inspect the caliper mounting holes for cracks, scoring, pitting, rust, and/or excessive corrosion. Replace the caliper assembly if any of these conditions exist.
- Lubricate the new piston seal with Delco Supreme 11®, GM P/N 12377967 (Canadian P/N 992667) or equivalent DOT-3 brake fluid from a clean, sealed brake fluid container.
- Install the lubricated, new piston seal into the caliper bore.
- Install the new dust boot seal onto the caliper piston (2).
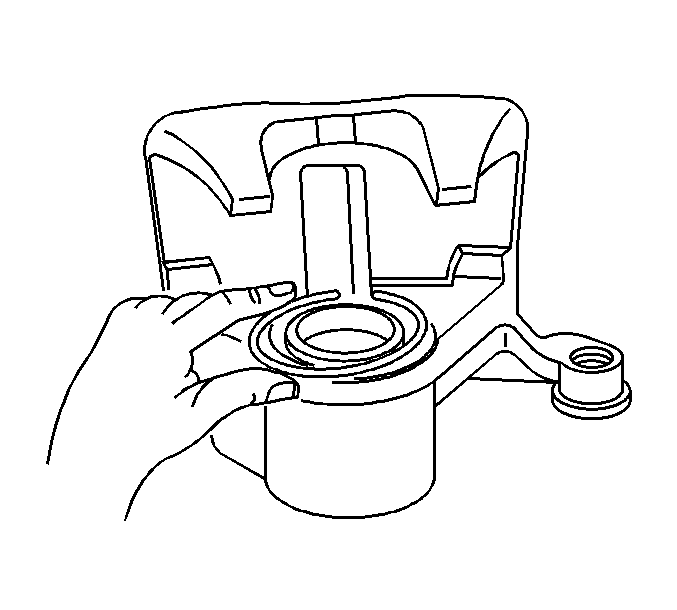
- Insert the caliper piston into the caliper bore; using a spanner type wrench, rotate the piston (2) clockwise to fully seat the piston into the caliper body (1).
- Fully seat the piston dust boot seal in the seal counterbore.
- Install the piston dust boot seal retaining ring to the groove in the caliper seal counterbore.
- Install the brake caliper to the vehicle. Refer to Rear Brake Caliper Replacement.
Important: Do not use abrasives to clean the brake caliper piston.
Inspect the brake caliper for brake fluid leaks while performing the hydraulic brake system bleeding procedure after the caliper has been installed to the vehicle. If the brake caliper leaks brake fluid from the FRONT of the caliper past the piston dust boot seal, replace the caliper piston assembly. The piston integral adjustment mechanism contains a non-serviceable seal which may be allowing brake fluid to leak past it through a bleed hole near the end of the caliper piston.
