For 1990-2009 cars only
Battery Positive and Negative Cable Replacement LS4
Removal Procedure
Important: When replacing battery cables be sure to use replacement cables that are the same type, gage, and length.
- Disconnect the negative battery cable (3). Refer to Battery Negative Cable Disconnection and Connection .
- Open the positive battery cable terminal lead cover (1).
- Loosen the positive battery cable terminal lead nut
- Remove the positive battery cable terminal from the battery.
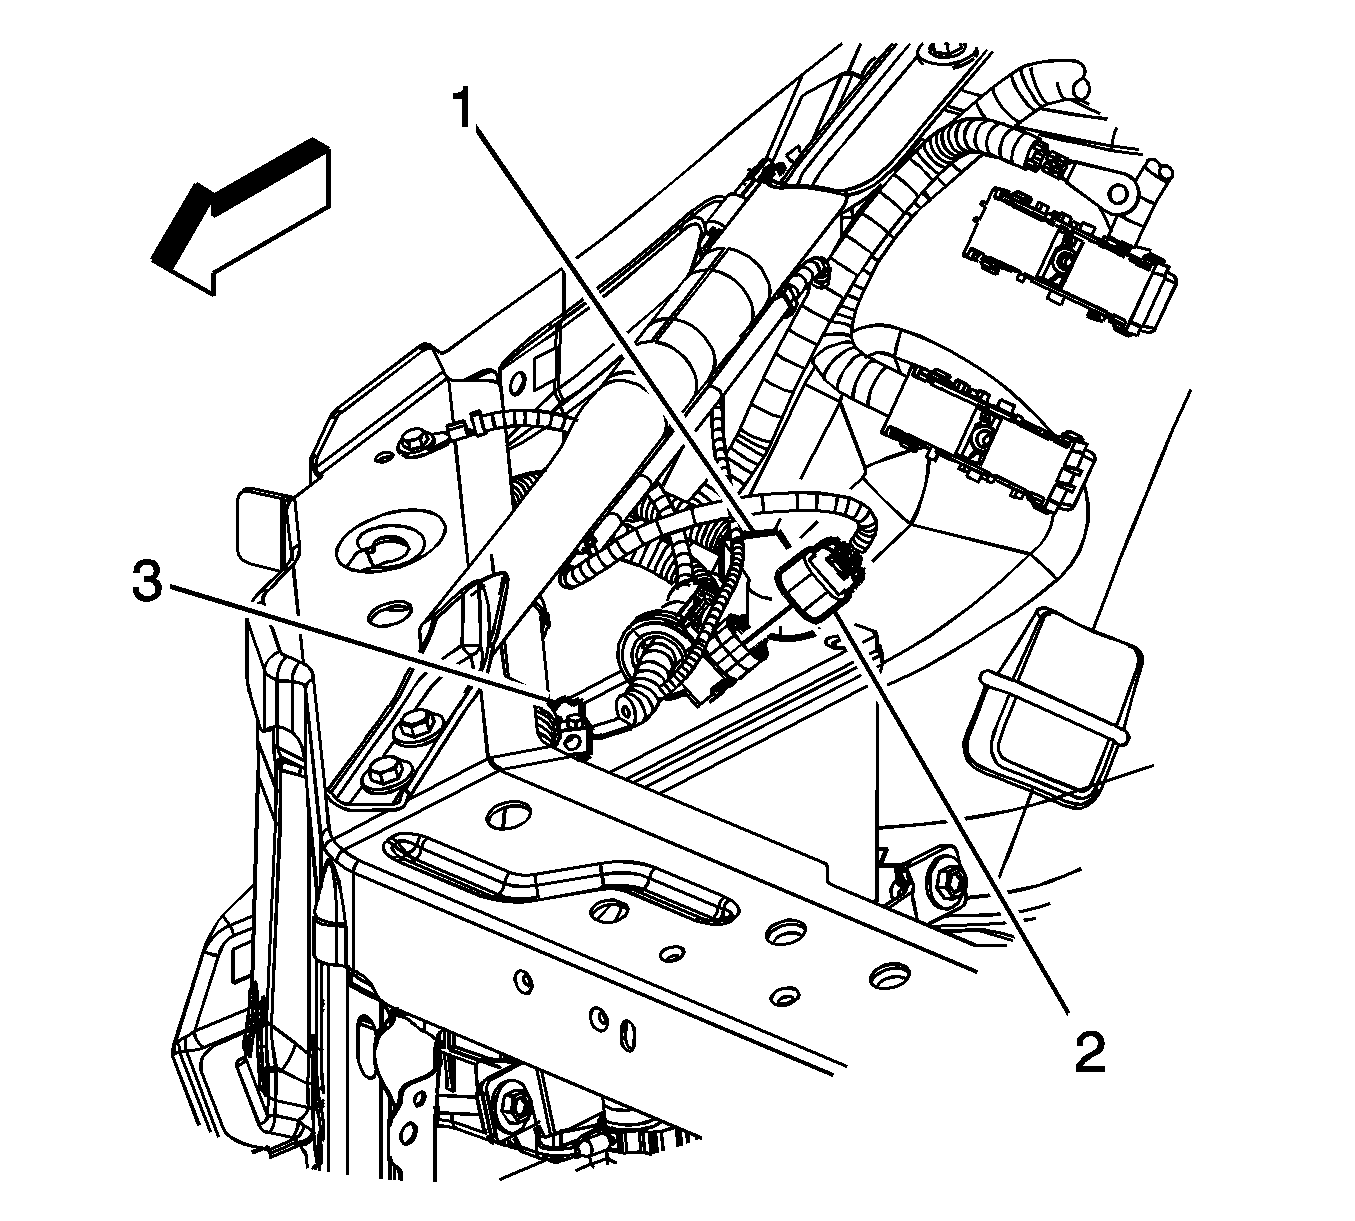
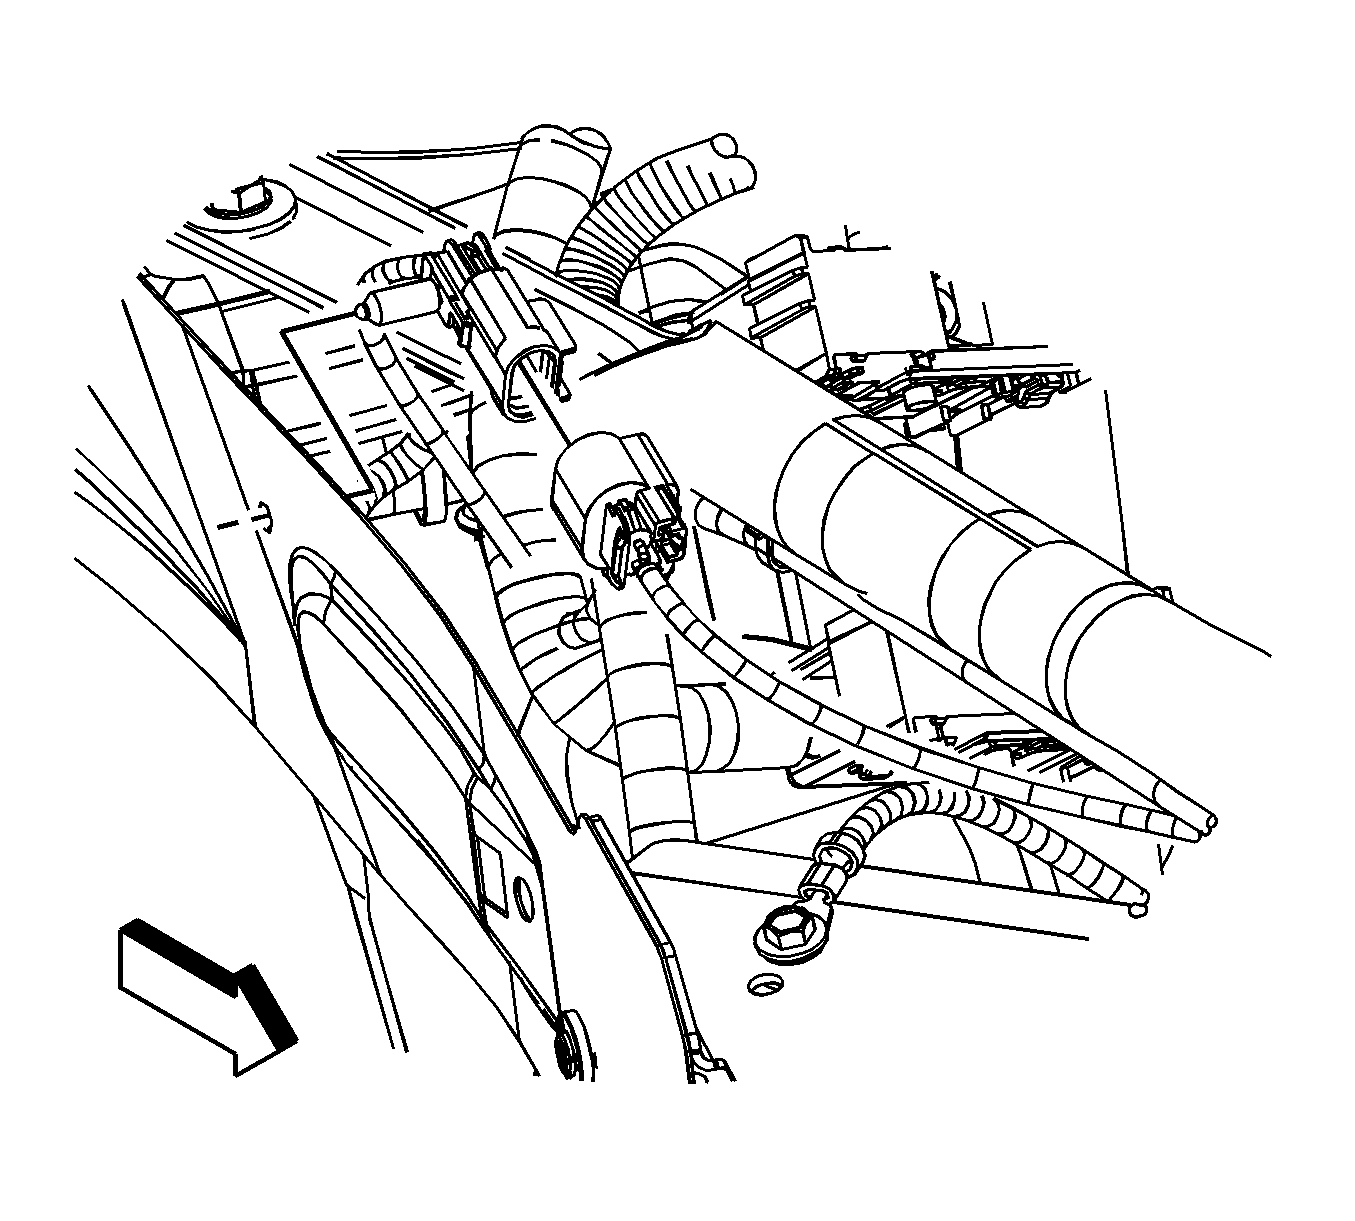
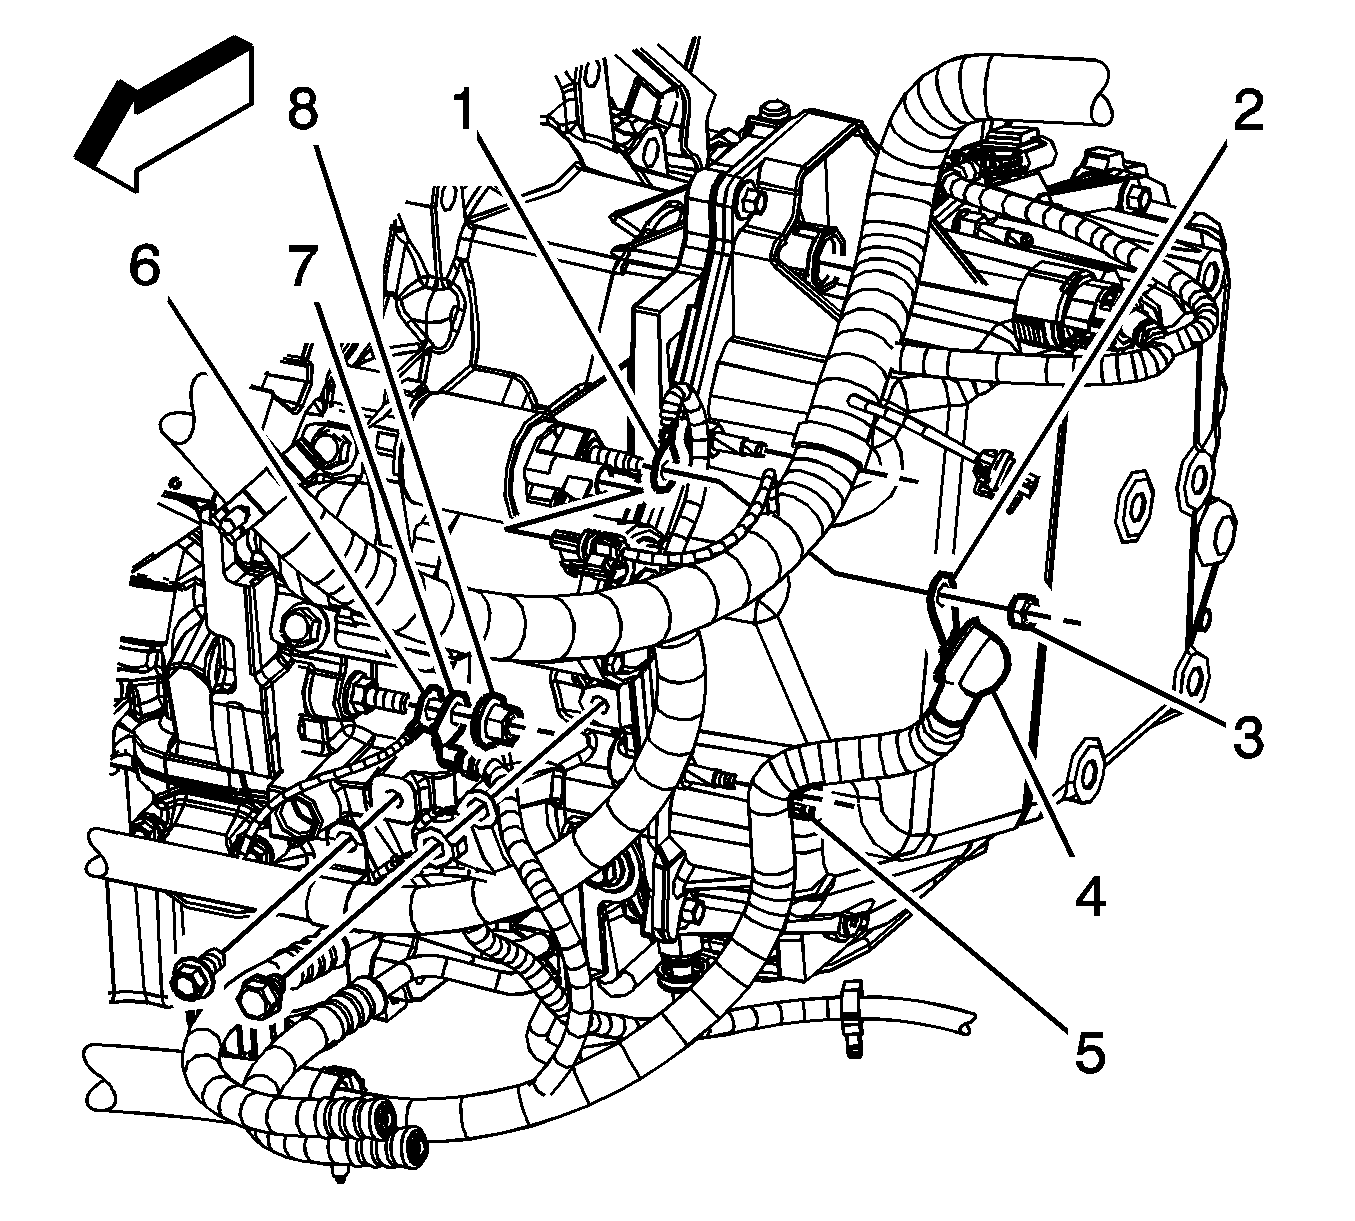
- Disconnect the instrument panel (I/P) harness electrical connector (2) from the battery current sensor.
- Disconnect the battery cable connector from the I/P harness electrical connector.
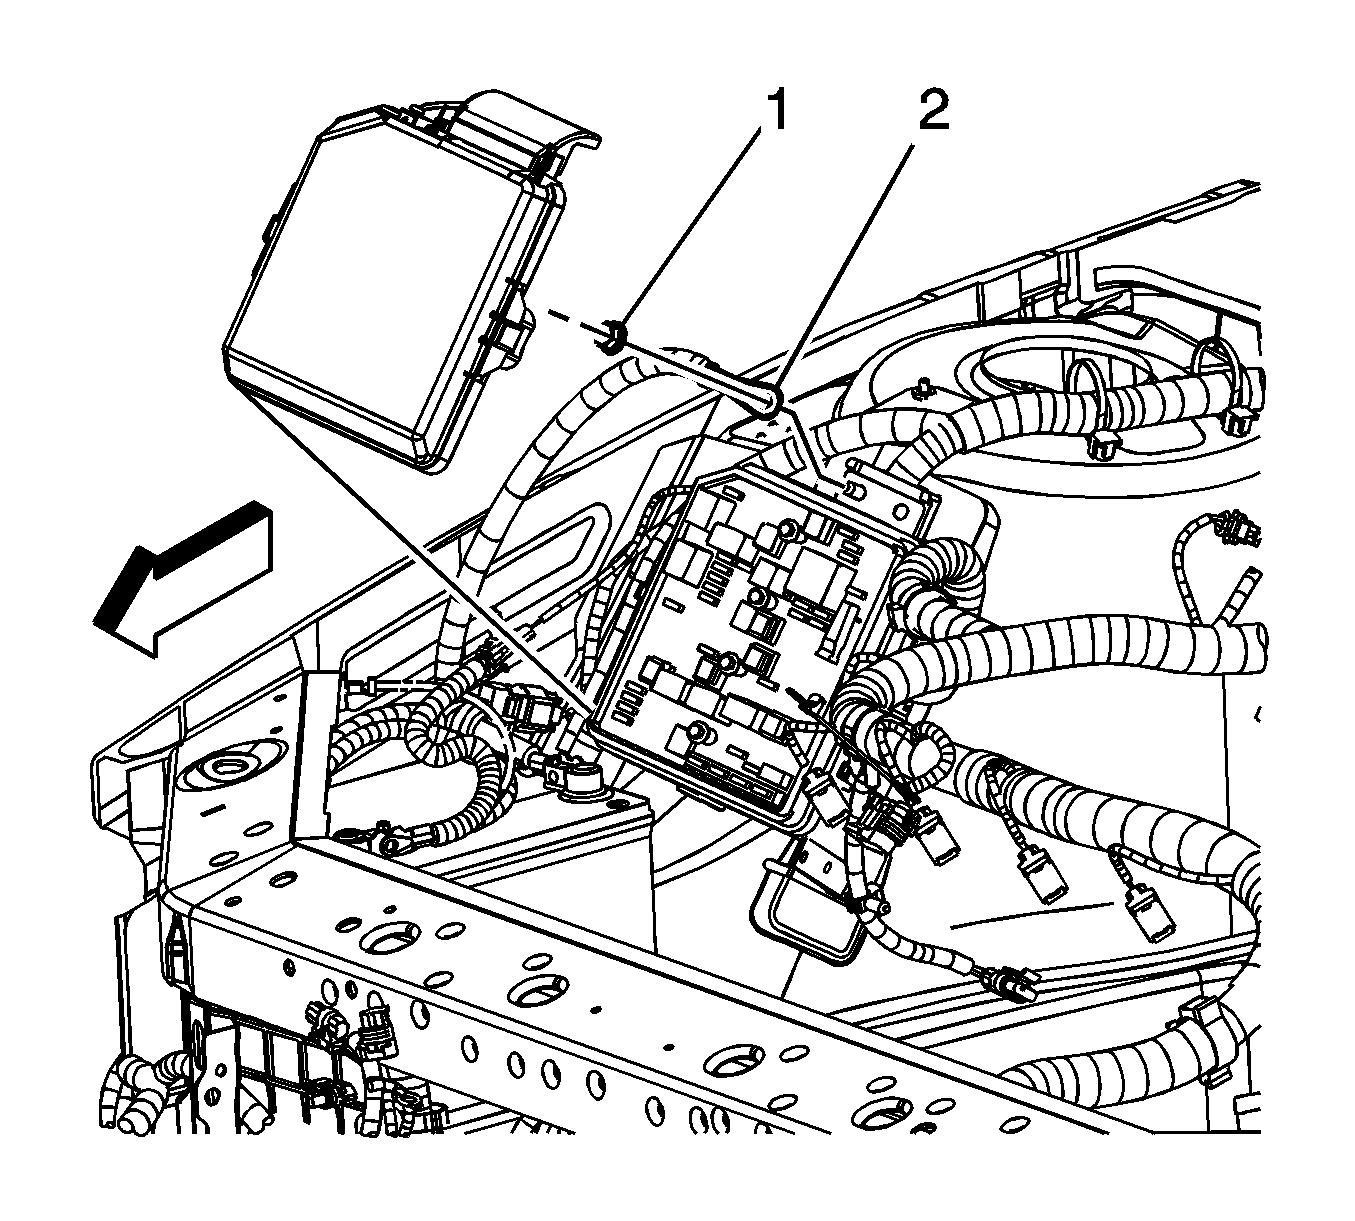
- Remove the bussed electrical center (BEC) cover.
- Remove the positive battery cable junction block lead nut (1).
- Remove the positive battery cable terminal (2) from the BEC.
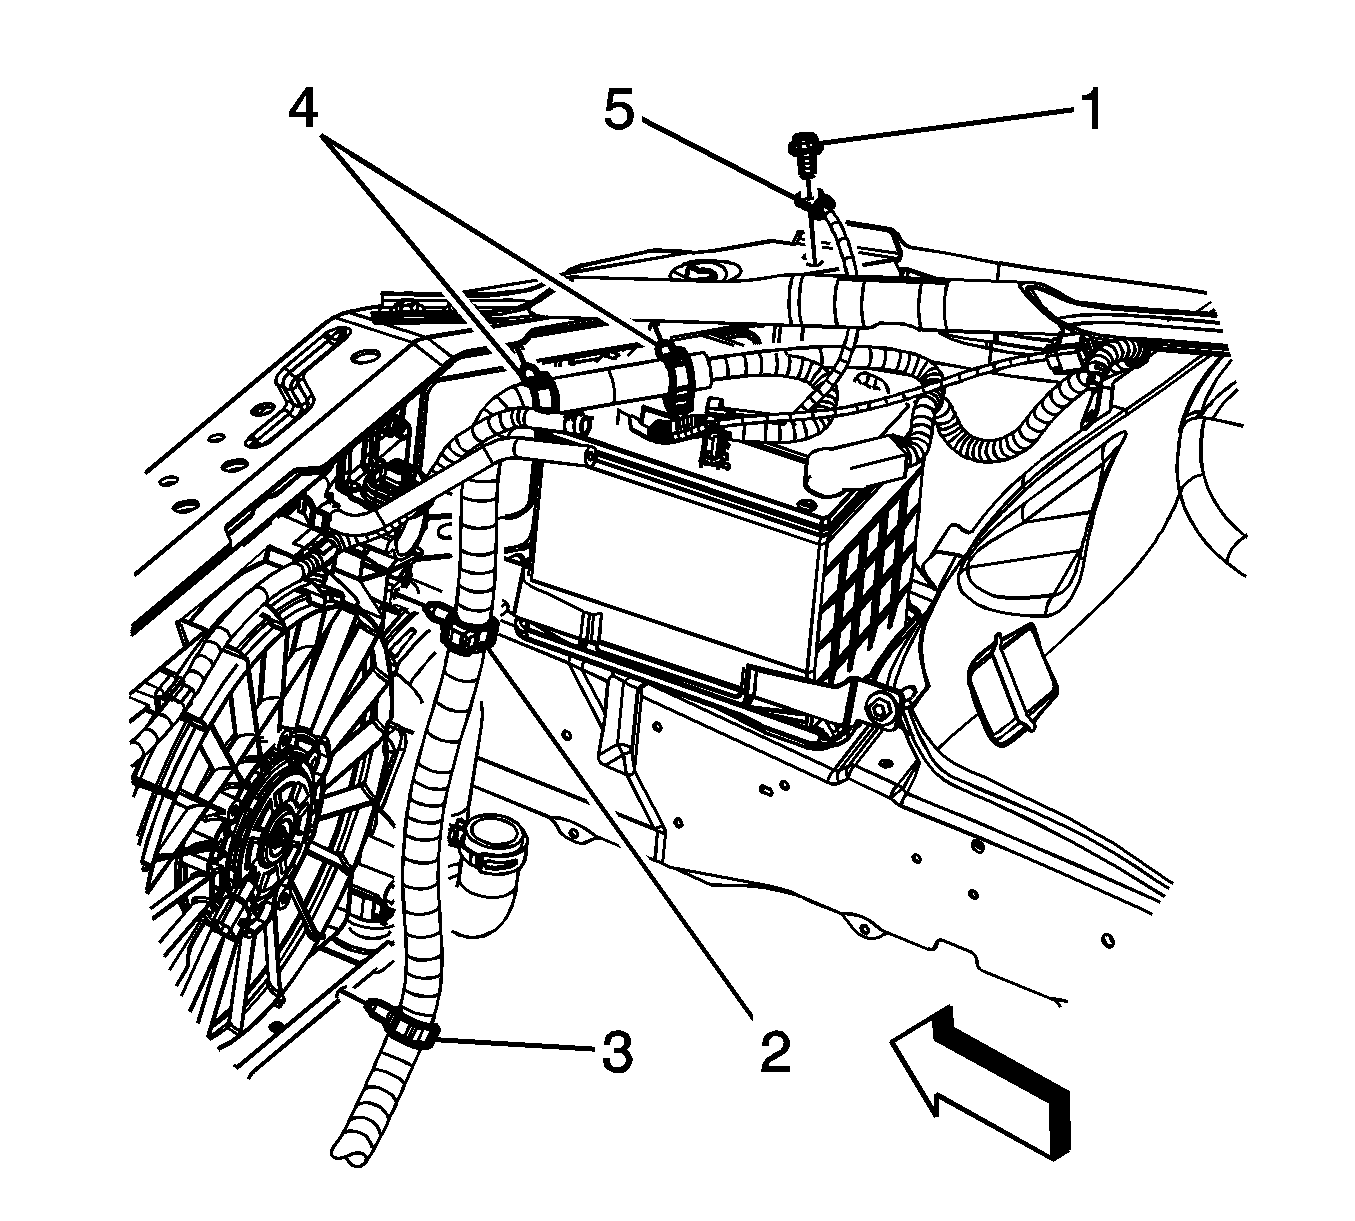
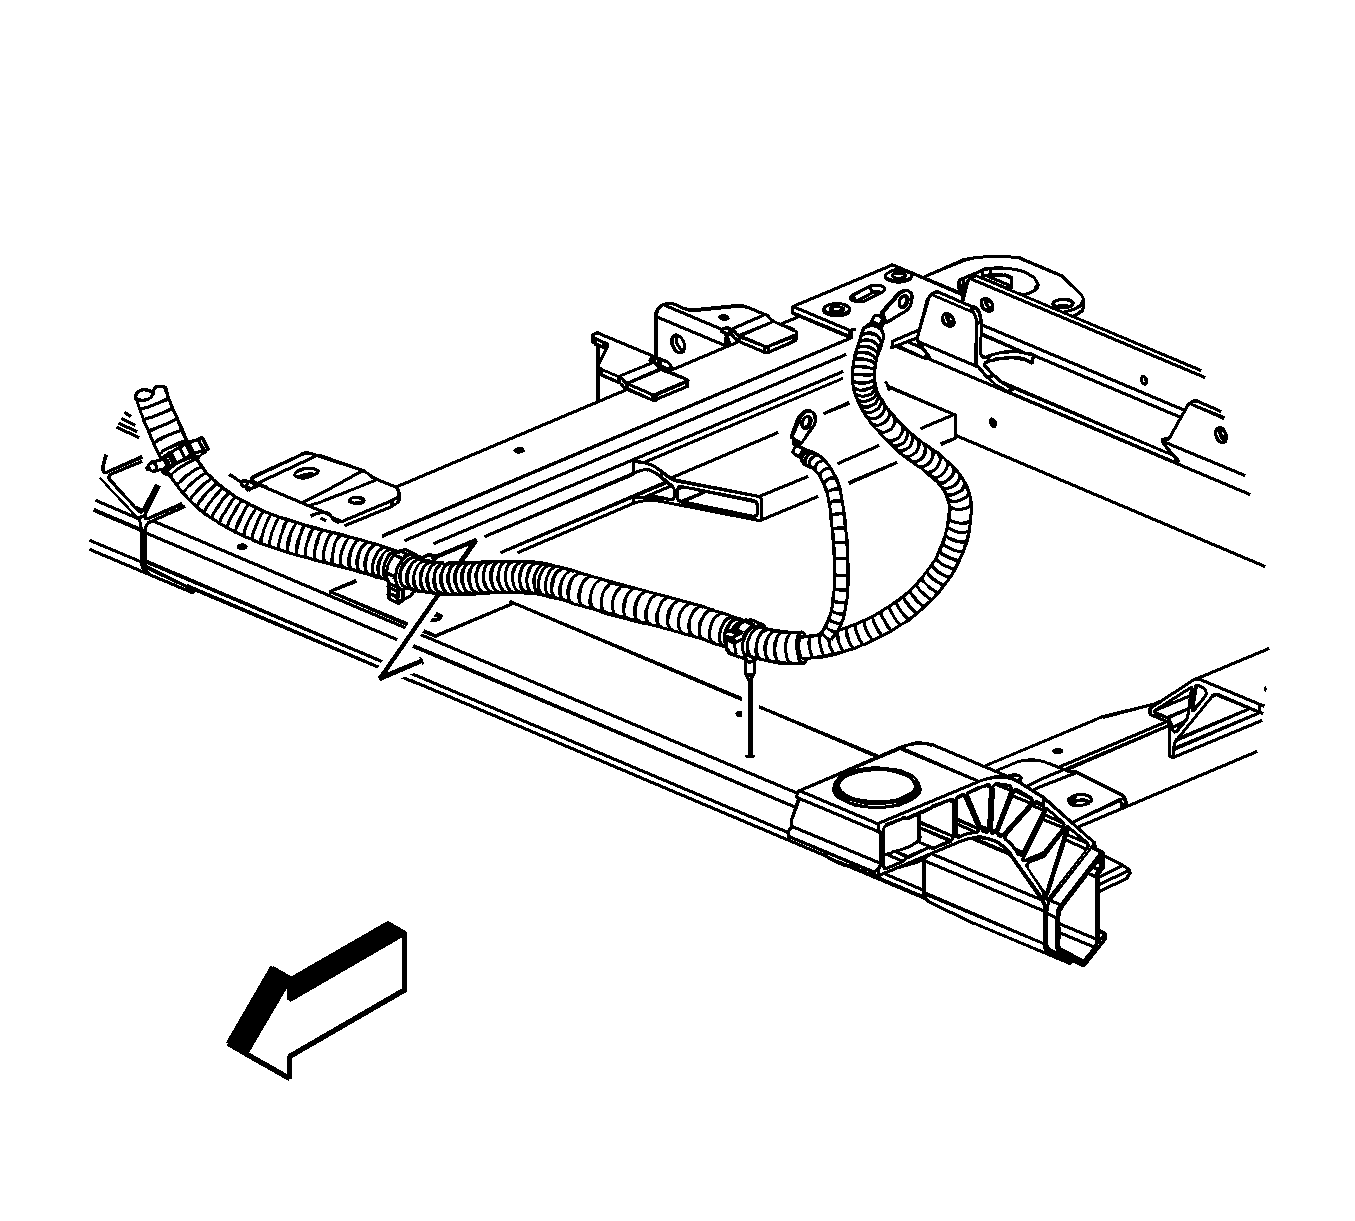
- Remove the ground wire bolt (1) and reposition the wire (5) from the top rail.
- Remove the battery cable harness retaining clips (2, 3, and 4) from the front rail and fan shroud.
- Raise and support the vehicle. Refer to Lifting and Jacking the Vehicle .
- Remove the battery cable harness retainers from the engine cradle.
- Remove the transaxle stud nut (8).
- Remove the battery cable ground (7) from the transaxle stud.
- Reposition the positive battery cable boot (4) at the starter solenoid.
- Remove the starter solenoid BAT terminal nut (3) from the starter.
- Remove the positive battery cable (2) from the starter motor.
- Remove the positive battery cable clip (5) from the transmission stud.
- Lower the vehicle.
- Remove the positive and negative battery cable from the vehicle.
- If replacing the positive and negative battery cable, perform the following:
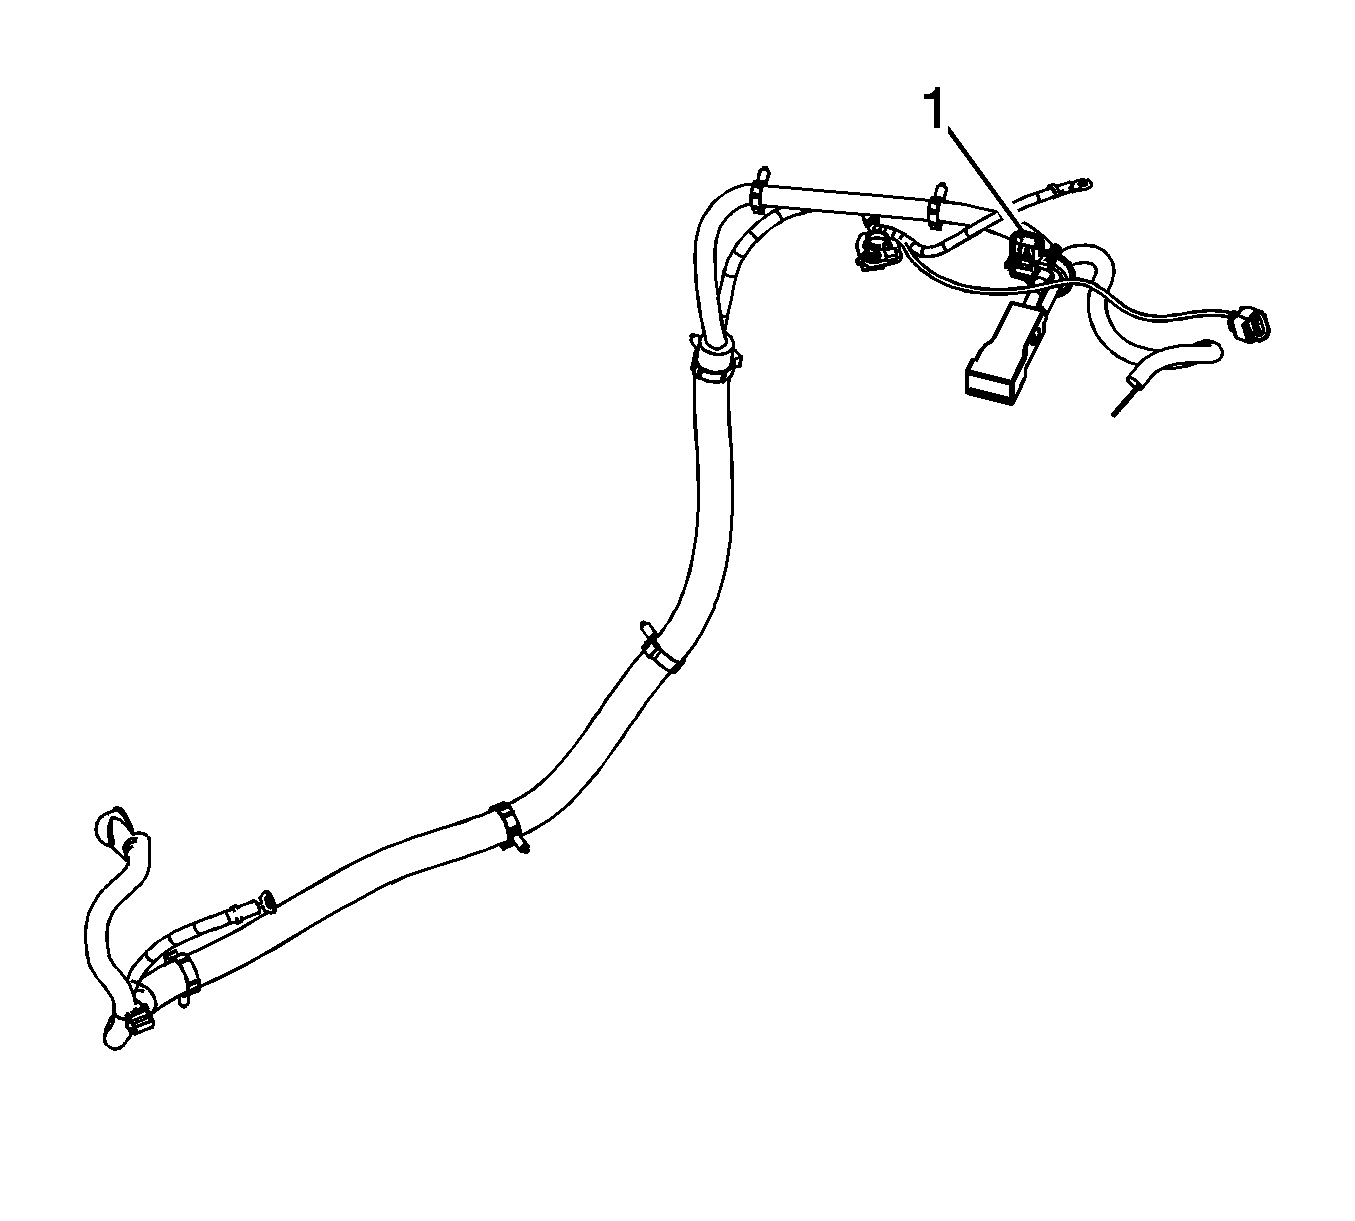
| 22.1. | Cut the tie straps and electrical tape attaching the battery current sensor to the battery cable. |
| 22.2. | Squeeze the battery cable branches together. |
| Important: Note the position of the battery current sensor prior to removal. |
| 22.3. | Slide the battery current sensor (1) off of the battery cable. |
Installation Procedure
- If the positive and negative battery cable was replaced, perform the following:
- Install the positive and negative battery cable to the vehicle.
- Raise and support the vehicle.
- Install the positive battery cable (2) to the starter motor.
- Install the starter solenoid BAT terminal nut (3) to the starter.
- Position the positive battery cable boot (4) at the starter solenoid.
- Install the positive battery cable clip (5) to the transmission stud.
- Install the battery cable ground (7) to the transaxle stud.
- Install the transaxle stud nut (8).
- Install the battery cable harness retainers from the engine cradle.
- Lower the vehicle.
- Position the ground wire (5) and install the ground wire bolt (1) to the top rail.
- Install the battery cable harness retaining clips (2, 3, and 4) to the front rail and fan shroud.
- Install the positive battery cable terminal (2) to the BEC.
- Install the positive battery cable junction block lead nut (1).
- Install the BEC cover.
- Connect the battery cable connector to the I/P harness electrical connector.
- Connect the I/P harness electrical connector (2) to the battery current sensor.
- Install the positive battery cable terminal to the battery.
- Tighten the positive battery cable terminal lead nut.
- Snap closed the positive battery cable terminal lead cover (1).
- Connect the negative battery cable (3). Refer to Battery Negative Cable Disconnection and Connection .
| 1.1. | Slide the battery current sensor (1) onto the battery cable. |
| Important: Ensure that the tape tab is pointing away from the negative cable terminal. |
| 1.2. | Using NEW tie straps and electrical tape, attach the battery current sensor to the battery cable. |
Notice: Refer to Fastener Notice in the Preface section.
Tighten
Tighten the nut to 10 N·m (89 lb in).
Tighten
Tighten the nut to 30 N·m (22 lb ft).
Tighten
Tighten the nut to 10 N·m (89 lb in).
Tighten
Tighten the nut to 10 N·m (89 lb in).
Tighten
Tighten the nut to 15 N·m (11 lb ft).
