For 1990-2009 cars only
Exhaust Manifold Replacement - Left Side 3.8L
Removal Procedure
- Turn the ignition OFF.
- Remove the left and the right torque strut bolts at the engine strut bracket.
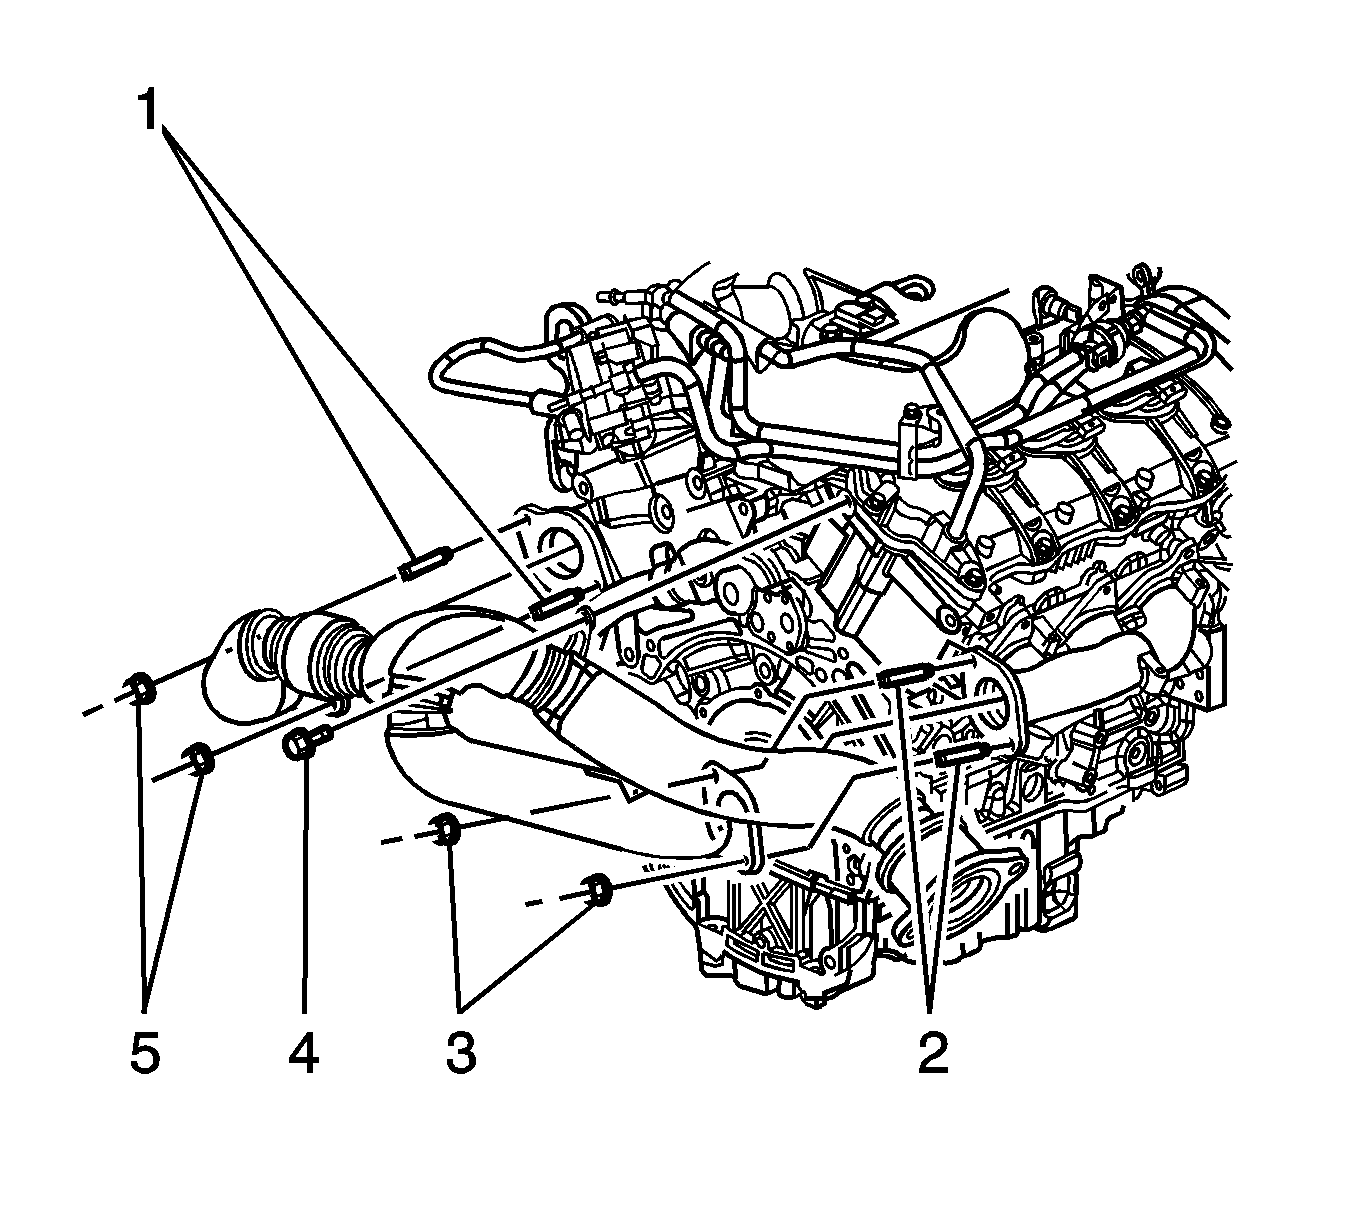
- Remove the exhaust crossover pipe to left bank exhaust manifold nuts (5).
- Remove the oil lever indicator and tube. Refer to Oil Level Indicator and Tube Replacement .
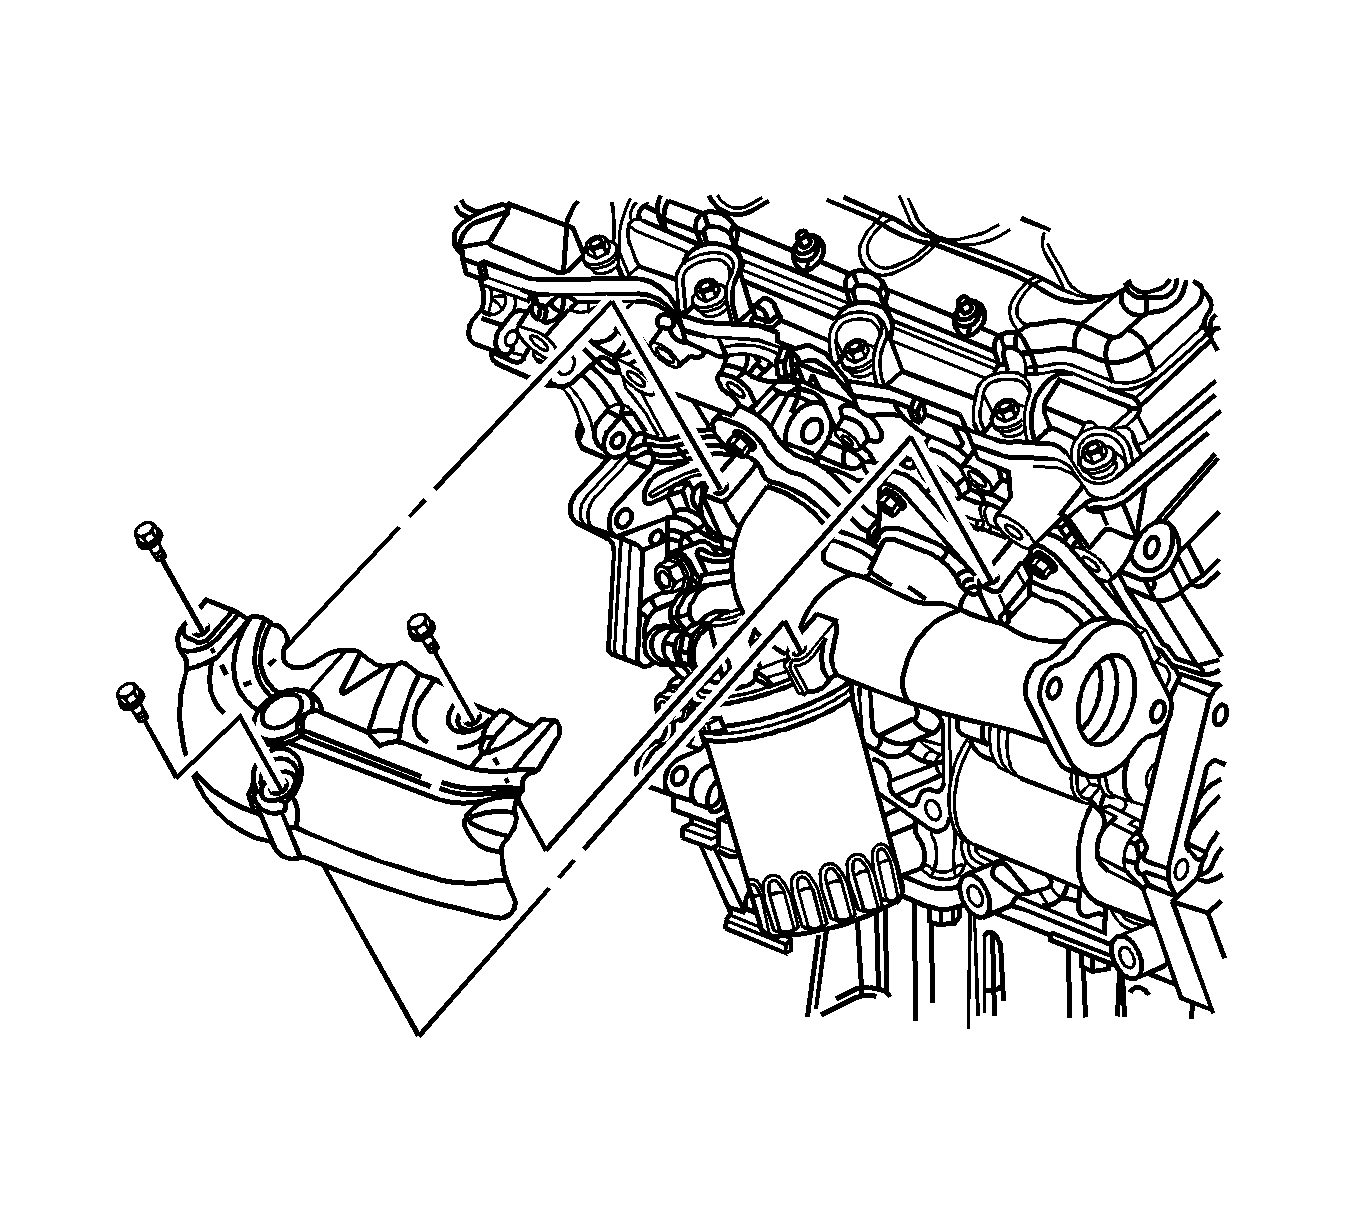
- Remove the exhaust manifold heat shield bolts.
- Remove the exhaust manifold heat shield.
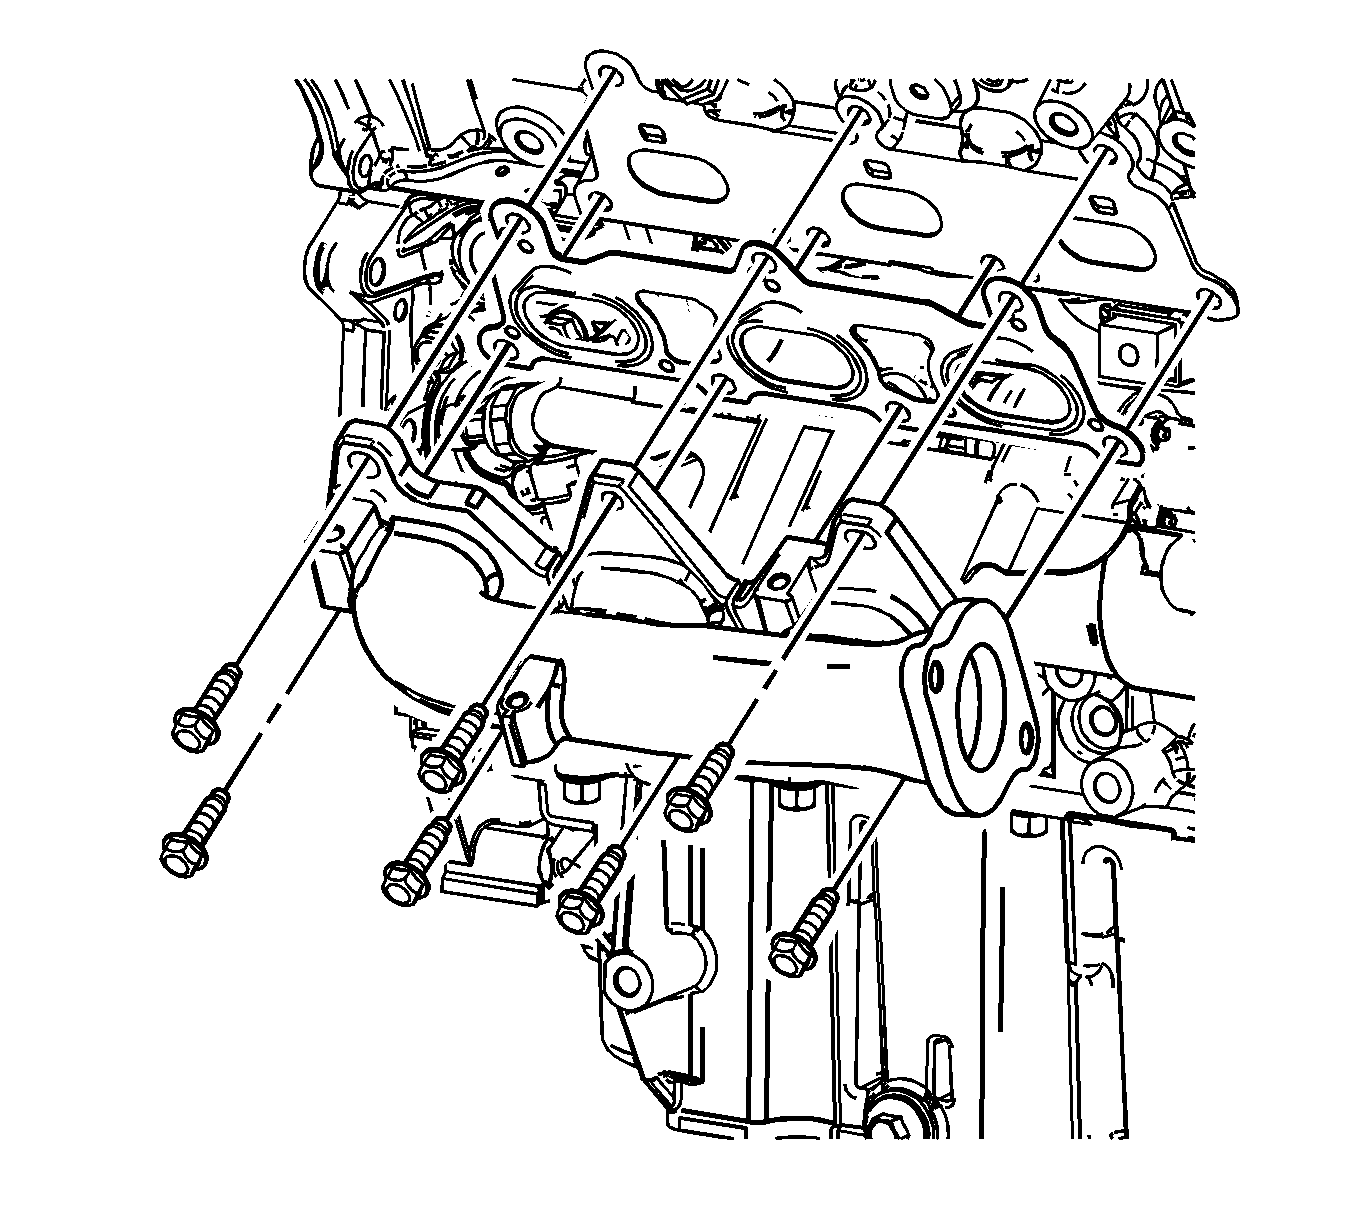
- Remove the exhaust manifold bolts.
- Remove the exhaust manifold.
- Remove and discard the exhaust manifold gasket.
- Clean and inspect the exhaust manifold and the sealing surfaces. Refer to Exhaust Manifold Cleaning and Inspection - Left Side .
Installation Procedure
- Install the NEW exhaust manifold gasket.
- Install the exhaust manifold.
- Install the exhaust manifold bolts.
- Install the exhaust manifold heat shield.
- Install the exhaust manifold heat shield bolts.
- Install the oil lever indicator and tube. Refer to Oil Level Indicator and Tube Replacement .
- Install the exhaust crossover pipe to left bank exhaust manifold nuts (5). Refer to Exhaust Crossover Pipe Replacement .
- Install the left and the right torque strut at the engine. Secure with the strut bolts.

Notice: Refer to Fastener Notice in the Preface section.
Tighten
Tighten the bolts to 20 N·m (15 lb ft).

Tighten
Tighten the bolts to 10 N·m (89 lb in).

Tighten
Tighten the bolts to 48 N·m (35 lb ft).
Exhaust Manifold Replacement - Left Side RPO LY7
Removal Procedure
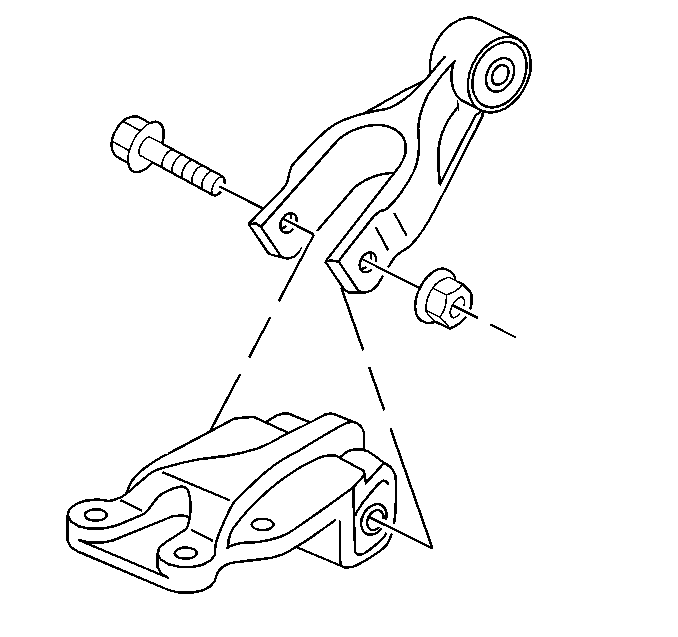
- Remove the left and right engine mount struts. Refer to Engine Mount Strut Replacement - Left Side Exhaust Manifold Replacement - Right Side and Engine Mount Strut Replacement - Right Side Engine Mount Strut Replacement - Right Side .
- Remove the oil level indicator and tube. Refer to Oil Level Indicator and Tube Replacement .
- Remove the exhaust crossover pipe to left exhaust manifold nuts (5).
- Remove the exhaust manifold heat shield bolts.
- Remove the exhaust manifold heat shield.
- Remove the exhaust manifold bolts.
- Remove the exhaust manifold.
- Remove and discard the exhaust manifold gasket.
- Clean and inspect the exhaust manifold sealing surfaces.

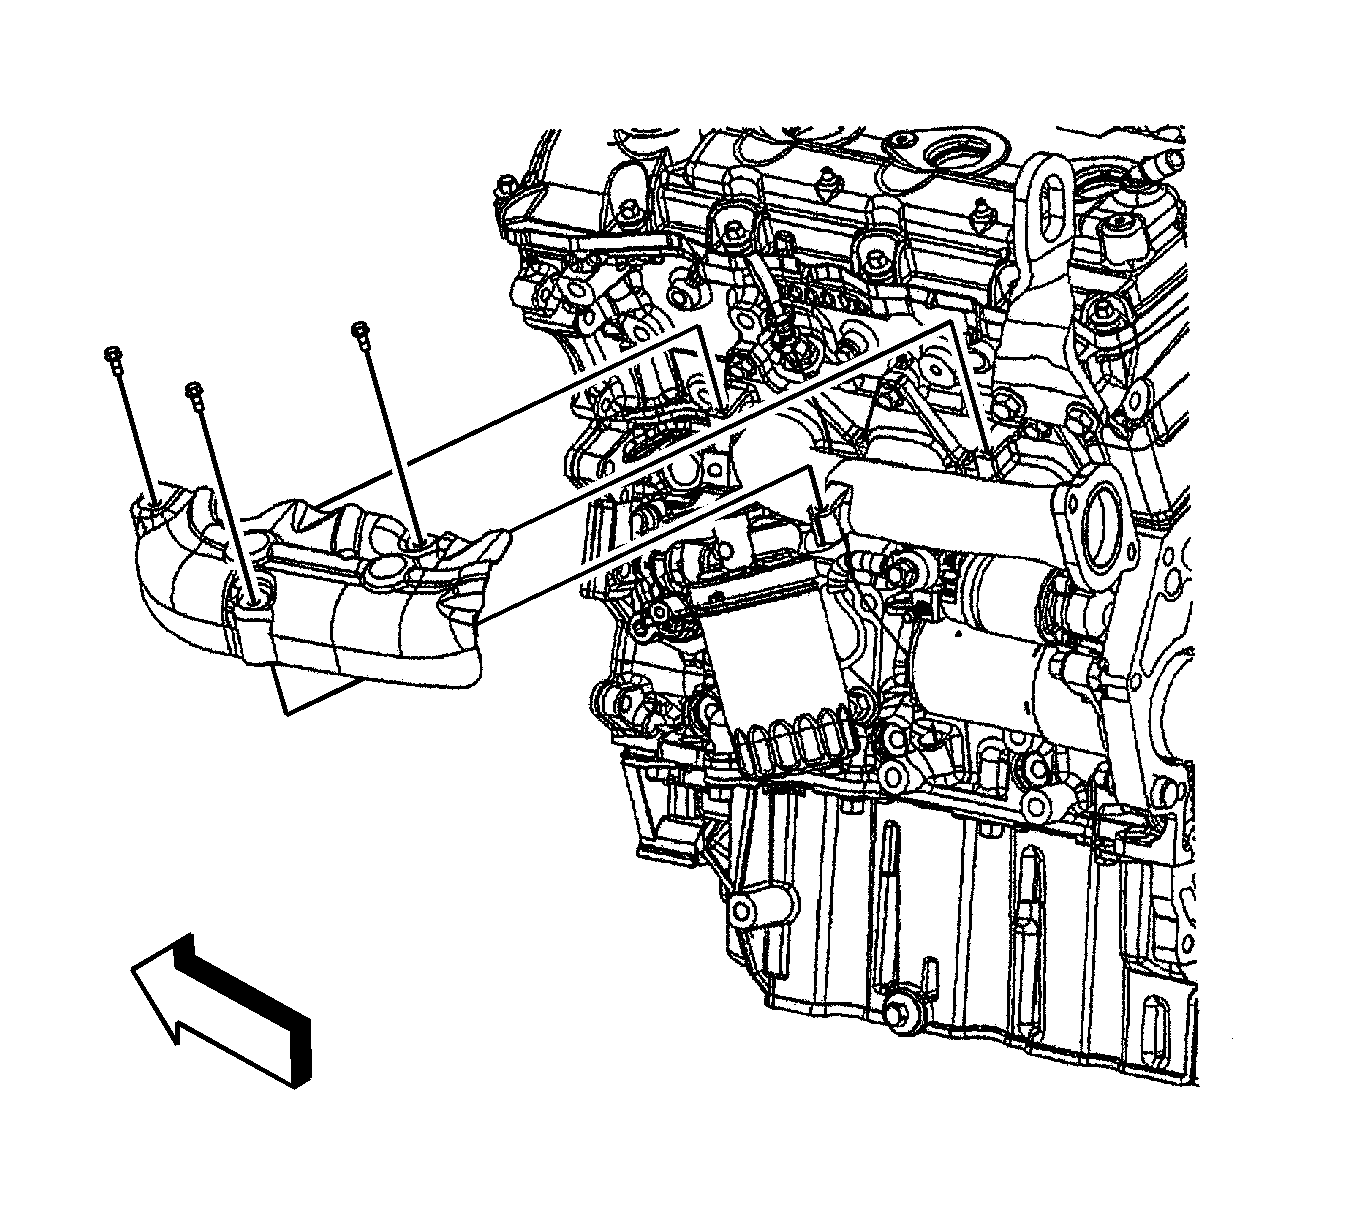
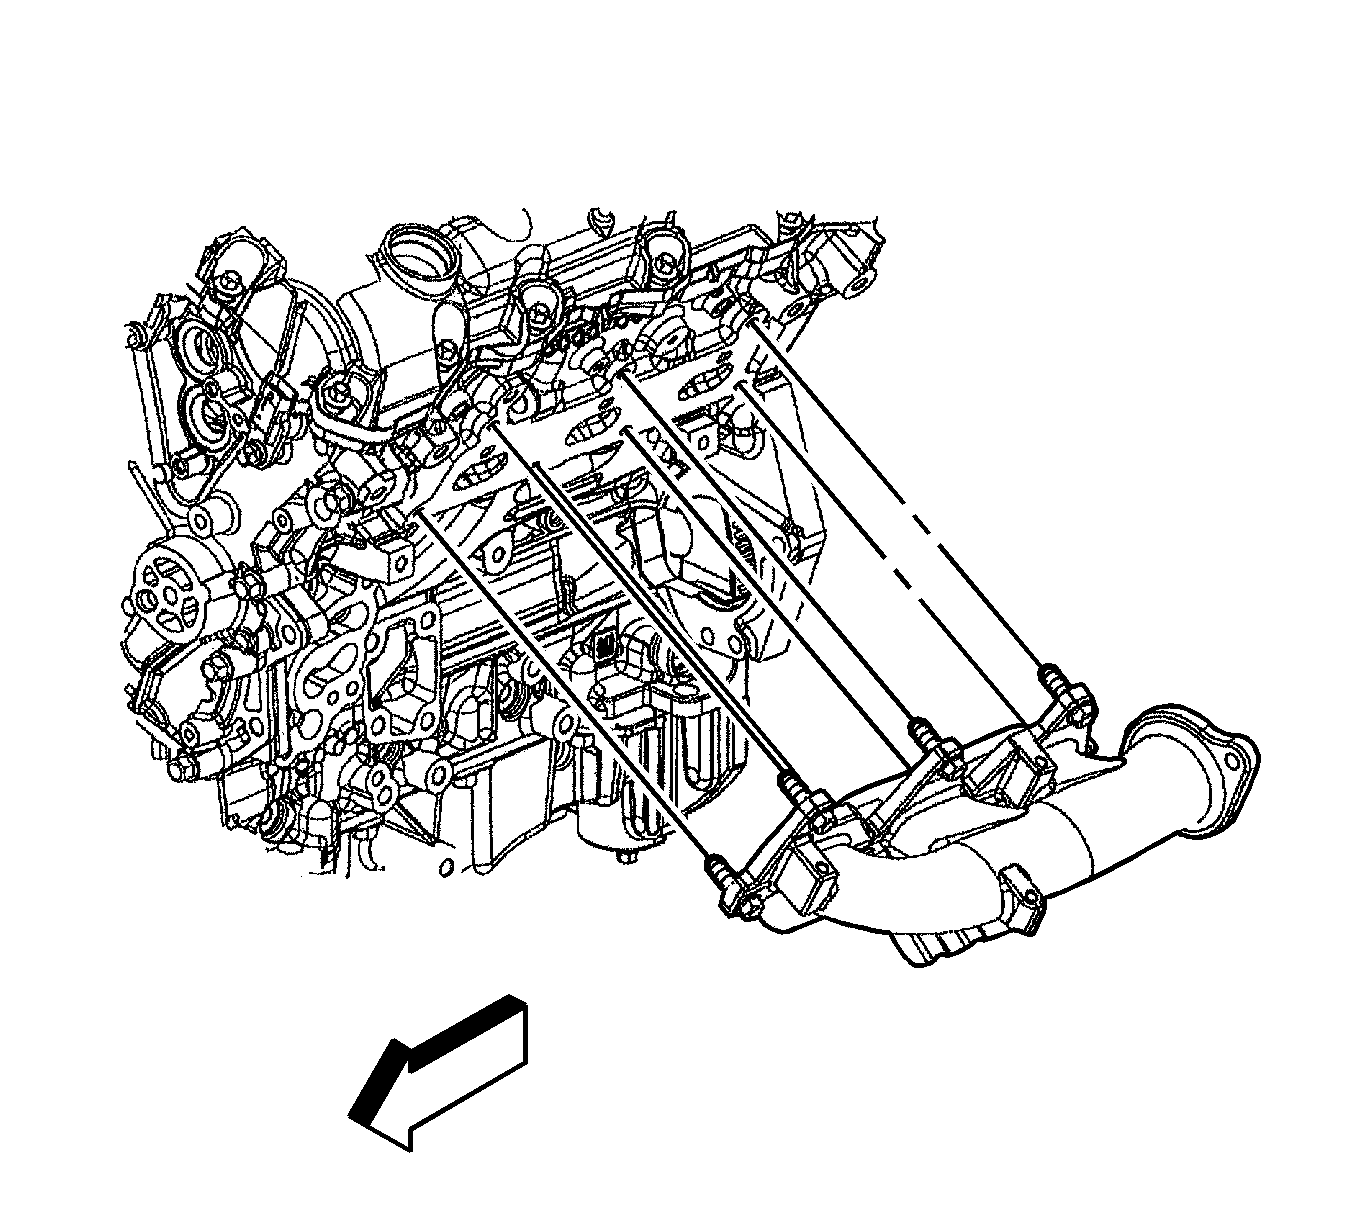
Installation Procedure
- Install one exhaust manifold bolt through a bolt hole in the manifold.
- Install the NEW exhaust manifold gasket onto the bolt.
- Position the exhaust manifold to the cylinder head.
- Install the exhaust manifold using the one installed bolt until snug.
- Install the remaining exhaust manifold bolts.
- Install the exhaust manifold heat shield.
- Install the exhaust manifold heat shield bolts.
- Install the exhaust crossover pipe to exhaust manifold nuts (5).
- Install the oil level indicator and tube. Refer to Oil Level Indicator and Tube Replacement .
- Install the left and right engine mount struts. Refer to Engine Mount Strut Replacement - Left Side Exhaust Manifold Replacement - Right Side and Engine Mount Strut Replacement - Right Side Engine Mount Strut Replacement - Right Side .
- Inspect for exhaust leaks.

Notice: Refer to Fastener Notice in the Preface section.
Tighten
Tighten the bolts to 30 N·m (22 lb ft).

Tighten
Tighten the bolts to 10 N·m (89 lb in).

Tighten
Tighten the nuts to 25 N·m (18 lb ft).

