Transmission Control Lever Knob Replacement Acadia
Removal Procedure
- Apply the parking brake.
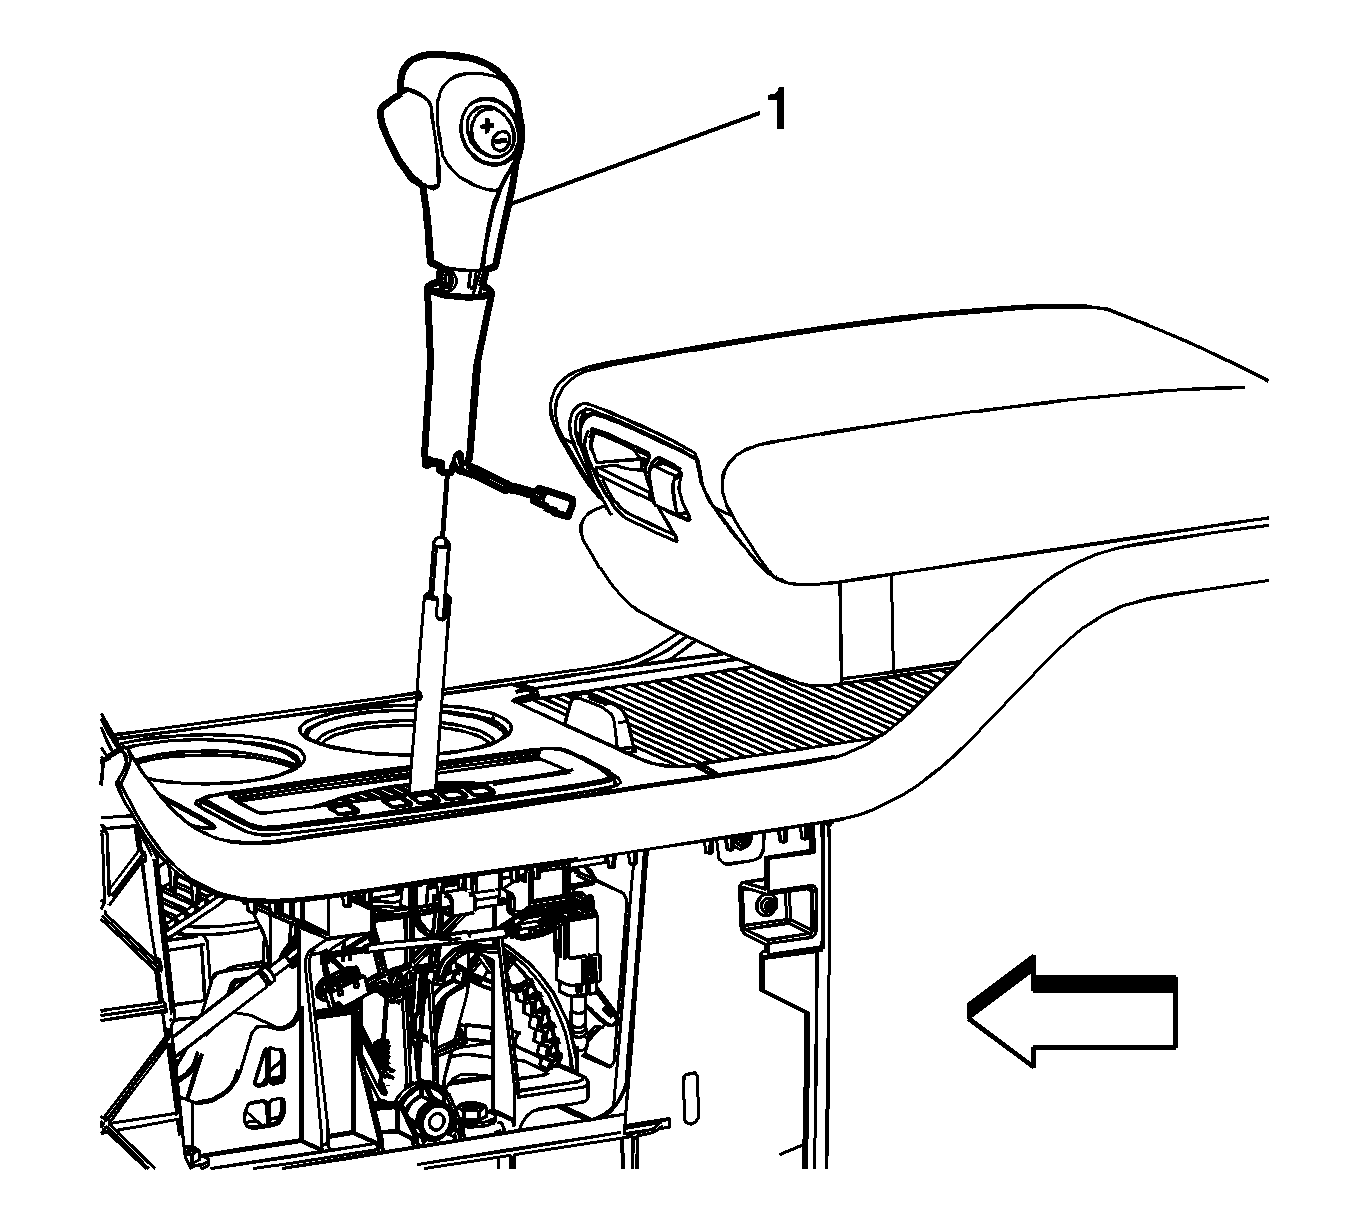
- Remove the floor console left extension panel. Refer to Front Floor Console Extension Panel Replacement - Left Side.
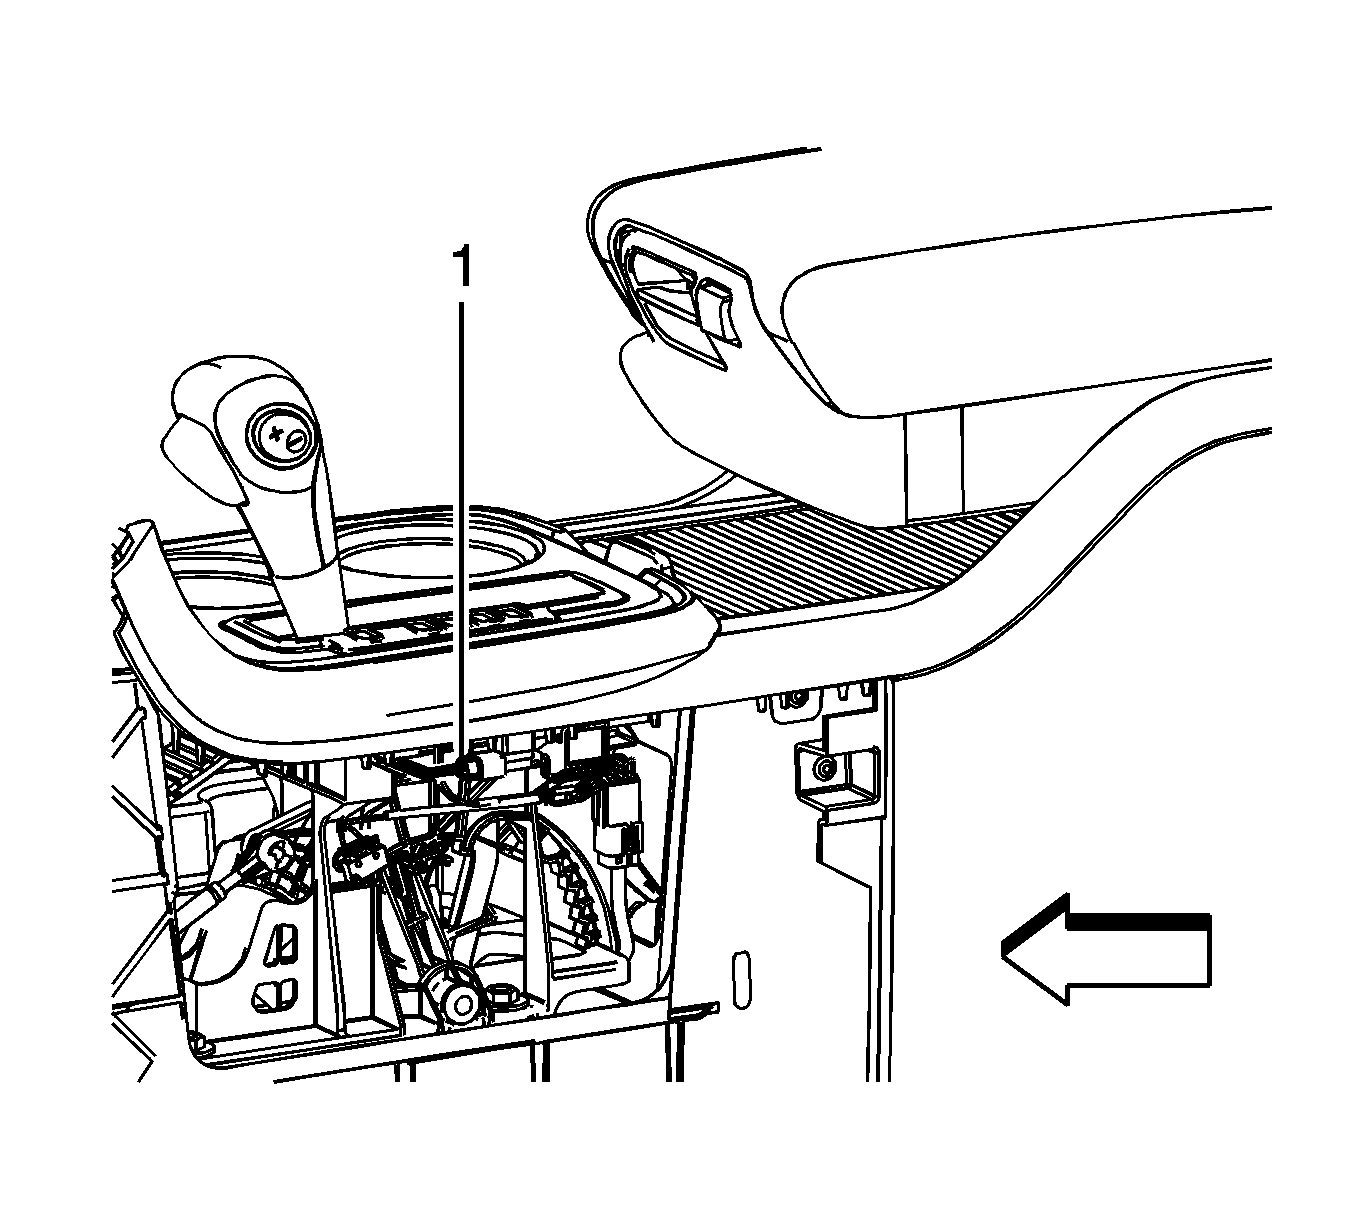
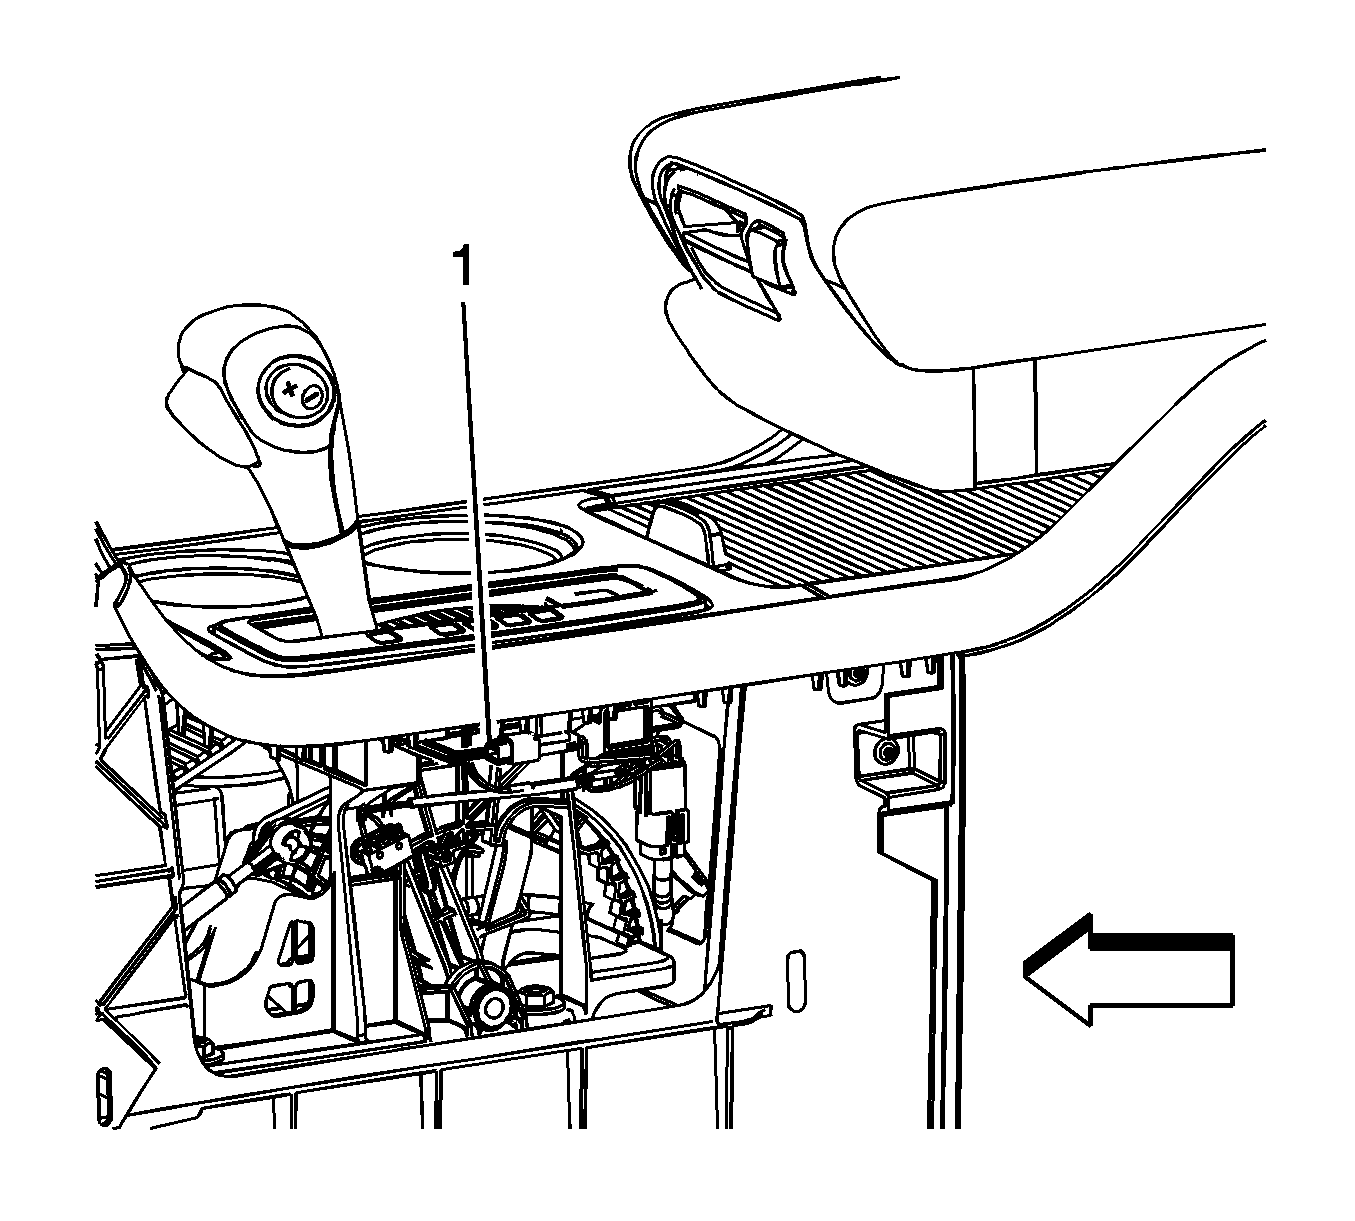
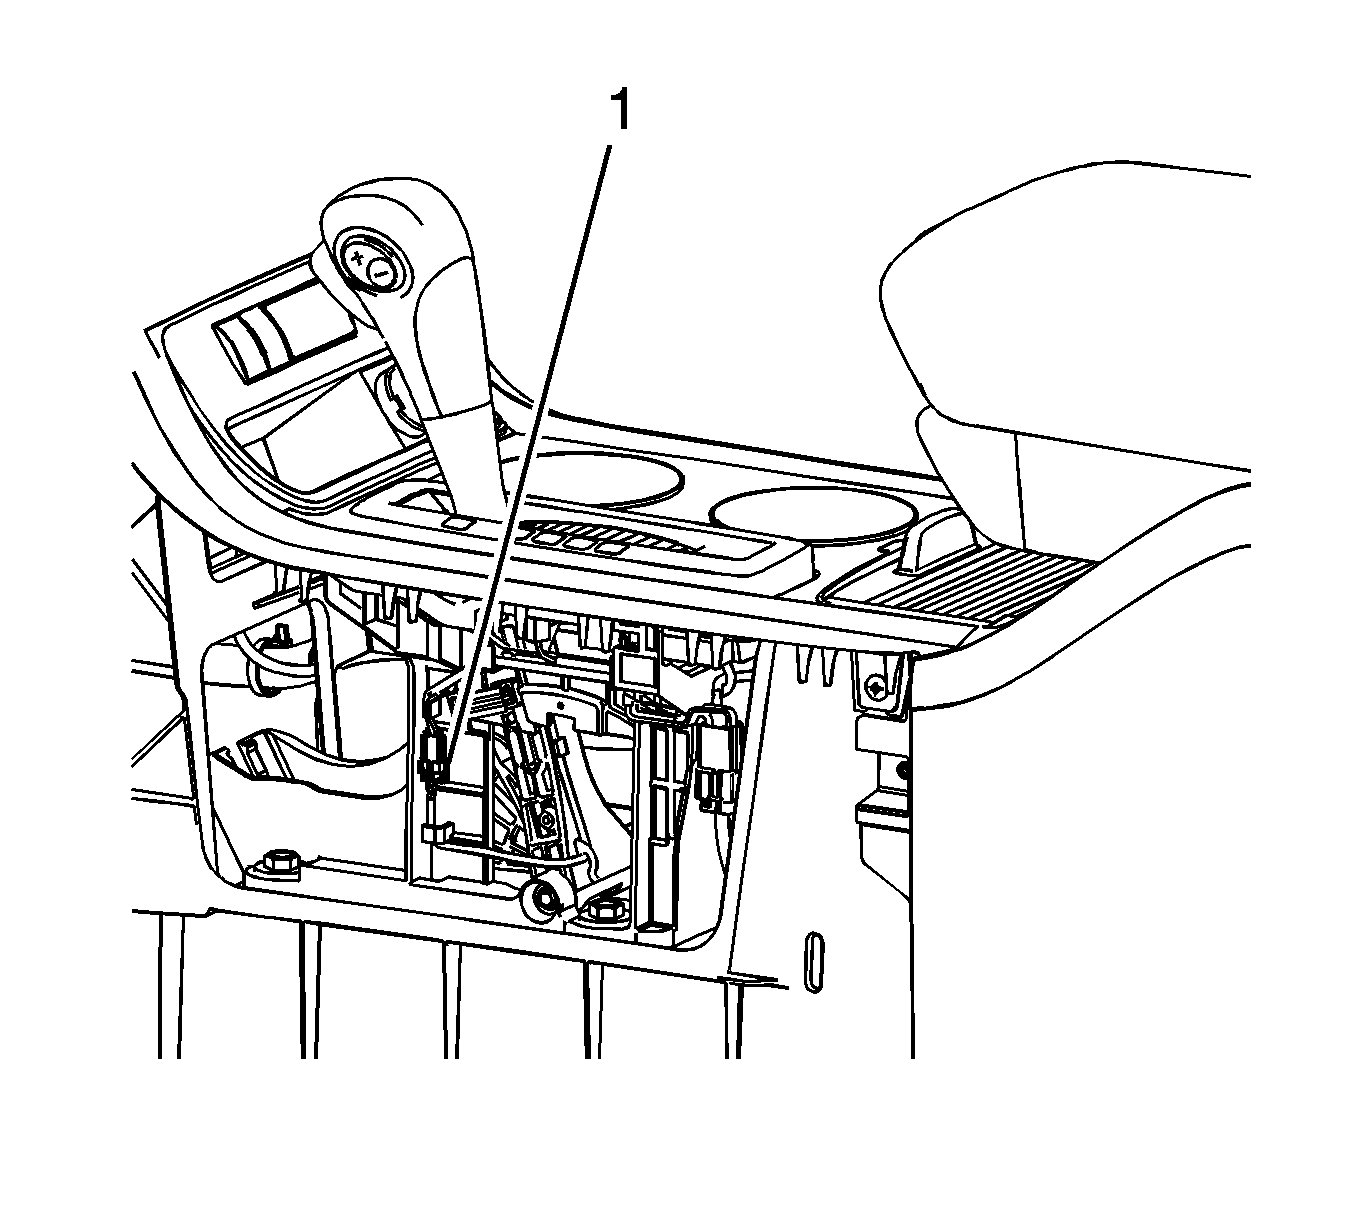
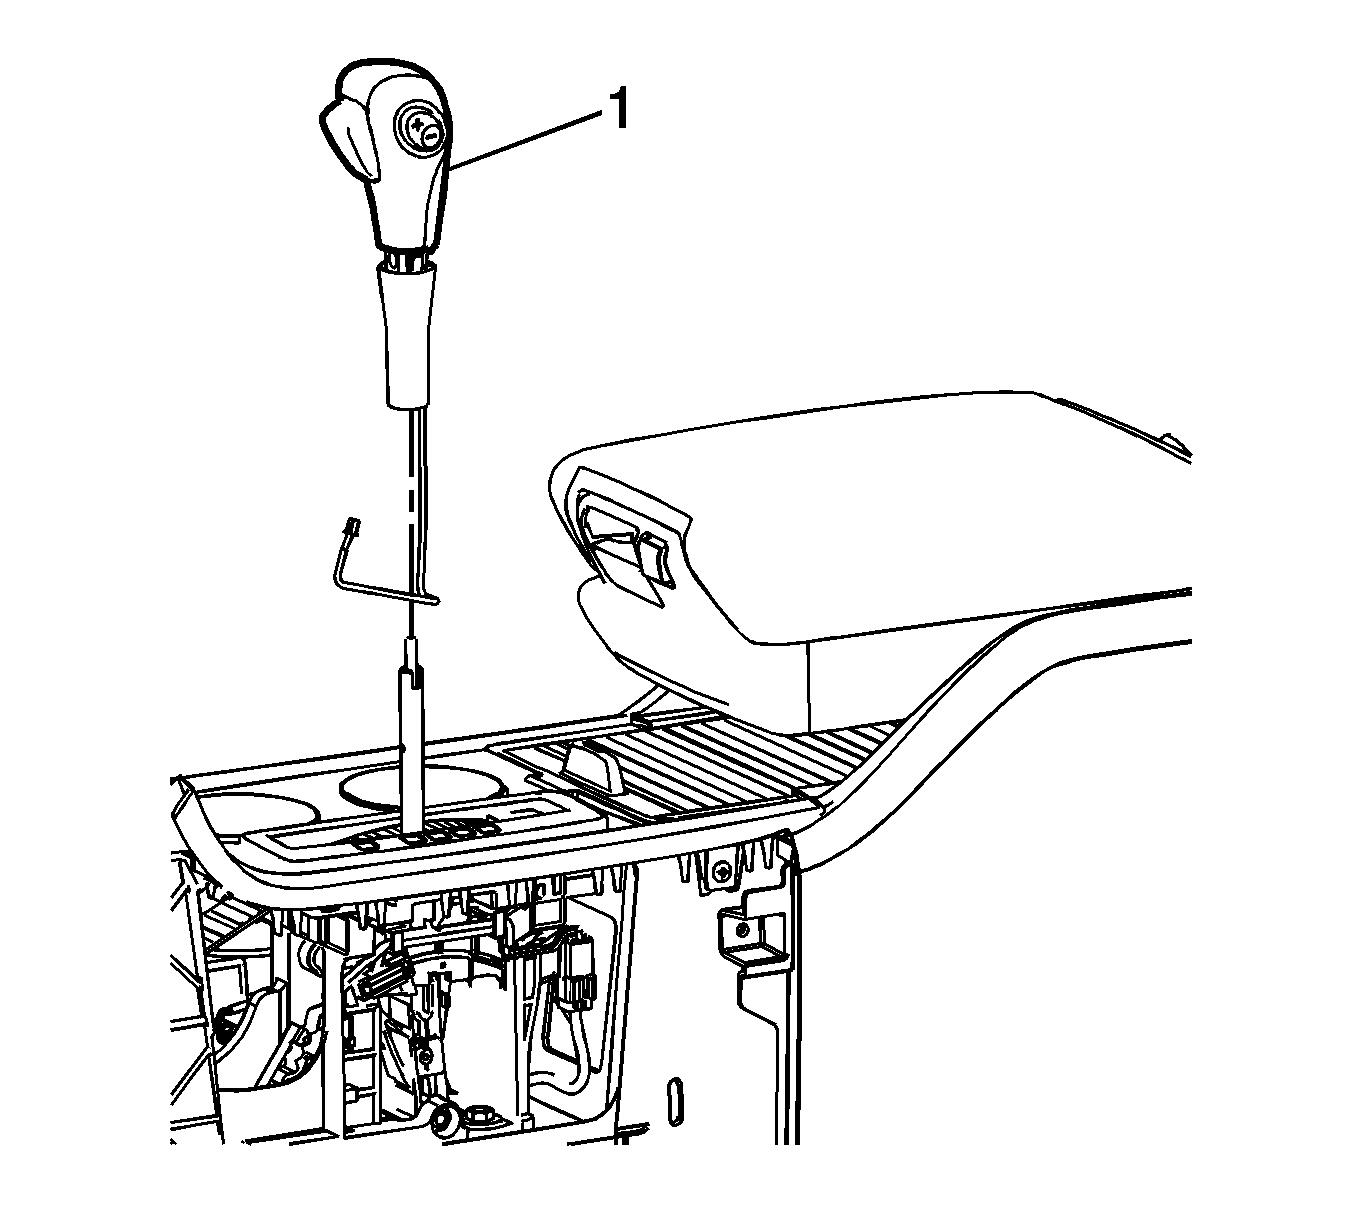
- Disconnect the transmission tap up/tap down switch electrical connector (1).
- Rotate the key to the RUN position, however do NOT start the vehicle.
- Move the transmission shift control lever rearward.
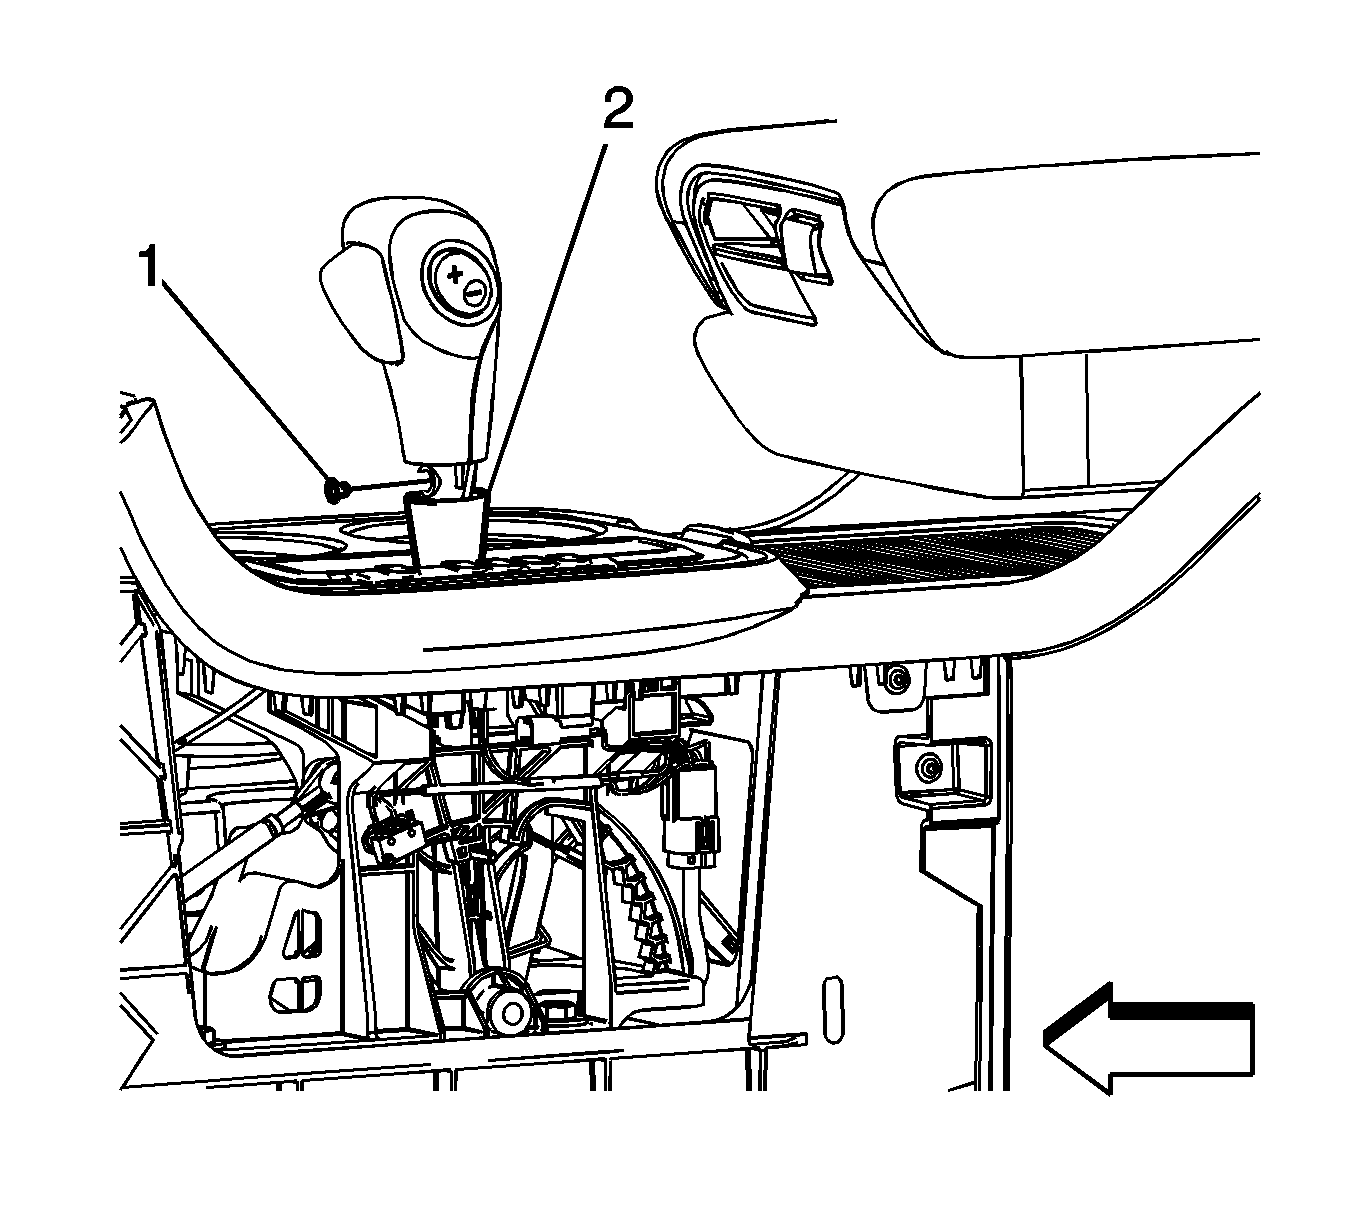
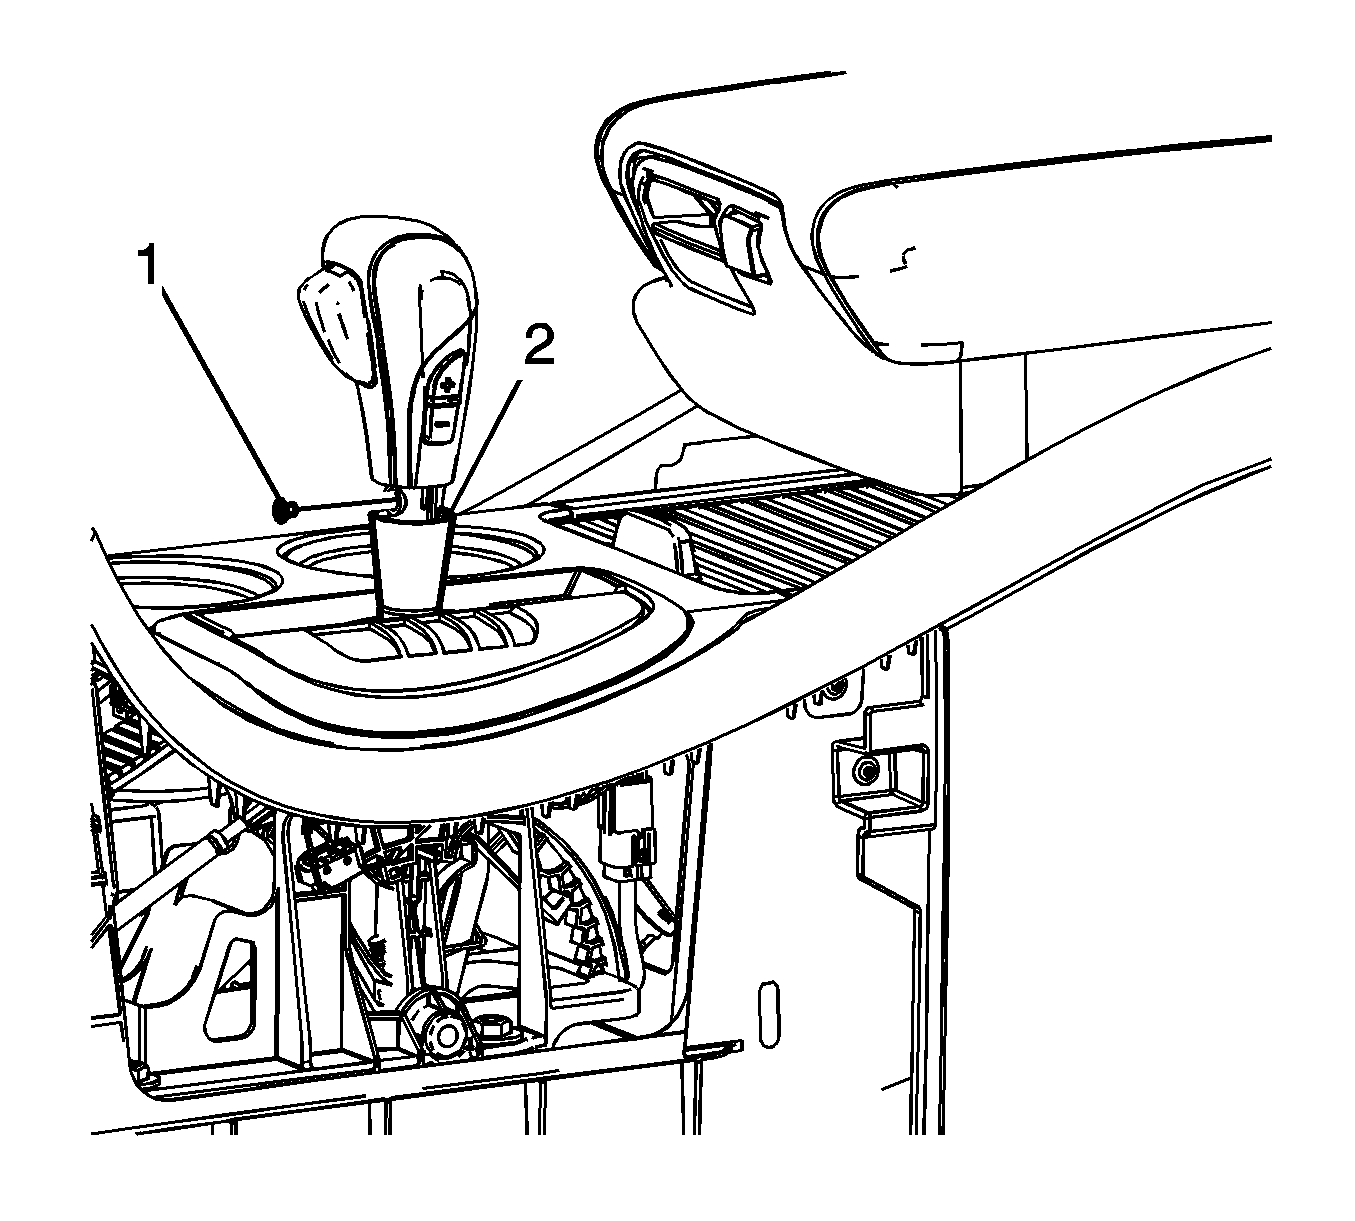
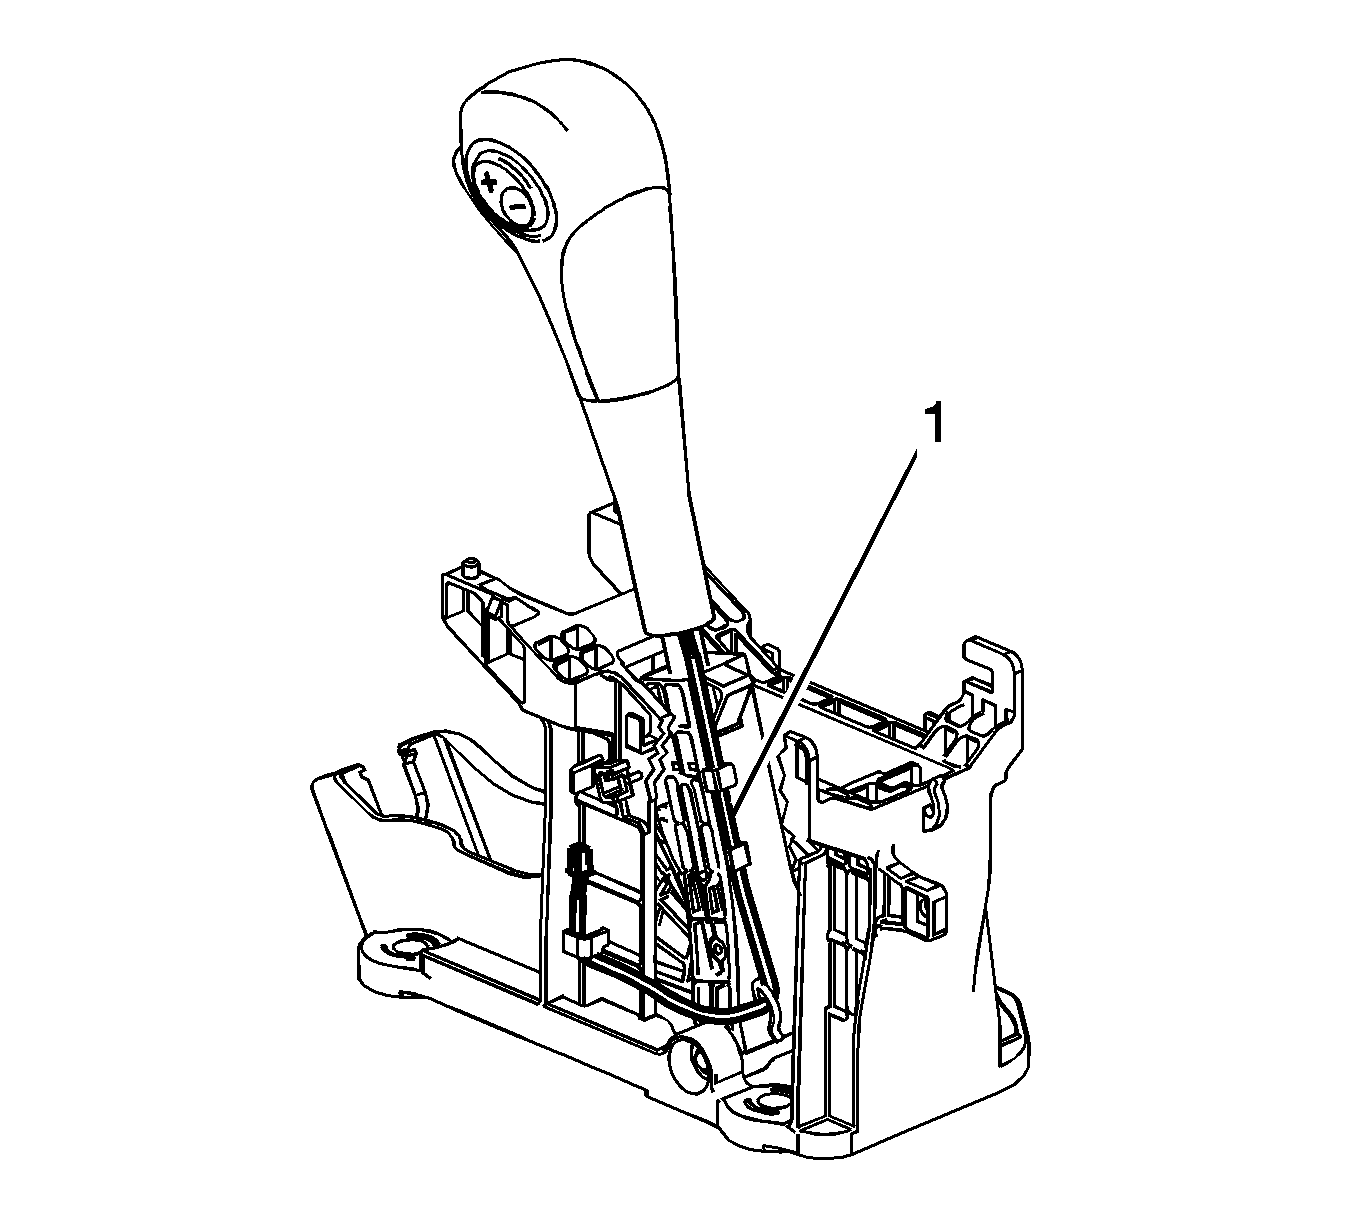
- Carefully insert a small flat-bladed tool between the trim ring (2) and the shift knob. Apply careful downward pressure to the shift knob trim ring to separate the trim ring from the shift knob. The trim ring will drop down approximately 13.0 mm (0.5 in) exposing the shift knob retaining screw.
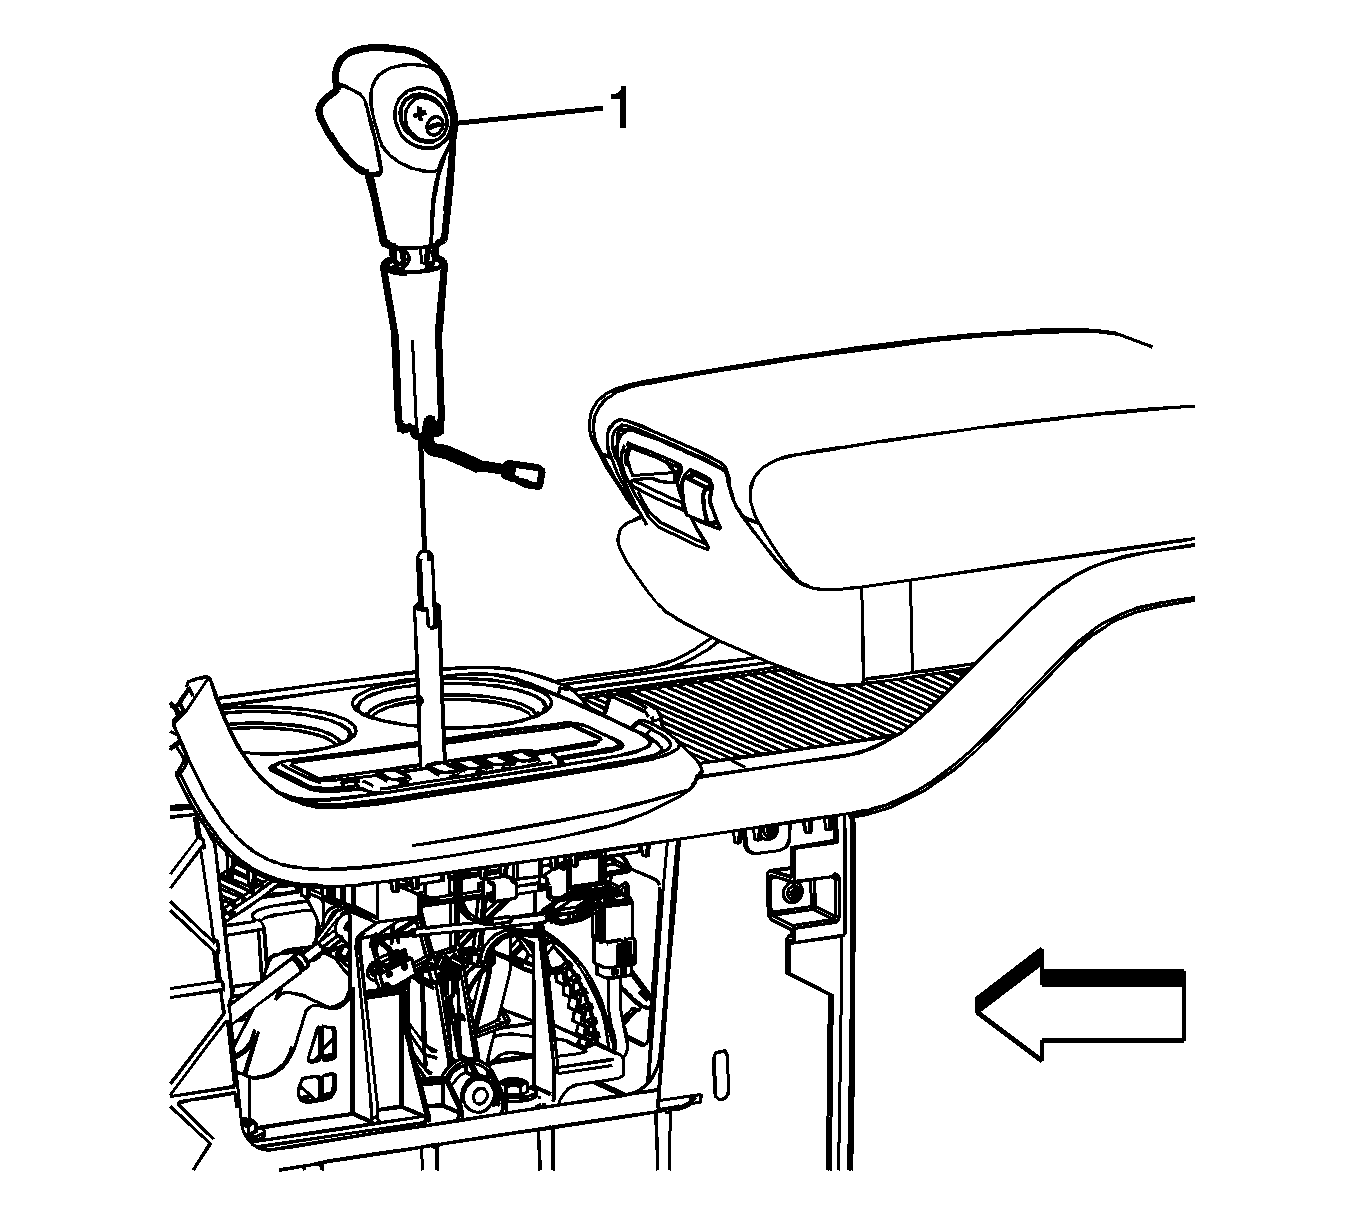
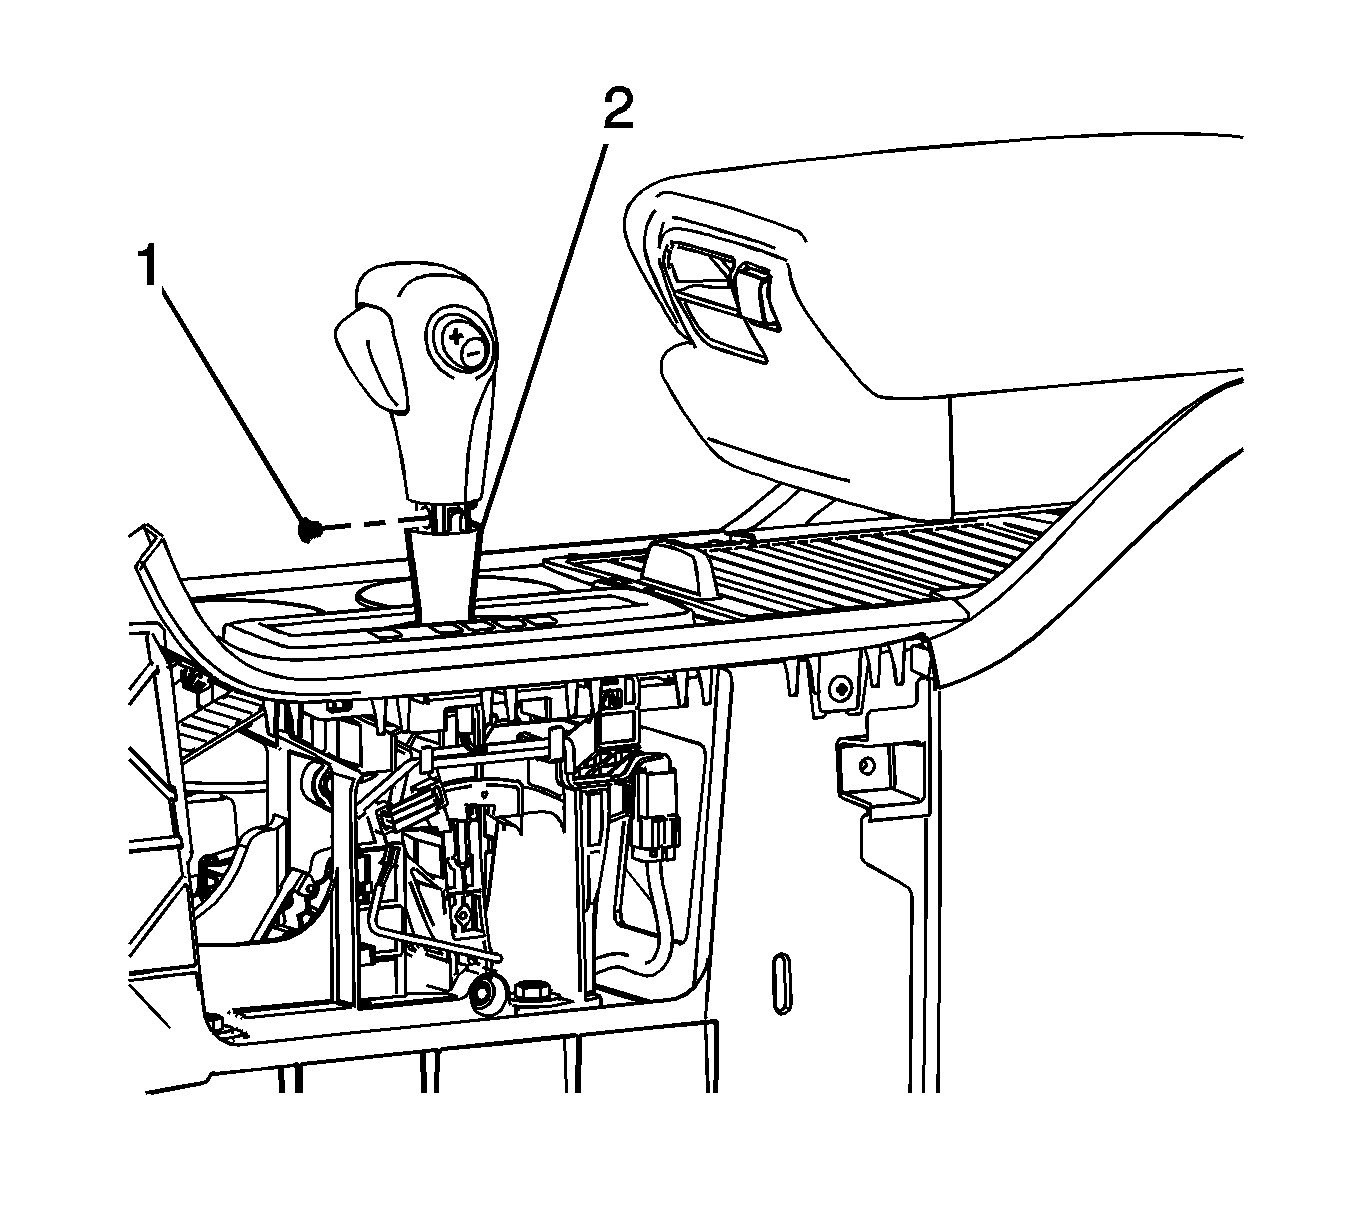
- Remove the shift control knob screw (1) from the shift control knob.
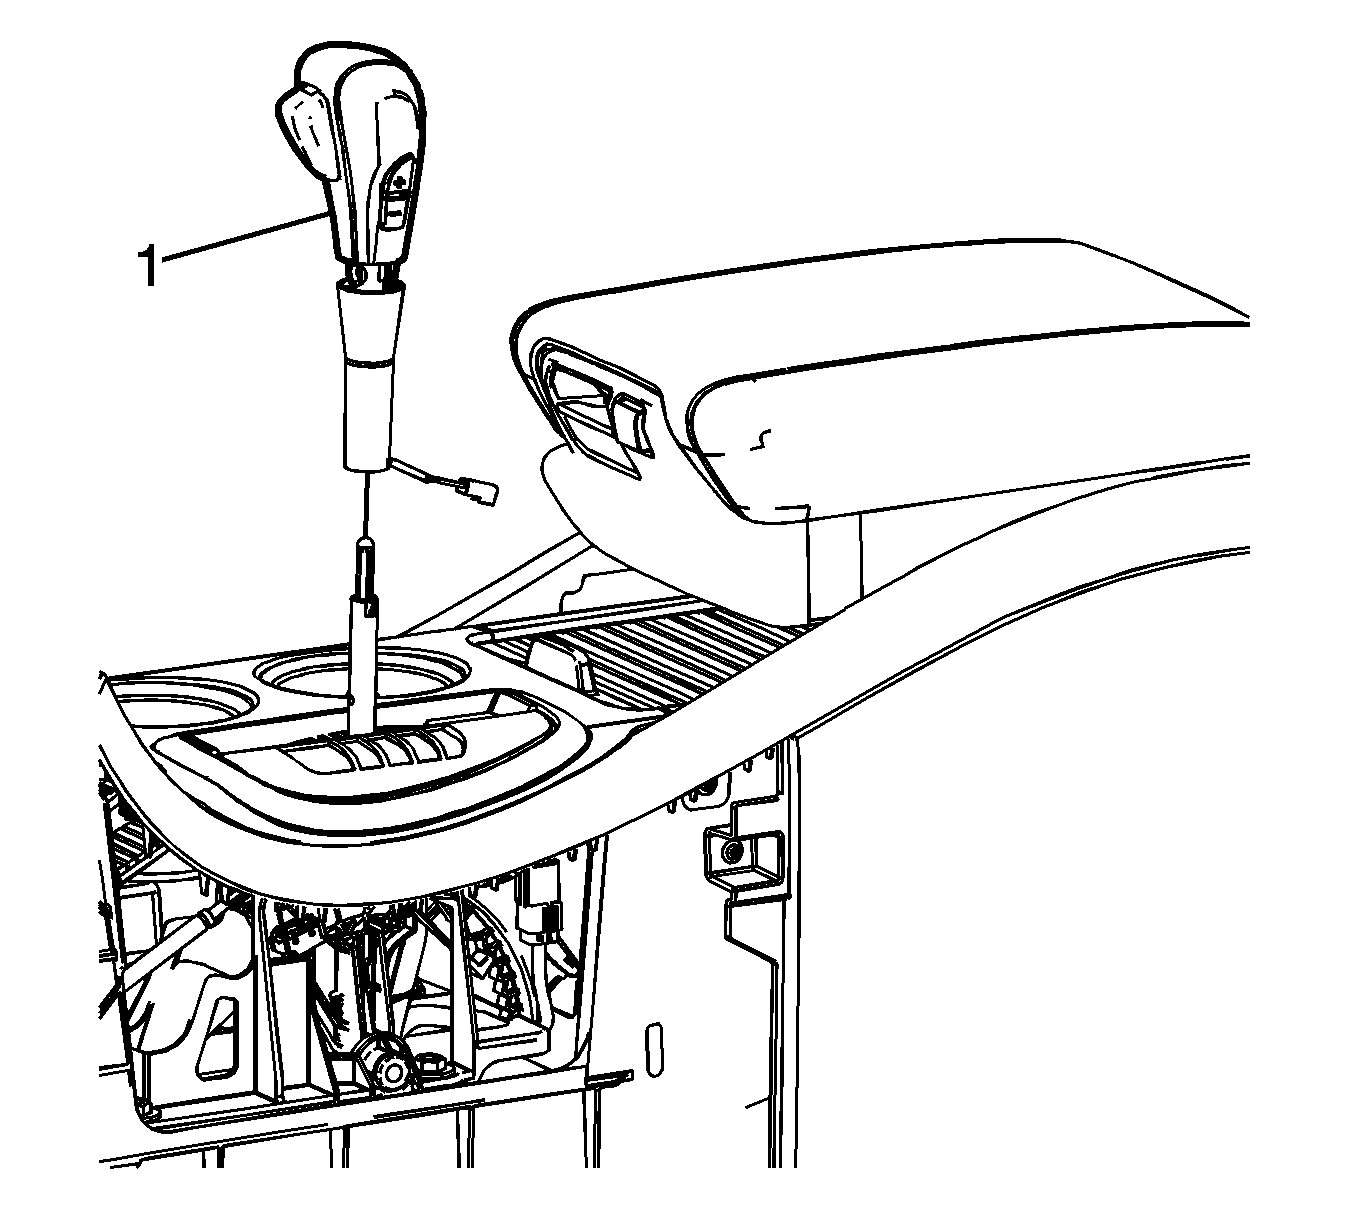
- Remove the shift control knob (1) from the shift control lever.
Note: Carefully guide the transmission tap up/tap down switch electrical harness and connector past the shift control indicator while removing the shift control knob.
Installation Procedure
- Apply lubricant GM P/N 88861426 (Canadian P/N 88861442) to the tip of the shift control lever.
- Install the shift control knob (1) to the shift control lever.
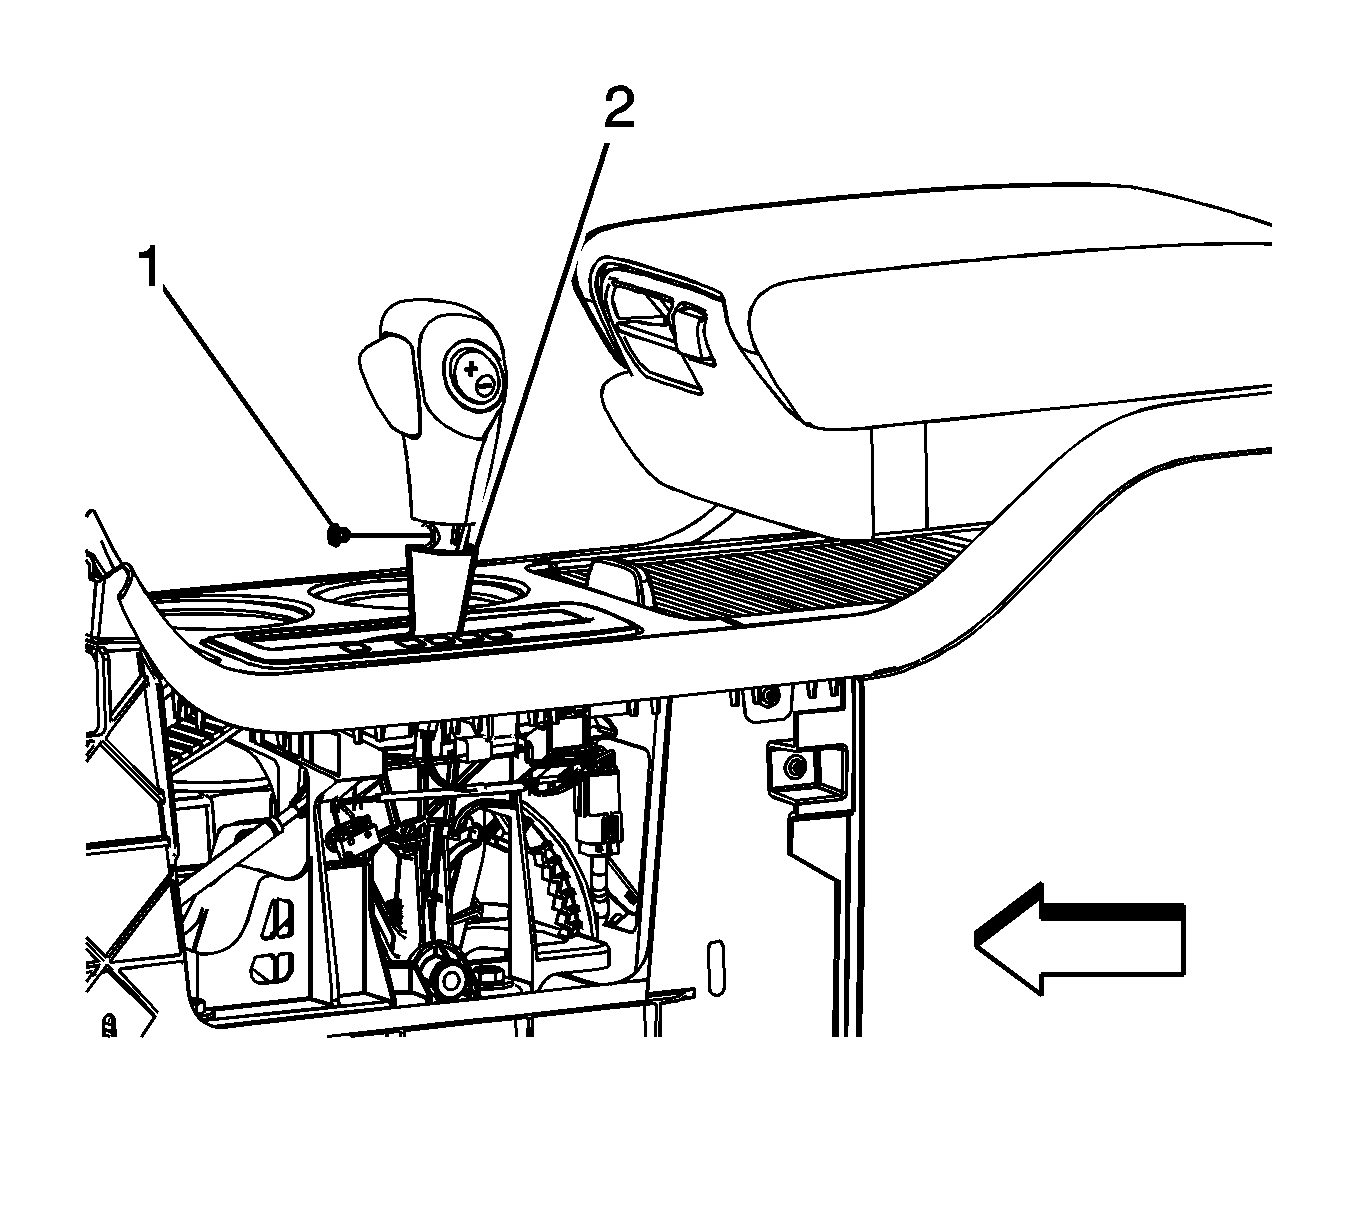
- Install the control knob screw (1).
- Lift the shift control knob trim ring (2) up to the shift control knob until a click sound is heard indicating the trim ring is secured to the shift knob.
- Place the shift control lever in the PARK position.
- Rotate the key to the off position.
- Connect the transmission tap up/tap down switch electrical connector (1).
- Check for proper operation of the shift control through all gear ranges.
- Install the floor console left extension panel. Refer to Front Floor Console Extension Panel Replacement - Left Side.
- Release the parking brake.
Note: Carefully guide the transmission tap up/tap down switch electrical harness and connector past the shift control indicator while installing the shift control knob.
Caution: Refer to Fastener Caution in the Preface section.
Tighten
Tighten the screw to 4 N·m (35 lb in).
Transmission Control Lever Knob Replacement Enclave
Removal Procedure
- Apply the parking brake.
- Remove the floor console left extension panel. Refer to Front Floor Console Extension Panel Replacement - Left Side.
- Disconnect the transmission tap up/tap down switch electrical connector (1).
- Rotate the key to the RUN position, however do NOT start the vehicle.
- Move the transmission shift control lever rearward.
- Carefully insert a small flat-bladed tool between the trim ring (2) and the shift knob. Apply careful downward pressure to the shift knob trim ring to separate the trim ring from the shift knob. The trim ring will drop down approximately 13.0 mm (0.5 in) exposing the shift knob retaining screw.
- Remove the shift control knob screw (1) from the shift control knob.
- Remove the shift control knob (1) from the shift control lever.
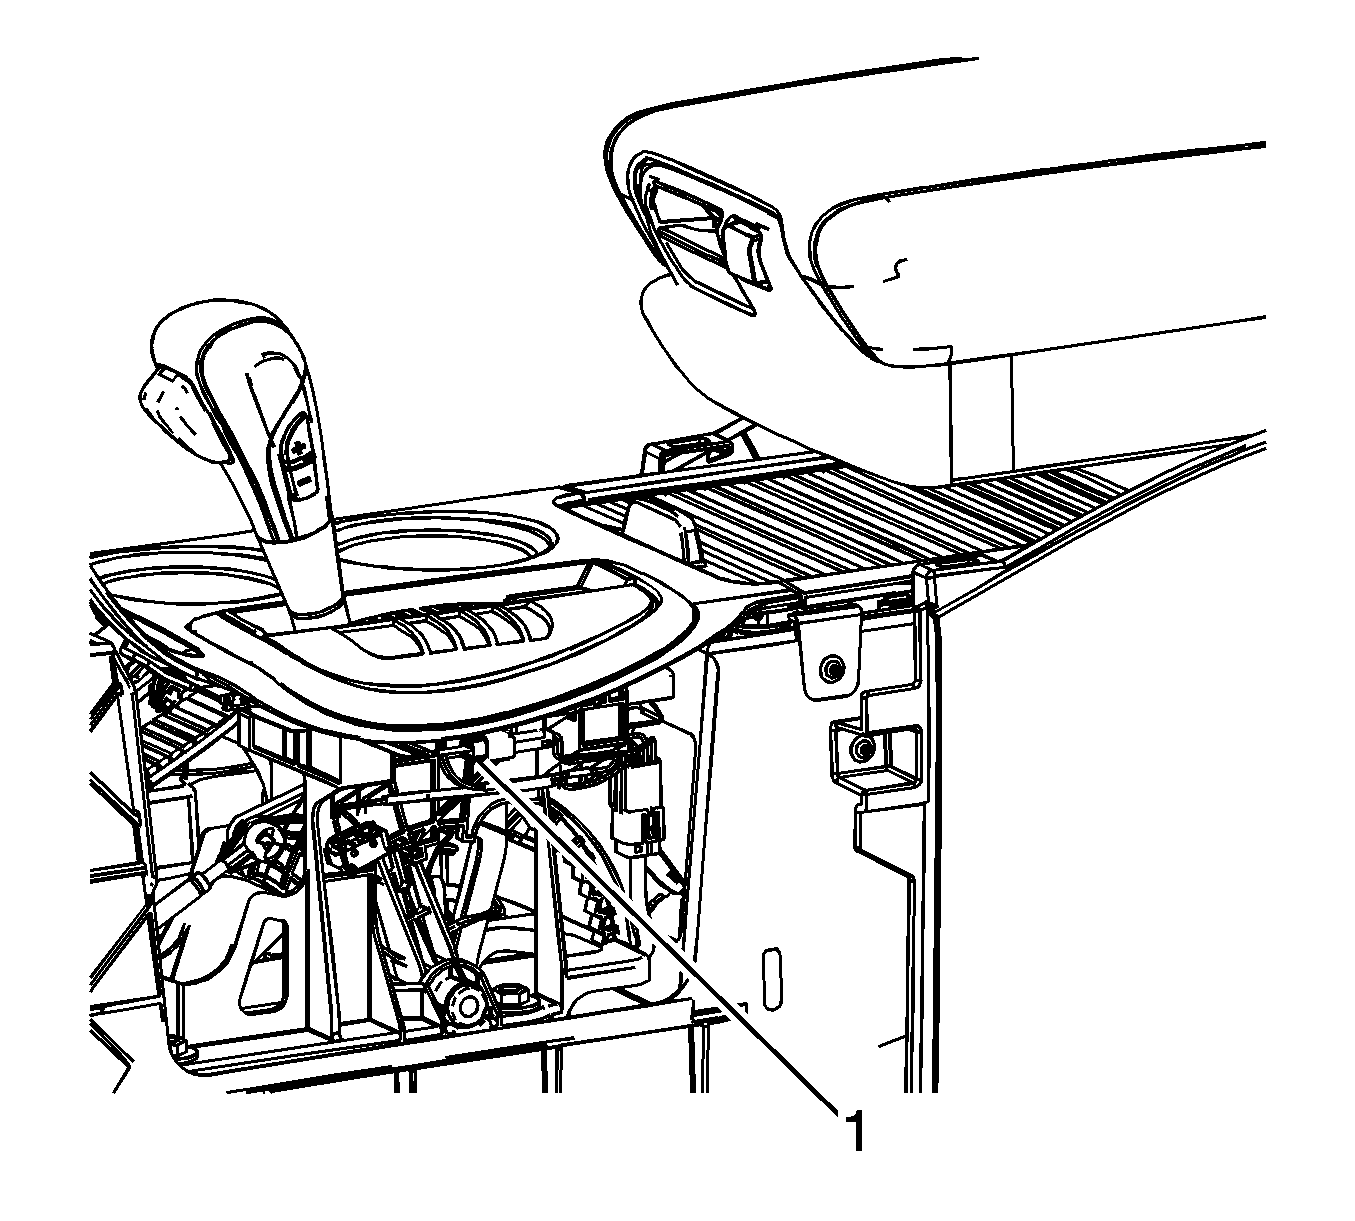
Note: Carefully guide the transmission tap up/tap down switch electrical harness and connector past the shift control indicator while removing the shift control knob.
Installation Procedure
- Apply lubricant GM P/N 88861426 (Canadian P/N 88861442) to the tip of the shift control lever.
- Install the shift control knob (1) to the shift control lever.
- Install the control knob screw (1).
- Lift the shift control knob trim ring (2) up to the shift control knob until a click sound is heard indicating the trim ring is secured to the shift knob.
- Place the shift control lever in the PARK position.
- Rotate the key to the off position.
- Connect the transmission tap up/tap down switch electrical connector (1).
- Check for proper operation of the shift control through all gear ranges.
- Install the floor console left extension panel. Refer to Front Floor Console Extension Panel Replacement - Left Side.
- Release the parking brake.
Note: Carefully guide the transmission tap up/tap down switch electrical harness and connector past the shift control indicator while installing the shift control knob.
Caution: Refer to Fastener Caution in the Preface section.
Tighten
Tighten the screw to 4 N·m (35 lb in).
Transmission Control Lever Knob Replacement OUTLOOK
Removal Procedure
- Apply the parking brake.
- Remove the floor console left extension panel. Refer to Front Floor Console Extension Panel Replacement - Left Side.
- Disconnect the transmission tap up/tap down switch electrical connector (1).
- Rotate the key to the RUN position, however do NOT start the vehicle.
- Move the transmission shift control lever rearward.
- Carefully insert a small flat-bladed tool between the trim ring (2) and the shift knob. Apply careful downward pressure to the shift knob trim ring to separate the trim ring from the shift knob. The trim ring will drop down approximately 13.0 mm (0.5 in) exposing the shift knob retaining screw.
- Remove the shift control knob screw (1) from the shift control knob.
- Remove the shift control knob (1) from the shift control lever.
Note: Carefully guide the transmission tap up/tap down switch electrical harness and connector past the shift control indicator while removing the shift control knob.
Installation Procedure
- Apply lubricant GM P/N 88861426 (Canadian P/N 88861442) to the tip of the shift control lever.
- Install the shift control knob (1) to the shift control lever.
- Install the control knob screw (1).
- Lift the shift control knob trim ring (2) up to the shift control knob until a click sound is heard indicating the trim ring is secured to the shift knob.
- Place the shift control lever in the PARK position.
- Rotate the key to the off position.
- Connect the transmission tap up/tap down switch electrical connector (1).
- Check for proper operation of the shift control through all gear ranges.
- Install the floor console left extension panel. Refer to Front Floor Console Extension Panel Replacement - Left Side.
- Release the parking brake.
Note: Carefully guide the transmission tap up/tap down switch electrical harness and connector past the shift control indicator while installing the shift control knob.
Caution: Refer to Fastener Caution in the Preface section.
Tighten
Tighten the screw to 4 N·m (35 lb in).
Transmission Control Lever Knob Replacement Traverse
Removal Procedure
- Apply the parking brake.
- Remove the floor console left extension panel. Refer to Front Floor Console Extension Panel Replacement - Left Side.
- Disconnect the transmission tap up/tap down switch electrical connector (1).
- Remove the tap up/tap down switch electrical wire harness (1) from the wire harness retaining features on the shift control handle and shift control base.
- Rotate the key to the RUN position, however do NOT start the vehicle.
- Move the transmission shift control lever rearward.
- Carefully apply downward pressure to the shift knob trim ring to separate the trim ring from the shift knob. The trim ring will drop down approximately 13.0 mm (0.5 in) exposing the shift knob retaining screw.
- Remove the shift control knob screw (1) from the shift control knob.
- Remove the shift control knob (1) from the shift control lever.
Note: Pay attention to the tap up/tap down switch electrical wire harness routing for later reinstallation.
Note: Carefully guide the transmission tap up/tap down switch electrical harness and connector past the shift control indicator while removing the shift control knob.
Installation Procedure
- Install the shift control knob (1) to the shift control lever.
- Install the control knob screw (1).
- Lift the shift control knob trim ring (2) up to the shift control knob until a click sound is heard indicating the trim ring is secured to the shift knob.
- Install the tap up/tap down switch electrical wire harness (1) to the wire harness retaining features on the shift control handle and shift control base.
- Place the shift control lever in the PARK position.
- Rotate the key to the off position.
- Connect the transmission tap up/tap down switch electrical connector (1).
- Check for proper operation of the shift control through all gear ranges.
- Install the floor console left extension panel. Refer to Front Floor Console Extension Panel Replacement - Left Side.
- Release the parking brake.
Note: Carefully guide the transmission tap up/tap down switch electrical harness and connector past the shift control indicator while installing the shift control knob.
Caution: Refer to Fastener Caution in the Preface section.
Tighten
Tighten the screw to 4 N·m (35 lb in).
