Callout
| Component Name
|
Preliminary Procedures
- Support the engine. Refer to
Engine Support Fixture.
- Raise and support the vehicle. Refer to
Lifting and Jacking the Vehicle.
|
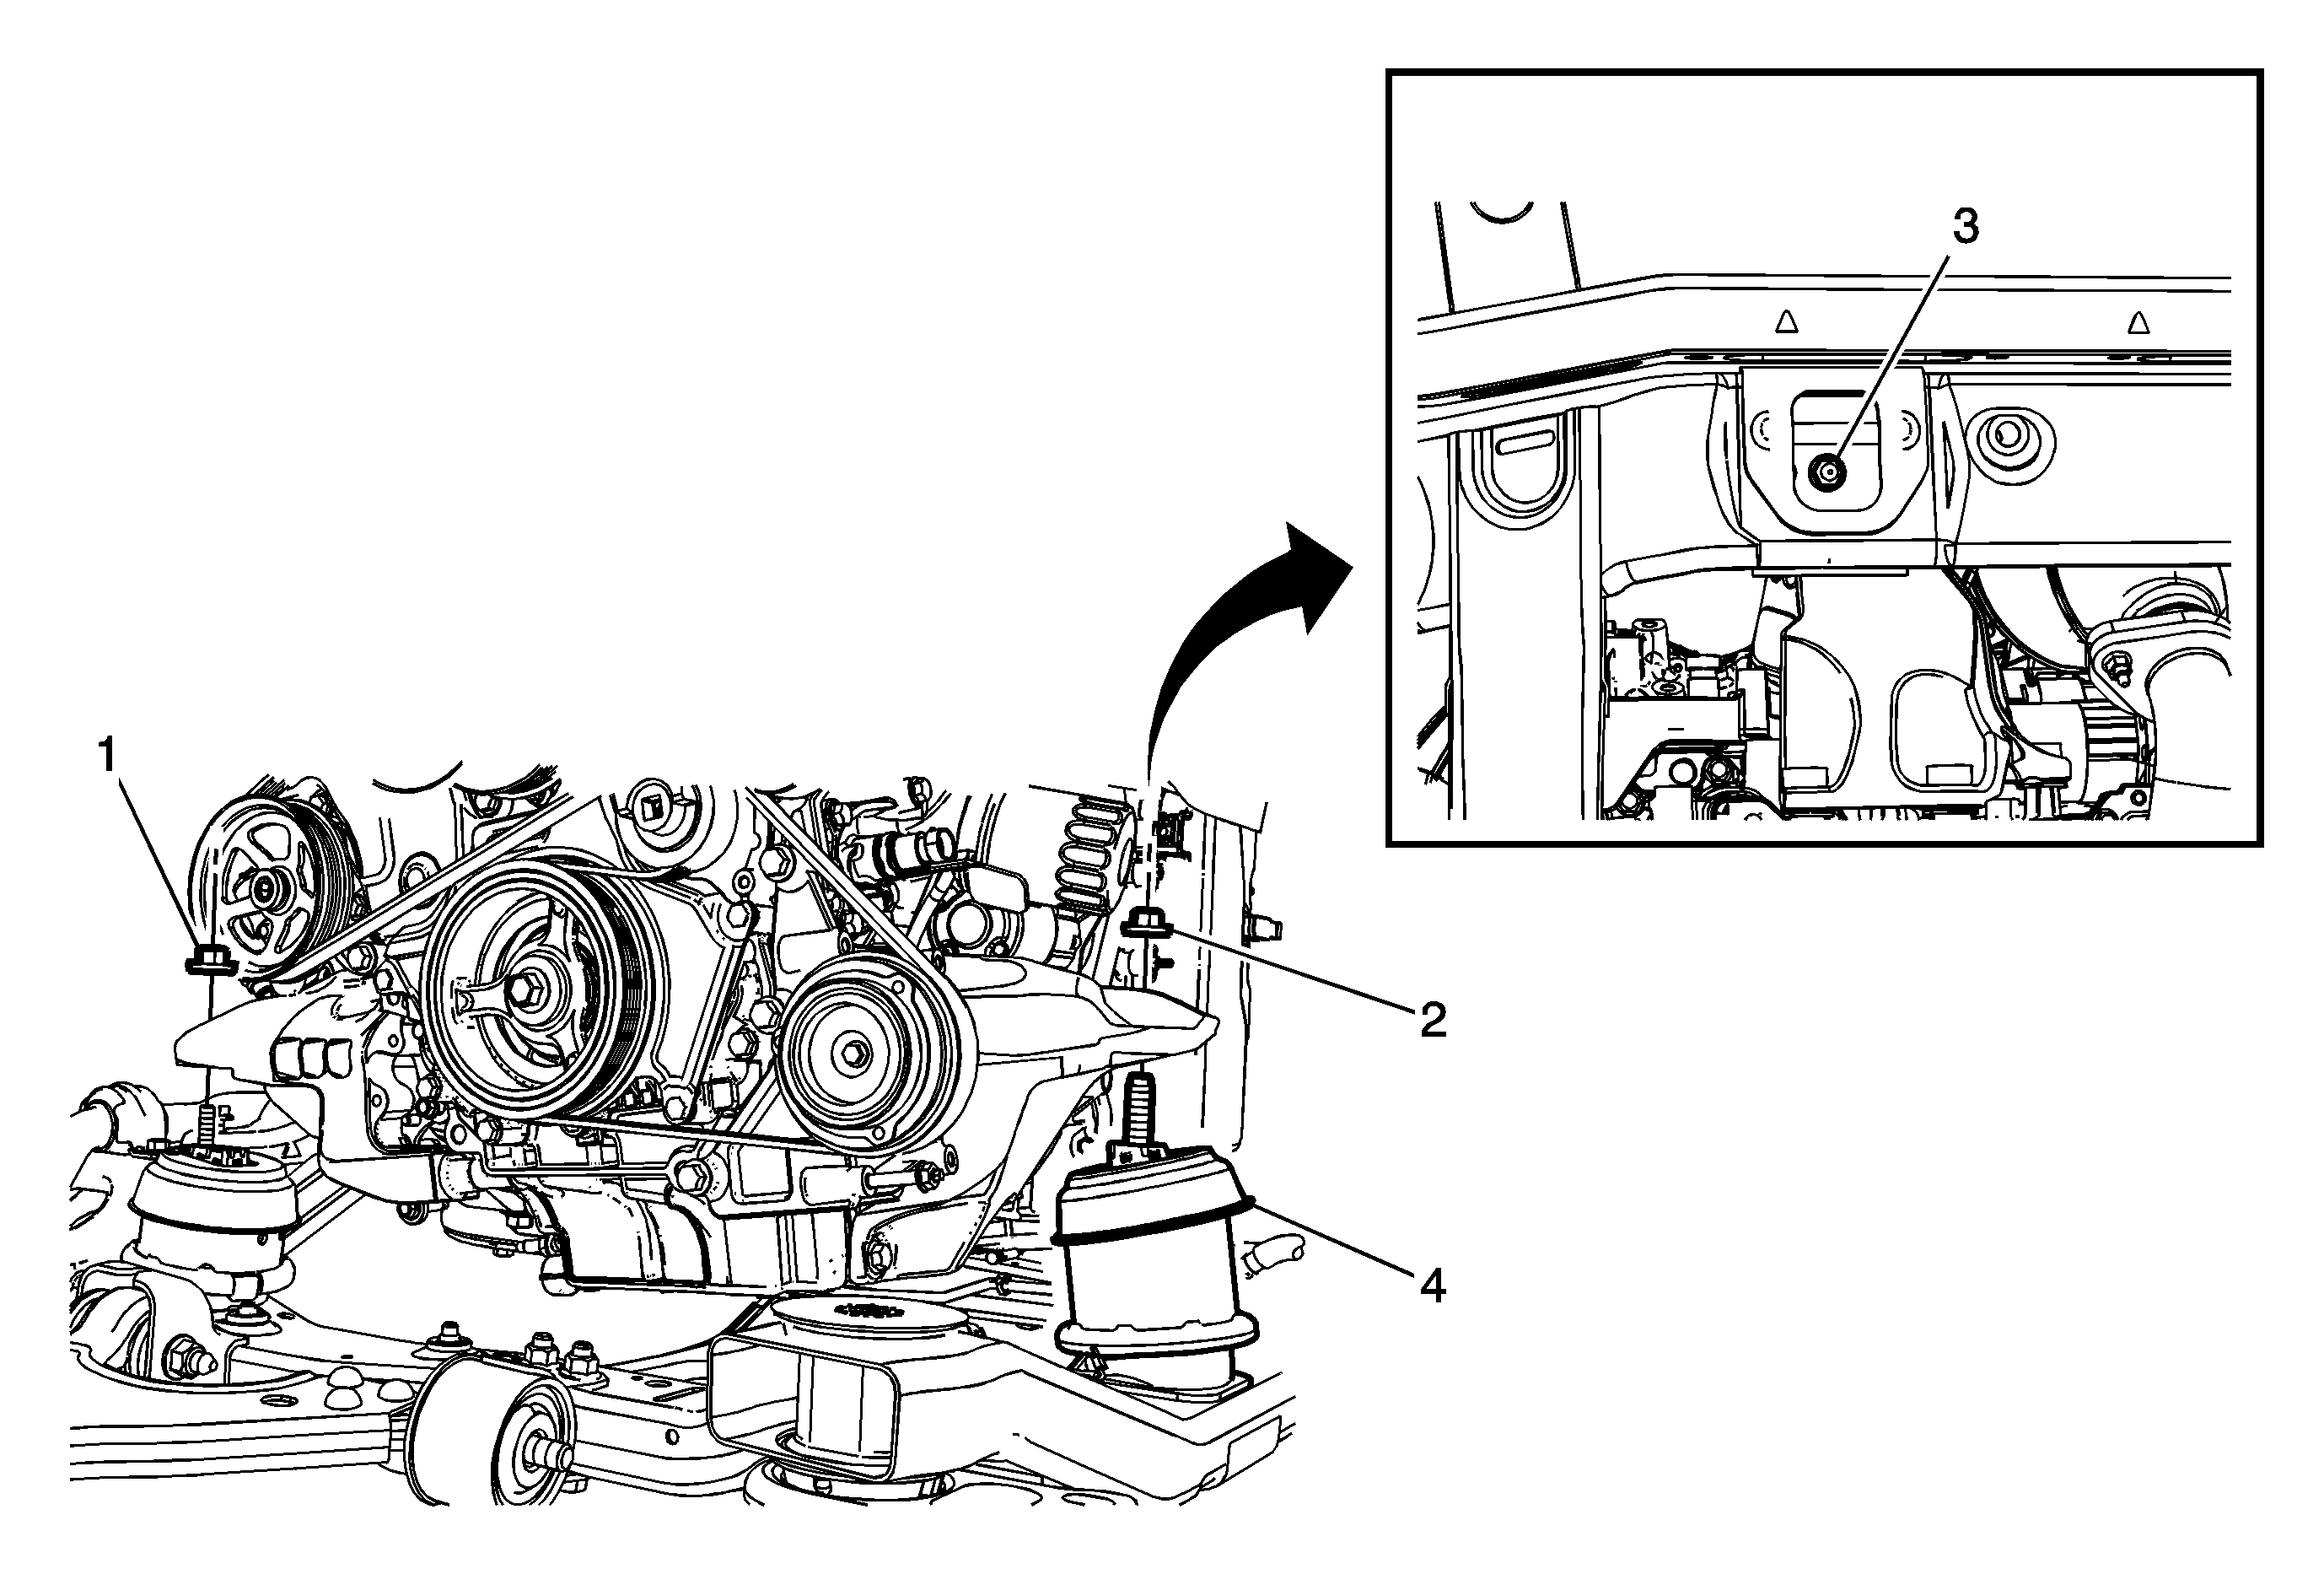
1
| Rear Upper Engine Mount Nut
Caution: Refer to Fastener Caution in the Preface section.
Procedure
- Remove and discard the rear engine mount nut.
- Apply threadlocker to the engine mount threads. Refer to
Adhesives, Fluids, Lubricants, and Sealers.
Tip
The engine mount nuts must be replaced once removed. Allow adhesive on new engine mounts nuts to cure for 24 hours after replacement.
Tighten
75 N·m (55 lb ft) |
2
| Front Upper Engine Mount Nut
Procedure
- Remove and discard the front engine mount nut.
- Disconnect the active engine mount vacuum line, if equipped.
- Apply threadlocker to the engine mount threads. Refer to
Adhesives, Fluids, Lubricants, and Sealers.
Tip
The engine mount nuts must be replaced once removed. Allow adhesive on new engine mounts nuts to cure for 24 hours after replacement.
Tighten
75 N·m (55 lb ft) |
3
| Front Lower Engine Mount Nut
Procedure
- Remove and discard the lower front engine mount nut.
- Apply threadlocker to the engine mount threads. Refer to
Adhesives, Fluids, Lubricants, and Sealers.
Tip
The engine mount nuts must be replaced once removed. Allow adhesive on new engine mounts nuts to cure for 24 hours after replacement.
Tighten
75 N·m (55 lb ft) |
4
| Engine Mount
Tip
To remove the engine mount, use the engine support fixture to raise engine. |