For 1990-2009 cars only
Tools Required
| • | J 39400-A Halogen Leak Detector |
| • | J 38185 Hose Clamp Pliers |
Removal Procedure
- Recover the refrigerant. Refer to Refrigerant Recovery and Recharging .
- Disconnect the battery negative cable. Refer to Battery Negative Cable Disconnection and Connection .
- Remove the air cleaner assembly. Refer to Air Cleaner Assembly Replacement for the 3.8L engine or Air Cleaner Assembly Replacement for the 3.6L (LY7) engine.
- Remove the fuel injector sight shield. Refer to Fuel Injector Sight Shield Replacement for the 3.8L engine.
- Drain the cooling system. Refer to Cooling System Draining and Filling .
- Remove the instrument panel (I/P) trim pad. Refer to Instrument Panel Trim Pad Replacement .
- Remove the bolt from the accessory wiring junction block.
- Disengage the junction block tabs from the passenger knee bolster. Remove the junction block from the knee bolster.
- Remove the brake pedal nut and bolt.
- Remove the brake pedal brace bolts from the I/P carrier cross car beam.
- Disconnect any ground wires, as necessary.
- Reposition the I/P wiring harness out of the way.
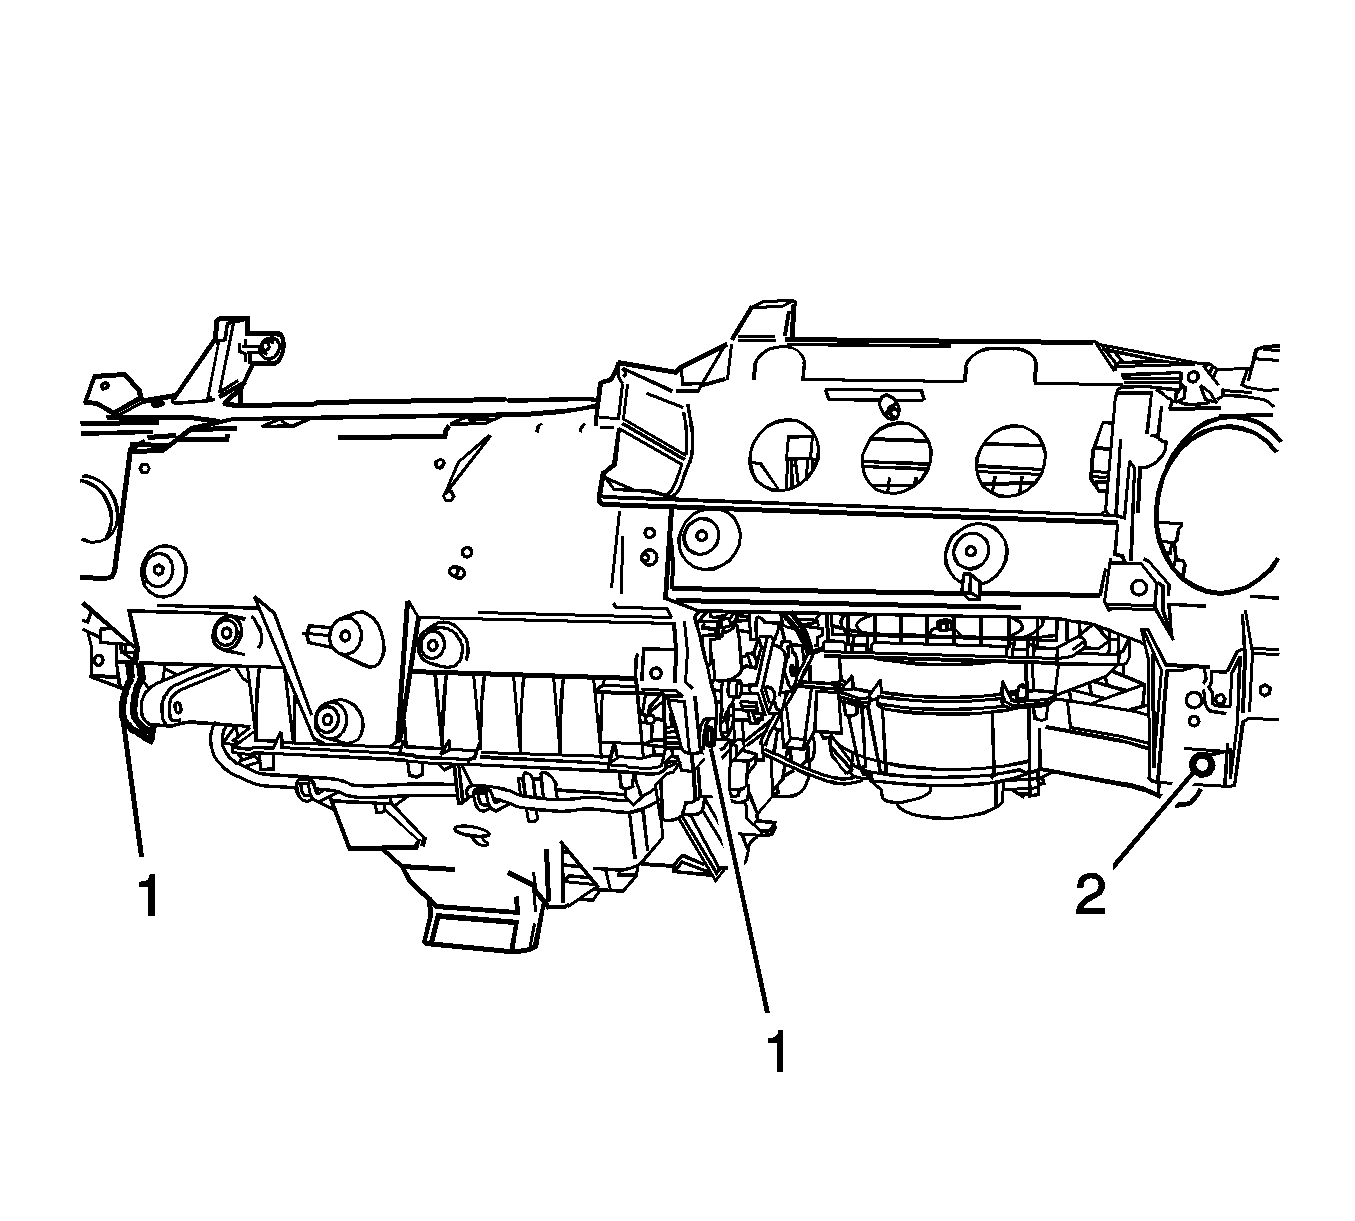
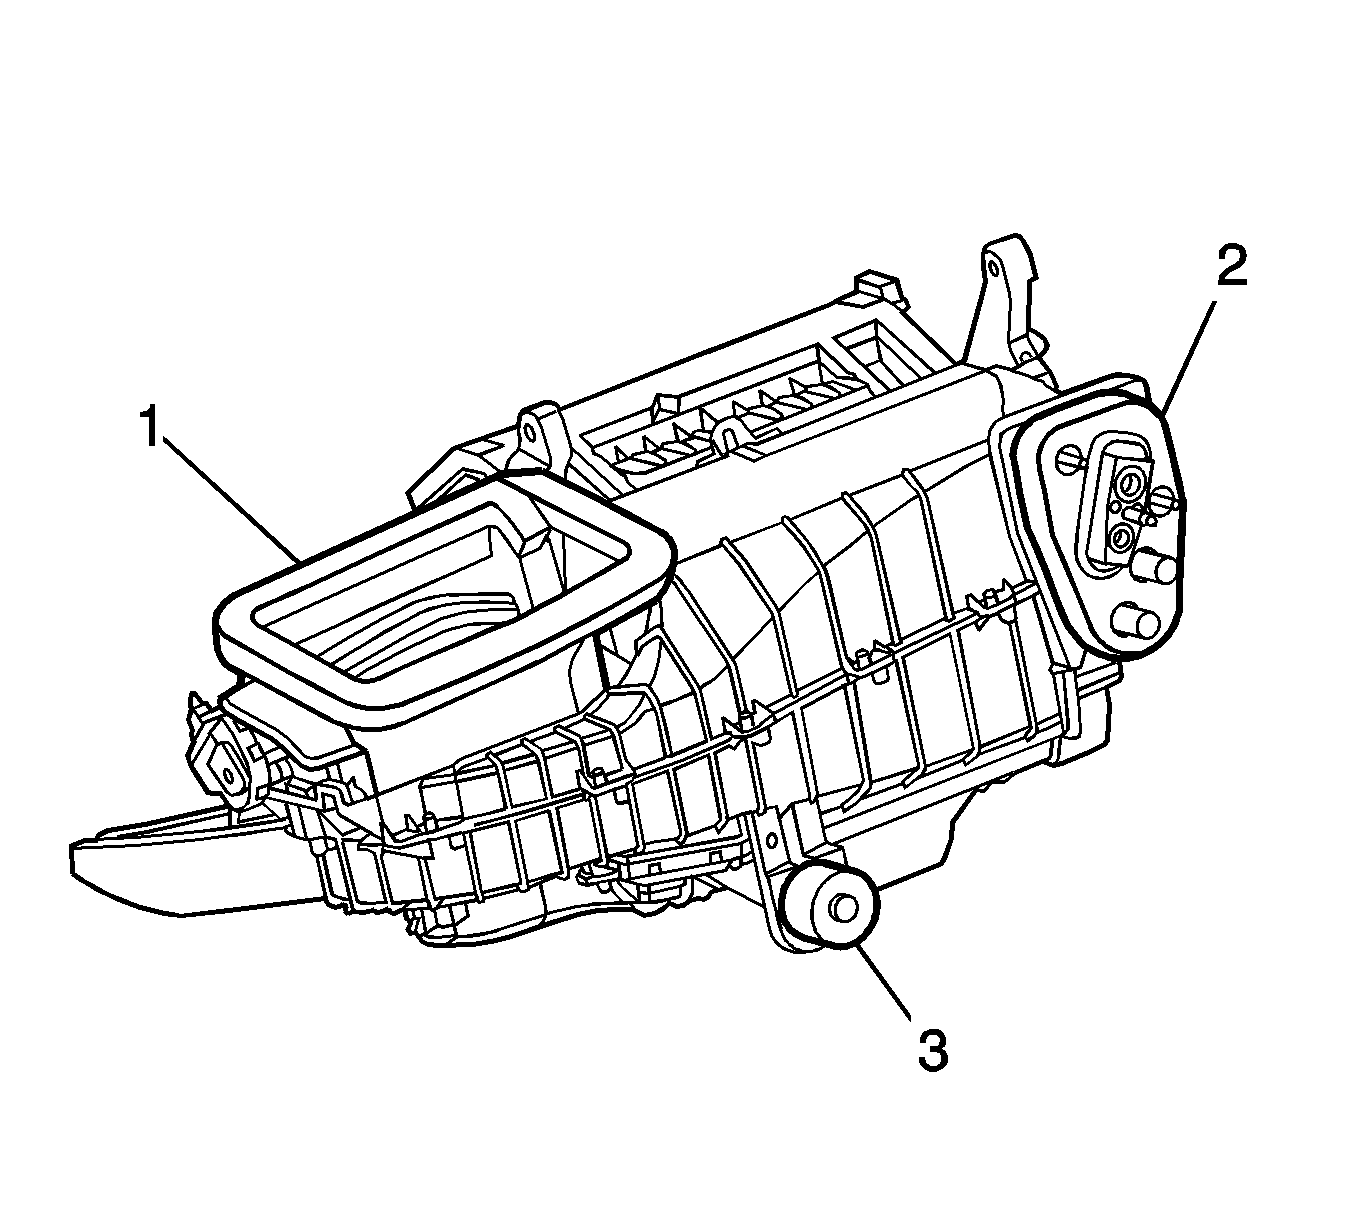
- Remove the bracket bolt from the HVAC module assembly right support (2).
- Remove the bracket bolts from the HVAC module assembly lower support (1).
- Remove the bracket bolts from the HVAC module assembly upper support.
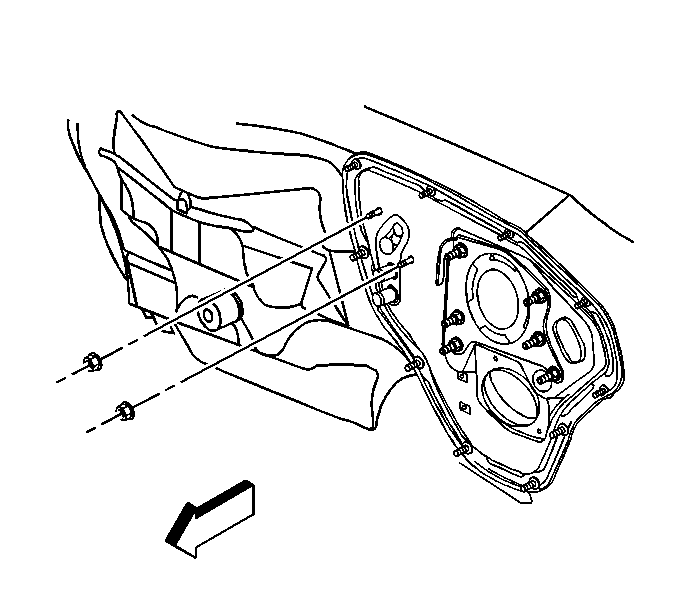
- Remove the right and the left I/P carrier bolts.
- Remove the I/P carrier.
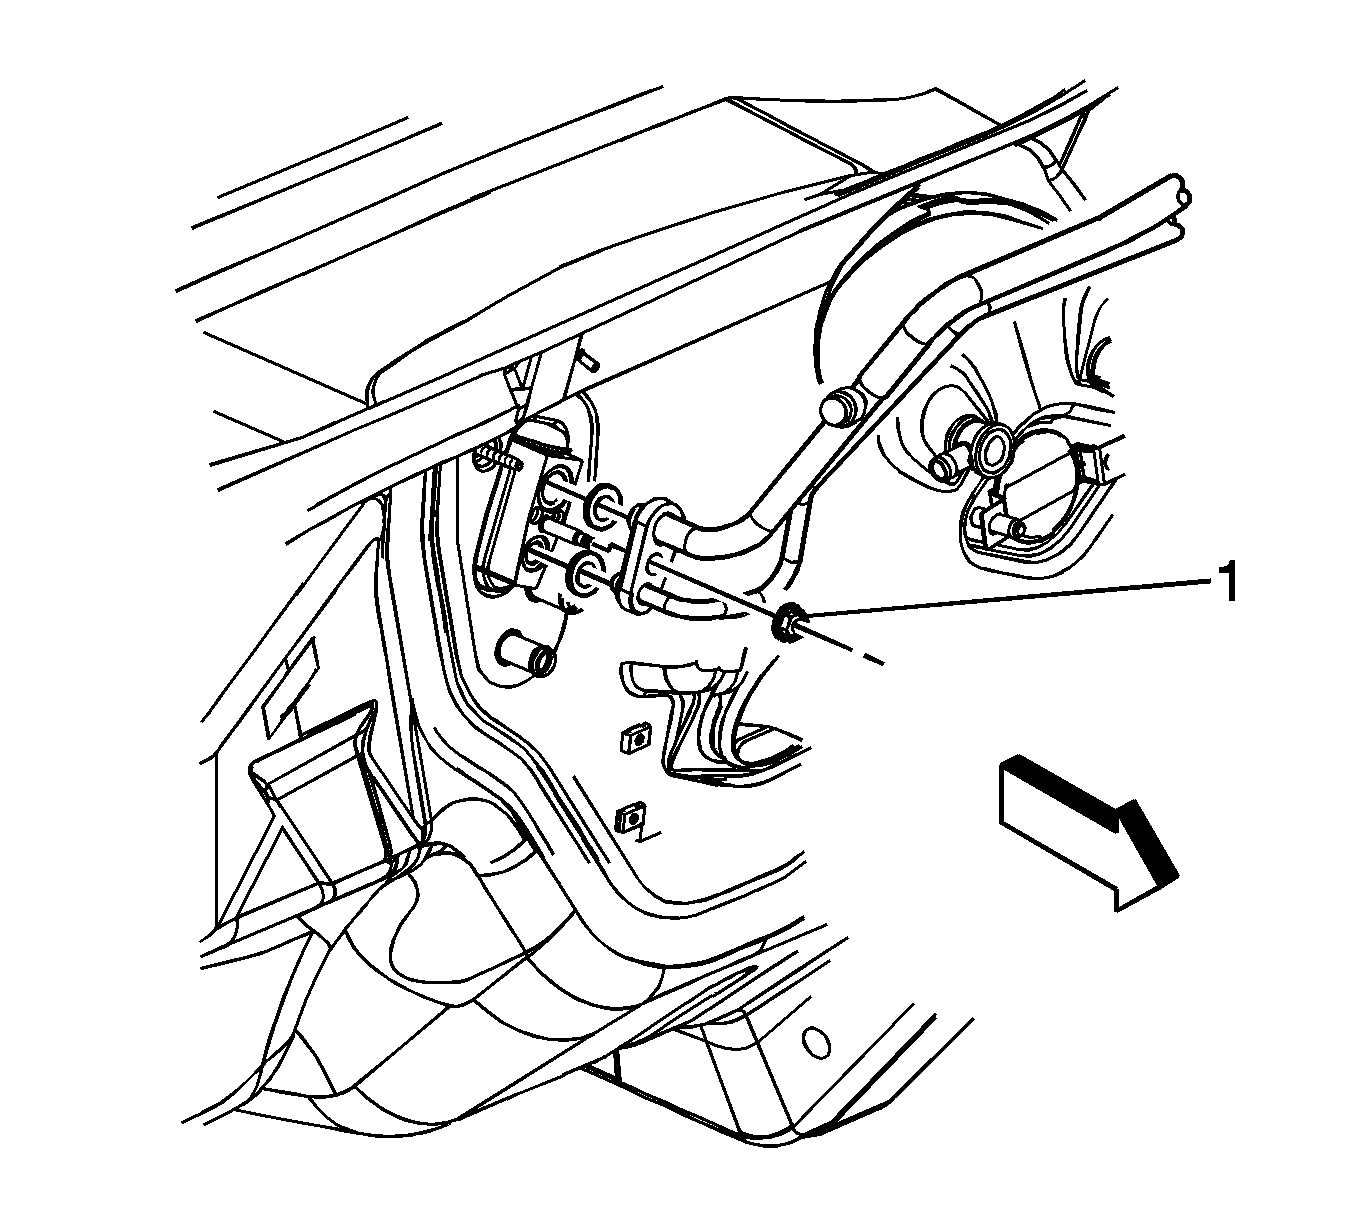
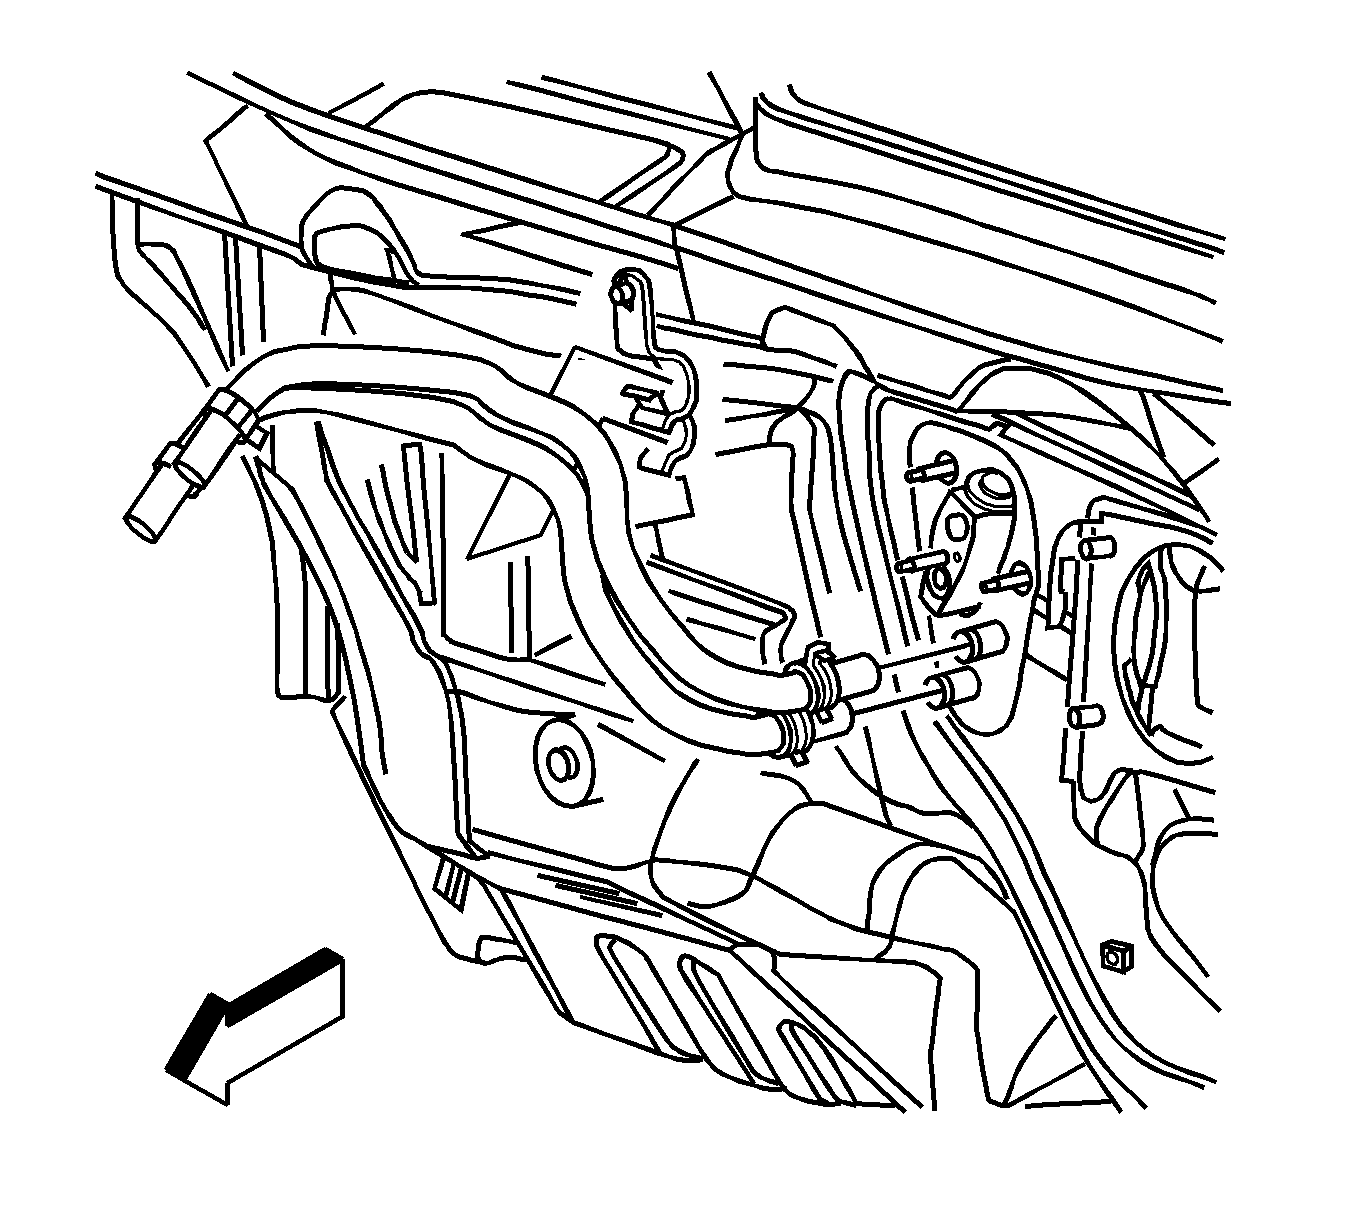
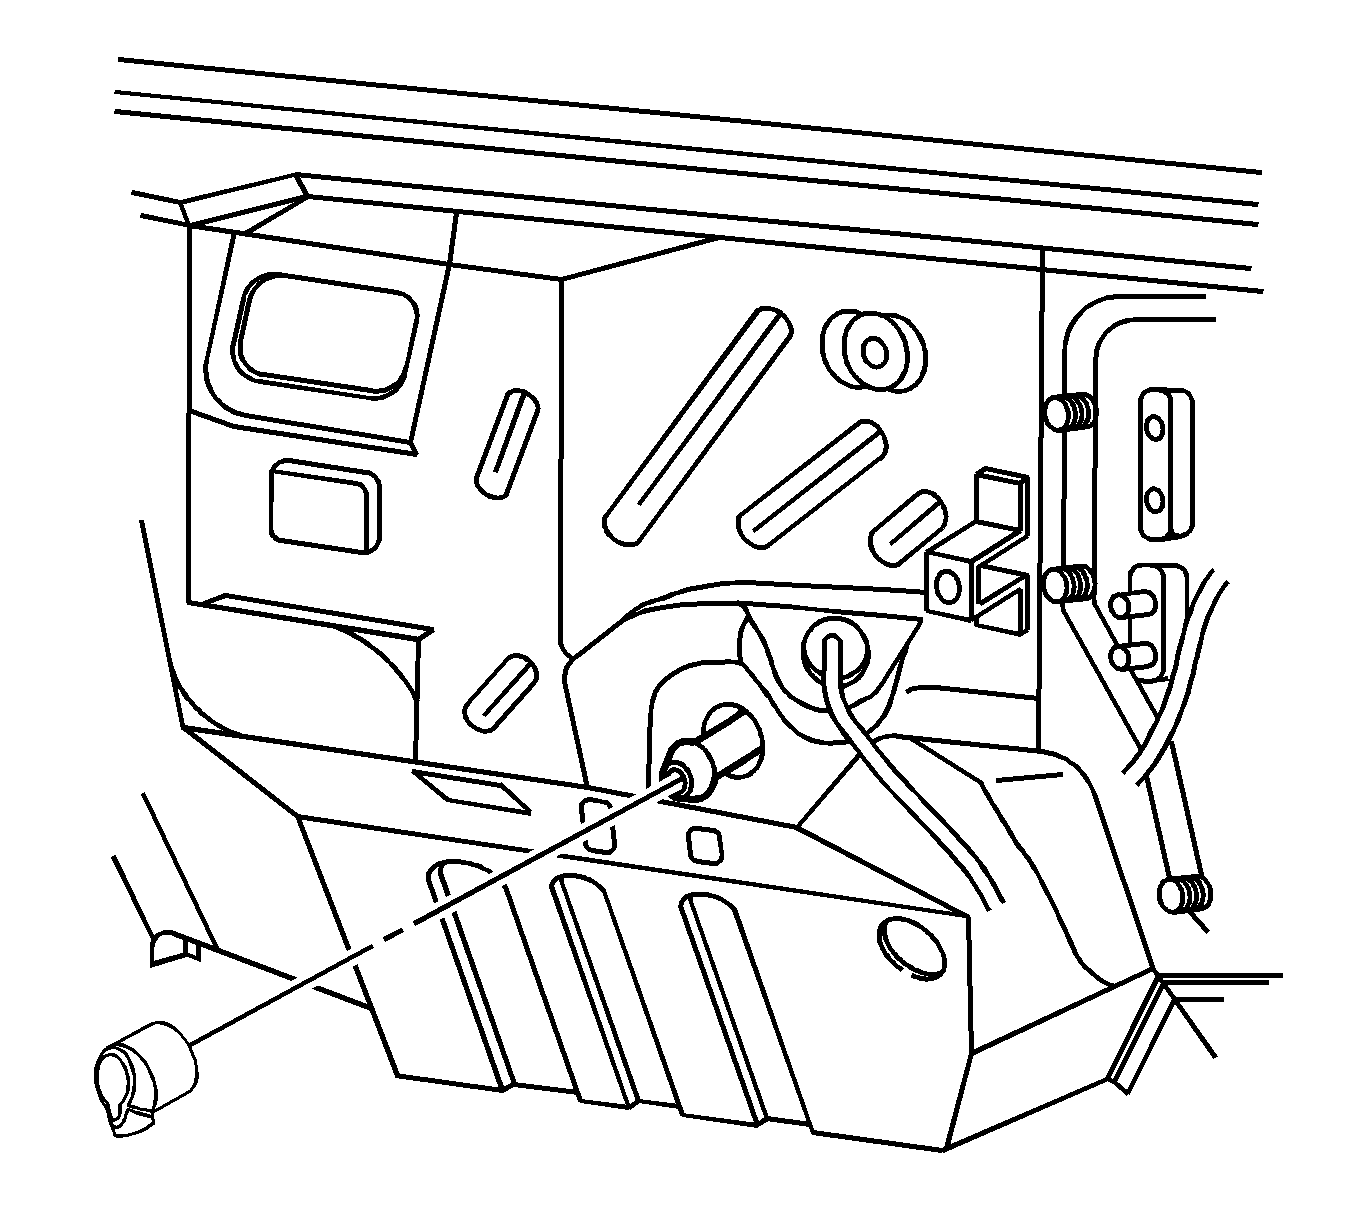
- Remove the nut (1) that secures the evaporator tube to the thermostatic expansion valve (TXV).
- Disconnect the evaporator tube from the TXV.
- Remove the seal washers and discard.
- Use J 38185 in order to position aside the inlet heater hose clamp at the heater core.
- Use J 38185 in order to position aside the outlet heater hose clamp at the heater core.
- Disconnect the inlet heater hose from the heater core.
- Disconnect the outlet heater hose from the heater core.
- Disconnect the electrical connectors from the HVAC module assembly.
- Remove the evaporator drain elbow.
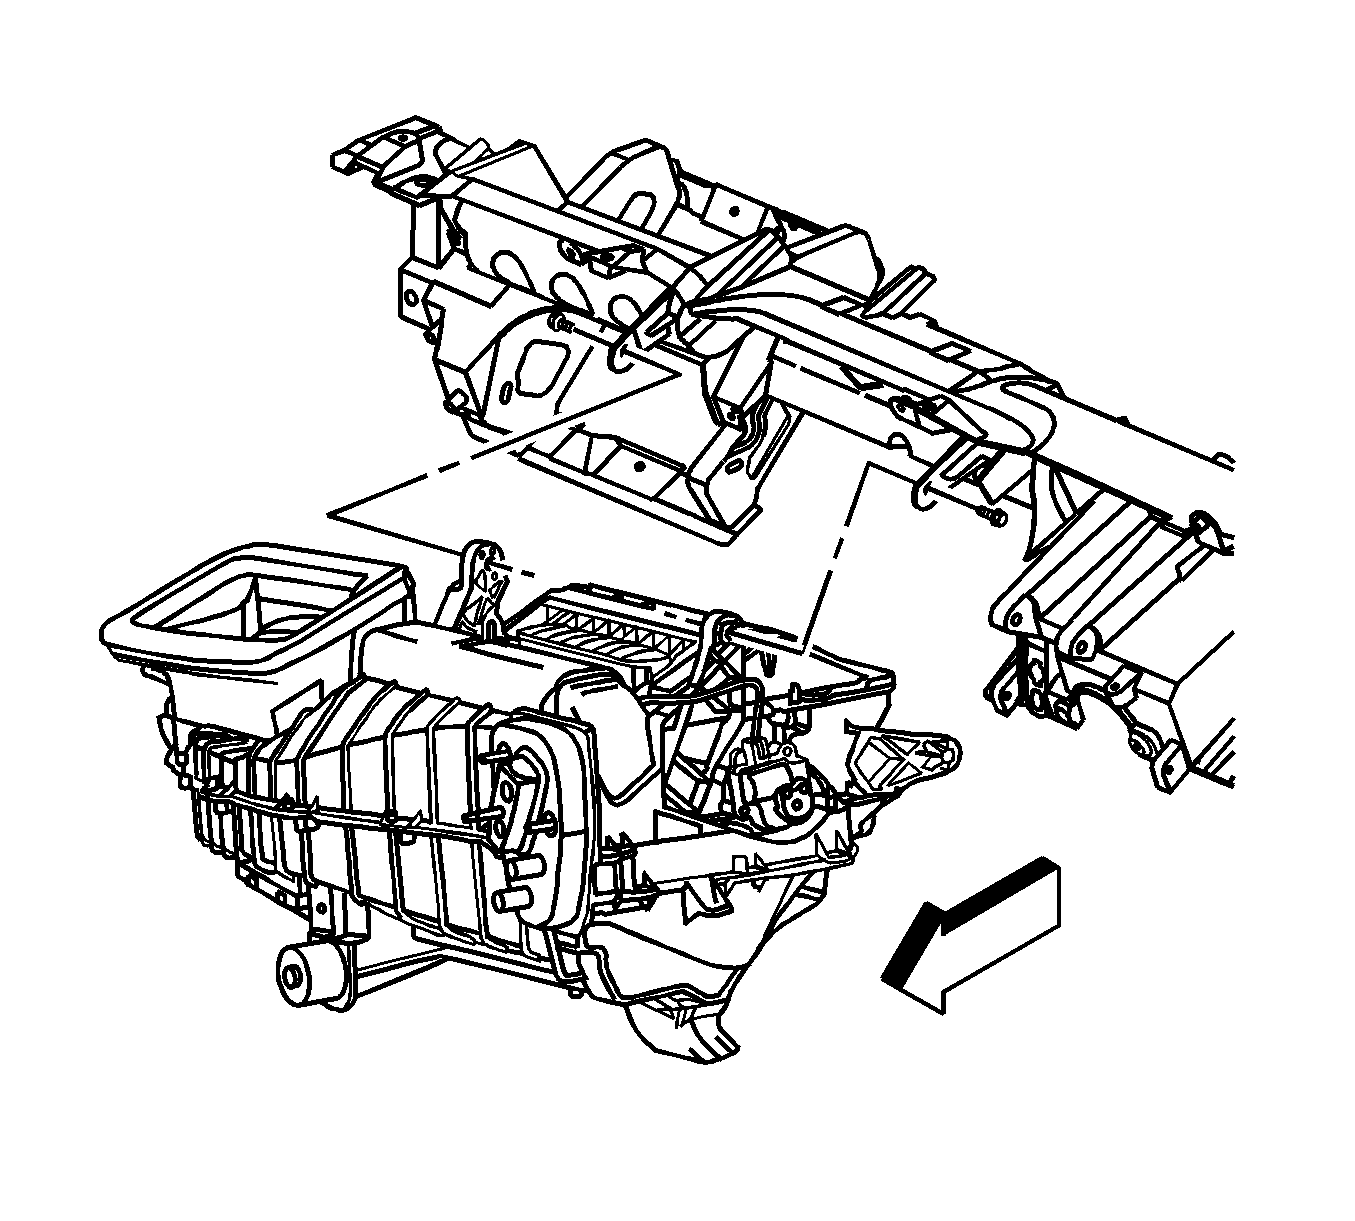
- Remove the nuts which secure the HVAC module assembly to the dash.
- Remove the HVAC module assembly.
- Remove all of the seals (1, 2, 3) from the outer HVAC module assembly.
Installation Procedure
- Install new seals (1, 2, 3) to the outer HVAC module assembly.
- Install the HVAC module assembly to the vehicle.
- Install the nuts which secure the HVAC module assembly to the dash.
- Install the evaporator drain elbow.
- Connect the electrical connectors to the HVAC module assembly.
- Install the I/P carrier to the vehicle. Align the I/P carrier to the HVAC module assembly and the hinge pillars.
- Install the bolts to the right and the left I/P carrier.
- Install the bolts to the HVAC module assembly upper support bracket.
- Install the bolts to the HVAC module assembly lower support bracket (1).
- Install the bolt to the HVAC module assembly right support bracket (2).
- Position the I/P wiring harness to the original position.
- Connect any disconnected ground wires.
- Install the brake pedal brace bolts to the I/P carrier.
- Position the brake pedal to the brake pedal brace.
- Install the brake pedal bolt and nut. Refer to Brake Pedal Assembly Replacement .
- Seat the bottom junction block tabs and snap the top of the junction block to the passenger knee bolster.
- Install the junction block bolt.
- Install the I/P trim pad. Refer to Instrument Panel Trim Pad Replacement .
- Connect the inlet heater hose to the heater core.
- Connect the outlet heater hose to the heater core.
- Use J 38185 in order to reposition the inlet heater hose clamp to the heater core.
- Use J 38185 in order to reposition the outlet heater hose clamp to the heater core.
- Install the fuel injector sight shield. Refer to Fuel Injector Sight Shield Replacement for the 3.8L engine.
- Fill the cooling system. Refer to Cooling System Draining and Filling .
- Install new sealing washers on the evaporator tube. Refer to Sealing Washer Replacement .
- Connect the evaporator tube to the TXV.
- Install the evaporator tube to the TXV block fitting nut (1).
- Install the air cleaner assembly. Refer to Air Cleaner Assembly Replacement for the 3.8L engine or Air Cleaner Assembly Replacement for the 3.6L (LY7) engine.
- Connect the battery negative cable. Refer to Battery Negative Cable Disconnection and Connection .
- Evacuate and recharge the A/C system. Refer to Refrigerant Recovery and Recharging .
- Leak test the fittings of the component using J 39400-A .
Notice: Refer to Fastener Notice in the Preface section.
Tighten
Tighten the nuts to 10 N·m (89 lb in).
Tighten
Tighten the bolts to 25 N·m (18 lb ft).
Tighten
Tighten the bolts to 4 N·m (36 lb in).
Tighten
Tighten the bolts to 4 N·m (36 lb in).
Tighten
Tighten the bolt to 4 N·m (36 lb in).
Tighten
Tighten the bolts to 10 N·m (89 lb in).
Tighten
Tighten the nut to 17 N·m (12.5 lb ft).
